
In the Scan window, all the scan process options can be set.
The SQL Server checkbox under the Include area is ticked by default. Additionally, SQL manage instance tool offers an option to search across the network for SQL Server instance services: SSAS, SSIS, and SSRS

There are two different search options within the SQL Server instance tool: domain and IP scan.
A DNS or Domain Name System Server is a system that converts computer names into IP addresses. Namely, it is a distributed hierarchical composition of Internet Servers containing information about domain names. It can be said that a DNS Server is a database that contains all the names and IP addresses of its individual computers.
To further explain, when the IP address is provided, the signal is sent to the domain controller that further includes all different machines, i.e., all IP addresses which are part of that particular domain will also be scanned.
For example, to search for SQL Server instances, SSAS and SSIS services on a remote machine that is a part of a specific domain do the following:

Quick tip: If the machine where the SQL manage instance tool is installed on, is part of a domain then all domain settings in the Scan window can be left blank thus having no impact on search results |
After scanning is complete, under the Register window, the scan results will be displayed in four columns:
To connect to any of the listed SQL Server instances and its services via SQL manage instance tool, check them in the grid, check the Ask for credentials for failed logins option since the credentials are required for the remote communication, and click the OK button:

Provide valid credentials in the Edit connection window, and click the OK button:

This action will open an additional window where a separate folder for the chosen SQL Server instance can be assigned:

After this, the chosen SQL Server instances, SSAS and SSIS services will be displayed in the main grid of the Inventory tab with all necessary information spread across the following columns:

When scanning the network by using the IP range option, there are three scan methods to choose from in the SQL manage instance tool, and each of those gives different scan results:
To search for SQL Server instances, SSAS, SSIS and SSRS services across the network using IP range scan and WMI, SCM and SSRS scan methods, do the following:

The following are the results of the last scan.
Quick tip: It is mandatory to have valid credentials to make a connection between the SQL manage instance tool and any of the remote machines that host discovered SQL Server instances |

Quick tip: If valid credentials are provided, and some SQL Servers still aren’t accessible, there is a possibility they are not configured to allow the remote connections |
To add SQL Server instances from the last performed scan, under the Inventory tab, click on the Add button and from the drop-down list choose the Add from last scan option:

Additionally, there is a neat option to scan the local machine by using its IP address and, in result, allowing fast connection to local SQL Servers and its further managing. For this example, do the following:

Quick tip: There is also an option to search SQL Server instances across the network by ports |

After the scan process is finished, connect to all discovered SQL Server instances by using the Windows authentication, in other words, the Log in automatically using Windows authentication option must be checked:

In the next step, choose the available or create a custom folder to allocate SQL Server instances:

This way, under the Home tab, all connected SQL Server instances in the Server explorer will be organized by the assigned folders:

After the connection between the SQL manage instance tool and the discovered SQL Server instances, SSAS, SSIS, and SSRS services, the main grid of the Inventory tab is populated with all its details.
To export SQL Server instances and its services into a list, check them in the main grid and click the Export to list option. After the Export window is opened provide the name for the list and click the Save button:

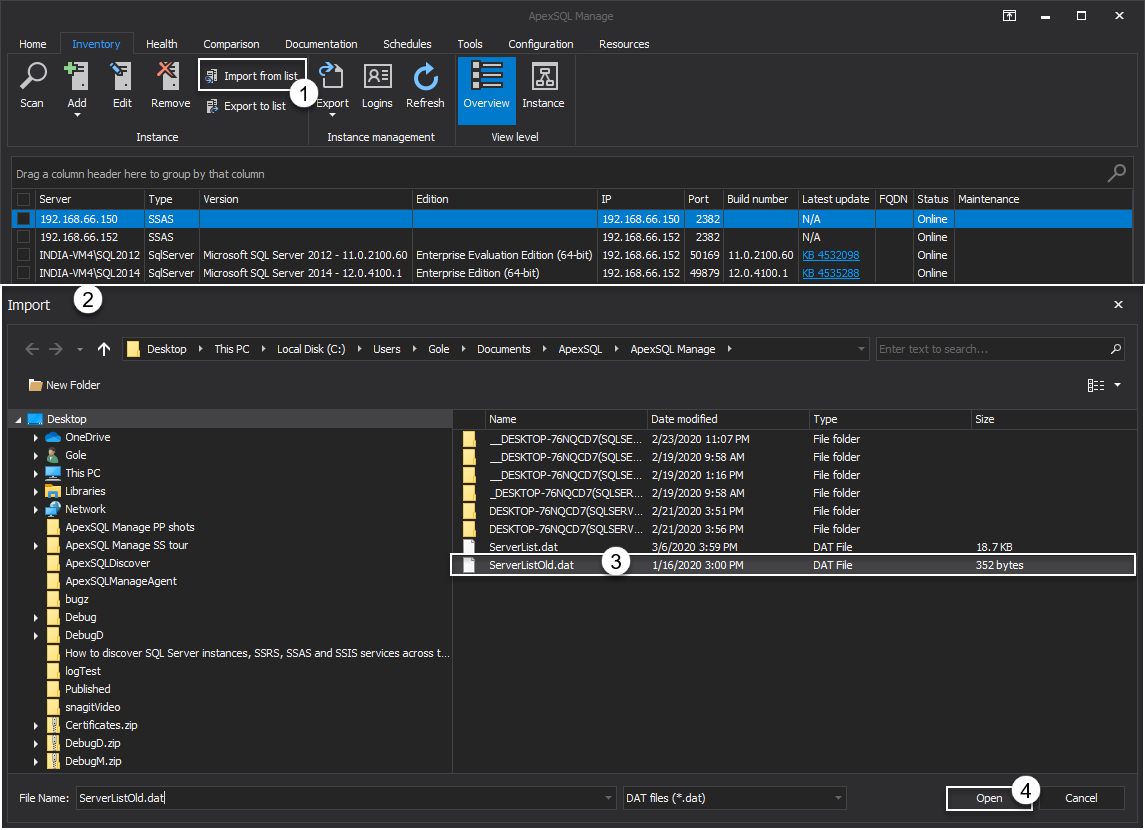
This way, the list can be later easily imported from the same folder location by using the Import from list option under the Inventory tab. After the Import window is opened, select the saved list and click the Open button:
Scan results from the main grid can be further easily exported to DOCX, PDF, and XLSX file formats using the Export option under the Inventory tab:

All the data displayed in the main grid can be grouped by its columns for a better visual experience. There are two different approaches when sorting scan results:
drag and drop the desired column into a group area:

The following image is the depiction of all the grid data that is grouped by the Type and IP columns, respectively:

