An internet connection is required to access the online help system and video tutorials.
Within the Directory Sync Pro for Active Directory/Migrator Pro for Active Directory interface, the online help system can be accessed by clicking “HELP” in the pull-down menu 

Windows Server operating systems will need to have the Desktop Experience feature (or a video codec) installed to view the video tutorials.
Section 6. Installing Directory Sync Pro for Active Directory and Migrator Pro for Active Directory
The Directory Sync Pro for Active Directory and Migrator Pro for Active Directory installer can be used to install both Directory Sync Pro for Active Directory and Migrator Pro for Active Directory at the same time or individually. Migrator Pro for Active Directory should only be installed at the same time as Directory Sync Pro for Active Directory or if it has previously been installed on the same server.
This guide includes the steps for installing Directory Sync Pro for Active Directory and Migrator Pro for Active Directory at the same time. Installing Directory Sync Pro for Active Directory first and running the installer again to install the Migrator Pro for Active Directory components is another option.
The installer creates a local group on the Directory Sync Pro for Active Directory server named BTDirSyncPro and will add the currently logged in user to the group. Other users or a Domain group can be added to provide access to other users.
|
|
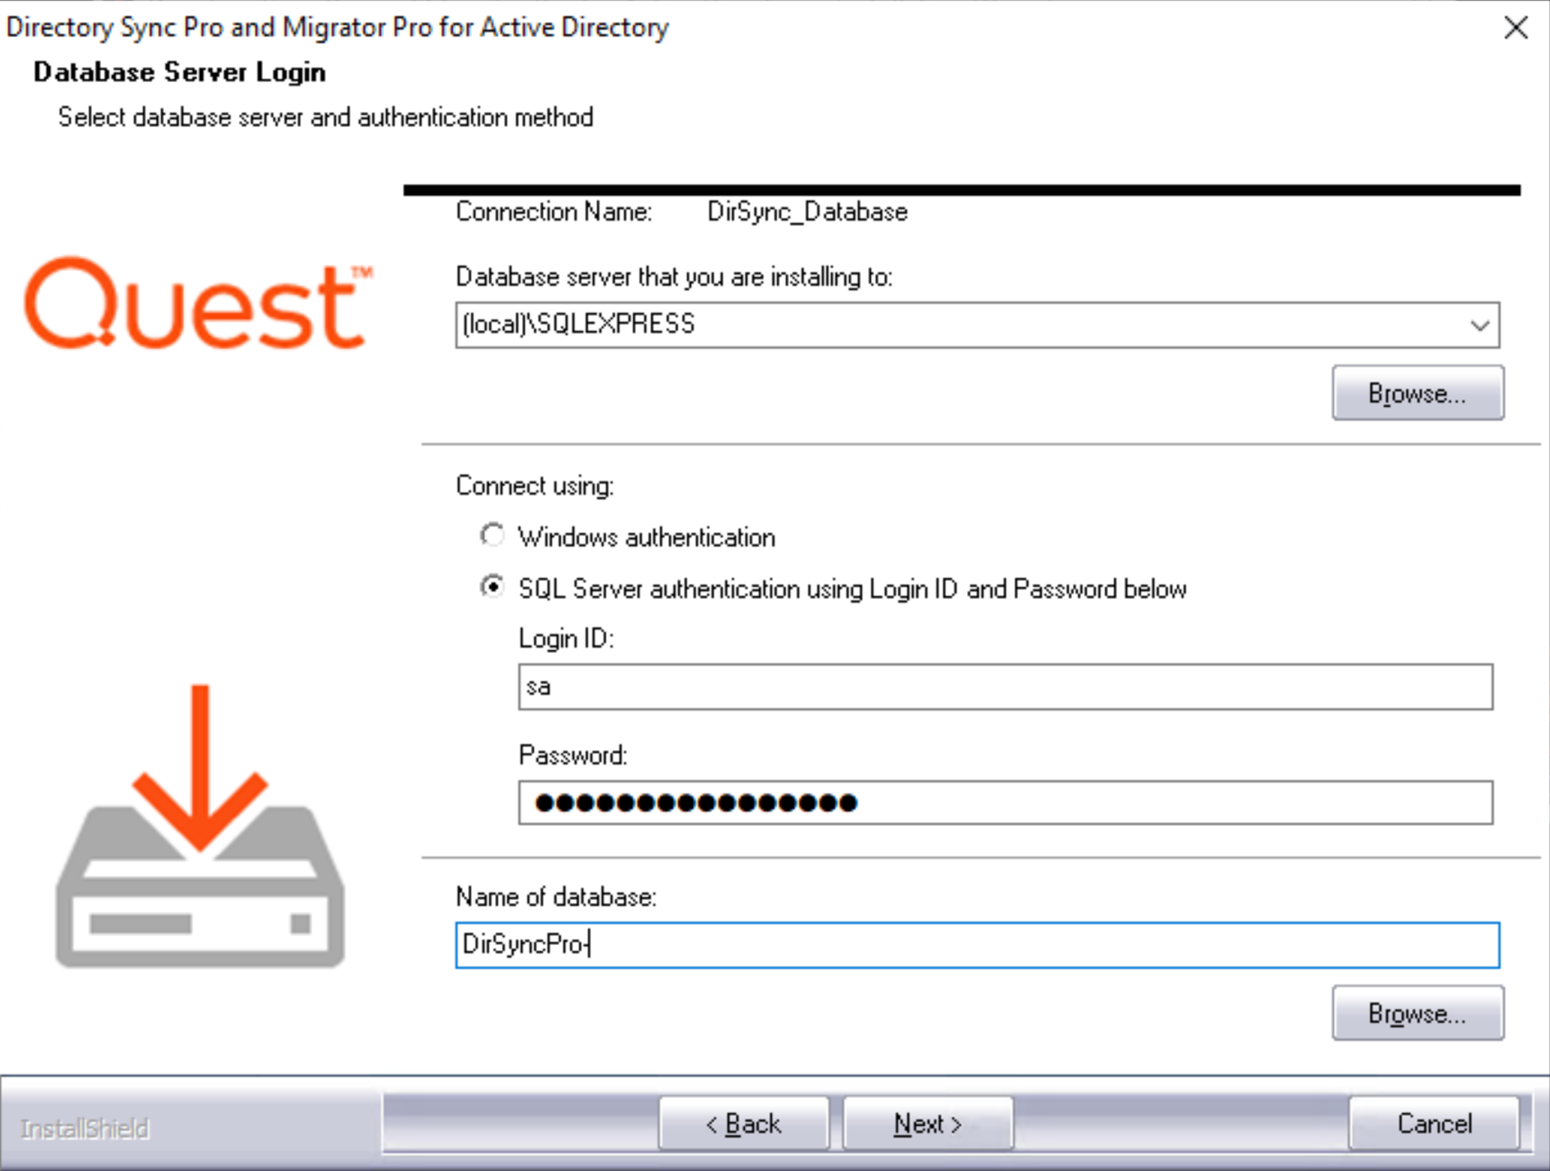
It is recommended to select “SQL Server Authentication” during the Directory Sync Pro for Active Directory/Migrator Pro for Active Directory server console installation if multiple people will be accessing the Directory Sync Pro for Active Directory/Migrator Pro for Active Directory web user interfaces. Otherwise, if “Windows Authentication” is chosen during installation, create a security group in AD and assign DB Owner rights to the Directory Sync Pro for Active Directory SQL databases and add all the users that need access to the console as members. |
6.1 Installing Directory Sync Pro for Active Directory and Migrator Pro for Active Directory on a Windows Server
Download the installation package from the Quest Support site and save it on the Quest Windows Server.
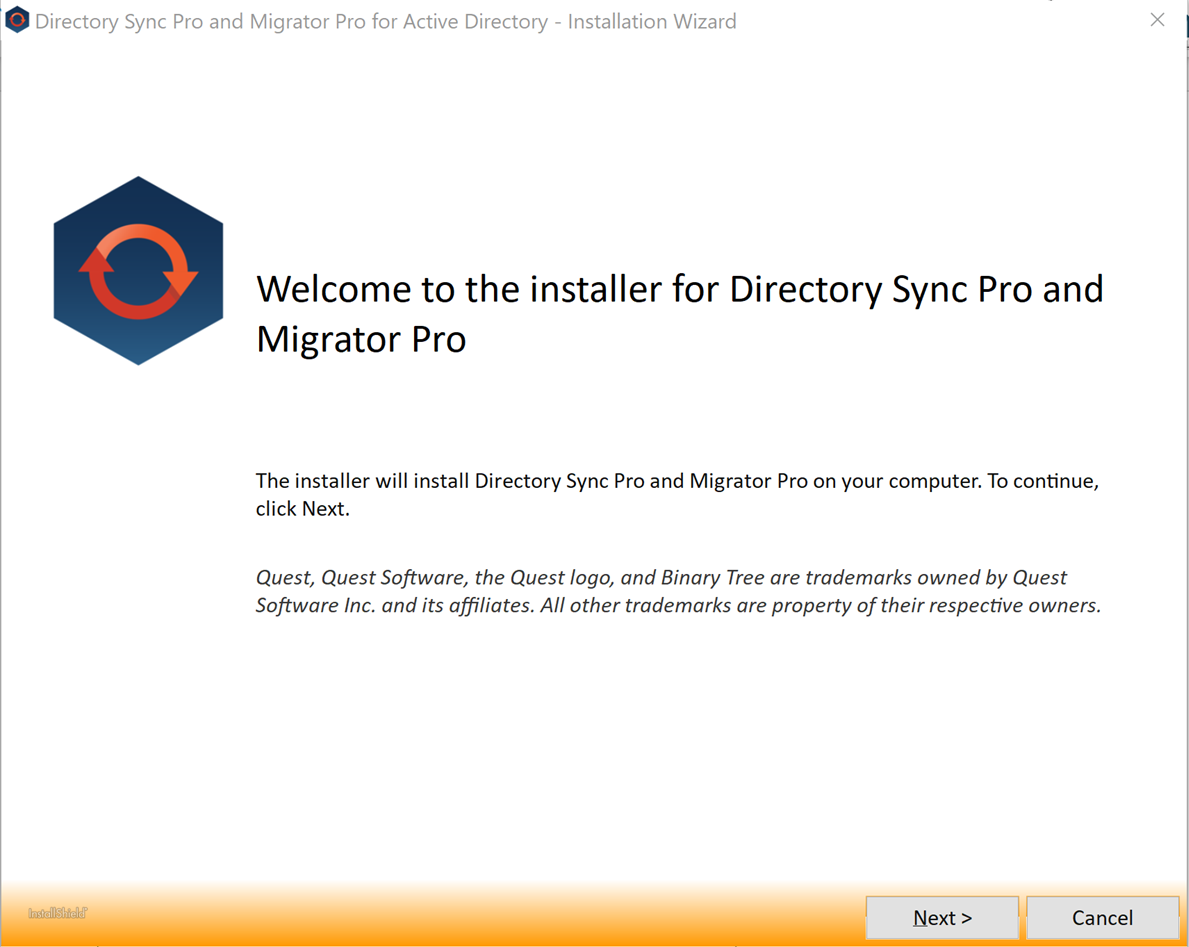
Double-click the executable to begin installing Migrator Pro for Active Directory. The Welcome screen appears. Click Next to continue.
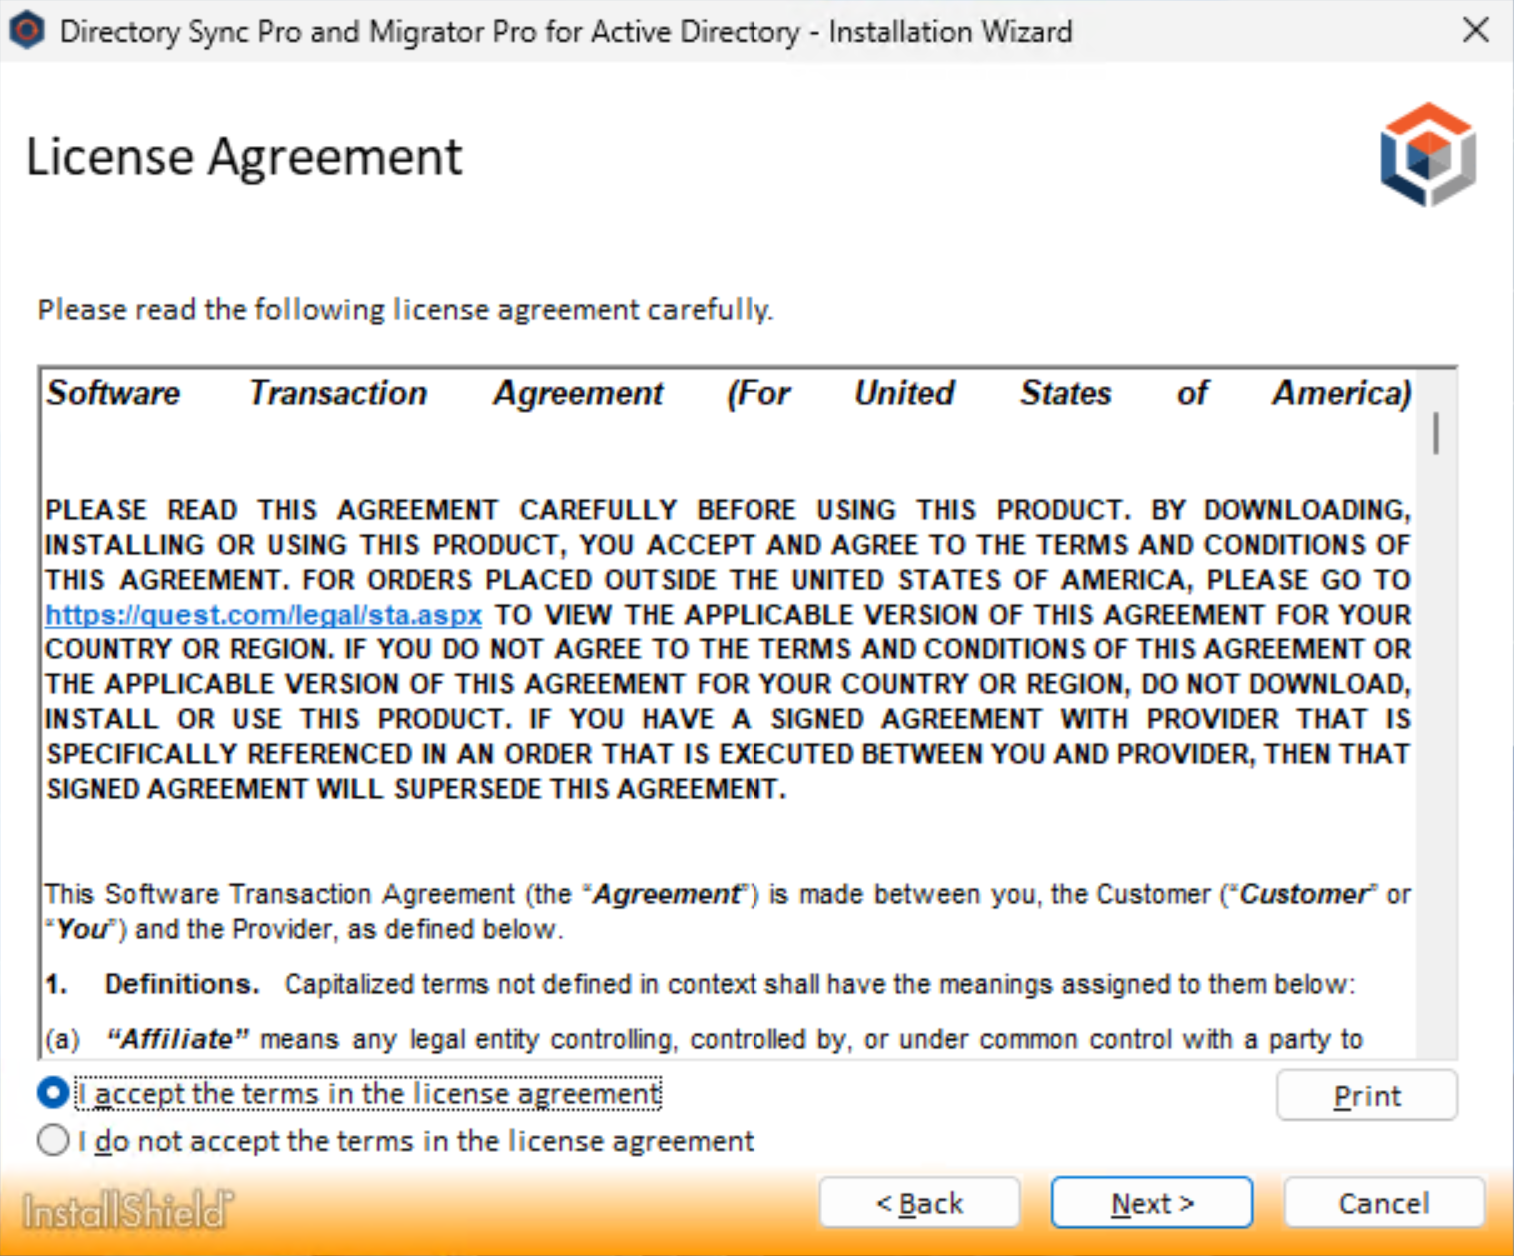
The License Agreement screen appears. To accept the terms of the license agreement and continue with the install, select “I accept the terms in the license agreement” and click Next.
The Setup Type screen appears.
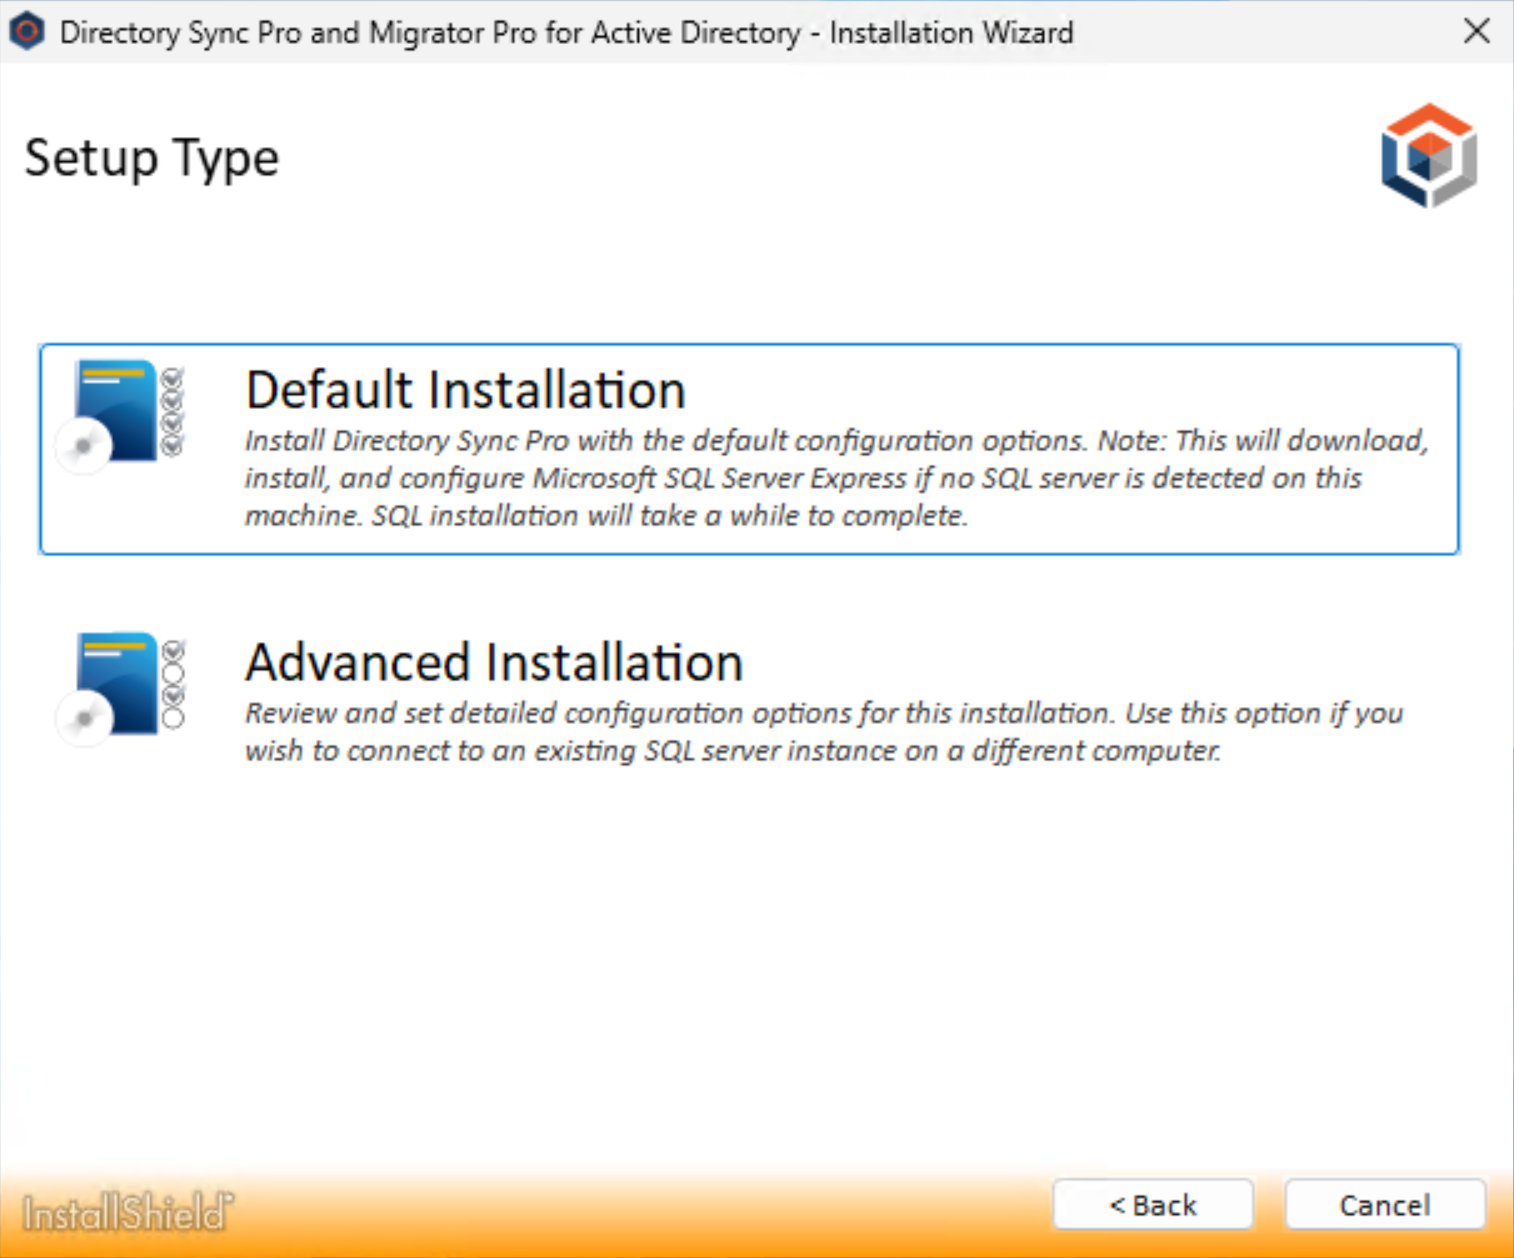
Select Default Installation to install Directory Sync Pro for Active Directory and/or Migrator Pro for Active Directory with the default configuration options. A series of screens will appear while installing the needed databases and features. The Install Wizard Completed screen will appear when done.
Select the Advanced Installation option to review and set the configuration options for the installation. The Install Wizard will continue to the next step.
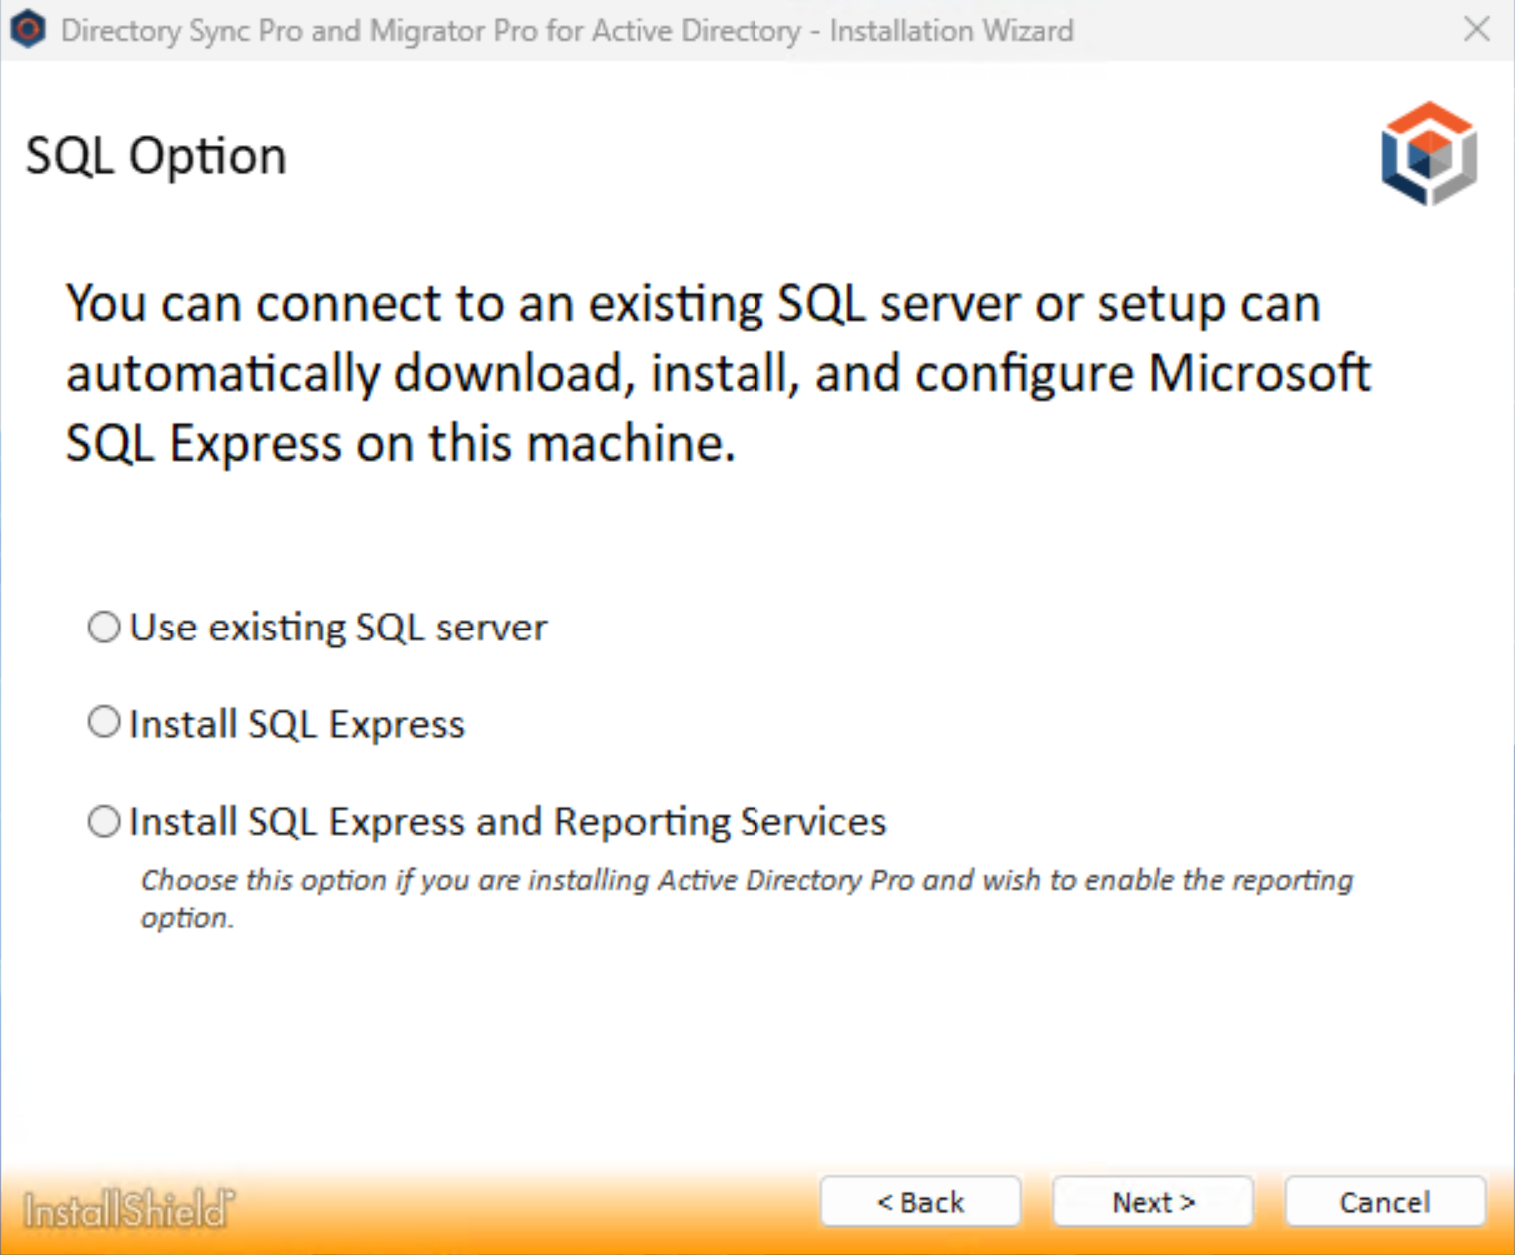
The SQL Option screen appears. Select to use an existing SQL server or to install SQL Express and then click Next. If you choose to install SQL Express, a series of installation screens will appear while SQL Express is being installed.
|
|
An existing SQL server must be used in STIG environments. SQL Express does not meet STIG requirements. Please see Appendix C. STIG Environments for more information. |
The Installation screen appears and will remain open. The Recommended Components screen will appear in a separate window. You will be prompted if there are applications using files that need to be updated by the installer.
The Recommended Components for This Computer screen appears. By default, only the Directory Sync Pro for Active Directory components are selected. To install Migrator Pro for Active Directory, select the Directory Sync Pro / Migrator Pro Console, Migrator Pro for Active Directory, and (optionally) Migrator Pro for Active Directory Reports components and click Next to continue.
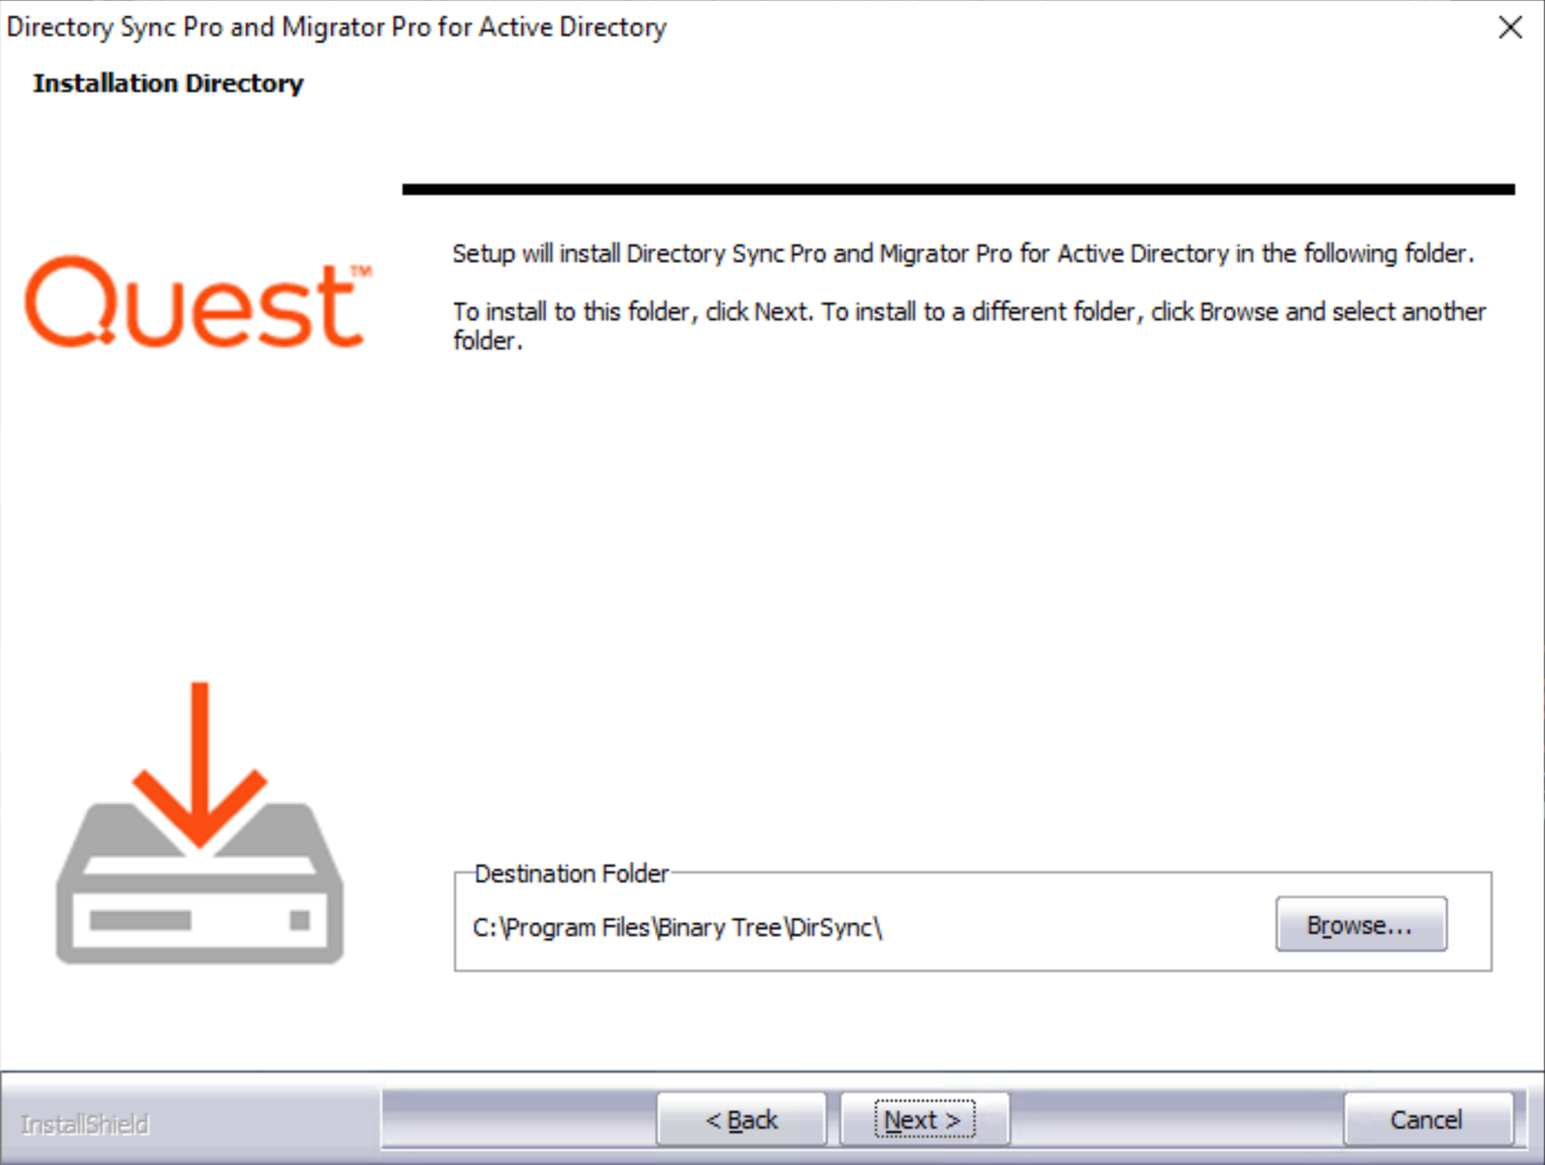
The Installation Directory screen appears. Both Directory Sync Pro for Active Directory and Migrator Pro for Active Directory are installed in the same directory. Click Browse to choose a different install location. Click Next to continue.
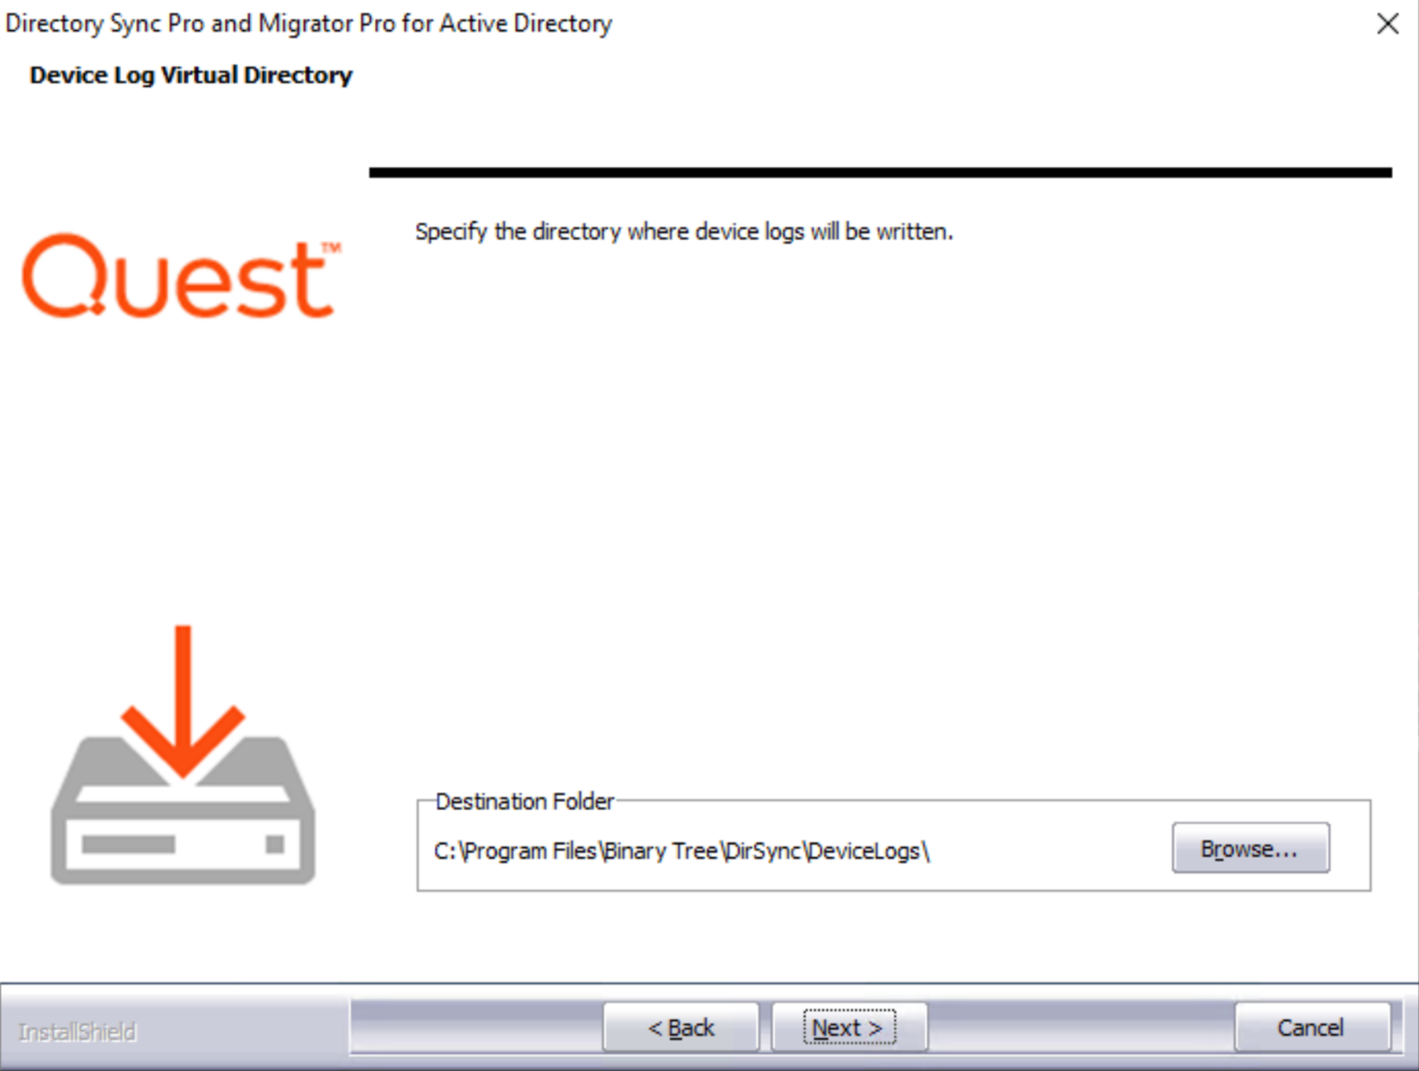
The Device Log Virtual Directory screen appears. Click Browse to choose a different location where device logs will be written. Click Next to continue.
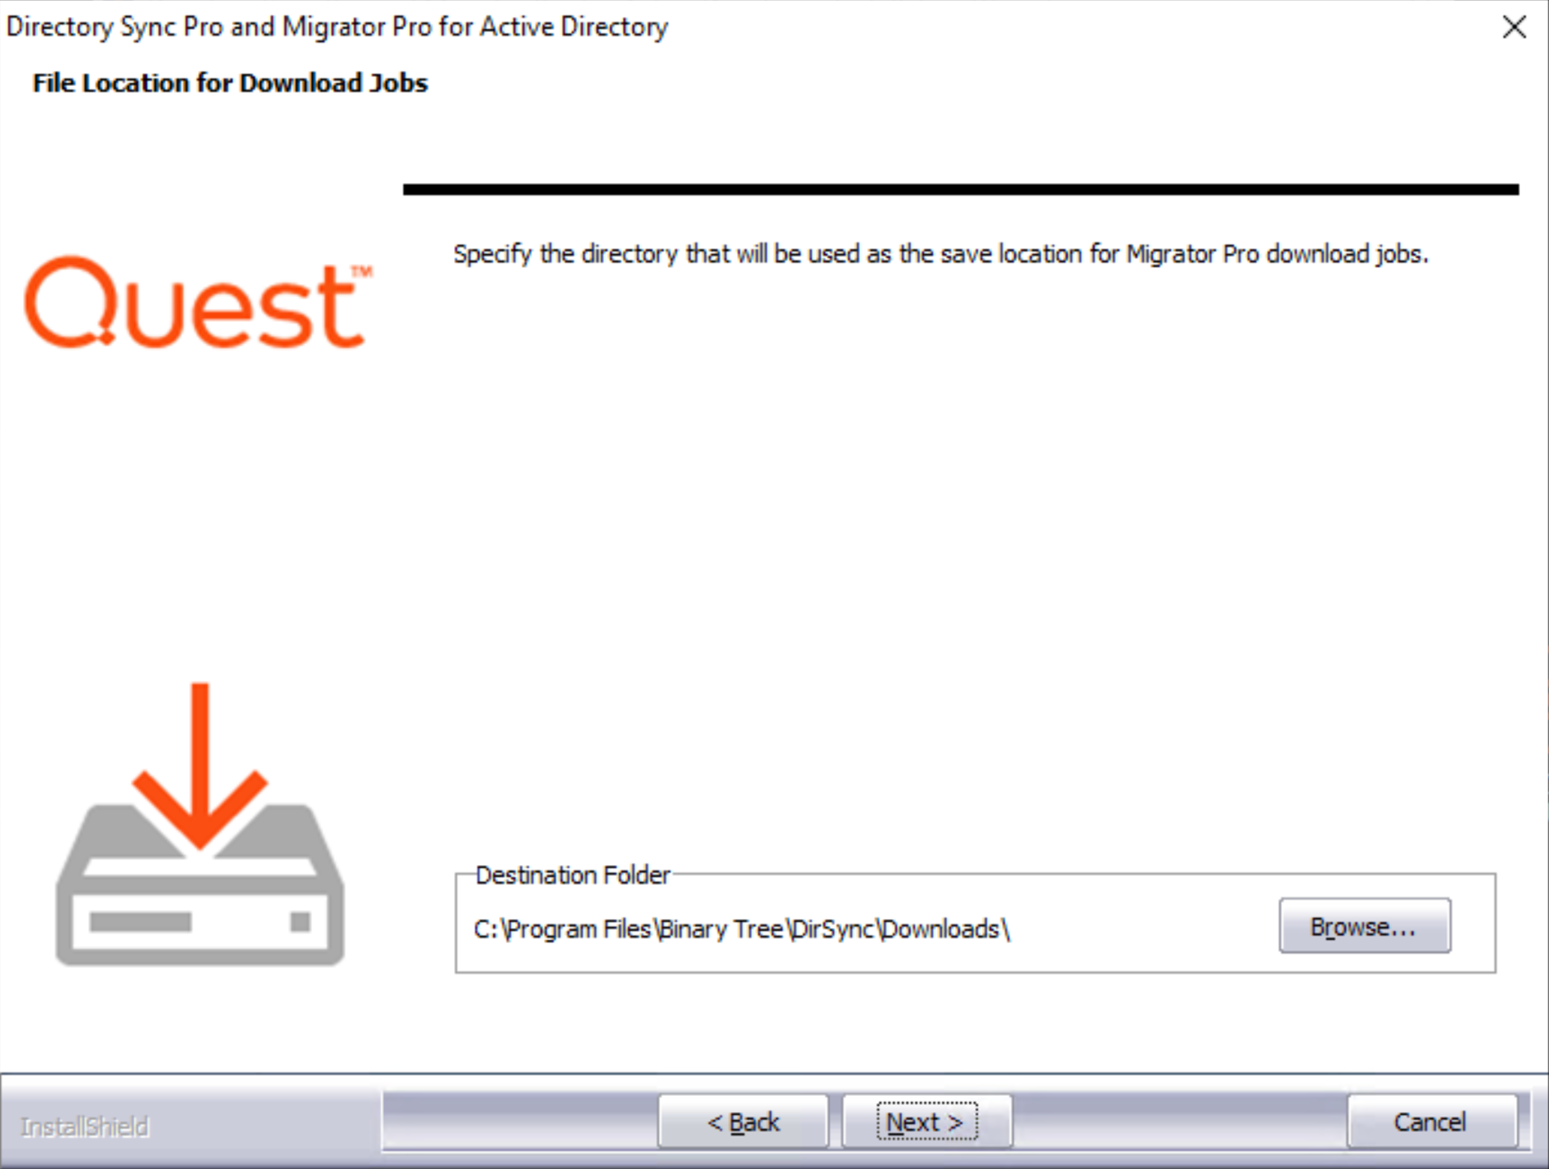
The File Location for Download Jobs screen appears. Click Browse to choose a different location where download jobs will be saved. Click Next to continue.
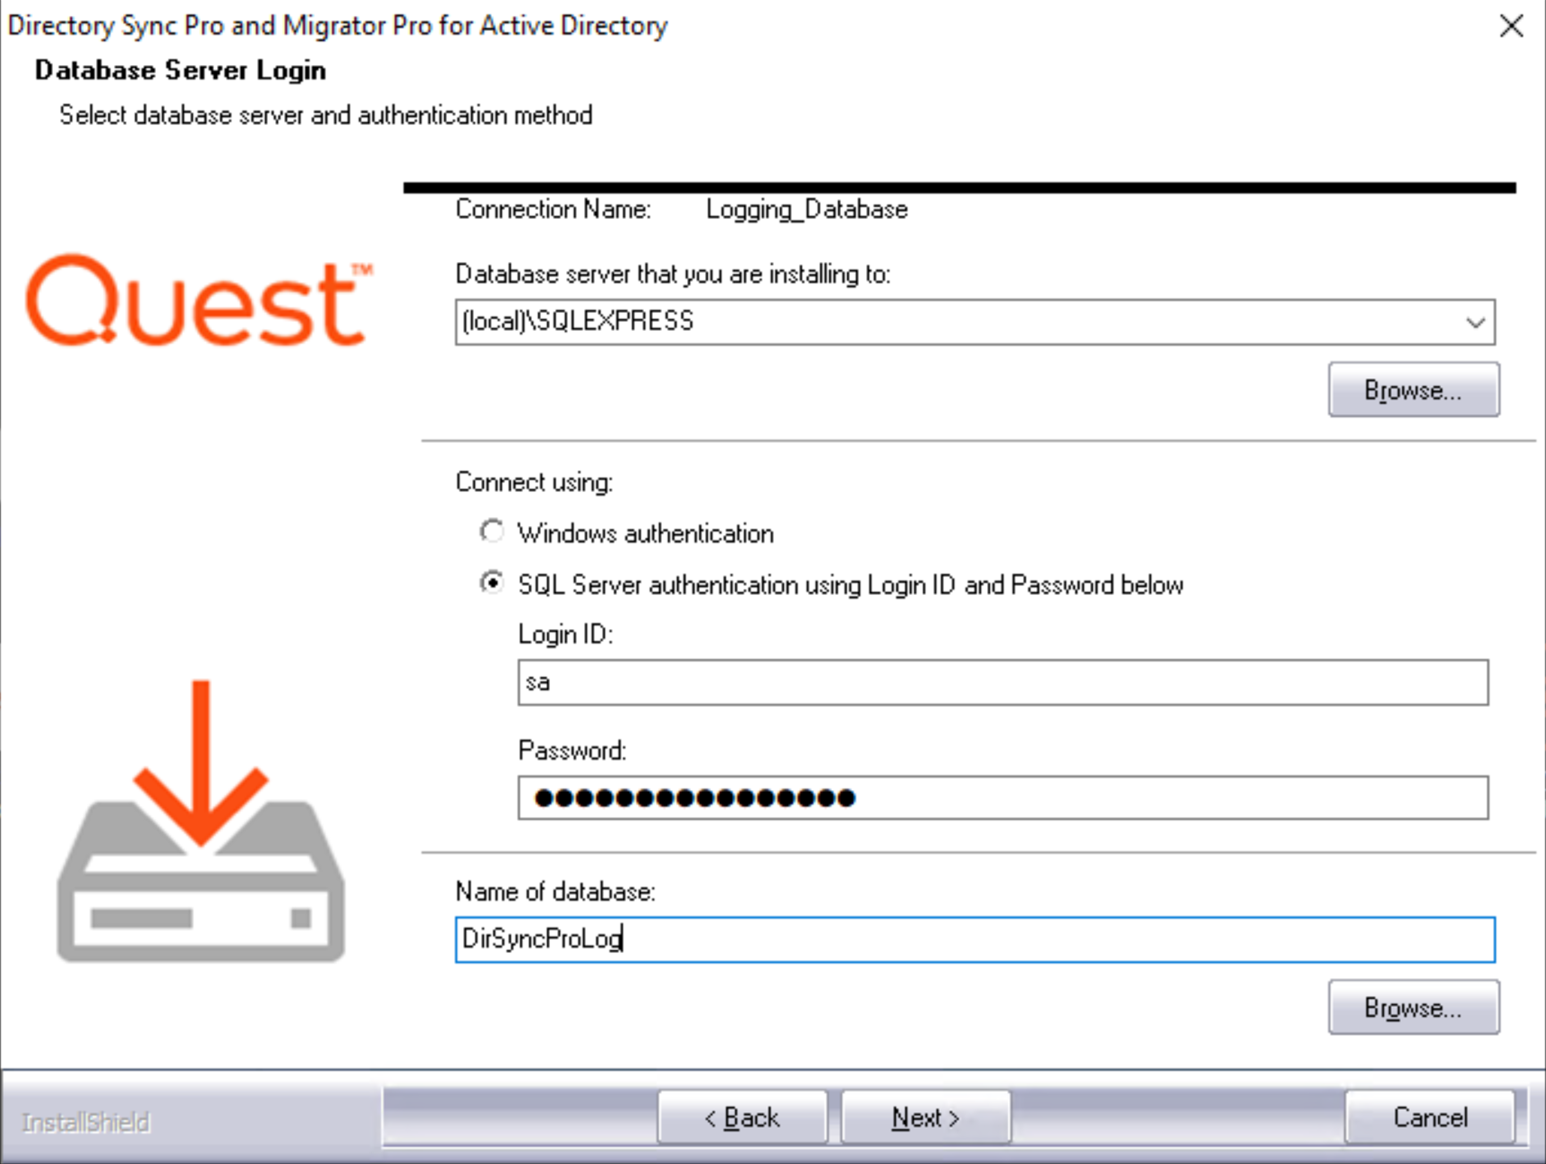
The Database Server Login screen appears. Enter the SQL Database Server location, credential information, and database name. Click Next to continue. If you choose to install SQL Server Express, the installer will populate the 'sa' account and default password. This password should be changed according to your organizations password complexity policy prior to configuring the product databases on the Database Server Login screen.
The Database Server Login screen appears again, this time for the logging database. Enter the SQL Database Server location for the logging database, credential information, and database name. Click Next to continue.
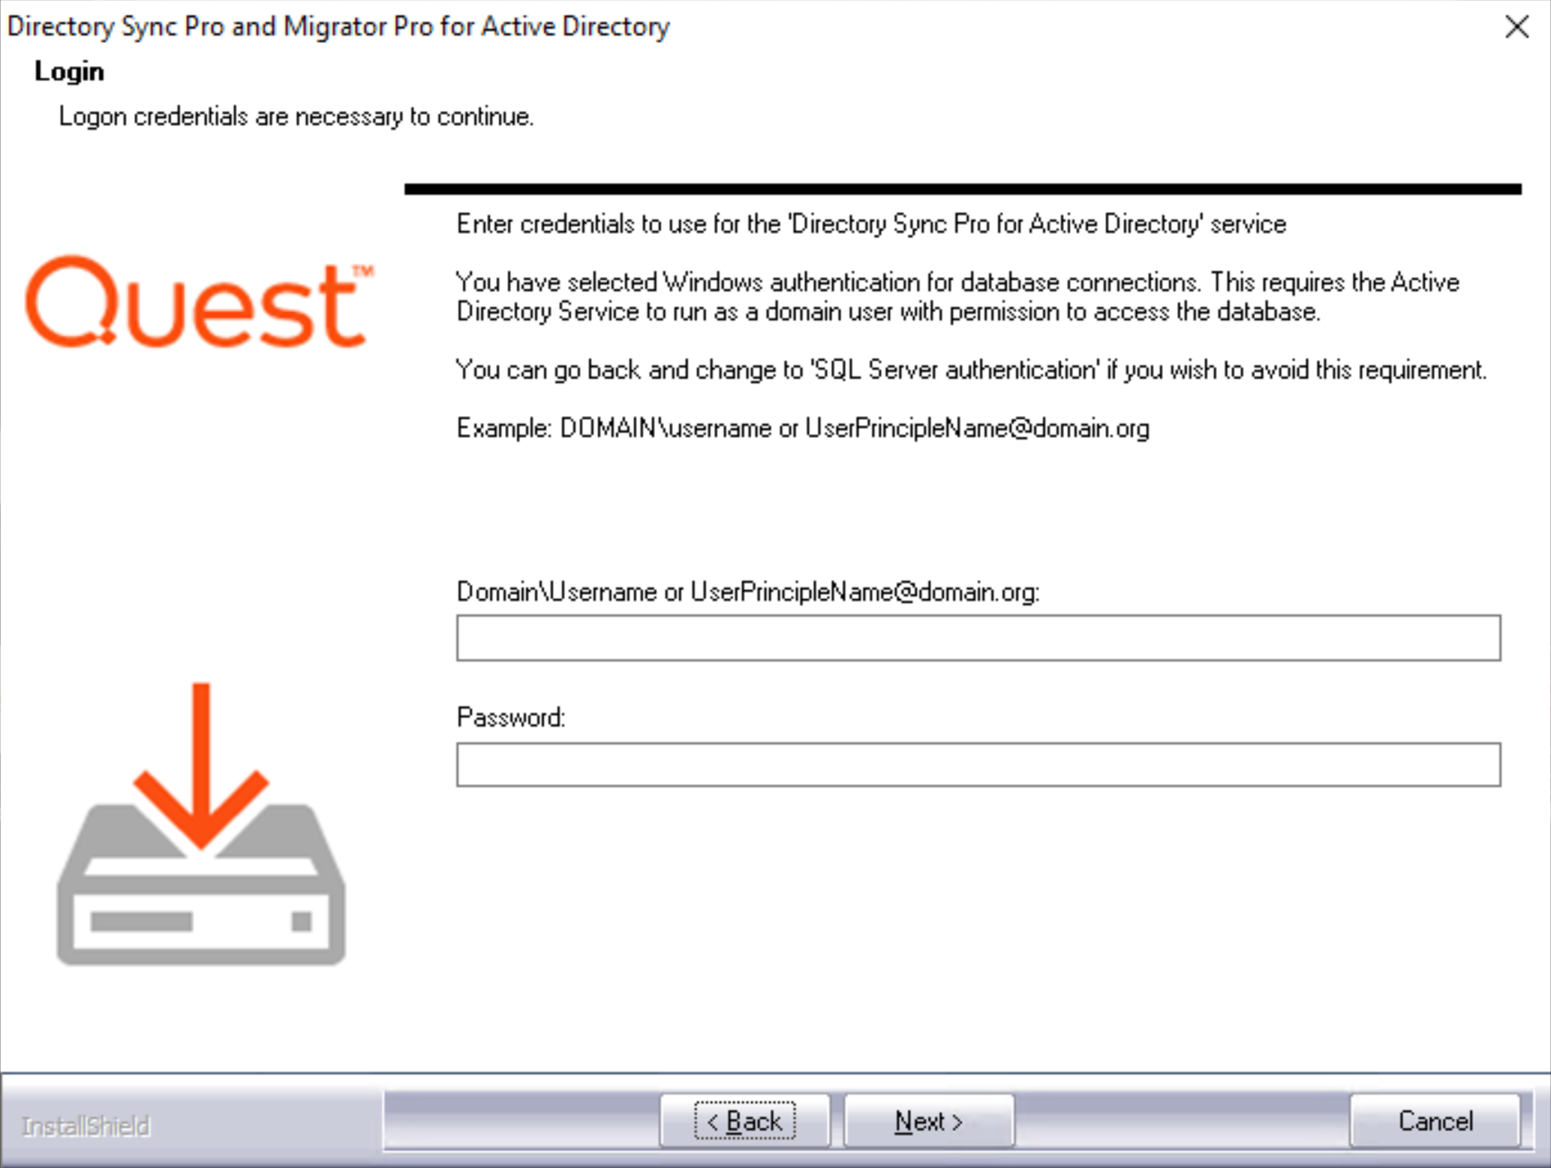
If you selected to connect using Windows Authentication on the previous screen, a screen to enter domain username and password appears. Enter the domain user in DOMAIN\username format and the password. Click Next to continue.
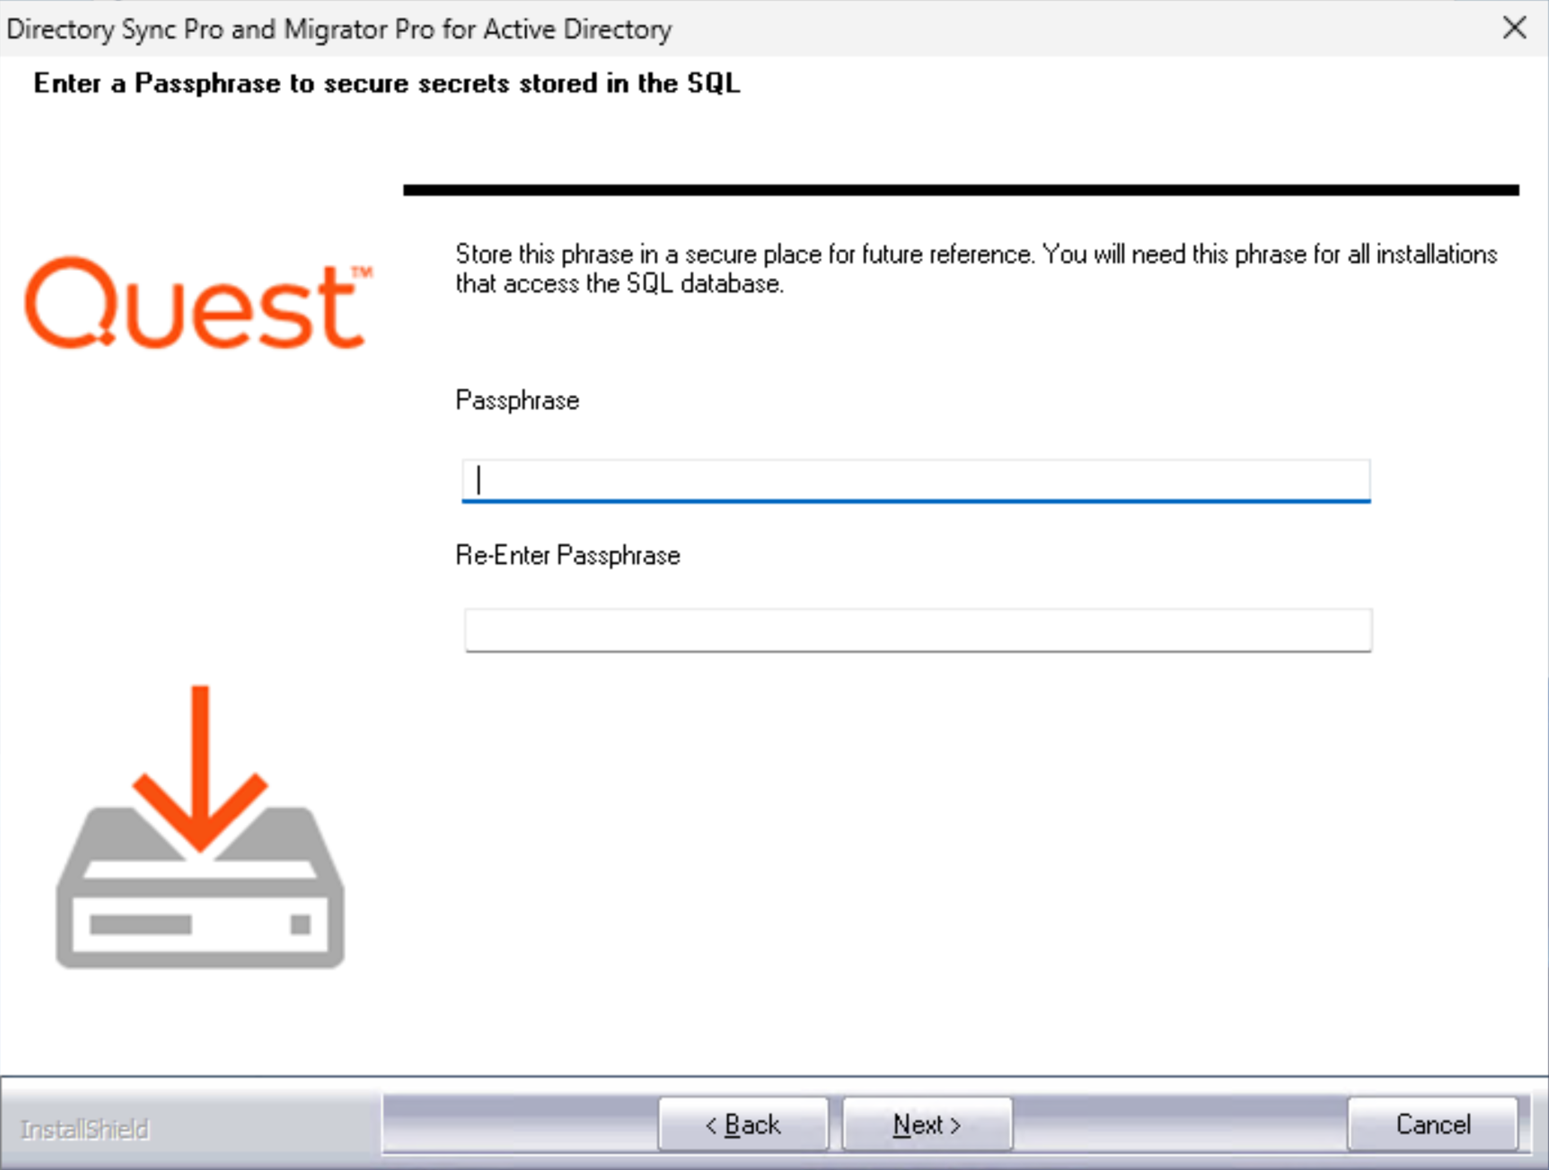
The SQL Passphrase screen appears if the passphrase was never entered on the current machine. The passphrase is required because once a database has been stamped with a passphrase, subsequent installs that reference the same database require the same passphrase. Enter the passphrase that was used during the initial installation of the SQL database. Click Next to continue.
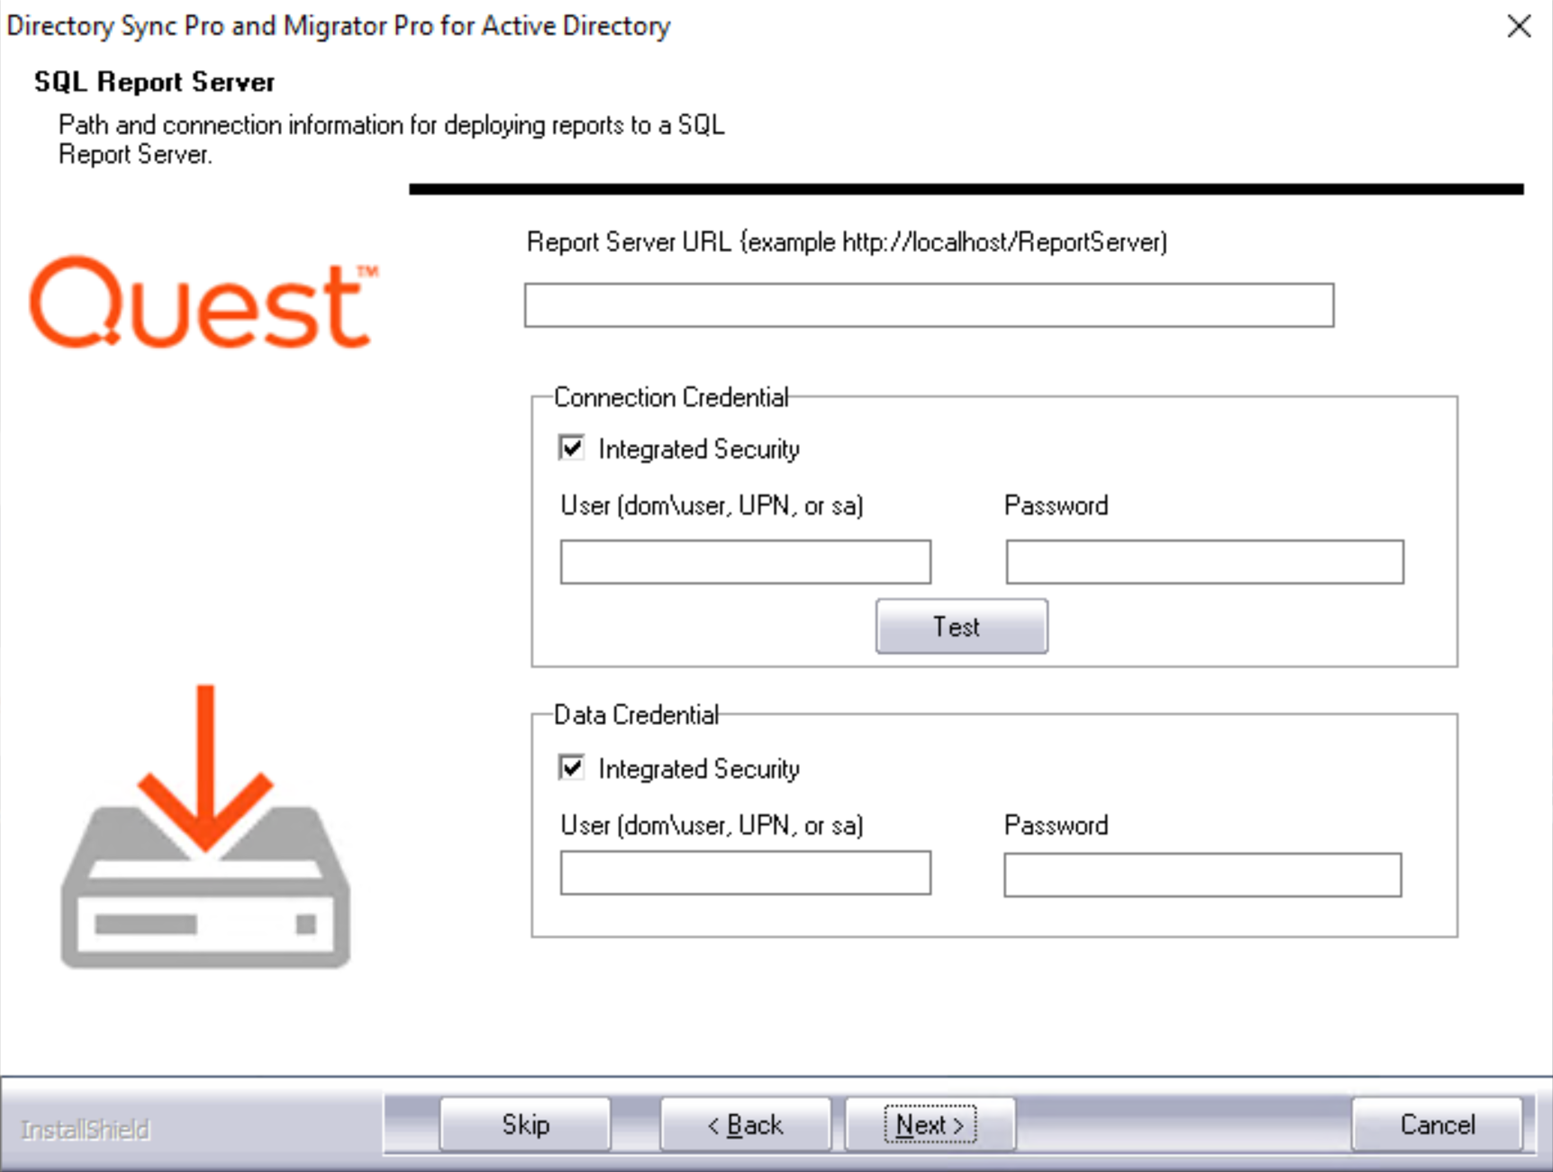
If you selected to install the optional Reporting feature, the SQL Report Server screen appears. Enter the Report Server URL and select the appropriate Connection Credential and Data Credential options. Clicking the Test button to verify the SSRS connection credential is a best practice. See the Appendix of this document for information on verifying the Report Server URL. Click Next to continue. If SQL Server Reporting Services (SSRS) is not set up, click Skip and OK on the confirmation window.
|
|
The Connection Credential requires an account that has the Content Manager role and the System Administrator role defined on the SQL Server Reporting Server. The Data Credential requires an account that has permission on the SQL Server Reporting Services database. These permissions are typically the database-level roles db_datareader and db_datawriter but should be verified by the SQL Server Reporting Services database administrator. Reports will not appear in the Migrator Pro for Active Directory Console UI if the installation of the Reporting feature is skipped. To install the Reporting feature at a later time, select to Modify the installation from the Programs and Features page in the Control Panel. When an AD credential is used as the Data Credential on the SQL Report Server screen in the Migrator Pro for Active Directory installer, the Windows Credential check box is not checked. This will need to be changed manually in the DataSource in the Report Server after installation is completed. |
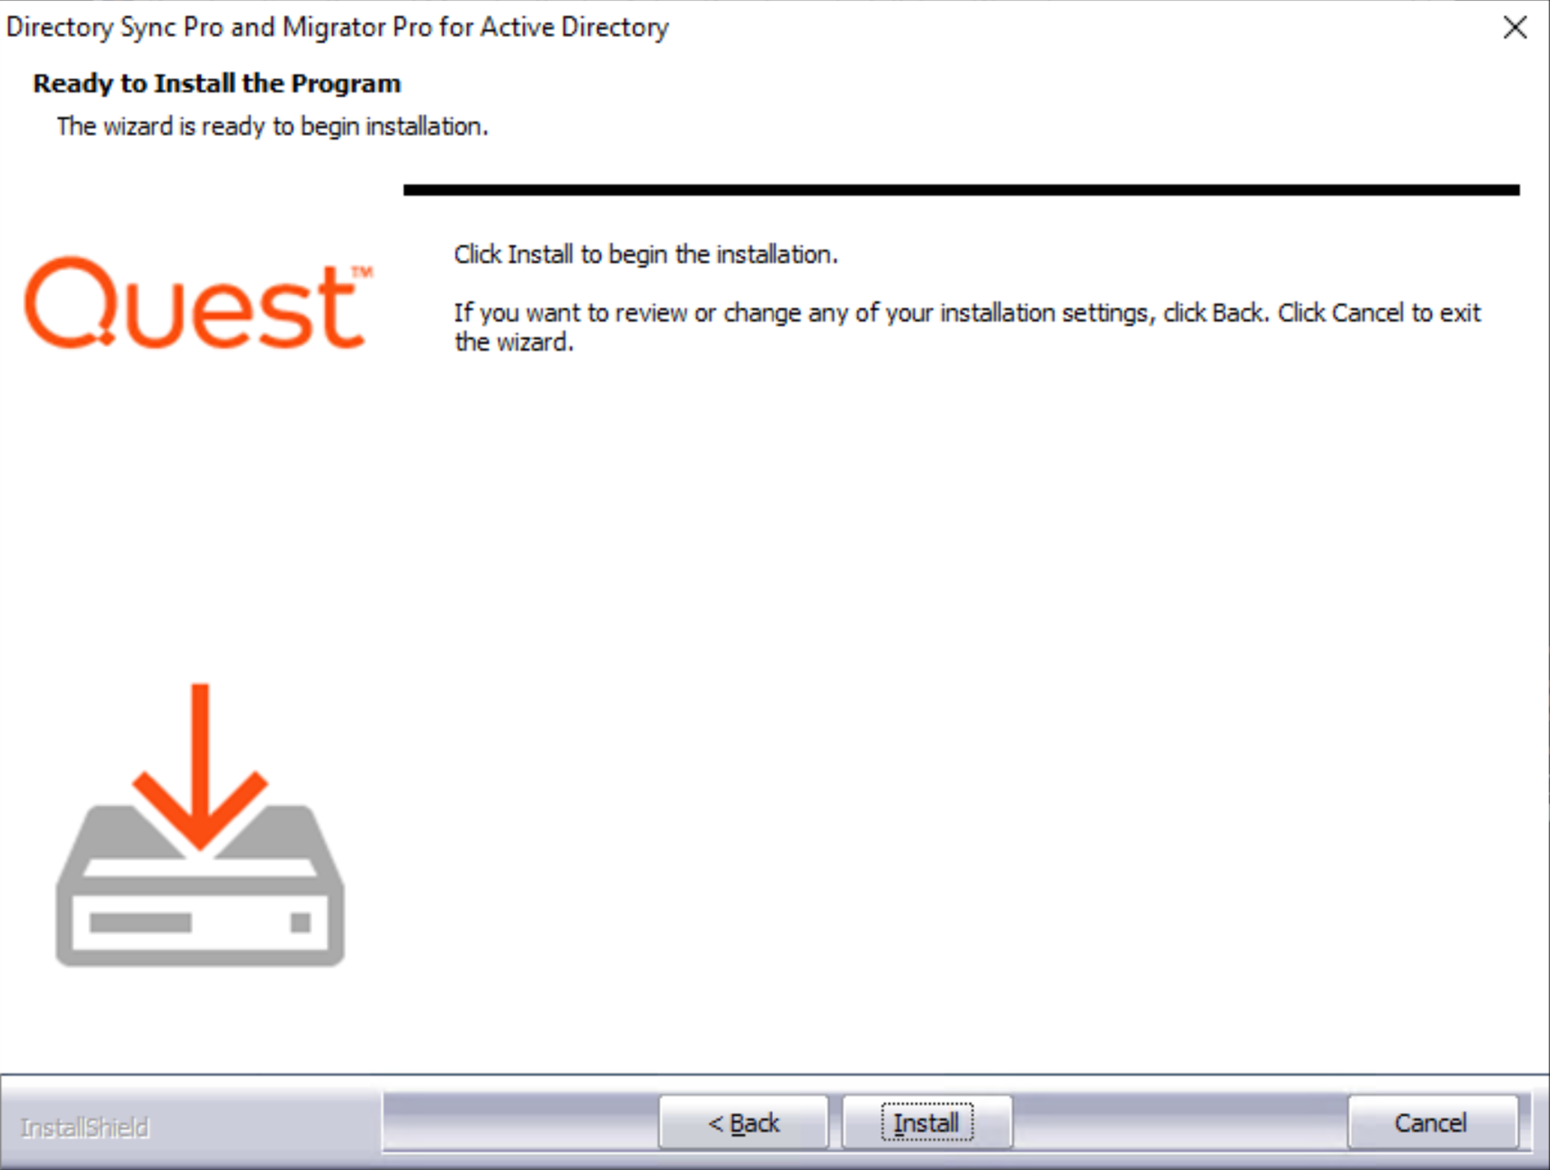
The Ready to Install screen appears. Click Install to begin the installation.
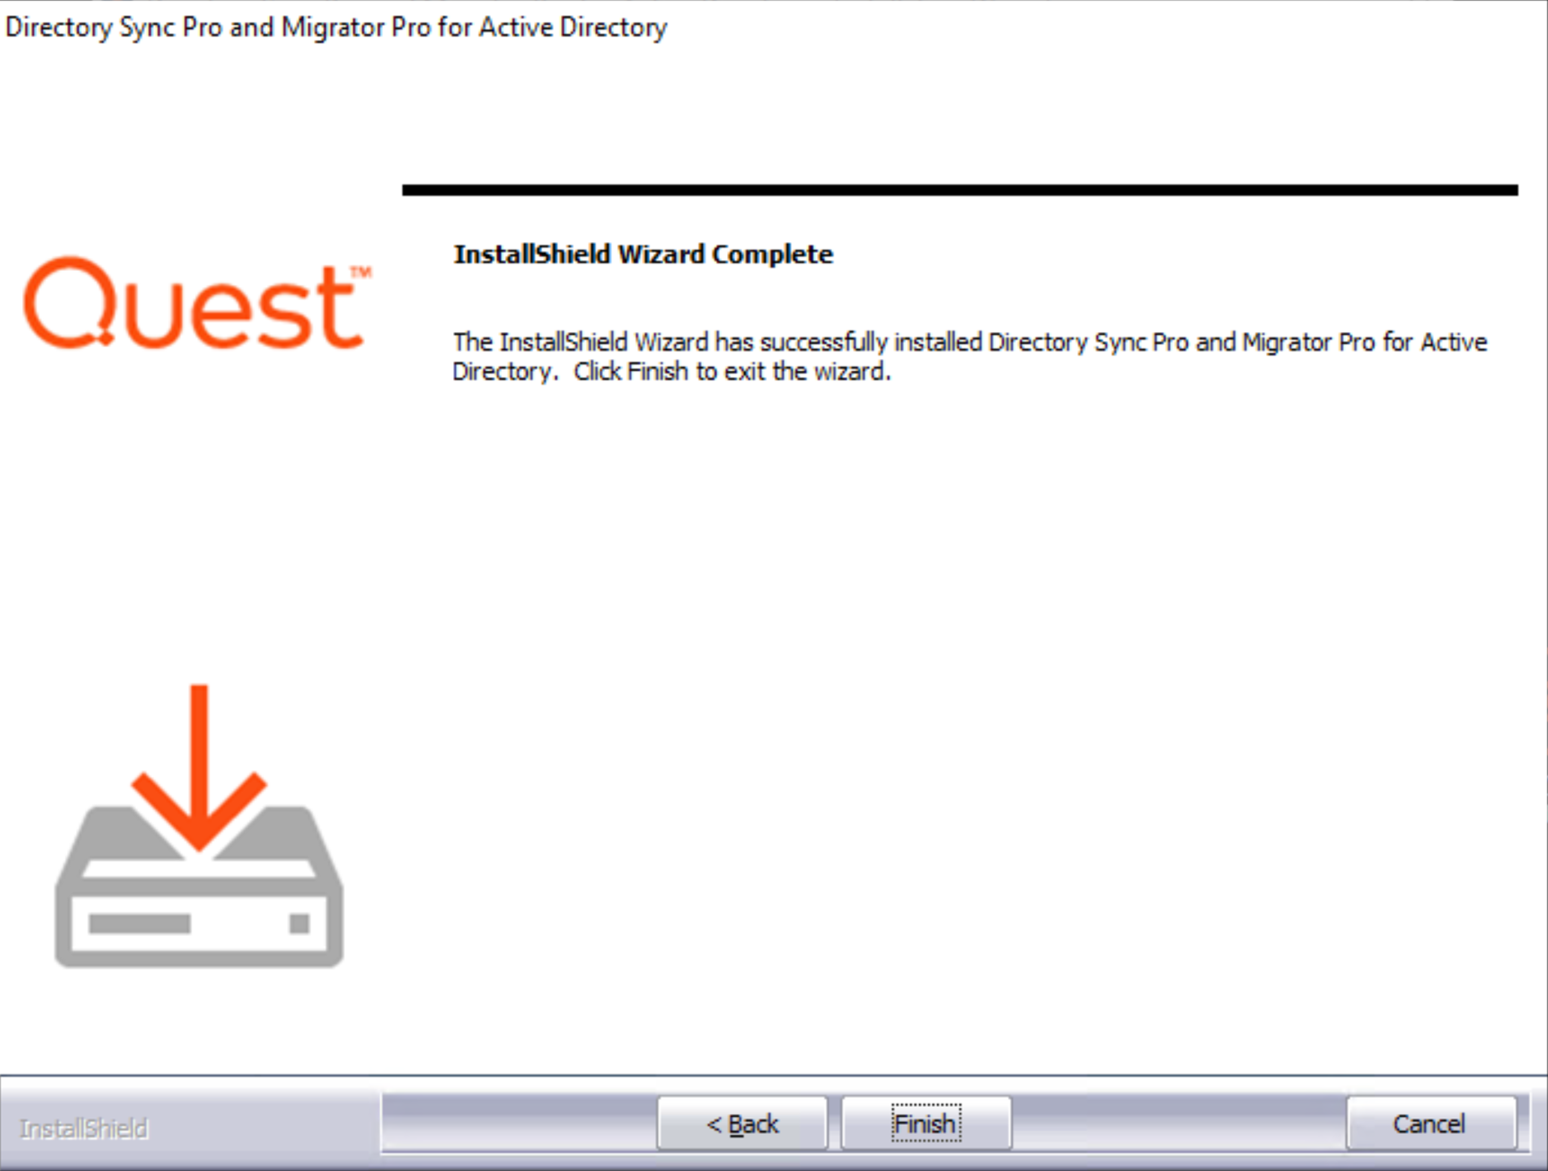
When the installation completes, the InstallShield Wizard Complete message appears. Click Finish.
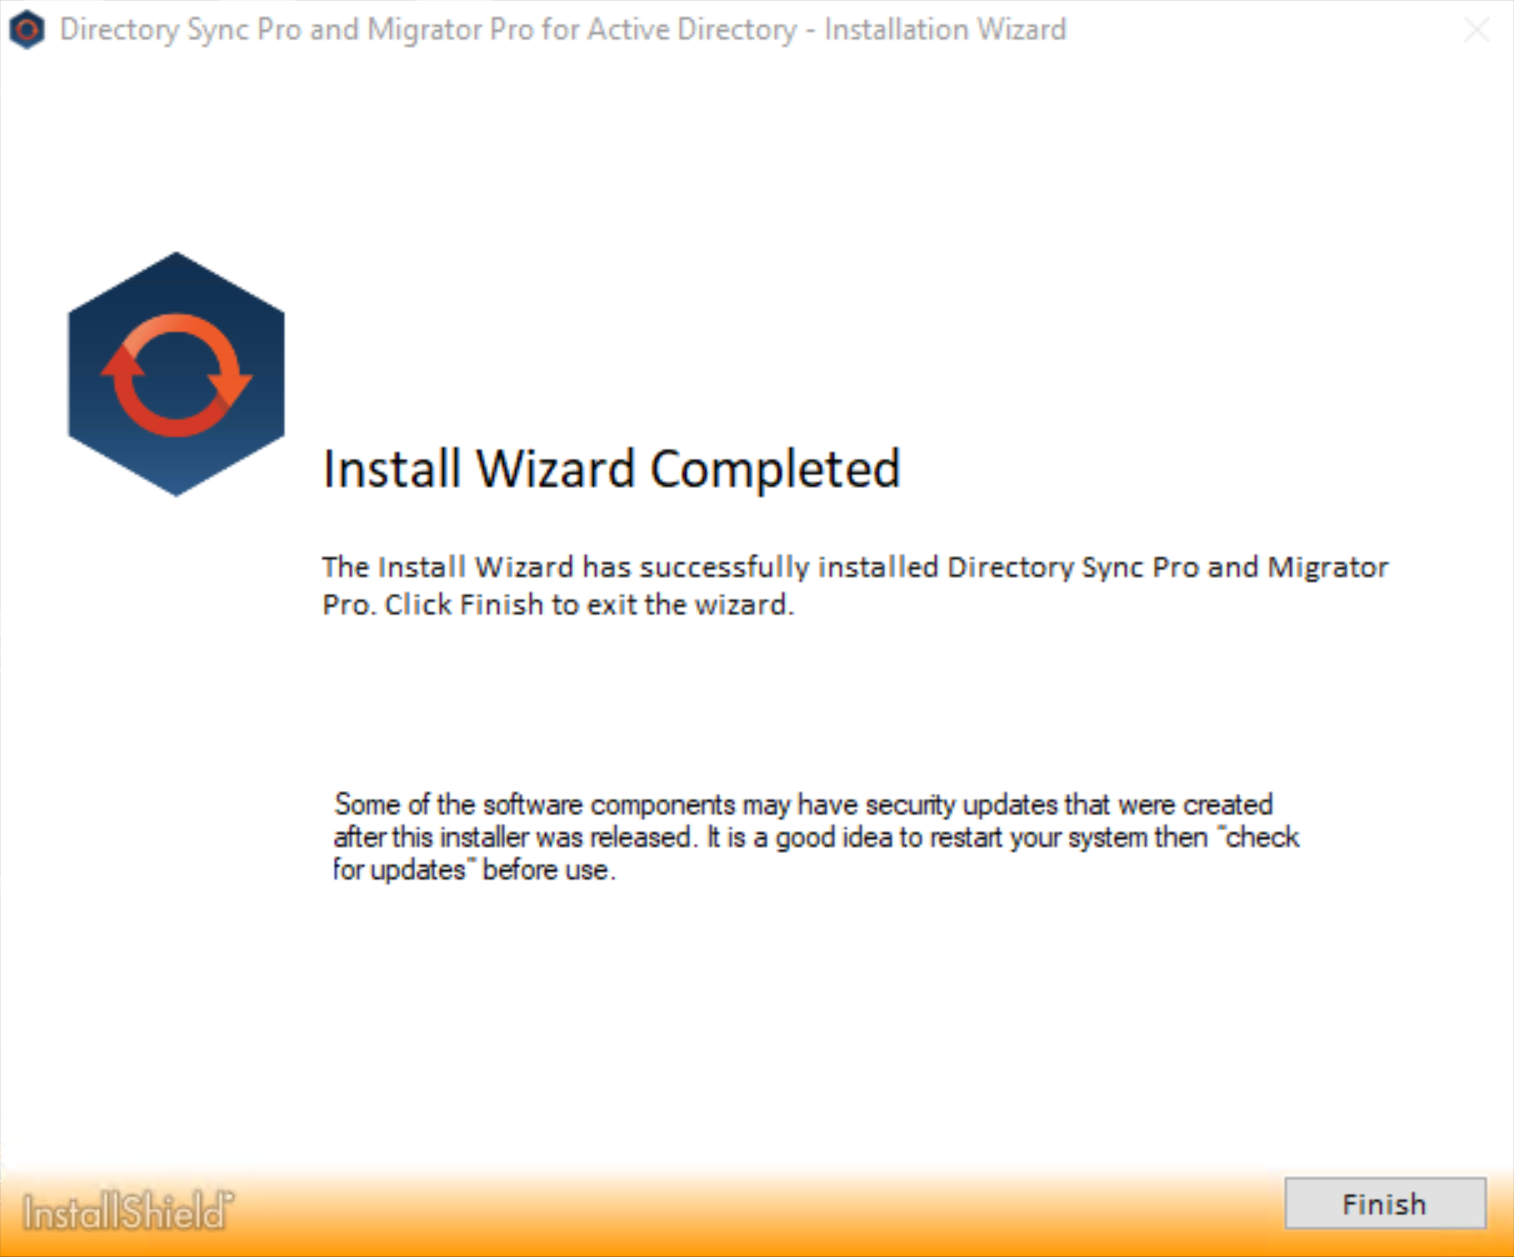
Also, click Finish on the Installation window.
|
|
If upgrading from a previous version of Directory Sync Pro for Active Directory, you must delete the C:\Windows\BTPass folder from all domain controllers being used in the Directory Sync Pro for Active Directory profiles. A new version of BTPass will be pushed to the domain controllers on the next sync. |
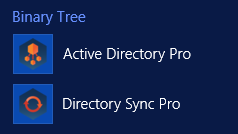
The Apps screen or Start Menu is updated and the Migrator Pro for Active Directory and Directory Sync Pro for Active Directory icons are added to the desktop.
Apps screen:
Desktop icons:
An internet connection is required to access the online help system and video tutorials.
Within the Directory Sync Pro for Active Directory/Migrator Pro for Active Directory interface, the online help system can be accessed by clicking “HELP” in the pull-down menu 

Windows Server operating systems will need to have the Desktop Experience feature (or a video codec) installed to view the video tutorials.
Section 6. Installing Directory Sync Pro for Active Directory and Migrator Pro for Active Directory
The Directory Sync Pro for Active Directory and Migrator Pro for Active Directory installer can be used to install both Directory Sync Pro for Active Directory and Migrator Pro for Active Directory at the same time or individually. Migrator Pro for Active Directory should only be installed at the same time as Directory Sync Pro for Active Directory or if it has previously been installed on the same server.
This guide includes the steps for installing Directory Sync Pro for Active Directory and Migrator Pro for Active Directory at the same time. Installing Directory Sync Pro for Active Directory first and running the installer again to install the Migrator Pro for Active Directory components is another option.
The installer creates a local group on the Directory Sync Pro for Active Directory server named BTDirSyncPro and will add the currently logged in user to the group. Other users or a Domain group can be added to provide access to other users.
|
|
It is recommended to select “SQL Server Authentication” during the Directory Sync Pro for Active Directory/Migrator Pro for Active Directory server console installation if multiple people will be accessing the Directory Sync Pro for Active Directory/Migrator Pro for Active Directory web user interfaces. Otherwise, if “Windows Authentication” is chosen during installation, create a security group in AD and assign DB Owner rights to the Directory Sync Pro for Active Directory SQL databases and add all the users that need access to the console as members. |
6.1 Installing Directory Sync Pro for Active Directory and Migrator Pro for Active Directory on a Windows Server
Download the installation package from the Quest Support site and save it on the Quest Windows Server.
Double-click the executable to begin installing Migrator Pro for Active Directory. The Welcome screen appears. Click Next to continue.

The License Agreement screen appears. To accept the terms of the license agreement and continue with the install, select “I accept the terms in the license agreement” and click Next.

The Setup Type screen appears.

Select Default Installation to install Directory Sync Pro for Active Directory and/or Migrator Pro for Active Directory with the default configuration options. A series of screens will appear while installing the needed databases and features. The Install Wizard Completed screen will appear when done.
Select the Advanced Installation option to review and set the configuration options for the installation. The Install Wizard will continue to the next step.
The SQL Option screen appears. Select to use an existing SQL server or to install SQL Express and then click Next. If you choose to install SQL Express, a series of installation screens will appear while SQL Express is being installed.

|
|
An existing SQL server must be used in STIG environments. SQL Express does not meet STIG requirements. Please see Appendix C. STIG Environments for more information. |
The Installation screen appears and will remain open. The Recommended Components screen will appear in a separate window. You will be prompted if there are applications using files that need to be updated by the installer.
The Recommended Components for This Computer screen appears. By default, only the Directory Sync Pro for Active Directory components are selected. To install Migrator Pro for Active Directory, select the Directory Sync Pro / Migrator Pro Console, Migrator Pro for Active Directory, and (optionally) Migrator Pro for Active Directory Reports components and click Next to continue.
The Installation Directory screen appears. Both Directory Sync Pro for Active Directory and Migrator Pro for Active Directory are installed in the same directory. Click Browse to choose a different install location. Click Next to continue.

The Device Log Virtual Directory screen appears. Click Browse to choose a different location where device logs will be written. Click Next to continue.

The File Location for Download Jobs screen appears. Click Browse to choose a different location where download jobs will be saved. Click Next to continue.

The Database Server Login screen appears. Enter the SQL Database Server location, credential information, and database name. Click Next to continue. If you choose to install SQL Server Express, the installer will populate the 'sa' account and default password. This password should be changed according to your organizations password complexity policy prior to configuring the product databases on the Database Server Login screen.

The Database Server Login screen appears again, this time for the logging database. Enter the SQL Database Server location for the logging database, credential information, and database name. Click Next to continue.

If you selected to connect using Windows Authentication on the previous screen, a screen to enter domain username and password appears. Enter the domain user in DOMAIN\username format and the password. Click Next to continue.

The SQL Passphrase screen appears if the passphrase was never entered on the current machine. The passphrase is required because once a database has been stamped with a passphrase, subsequent installs that reference the same database require the same passphrase. Enter the passphrase that was used during the initial installation of the SQL database. Click Next to continue.

If you selected to install the optional Reporting feature, the SQL Report Server screen appears. Enter the Report Server URL and select the appropriate Connection Credential and Data Credential options. Clicking the Test button to verify the SSRS connection credential is a best practice. See the Appendix of this document for information on verifying the Report Server URL. Click Next to continue. If SQL Server Reporting Services (SSRS) is not set up, click Skip and OK on the confirmation window.

|
|
The Connection Credential requires an account that has the Content Manager role and the System Administrator role defined on the SQL Server Reporting Server. The Data Credential requires an account that has permission on the SQL Server Reporting Services database. These permissions are typically the database-level roles db_datareader and db_datawriter but should be verified by the SQL Server Reporting Services database administrator. Reports will not appear in the Migrator Pro for Active Directory Console UI if the installation of the Reporting feature is skipped. To install the Reporting feature at a later time, select to Modify the installation from the Programs and Features page in the Control Panel. When an AD credential is used as the Data Credential on the SQL Report Server screen in the Migrator Pro for Active Directory installer, the Windows Credential check box is not checked. This will need to be changed manually in the DataSource in the Report Server after installation is completed. |
The Ready to Install screen appears. Click Install to begin the installation.

When the installation completes, the InstallShield Wizard Complete message appears. Click Finish.

Also, click Finish on the Installation window.

|
|
If upgrading from a previous version of Directory Sync Pro for Active Directory, you must delete the C:\Windows\BTPass folder from all domain controllers being used in the Directory Sync Pro for Active Directory profiles. A new version of BTPass will be pushed to the domain controllers on the next sync. |
The Apps screen or Start Menu is updated and the Migrator Pro for Active Directory and Directory Sync Pro for Active Directory icons are added to the desktop.
Apps screen:

Desktop icons:
An internet connection is required to access the online help system and video tutorials.
Within the Directory Sync Pro for Active Directory/Migrator Pro for Active Directory interface, the online help system can be accessed by clicking “HELP” in the pull-down menu 

Windows Server operating systems will need to have the Desktop Experience feature (or a video codec) installed to view the video tutorials.
Section 6. Installing Directory Sync Pro for Active Directory and Migrator Pro for Active Directory
The Directory Sync Pro for Active Directory and Migrator Pro for Active Directory installer can be used to install both Directory Sync Pro for Active Directory and Migrator Pro for Active Directory at the same time or individually. Migrator Pro for Active Directory should only be installed at the same time as Directory Sync Pro for Active Directory or if it has previously been installed on the same server.
This guide includes the steps for installing Directory Sync Pro for Active Directory and Migrator Pro for Active Directory at the same time. Installing Directory Sync Pro for Active Directory first and running the installer again to install the Migrator Pro for Active Directory components is another option.
The installer creates a local group on the Directory Sync Pro for Active Directory server named BTDirSyncPro and will add the currently logged in user to the group. Other users or a Domain group can be added to provide access to other users.
|
|
It is recommended to select “SQL Server Authentication” during the Directory Sync Pro for Active Directory/Migrator Pro for Active Directory server console installation if multiple people will be accessing the Directory Sync Pro for Active Directory/Migrator Pro for Active Directory web user interfaces. Otherwise, if “Windows Authentication” is chosen during installation, create a security group in AD and assign DB Owner rights to the Directory Sync Pro for Active Directory SQL databases and add all the users that need access to the console as members. |
6.1 Installing Directory Sync Pro for Active Directory and Migrator Pro for Active Directory on a Windows Server
Download the installation package from the Quest Support site and save it on the Quest Windows Server.
Double-click the executable to begin installing Migrator Pro for Active Directory. The Welcome screen appears. Click Next to continue.

The License Agreement screen appears. To accept the terms of the license agreement and continue with the install, select “I accept the terms in the license agreement” and click Next.

The Setup Type screen appears.

Select Default Installation to install Directory Sync Pro for Active Directory and/or Migrator Pro for Active Directory with the default configuration options. A series of screens will appear while installing the needed databases and features. The Install Wizard Completed screen will appear when done.
Select the Advanced Installation option to review and set the configuration options for the installation. The Install Wizard will continue to the next step.
The SQL Option screen appears. Select to use an existing SQL server or to install SQL Express and then click Next. If you choose to install SQL Express, a series of installation screens will appear while SQL Express is being installed.

|
|
An existing SQL server must be used in STIG environments. SQL Express does not meet STIG requirements. Please see Appendix C. STIG Environments for more information. |
The Installation screen appears and will remain open. The Recommended Components screen will appear in a separate window. You will be prompted if there are applications using files that need to be updated by the installer.
The Recommended Components for This Computer screen appears. By default, only the Directory Sync Pro for Active Directory components are selected. To install Migrator Pro for Active Directory, select the Directory Sync Pro / Migrator Pro Console, Migrator Pro for Active Directory, and (optionally) Migrator Pro for Active Directory Reports components and click Next to continue.
The Installation Directory screen appears. Both Directory Sync Pro for Active Directory and Migrator Pro for Active Directory are installed in the same directory. Click Browse to choose a different install location. Click Next to continue.

The Device Log Virtual Directory screen appears. Click Browse to choose a different location where device logs will be written. Click Next to continue.

The File Location for Download Jobs screen appears. Click Browse to choose a different location where download jobs will be saved. Click Next to continue.

The Database Server Login screen appears. Enter the SQL Database Server location, credential information, and database name. Click Next to continue. If you choose to install SQL Server Express, the installer will populate the 'sa' account and default password. This password should be changed according to your organizations password complexity policy prior to configuring the product databases on the Database Server Login screen.

The Database Server Login screen appears again, this time for the logging database. Enter the SQL Database Server location for the logging database, credential information, and database name. Click Next to continue.

If you selected to connect using Windows Authentication on the previous screen, a screen to enter domain username and password appears. Enter the domain user in DOMAIN\username format and the password. Click Next to continue.

The SQL Passphrase screen appears if the passphrase was never entered on the current machine. The passphrase is required because once a database has been stamped with a passphrase, subsequent installs that reference the same database require the same passphrase. Enter the passphrase that was used during the initial installation of the SQL database. Click Next to continue.

If you selected to install the optional Reporting feature, the SQL Report Server screen appears. Enter the Report Server URL and select the appropriate Connection Credential and Data Credential options. Clicking the Test button to verify the SSRS connection credential is a best practice. See the Appendix of this document for information on verifying the Report Server URL. Click Next to continue. If SQL Server Reporting Services (SSRS) is not set up, click Skip and OK on the confirmation window.

|
|
The Connection Credential requires an account that has the Content Manager role and the System Administrator role defined on the SQL Server Reporting Server. The Data Credential requires an account that has permission on the SQL Server Reporting Services database. These permissions are typically the database-level roles db_datareader and db_datawriter but should be verified by the SQL Server Reporting Services database administrator. Reports will not appear in the Migrator Pro for Active Directory Console UI if the installation of the Reporting feature is skipped. To install the Reporting feature at a later time, select to Modify the installation from the Programs and Features page in the Control Panel. When an AD credential is used as the Data Credential on the SQL Report Server screen in the Migrator Pro for Active Directory installer, the Windows Credential check box is not checked. This will need to be changed manually in the DataSource in the Report Server after installation is completed. |
The Ready to Install screen appears. Click Install to begin the installation.

When the installation completes, the InstallShield Wizard Complete message appears. Click Finish.

Also, click Finish on the Installation window.

|
|
If upgrading from a previous version of Directory Sync Pro for Active Directory, you must delete the C:\Windows\BTPass folder from all domain controllers being used in the Directory Sync Pro for Active Directory profiles. A new version of BTPass will be pushed to the domain controllers on the next sync. |
The Apps screen or Start Menu is updated and the Migrator Pro for Active Directory and Directory Sync Pro for Active Directory icons are added to the desktop.
Apps screen:

Desktop icons:
Directory Sync Pro for Active Directory and Migrator Pro for Active Directory can be upgraded to a new version without uninstalling the existing version. The install wizard will detect the necessary changes and manage the upgrade.