Once Desktop Authority is installed, based on the options selected during the installation, Desktop Authority will be automatically started. If it does not automatically start, you can run it from the Start menu.
Click Start > All Programs > Quest > Desktop Authority Manager > Desktop Authority Manager, to start the Desktop Authority Manager. You will be presented with the Manager and logon dialog within your default web browser.
Figure 1: Login to the KACE® Desktop Authority Manager
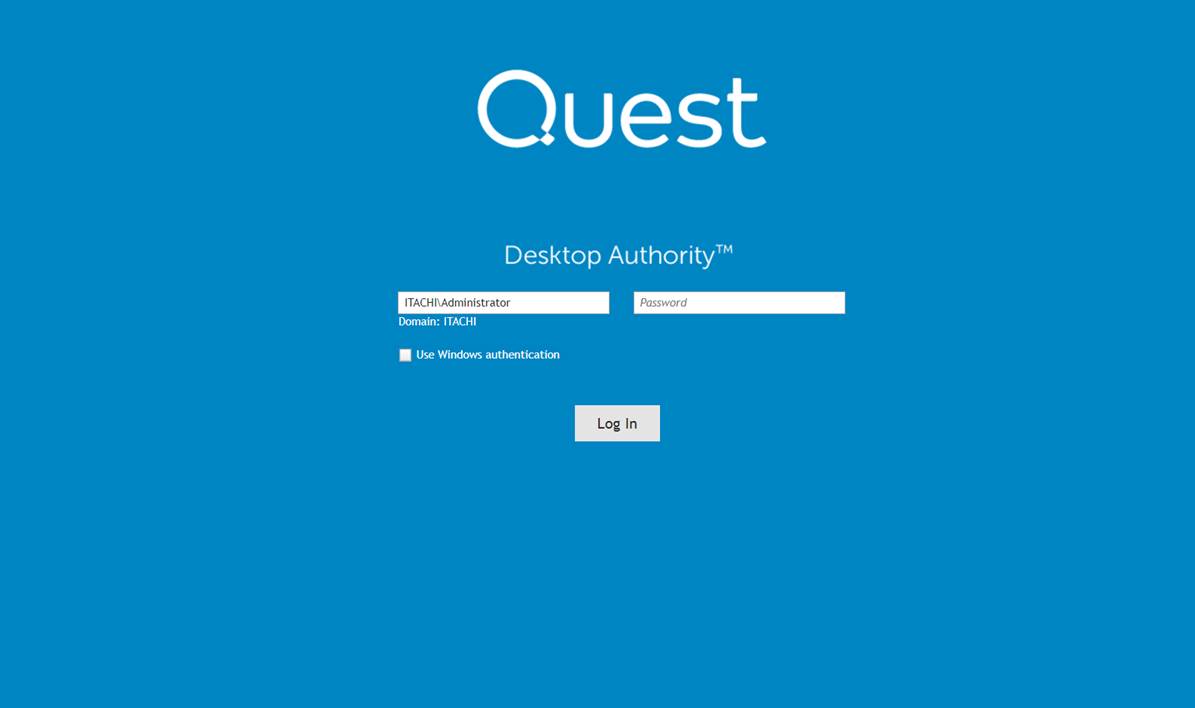
Enter your User name and Password. Be sure to include the domain with your user name. Optionally you may choose to logon by using your current Windows logon credentials. To do this select the Use Windows authentication box.
Once you are logged in, you will see the Desktop Authority Dashboard. Here you will be instructed on how to proceed to get started. There is also a tab which shows new product features.
Figure 2: KACE® Desktop Authority Dashboard
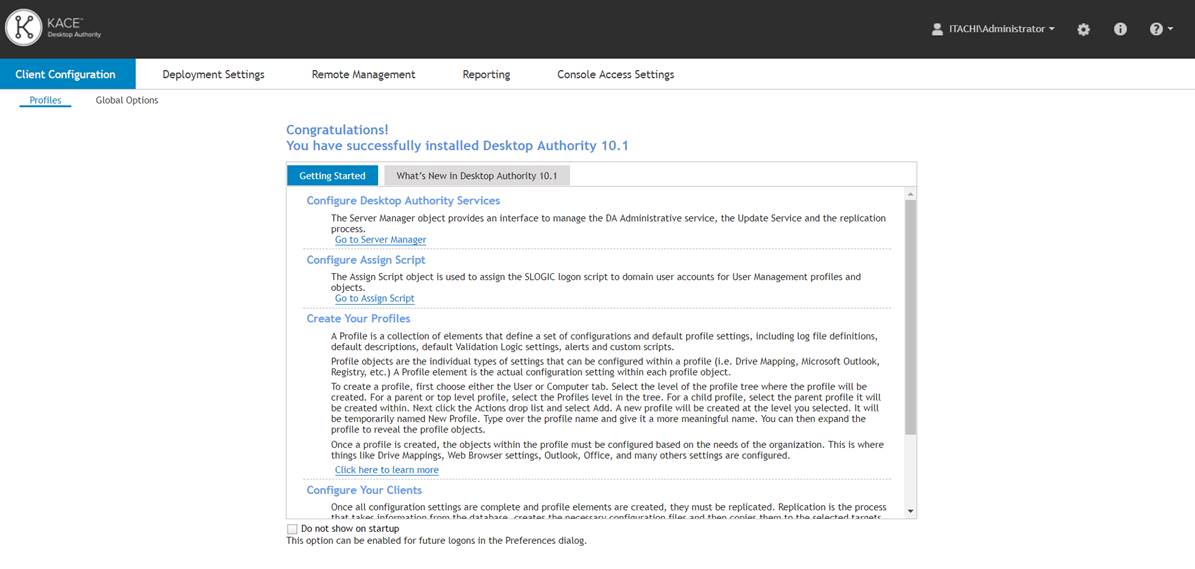
The dashboard will be te first dialog to show when logging into the Desktop Authority Manager. If you prefer not to see this each time you log in, check the Do not show on startup box. You can re-enable this setting in the Preferences dialog at any time.
The dashboard is your guide to getting started with Desktop Authority. It will remind you of the specific things that need to be done to properly configure the Manager for use. These configurations will be discussed further along in this guide.
If you are evaluating Desktop Authority there is no registration necessary.
Once a Desktop Authority license are purchased, you must register the software. Registering the software will remove the evaluation time period shown on the Desktop Authority client side splash screen and in the Desktop Authority Manager.
To register your Desktop Authority licenses, click the Registration link at the bottom of the Manager.
Figure 3: Click Registration to register your licenses of Desktop Authority

Once on the registration dialog, click the “Add New License” button and enter the required Key. Click Register when finished. Once the registration information is saved, be sure to logout of the Manager and then back in to see the newly licensed features.
There are numerous settings and configurations in Desktop Authority. These settings can be divided into two groups, 1) settings that are available to configure the inner workings of the Manager and backend services and 2) configurations that an administrator creates to provide desktop configuration, management and security for computers in the organization.
The following sections of the Getting Started manual are devoted to creating the settings that will help configure, manage and secure the computers in your organization.
The configurations that support the administration of the Desktop Authority Manager and its back end services are discussed in full detail in the Administrators Guide and the online help.
In this section we will cover the installation/configuration of the different services that should be installed following a new installation or system update. These services include the Desktop Authority Administrative Service and the Update Service and will be explained below.
The DA Administrative service enables Desktop Authority to perform tasks that require administrative rights. This service helps Desktop Authority perform these tasks by installing a client version of the DA Administrative service to each client machine and a complementary version of the DA Administrative service to one or more Domain Controllers within the domain.
To install or update this service, proceed to the Server Manager. Server Manager is a multi-threaded component that provides an interface to manage the DA Administrative Service, the replication process and the Update Service.
The first thing you will need to do is to load Server Manager with the servers that will be used by Desktop Authority. Click on the Go to Server Manager link on the Getting Started tab or click on Deployment Settings in the top menu.
Click the Discover button to have Server Manager automatically find existing Domain Controllers on the network. You can also manually add servers using the Add button. You will want to add servers/domain controllers that will be used for replication and hosting of the DA Administrative Service and Update Service.
Once the appropriate servers are added to the Server Manager grid, you will need to configure the DA Administrative Service. You will see a column in the grid for this service. Click on a server in the grid to add this service to. Once selected, click on the Administrative Service button and choose Install from the drop down menu. This will bring you to the service settings.
Provide two sets of credentials for the service. This service requires two unique user accounts. The Server user account (domain admin) is used on each Domain Controller to remotely install the Desktop Authority Administrative Client Service on each workstation. Therefore, the Server user account (server side service) must have Local Admin rights to all workstations. In most circumstances, this account will be one that is a member of the Domain Admins group.
The Client User account (client side service) is used on each workstation to make registry changes, install software, add printers, synchronize time and perform any other task that may require elevated privileges during the logon, logoff or shutdown events. The Client user account should be a member of the Domain Users group.
Click Install once the account credentials are entered. You will see the progress of the service installation. Once complete, click the Back link to go back to the Server Manager grid.
The Update Service is only used for MSI Packages and is installed in the Server Manager. If you have not done so yet, you will need to load Server Manager with the servers that will be used by Desktop Authority. Click the Discover button to have Server Manager automatically find existing Domain Controllers on the network. You can also manually add servers using the Add button. You will want to add servers/domain controllers that will be used for replication and hosting of the DA Administrative Service and Update Service.
Once the appropriate servers are added to the Server Manager grid, you will need to configure the Update Service. You will see a column in the grid for this service. Click on a server in the grid to add this service to. Once selected, click on the Update Service button and choose Install from the drop down menu. This will bring you to the service settings.
The user account configured for this service must be a member of the Local Administrators group on the server in which the service is being installed to. This account must have Local Administrator access to the Operations Master server, as well as access to the Internet.
Click Install once the account credentials are entered. You will see the progress of the service installation. Once complete, click the Back link to go back to the Server Manager grid.
