
Agents and Customizations
Admin Agents
The Admin Agents screen allows you to designate one or more machines as remote workstations that can perform customized tasks, such as running PowerShell scripts that can be triggered against Computers, Users, Resource Mailboxes, Contacts, or Groups as needed. For example, an organization may want to designate a machine to move users from a temporary OU in the target, to what is later designated as their final destination.
Typically, the Admin Agent will be run on a computer outside the scope of the Synchronization profile being used. You also have the option to convert an existing machine already running the Agent into an Admin Agent computer on the Computer Actions screen. The Admin Agent cannot perform both roles, so Admin Agent computers are typically chosen from the target forest as they do not need to be cutover.
If you are choosing a machine from the target as an Admin Agent computer, you should create it on the Admin Agents tab under Settings before installing the Agent software. Existing computers that were converted to an Admin Agent computer will appear there automatically.
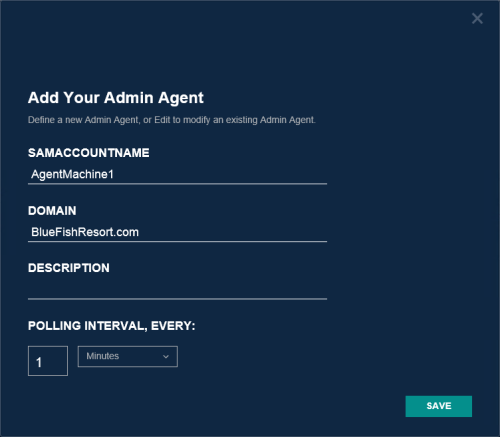
Click on Add to define a new Admin Agent computer, or Edit to modify an existing Admin Agent computer.
- The sAMAccountName identifies the machine name the Admin Agent will run on.
- The Domain identifies where the machine is located.
- The Description is an optional field used to describe the machine.
- The Polling Interval, Every setting determines the length of time between polls. The Polling Interval is set to 1 minute by default.
After adding a machine to the Admin Agents screen, you can install the Agent software on the Admin Agent machine. You should see the computer register here after refreshing the screen. If you can ping the computer from the Migrator Pro for Active Directory console, but it never registers, check that the Agent software has been successfully installed using the Event Viewer on the Admin Agent machine.
After the Admin Agent computer is added and registered, credentials to be used for the Admin Agent computer can be added to the Credentials screen and custom tasks (marked as "Run On Admin Agent") can be created on the Actions screen. These new tasks can then be added to actions available for Users, Resource Mailboxes, Contacts, Groups, or Computers.
Polling Interval
The Admin Agent polling interval is set to 1 minute by default. The polling interval tells computers how frequently to contact the Migrator Pro for Active Directory Server and check for jobs. If the polling interval is set to a high number, such as 240 minutes (4 hours), it is possible that any command sent to the computer may not execute for up to four hours.
Computers will only obtain an updated polling interval when next contacting the Migrator Pro for Active Directory Server according to their currently set polling interval.
View Jobs
To view Admin Agent jobs:
- Select one or more Admin Agent computers in the list.
- Select View Jobs from the Actions menu and click the Run Action button. The Admin Agent Jobs window appears.
- The Admin Agent Jobs table includes the following columns:
- Job ID - The ID of the job.
- Queued Timestamp - The date and time the job was queued.
- Do Not Start Before - The date selected if using the "Do Not Start Before" option.
- Command Name - The command name of the job.
- Admin Agent- The Admin Agent the job is run on.
- NAS - The NAS computer the job is run on.
- Status - The current status of the job.
- Cancel Requested - This column is checked if a cancellation of the job has been requested.
- Message - Result codes and messages for the job.
- Timeout (sec) - The timeout in seconds.
- Retry Count - The number of times the job has been retried.
- Rollback Status - The status of a rollback process.
- Rollback Message - The status of a rollback process.
-
To cancel a job, select the job and click the Cancel button. To refresh the jobs list, click the Refresh View button.
View Properties
After the Discovery process has been completed for an Admin Agent computer, you can view the discovered properties of that Computer.
To view an Admin Agent computer's properties:
- Select a Computer in the list. Select View Properties in the Actions menu and click the Run Action button. The Computer Properties window appears displaying the properties of the Computer and the user profiles associated with the Computer.
- Click the Export All button to export the content of the window in Excel, text, CSV, or HTML format.
Admin Agent Example
Scenario: The administrator wants to designate a machine to move users from a temporary OU in the target, to what is later designated as their final destination. Any specific PowerShell modules (like Active Directory) or any other script dependencies should be installed on the desired Admin Agent machine prior to these activities to ensure the necessary scripts can execute successfully.
Steps:
-
Add the machine to the Admin Agents list on the Agents screen.
-
Install the Migrator Pro for Active Directory Agent on a machine outside the scope of Directory Sync Pro for Active Directory Synchronization profile which will be used to migrate Computers. This is going to be the Admin Agent machine used for running custom admin actions. You should see the Computer register after refreshing the screen.
-
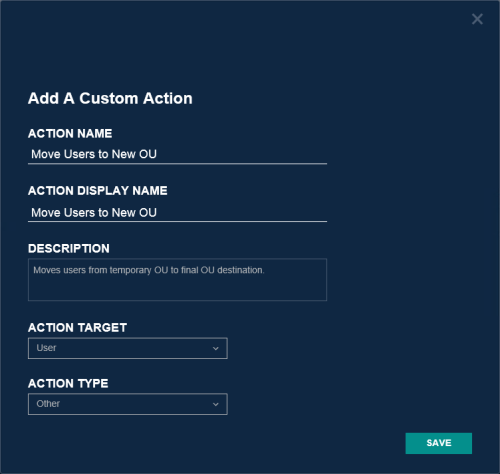
On the Actions screen, add a new custom action with Action Target "User" selected. This will create an Actions menu option on the User Actions screen.
-
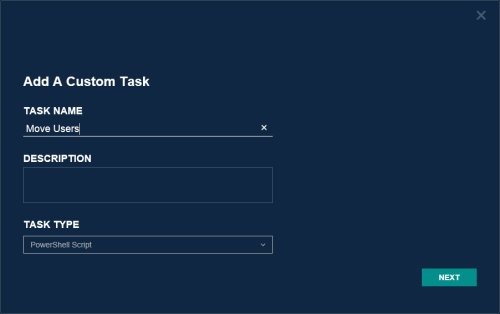
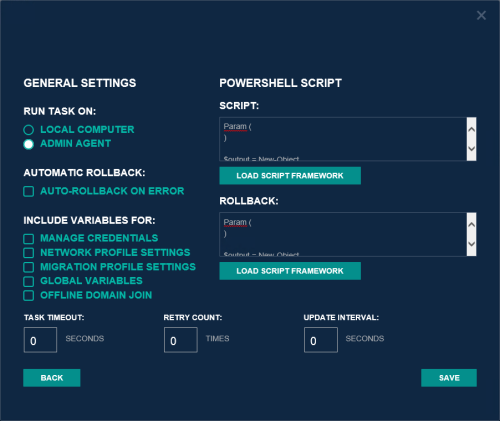
Add a Task to the new Custom Action. The "Run On Admin Agent" option must be checked. For this scenario, select "PowerShell Script" and edit the script. The script can call whatever credentials the PowerShell script should run under on the Admin Agent. The provided PowerShell script needs to clearly identify what Users are required to move and where the final destination is. A sample PowerShell starter script that moves users from one OU to another is available here. The provided sample script is meant to showcase the flexibility of the Admin Agent and is not representative of the definitive or best practices scripting method by which to accomplish moving users from one OU to another.
-
Add the task to the new CustomAction by selecting that row of the tasks table and then selecting the name of the new Custom Action in the Add to Action dropdown and clicking Add.
-
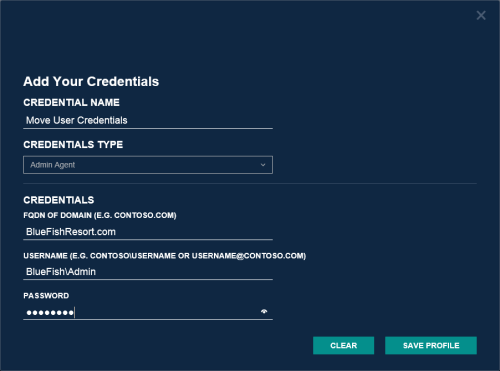
On the Credentials screen, add credentials the Admin Agent machine will use.
-
On the User Actions screen, select the Users you want to move, select the new Custom Action from the Actions menu, and click Apply Action.
-
Select the Admin Agent machine and the credentials on the Job Options window and click Apply to start the job. Instead of individual jobs for each User, a CSV file of Users to move is downloaded to the Admin Agent machine to run.
-
On the Agents screen, select the Admin Agent computer, select View Jobs in the Actions menu and click the Apply Action button to see the move job results.

Mapping Files
Use the Mapping Files page to generate the User Mapping File (Map.usr) and Group Mapping File (Map.gg). These files are automatically created during the ReACL process so the only time they need to be created manually is when re-permissioning SQL databases.
To create the mapping files:
- Click the Export Mapping Files button.
-
Use the browser options to open or save the mappings.zip file containing the User Mapping File (Map.usr) and Group Mapping File (Map.gg).
Each time the Create Mapping Files process is run, the Map.usr and Map.gg files are overwritten.
If the Active Directory environment is non-English, the values in the sAMAccountName column of the BT_SystemGroup table in the SQL database will need to be changed after Directory Sync Pro for Active Directory is installed to have the appropriate non-English values.
