As mentioned previously, automated archiving is done via jobs which must be specified up front.
|
|
NOTE: Before creating new job, click the Refresh icon to update the Jobs tab. |
To define a new job:
1.In Manager view click on the Jobs tab.
2.Right-click in the left pane and in the context menu select New job. You can also click on the Create new job icon on the toolbar to define a job.
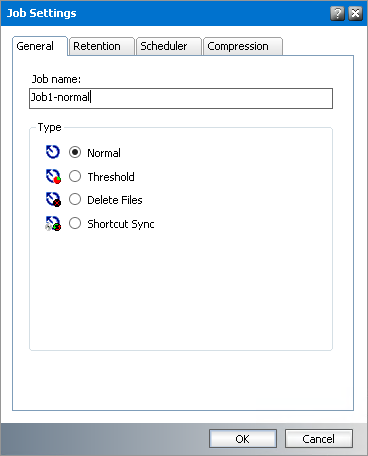
3.In the Job Settings window that is displayed and select the type of job. Each job type is explained in the following topics.
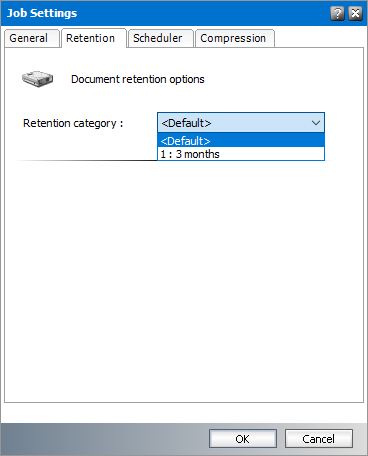
4.Click the Retention tab. On this tab you must specify the retention category which defines the retention time for the items archived via this job. By the means of these categories you can adjust shortcut behavior and set various retention times for archived items. You can choose from available categories or you can create your own categories on the Retention tab of Manager view.
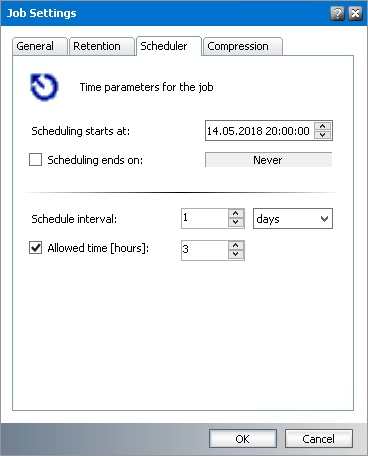
5.Click the Scheduler tab. On this tab you must specify the time when scheduling begins: in the Scheduling starts at field enter the date (by clicking on the upward or downward arrows, or by overwriting it) and time (directly by overwriting the time).
In the Schedule interval box you may specify a period following which the job restarts itself. Click on the upward and downward arrows. The period may be set in minutes or days.
must you select the Allowed time [hours] box, then you may enter your archiving period simply by clicking on the upward or downward arrows.
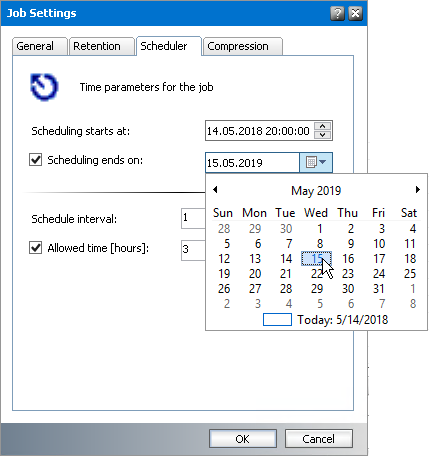
If you select the Scheduling ends on checkbox you may specify a time when the scheduling ends. The period is set to Never by default, i.e. when the checkbox is not selected. Click on the downward arrow to open the calendar where you can select the appropriate month (by clicking on the left and right arrows) and time (by selecting the appropriate day).
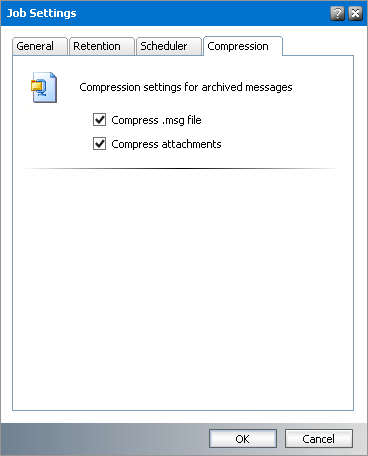
6.Click the Compression tab. On this tab you may specify which of the files will be compressed, simply by selecting the appropriate checkboxes: Compress .msg file, and Compress attachments.
Compression-related settings having been defined under Tools/Options/Archive settings relate to manual archiving only; they are not automatically used by jobs. Therefore, compression-related settings must be specified individually for each job.
A Normal job is used for archiving emails of a specific group. You can create multiple normal jobs and assign each job to one or more groups.
To define a Normal job:
1.In Manager view, click on the Jobs tab.
2.Click with your right mouse button inside the left pane. A context menu appears. In the context menu select New job.
3.In the Job Settings window that appears, select Normal on the General tab. Enter a name in the Job name text box.
4.Then specify your scheduling criteria on the Scheduler tab.
5.Configure settings in the Retention and Compression tabs.
6.Finish by clicking OK.
|
|
NOTE: To archive emails of a specific group, the job has to be assigned to that group (see the following section How to archive emails of a group via a job). |
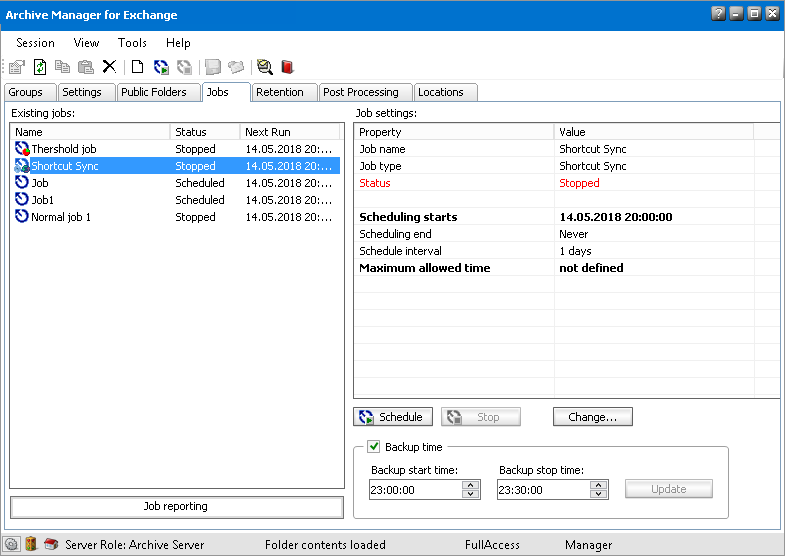
Jobs that you create will be displayed in the left pane on the Jobs tab (in Manager view). Under the Status field you may check their current status.
·Scheduled (displayed green) means that the job is scheduled and currently archiving emails or in a stand-by mode until it restarts again;
·Stopped (displayed red) means that the job, although might be scheduled, is currently not active.
In the right pane you will see the respective jobs settings displayed.
Change the status to Scheduled simply by clicking on the Schedule button or by right-clicking the respective job and selecting Schedule in the context menu. You may stop an already scheduled job by clicking on the Stop button or by right-clicking the respective job and selecting Stop in the context menu.
At the bottom of the right pane you must specify the backup time, in other words the period during which jobs are not supposed to run, in order to activate database backup. If it is not set, no archiving is possible. Enter the time in the Backup start time and Backup stop time fields and then press Update. You may for instance schedule your database backup over night. Pay attention to this backup period, as no jobs must be running at that time.
|
|
NOTE: Jobs which are running at the moment are highlighted in green in the Existing jobs pane of the Jobs tab. |
Companies usually define within their IT department rules regarding storage space mailboxes or groups may occupy on the MS Microsoft Exchange server, to avoid mail server overloading. The Threshold job is used specifically for that purpose.
By defining the maximal size of a mailbox on the Threshold tab (see the section "Threshold tab) you may actually specify space having been reserved for it on the MS Microsoft Exchange server. Other specifications (Upper and Lower values) are defined there as well.
When the Threshold job starts running, all mailboxes listed on the Threshold tab whose size has reached their respective Upper value will be archived until their respective Lower value has been reached (for each mailbox there can be assigned different threshold values). This way you can easily arrange enough space on your MS Microsoft Exchange server, so that CPU efficiency is preserved at a desirable level.
Example: The mailbox has a limit of 100 MB (defined in MS Microsoft Exchange Server). The administrator defines the threshold values 50/90. If the mailbox size reaches 90% of the limit (90 MB), the Threshold job will archive the mailbox until the size of the mailbox drops under 50% of the limit (50 MB). The threshold job archives the oldest messages first (default settings). The order of the messages can be modified using the scheduler service config keys (ThresholdSortBy) in <installdir>\ Quest\MAM4Exchange\ Services\ PamExSchedulerSv\ PamSchedulerSv.exe.config. The following values can be used:
·Order by last modification date (ascending, i.e. oldest first) [0]
·Order by received date (ascending) [1]
·Order by size (descending, i.e. biggest first) [2]
|
|
NOTE: After config file modification the services must be restarted. |
Further, it is possible to exclude specific messages from threshold processing. The Threshold job will archive the mailboxes but it will filter out specific messages based on your configuration. Available filtering for Threshold job:
·Filtering by message size
·Filtering by age
·Filtering by folder
·Filtering by message class
This filtering can be also configured using the scheduler service config keys in <installdir>\ Quest\MAM4Exchange\ Services\ PamExSchedulerSv\ PamSchedulerSv.exe.config. For more information see the following table:
|
Filtering |
Config key |
Value/default |
Description |
|
By message size |
ThresholdMinimumSize |
4 |
Minimum size (in KB) of the email which can be included in the threshold processing. All emails smaller than the defined size are not archived. |
|
By age |
ThresholdMinDate |
0 |
If value > 0, messages which are younger than x days are excluded from processing. |
|
By folder |
ThresholdExcludeFolders |
- |
Semicolon separated list of exclude folders defined for the threshold job. The syntax is the same as in case of group exclude folders. |
|
By message class |
ThresholdMessageClasses |
- |
Semicolon separated list of include message classes for the threshold job. |
The Threshold job runs in the background with pre-defined settings. Archived emails are replaced with a shortcut and the space is released for further usage.
To define a Threshold job:
1.In Manager view, click on the Jobs tab.
2.Click with your right mouse button inside the left pane. A context menu appears. In the context menu select New job.
3.In the Job Settings window that appears, select Threshold on the General tab. Enter a name in the Job name text box. Then specify your scheduling criteria on the Scheduler tab and other settings on the remaining tabs.
|
|
NOTE: There can be only one Threshold job defined.. |
The purpose of the Delete Files job is to purge the following items from the archive:
·Items marked for deletion upon expiration of their Retention + Keep alive time
·Items whose Delete time (the maximum time that the items can reside in the archive), if such was defined, has elapsed.
There can be only one Delete Files job defined. As with other scheduled jobs, the Delete Files job runs in the background with predefined settings.
|
|
CAUTION: This job permanently deletes files from the archive. |
|
|
TIP: Undelete feature of Archive Manager for Exchange allows users to list archived items that are marked for deletion in Outlook folder. If the Undelete feature is implemented, user can perform Undelete operation on such items marked for deletion. After the undelete operation the item(s) will have the same status as regular archived items. Upon expiration of their retention time they will still reside in the archive. |
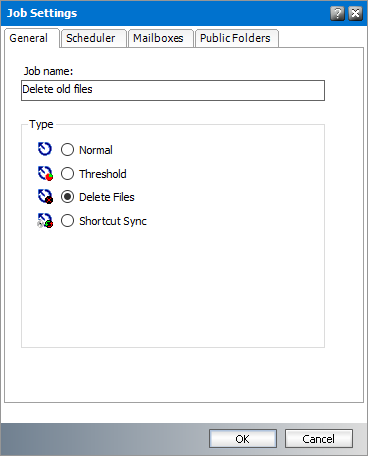
To define a Delete Files job:
1.In Manager view, click on the Jobs tab.
2.Click with your right mouse button inside the left pane. A context menu appears. In the context menu select New job.
3.In the Job Settings window that appears, select Delete Files on the General tab.
4.Enter a name in the Job name text box.
5.Click the Scheduler tab and set the scheduler properties as described below:
a.Scheduling starts at - enter the date manually or by clicking the upward or downward arrows, and time (directly by overwriting the time).
b.Scheduling ends on - select this option to specify a date when the scheduling ends. Click the date picker icon to open the calendar and select the month and date. The default is Never when the option is not selected.
c.Schedule interval - specify a period following which the job restarts itself. Click the upward or downward arrow. The period can be set in minutes or days.
d.Allowed time [hours] - enter the archiving period by clicking the upward or downward arrow. The minimum allowed time is 1 hour.
6.Click the Mailboxes tab and select the mailboxes as described below:
a.Include all mailboxes - select this option to include all mailboxes for the Delete Files job. When this option is selected the List of Members and the Add and Remove buttons are deactivated.
b.To add members:
i.Click Add. The Select Mailbox dialog appears.
ii.Select one or more groups or mailboxes. You can hold down the Ctrl or Shift keys to select multiple mailboxes and groups.
iii.Click 

iv.Click OK to add the selected members to the group or click Cancel to discard the changes.
c.To remove members:
i.Select one or more members to remove. You can hold down the Ctrl or Shift keys to select multiple members.
ii.Click Remove. A confirmation dialog appears.
iii.Click Yes in the confirmation dialog to remove the member. Click No to retain the member.
2.Click the Public Folders tab and select the public folders as described below:
a.Include all Public Folder mailboxes - select this option to include all Public Folder mailboxes for the Delete Files job. When this option is selected the List of Members and the Add and Remove buttons are deactivated.
b.To add Public Folders:
v.Click Add. The Select Mailbox dialog appears.
vi.Select one or more Public Folder mailboxes. You can hold down the Ctrl or Shift keys to select multiple mailboxes.
vii.Click
viii.Click OK to add the selected Public Folder mailboxes or click Cancel to discard the changes.
c.To remove Public Folders:
iv.Select one or more Public Folder(s) to remove. You can hold down the Ctrl or Shift keys to select multiple folders.
v.Click Remove. A confirmation dialog appears.
vi.Click Yes in the confirmation dialog to remove the folder(s). Click No to retain the folder(s).
3.Click OK to save the job setting and close the window.