
-
标题
How to USMT-Online -
说明
Important: Both online and offline modes of the User State Migration Tool (USMT) will not function if BitLocker is enabled on the target system.Capturing a User State
There are 3 important steps to consider to capture a User State.
All information in this document is also available in the admin guide -
解决办法
Step 1
Create a USMT Scan Template.
These templates are designed to specify which data to migrate. Including user-specific files and settings or excluding user profiles and data.- To create a template, navigate to “Library | Overview | USMT Scan Templates”
- From the USMT Scan Template page select “Choose Action | Add Scan Template”
- In Name, type a unique name to identify the template.
- Set the User selection options:
◦ Select the Scan all available user states check box to scan all the user states on a device.
◦ Select the Specify users to excluded check box to exclude the user states set from the scan. You can Include the user states for exclusion in a comma-separated list in the config.xml file created using the /genconfig option in the ScanState Tool.
- Set the Command-line options that the appliance uses to run the scan. Defaults command-line options are recommended.
- Set the Content configuration options to control which data to capture and migrate using the customized configuration config.xml file. Use this feature to exclude Windows and Document components only. Generate the configuration file on a workstation with the same files and folders, applications, and component setup as the device from which you are scanning the user states.
◦ Select the Exclude Files check box to choose file types to exclude. You can also list the file extensions in a comma-separated list.
◦ Select the Specify config file check box to select the Windows components to include or exclude.
- Click Save.
Step 2
Use USMT Advisor to prepare the client machine.
Before using the USMT tool, disable Windows anti-virus on the client machine. For more information see: How to disable Real-Time Protection
This utility is designed to check permissions and configurations required for the KACE Systems Deployment Appliance's (SDA) Online USMT Scan to complete successfully.
===> Important: Every time the client machine reboots, Windows antivirus will re-enable.
Download the USMT advisor here
- Login to the target device with local admin credentials.
- Execute KACE USMT Advisor
- The tool will check permissions and configurations required for the KACE Systems Deployment Appliance's (SDA) Online USMT Scan to complete successfully. If there are issues found, click on the Fix it button
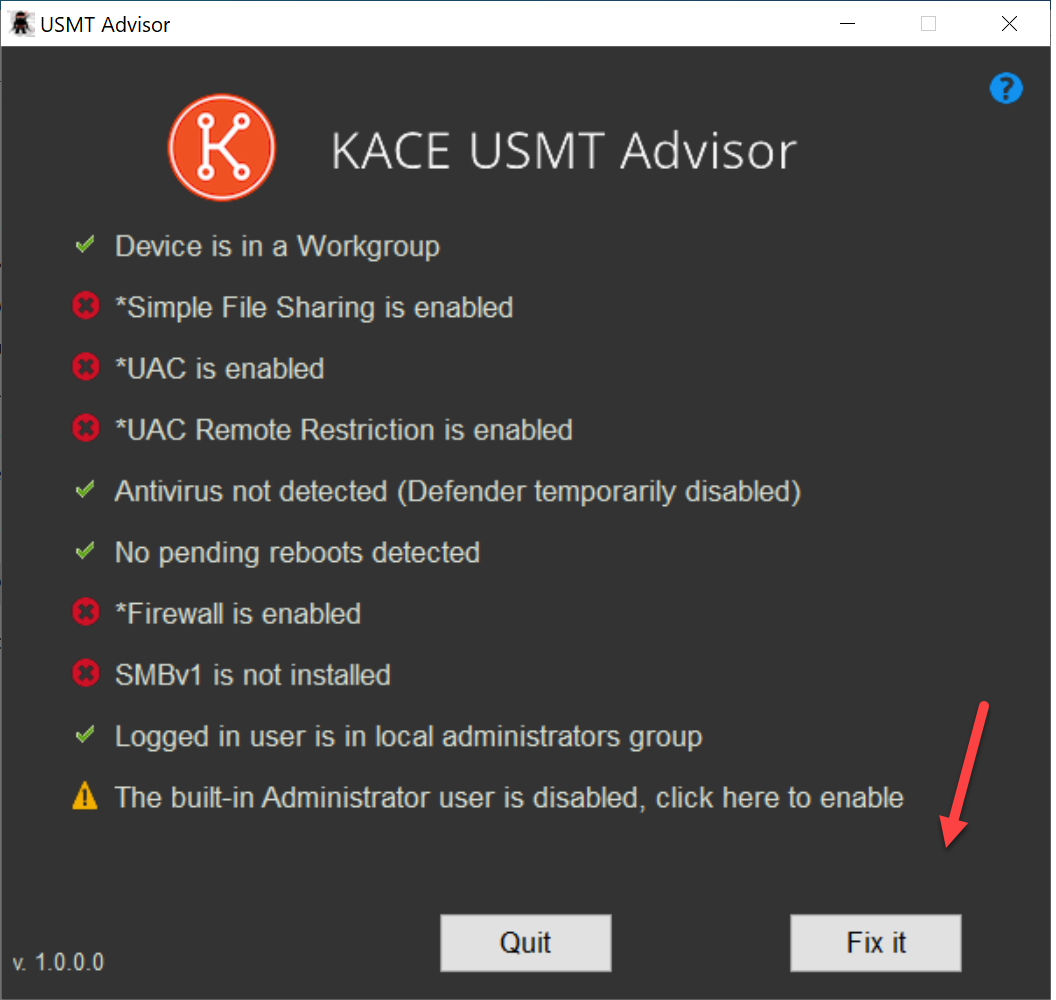
- If a reboot is required to make changes, a Reboot button will show up. (after each reboot, disable Real-Time Protection)
To continue, the device will need to reboot.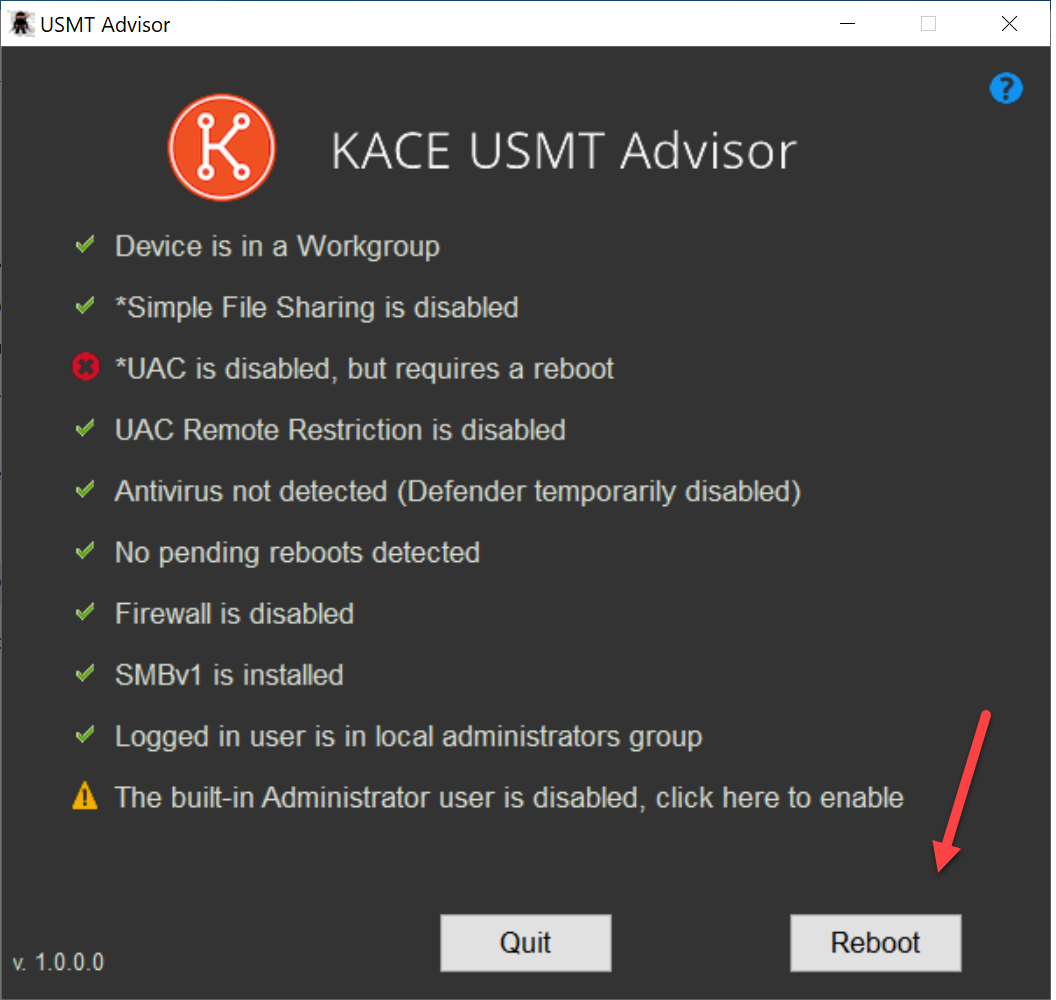
- Once the issues are addressed, the utility will display a message stating Device scanning can now be tested
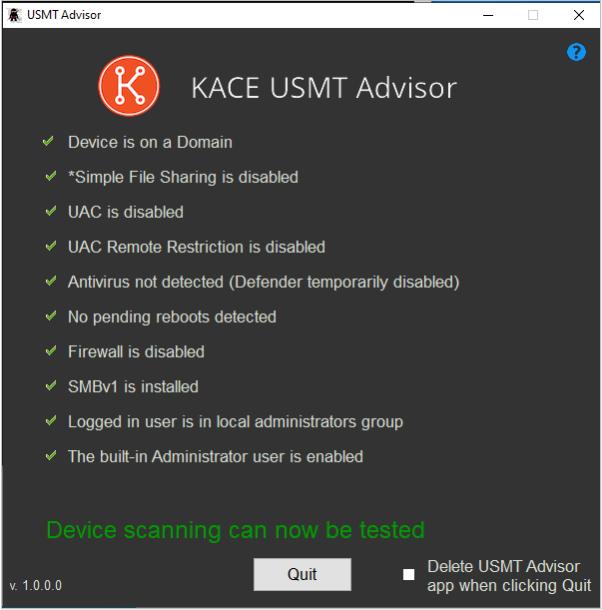
Stay logged into the target device and initiate the User State Scan from the SDA web interface. - To initiate the User State Scan from the SDA, go to Step 3 of this document, when complete, come back.
- When the online scan from the SDA finishes and the user states are uploaded, check the box to delete the USMT Advisor application (if desired) and press Quit.
- While following the Step 3 of this document, note that a “undo_fixes.exe” file is created by the USMT Advisor after completing applying the fixes for permissions and configurations required.
Running this file will reset the machine back to the way it was before USMT Advisor. (This file should only be run on the machine from which it was created.)
Step 3
Create a Scan User State
- To create a User State Scan, navigate to “Library | User States”
- Select “Choose Action | New” to display the Scan New User State Wizard page.
- In the HostName/IP enter the FQDN or IP address for the device that you are scanning. Use a comma, semi-colon, or a new line as a delimiter to enter a range of devices.
- Enter Domain name if the device that you are scanning, is joined to a domain. (as local admin account was used for the USMT advisor, this might not be needed)
- Username/Password is required with administrator privileges on the device that you are scanning. (local admin account preferred)
- Select the USMT version to be used.
- Choose the template to be used.
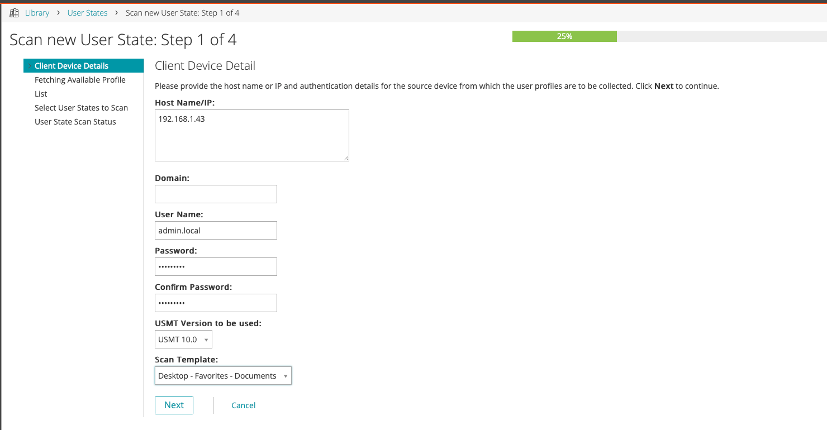
- Click Next and wait for the appliance to fetch the available profiles.
- When the process completes successfully, a list of profiles appears.
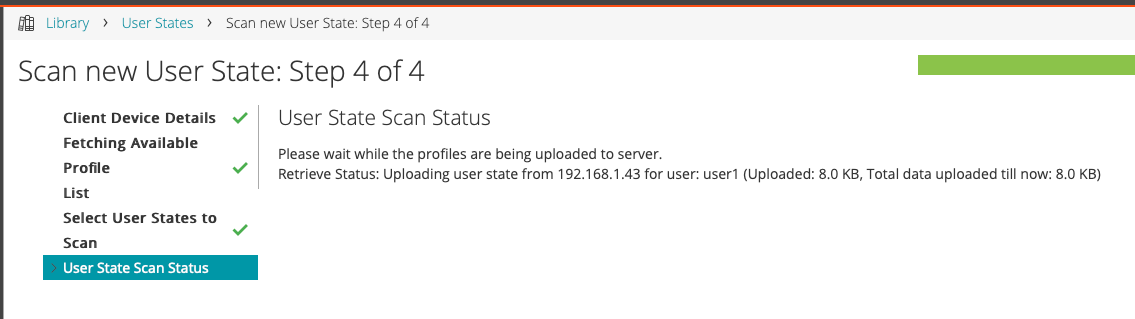
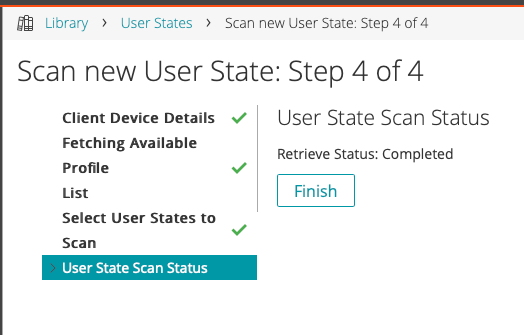
Select the profiles that you want to migrate on to the appliance and click Next. - After the Results Log are displayed, click Finish.
-
其他信息
For information about USMT deployment, see admin guide