For more information, see the following topics:
|
3 |
In the New MARKETPLACE view, type “foglight for virtualization” in the search box, and then select Foglight for Virtualization, Enterprise Edition from the search result. |
|
4 |
|
5 |

|
• |
Name (mandatory): Specify the name of the virtual machine. |
|
• |
VM disk type: Indicate the disk type of the virtual machine. Quest recommends selecting SSD for this field. |
|
• |
Password (mandatory): Specify the password of the virtual machine. |
|
• |
Confirm password (mandatory): Type your password again. |
|
• |
Subscription: Select your subscription from the drop-down list. |
|
• |
Resource group (mandatory): A resource group is a collection of resources that share the same lifecycle, permissions, and policies. Do either of the following: |
|
• |
Select Create new, and then specify the name of this new resource group. |
|
• |
Select Use existing, and then select an existing resource group from the drop-down list. |
|
• |
Location: Indicate in which the virtual machine is located. |
|
6 |

|
• |
DS11_V2: Select this option for an environment that includes less than 1000 VMs. |
|
• |
DS12_V2: Select this option for an environment that includes less than 3000 VMs. |
|
• |
DS13_V2: Select this option for an environment that includes more than 3000 VMs. |
|
7 |
|
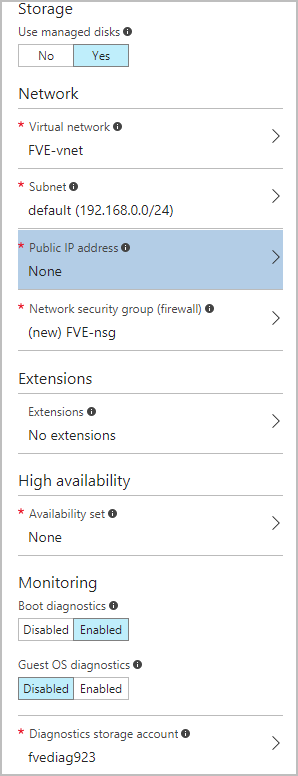
• |
Storage: Enable this feature to have Azure automatically manage the availability of disks to provide data redundancy and fault tolerance, without creating and managing storage accounts on your own. |
|
• |
Storage account (available for non-managed disks only): Disks for Azure virtual machines are created in storage accounts. Create a new storage account or select an existing account. |
|
• |
|
• |
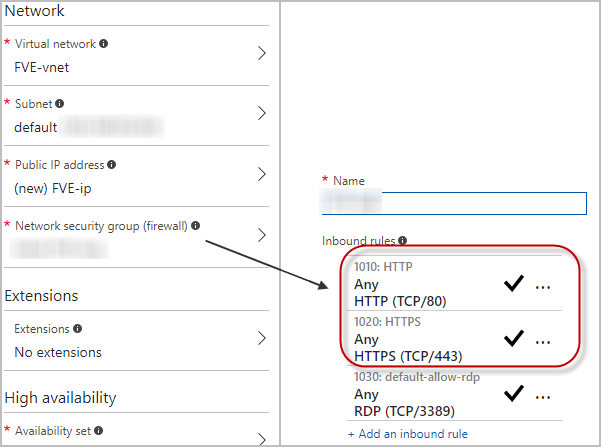
Virtual network (mandatory): Virtual networks are logically isolated from each other in Azure. You can create a new virtual network or select an existing one. Virtual machines in the same virtual network can access each other by default. |
|
• |
Subnet (mandatory): A subnet is a range of IP addresses in your virtual network, which can be used to isolate virtual machines from each other or from the Internet. |
|
• |
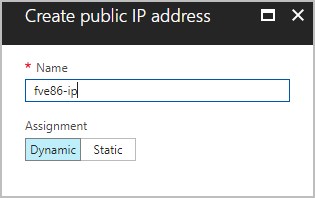
Public IP address (mandatory): Use a public IP address if you want to communicate with the virtual machine from outside the virtual network. |
|
• |
Network security group (firewall) (mandatory): A network security group is a set of firewall rules that control traffic to and from your virtual machine. |
|
• |
Extensions: Add new features, like configuration management or anti-virus protection, to your virtual machine using extensions. |
|
• |
Availability set (mandatory): To provide redundancy to your application, we recommend that you group two or more virtual machines in an availability set. |
|
• |
Boot diagnostics: Enable this feature to capture serial console output and screenshots of the virtual machine running on a host to help diagnose startup issue. |
|
• |
Guest OS diagnostics: Enable this feature to get metrics every minute for your virtual machine. You can use them to create alerts and stay informed on your application. |
|
• |
Diagnostics storage account (mandatory): Metrics are written to a storage account so you can analyze them with your own tools. |
|
8 |
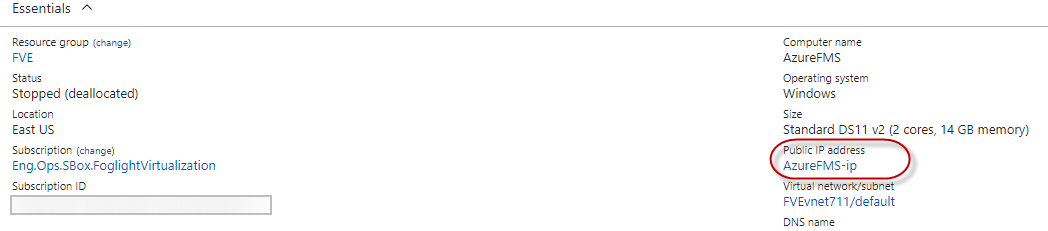
After deploying your virtual machine(s) on Microsoft Azure, enter http://<public-IP-address> in your Internet browser to open the management server console.
|
IMPORTANT: The default credentials for the Management Server console are: Username: foglight. Password: foglight. |
|
2 |
On the left navigation panel, select Virtual Machines, and then browse to select your virtual machine. |
|
4 |
The monitored agent(s) can be any of the following types:
|
• |
|
• |
|
• |
|
• |
