
Using Custom Templates for Site Provisioning Profiles
You can create custom templates by selecting an existing site collection or site, saving it as a template (.wsp file) and attaching the wsp to the ControlPoint Custom Site Templates list.
If you want to create a template from a site that uses a site definition (such as a custom site definition that has been deployed to the farm), that site definition feature must be activated on the ControlPoint Configuration Site collection.
To create a custom template for site provisioning profiles:
1Navigate to the Site Settings page of the site you want to save as a custom template, then click Save site as Template.
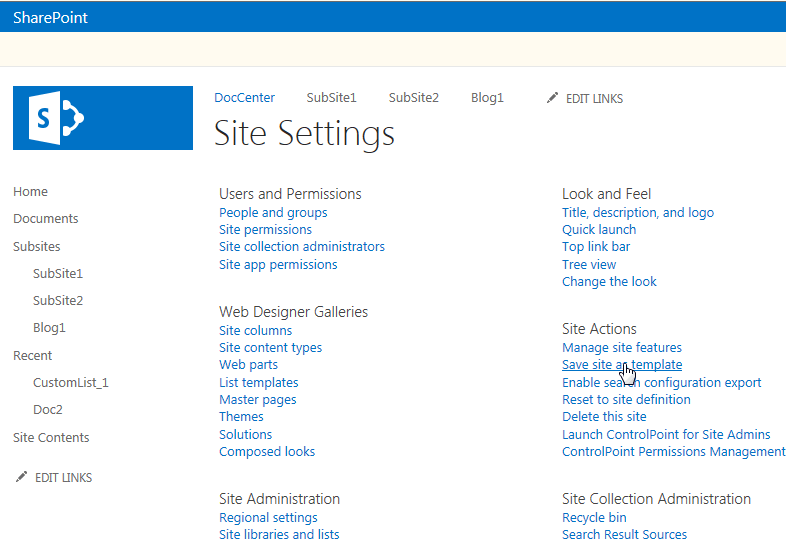
2Complete the Save as Template form, including whether you want to Include Content, then click [OK].

3Open the site's Solution Gallery.
4Select the template you just created and save it to the location of your choice.
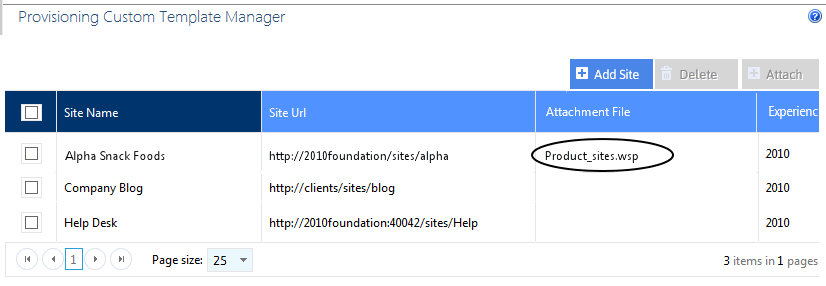
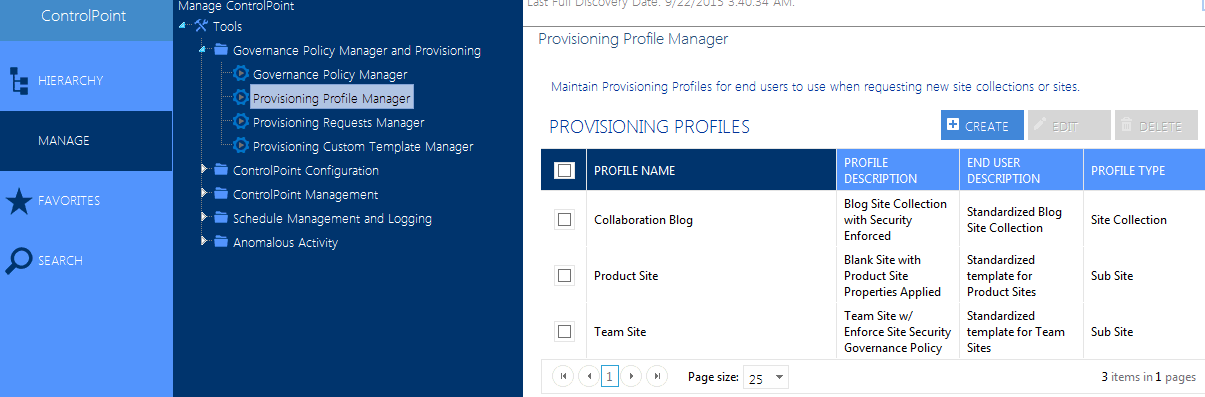
5From the Manage ControlPoint tree, choose Governance Policy Manager and Provisioning > Provisioning Custom Template Manager.
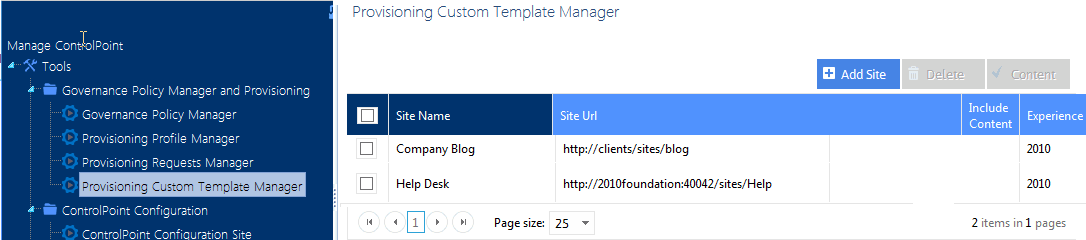
6Click [Add Site].
7From the Destination Farm Tree, select the site collection or site from which you created the .wsp file.
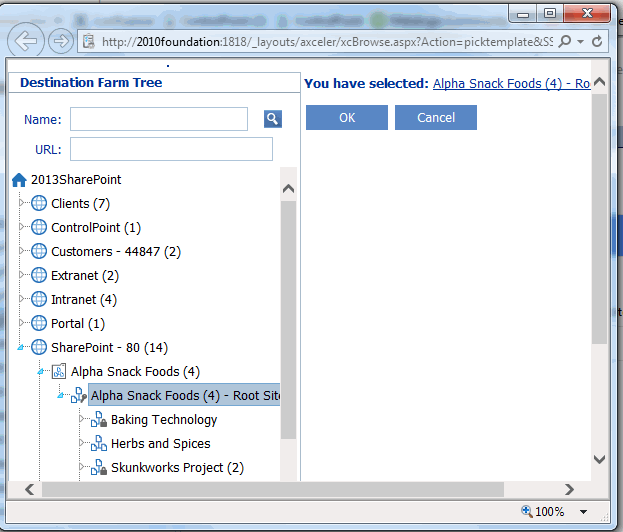
8Click [OK] to return to the Provisioning Custom Template Manager grid.
9Check the box to the left of the site collection/site, then click [Attach].
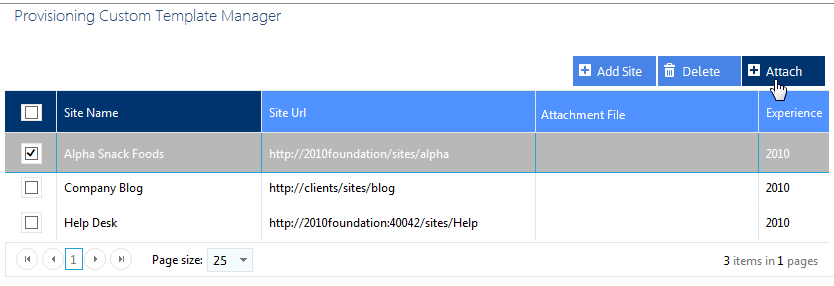
10Click [Browse] and select the .wsp file associated with the site.
11Click [Upload].
The custom template will now be available for provisioning requests.
Making Provisioning Profiles Available to End Users
After at least one Provisioning Profile has been created, the next step is to activate the ControlPoint Site Provisioning feature so that end users can submit requests for new site collections and sites. This feature adds a new itemRequest a New Site Collection or Siteto the SharePoint Site Actions menu.
The ControlPoint Site Provisioning feature can be activated for some or all sites in the farm via the ControlPoint Manage Site Features action.
NOTE: Because it is a hidden feature, it cannot be activated via the SharePoint user interface.
To activate the ControlPoint Site Provisioning Feature:
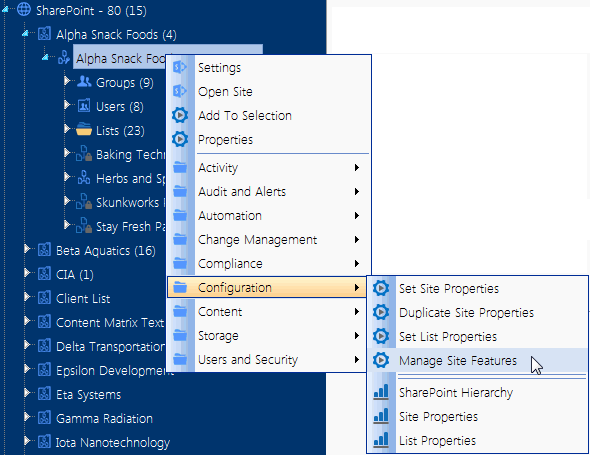
1From the SharePoint Hierarchy, select the objects(s) for which you want to make the ControlPoint Site Provisioning Feature available.
NOTE: Include in the scope of your selection the sites from which you want Request Forms to be accessible, not necessarily where the new site collection/site will actually be created.
2Choose Configuration > Manage Site Features.
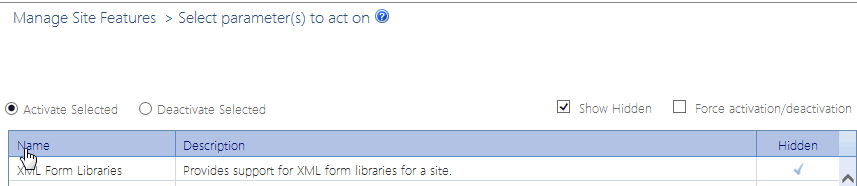
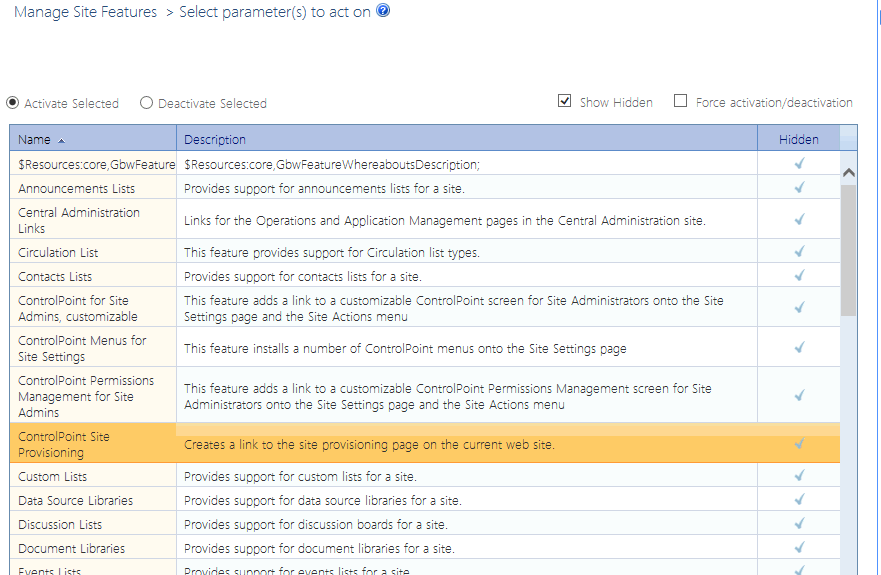
3Select Activate Selected and click the Show Hidden box.
4Click the Name header to sort the list of features alphabetically.
5Select ControlPoint Site Provisioning.
6Click [Run Now].
How New Sites and Site Collections Are Requested
An end user can request a new site or site collection from the SharePoint Site Actions menu as long as the ControlPoint Site Provisioning feature has been activated for that site.
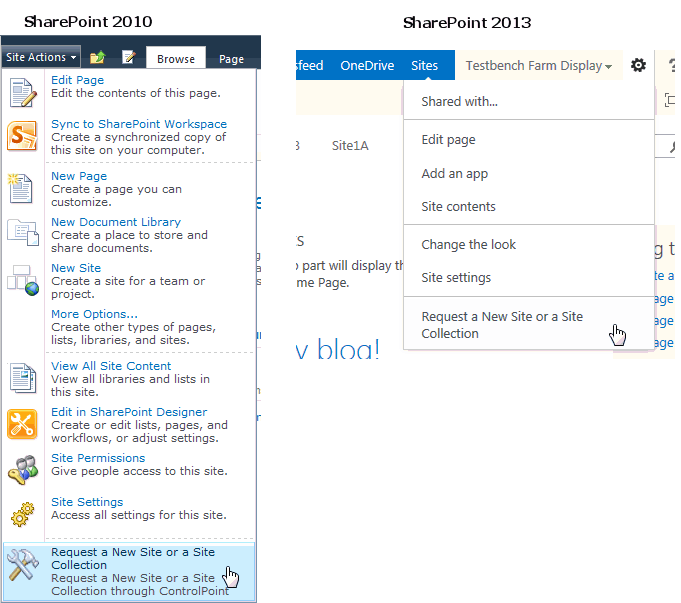
When the user chooses Request a New Site Collection or Site, the Request Site or Site Collection page is launched, and the user can select from the available Profiles that were created via the ControlPoint Provisioning Profile Manager.
Upon selecting a Profile, the Create Site (or Site Collection) page displays, prompting the requester for the following information:
·a Title and Description for the new site
·the Web Site Address that the requester wants to use for the new site
NOTE: The requester must enter a full URL, including the name of the new site. For example, if the requester wants to create a subsite called Employee Contact Information under myportal/sites/hr, a valid URL might be http://myportal/sites/hr/employeecontacts
The Requester Name and Requester Email address pre-populate with the login name and email address of the current user. The Requester Email Address can, however be changed. If the request is for a Site Collection, Primary Site Collection Administrator and Primary Site Collection Email Address fields are pre-populated with the current user's information, but they can also be changed.
·When the requester places the request, ControlPoint validates the information provided by the requester, including that the URL is valid and available. If the validation fails, any error messages display at the top of the form.

If the validation is successful, a confirmation number is generated and displays at the top of the form, and a confirmation email is automatically sent to the requester.

NOTE: Once a request is submitted, it is registered in the Site Creation Requests list on the ControlPoint Configuration Site.
Managing Site Provisioning Requests
From the Manage Site Provisioning Requests page, you can:
·monitor incoming requests for site collections and sites
·approve or reject the requests, and
·edit request details, such as title, description or url.
As an alternative to manually approving or rejecting requests, you can use a SharePoint workflow to handle the approval process. For details, refer to the topic "Configuring the Site Provisioning Workflow Settings" in the ControlPoint Administration Guide.
To launch the Provisioning Requests Manager:
From the Manage ControlPoint tree, choose Governance Policy Manager and Provisioning > Provisioning Requests Manager.
Note that you can filter your view based on the state of the request:
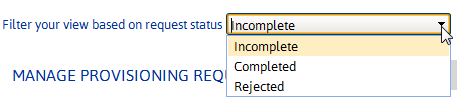
·The Incomplete view, includes requests with a status of:
§Requested
§Approved
§In Process
§Error
·The Completed view shows all requests which have been processed and for which site collections/sites have been created and all of the Additional Profile Settings (properties and Governance Policies) been applied.
·The Rejected view shows all Rejected requests.
If the approval process uses a workflow:
The grid displays an additional column, Workflow Status, so that you can monitor the progress of workflow instances. You can also view/update a workflow in SharePoint. (For example, if the Workflow Status is Failed on Start, you may want to start in manually.
To view/update a workflow instance, check the box to the left of the applicable request, then click [Workflow].
If you are using a SharePoint 2010 out-of-the-box workflow, instances may continually fail to start, even if the workflow is configured to start automatically.
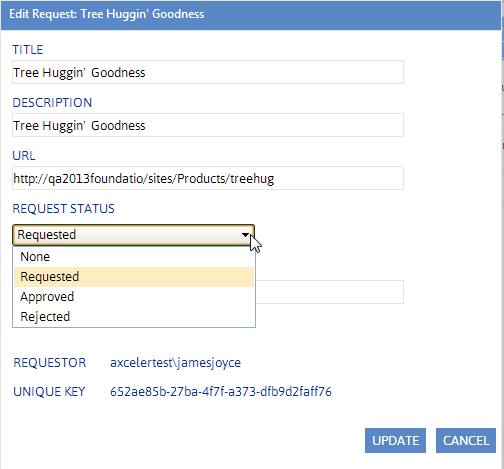
To edit/view details of a Provisioning Profile:
1In the Manage Provision Requests grid, check the box to the left of the request that you want to view/edit.
2Click [Edit].
Note that you can edit the Title, Description, and URL of the request. You can also approve or reject the request by changing the Request Status.
If a request is Rejected, an email is automatically sent to the requester. If a request is Approved, it automatically starts Processing and is Completed when the site collection or site is created. Once the site or site collection is created, an email is automatically sent to the requester.
Note that you can edit the Title, Description, and URL of the request. You can also approve or reject the request by changing the Request Status.
If a request is Rejected, an email is automatically sent to the requester. If a request is Approved, it automatically starts Processing and is Completed when the site collection or site is created and all of the Additional Profile Settings (properties and Governance Policies) been applied per the new site collection or site. Once the site or site collection is created, an email is automatically sent to the requester.
NOTE: Additional Profile Settings are applied the next time the scheduled job that has been defined for the operation has run.
1Click [Update].
To approve one or more requests without viewing or editing details:
1From the Provisioning Request Manager main page, check the box to the left of each request you want to approve.
2Click [Approve].
To delete one or more requests:
1From the Provisioning Requests Manager main page, check the box to the left of the request(s) that you want to delete.
2Click [Delete]
You will be prompted to confirm your action before continuing.