
Adding Users to SharePoint Groups
Add Users to SharePoint Groups is a ControlPoint action that enables you to add one or more users to existing SharePoint groups.
In a multi-farm environment, users can be added to SharePoint groups on a single farm; either the home farm or a remote farm.
Adding Multiple Users to SharePoint Groups Using a Wildcard
If a wildcard is used to select users, at the time you attempt to run, schedule, or save the operation a pop-up dialog will display, warning that you may be running the operation on a large number of Active Directory users and groups.
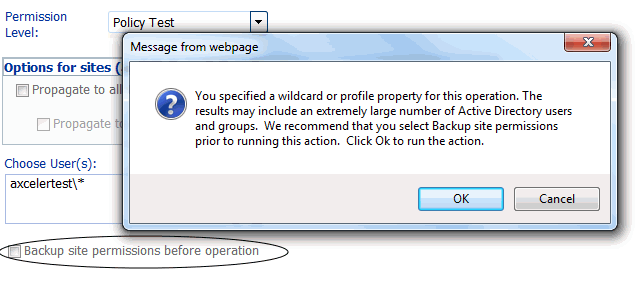
If you want to back up all permissions for the selected site(s) before running, saving, or scheduling the operation and have not already elected to do so, click [Cancel] to cancel the operation and check the Backup site permissions before operation box. To dismiss the dialog and run, schedule, or save the operation, click [OK].
Because the action requires an Active Directory lookup, a full domain name must be specified in the People Picker (that is, a wildcard cannot be used in place of the domain name or any part of it). For example, axcelertest\* is supported, but *\marktwain is not. It also means that alternate authentication methods (that is, other than Active Directory) are not supported.
To add users to SharePoint groups:
1Select the object(s) for which you want to add users to groups.
2Choose Users and Security > Add User to SharePoint Group.
3Select the SharePoint group(s) to which you want to add users as follows:
a)From the Available Items list, select the group(s) to which you want users and move them to the Selected Items list.
Note that all groups defined for the entire site collection display beneath the root site. Groups with unique permissions also display beneath the site granting those permissions. By default, groups will display in this list if they have been assigned at least one permissions level. ControlPoint Application Administrators can, however, configure ControlPoint to display groups that do not have an associated permissions level. Details can be found in the ControlPoint Administration Guide.
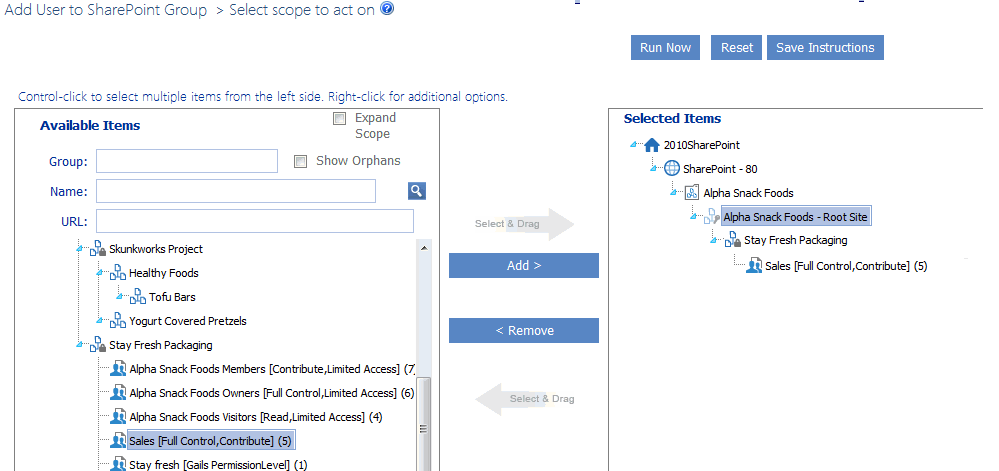
b)When you have finished adding groups to the Selected Items list, click [Apply].
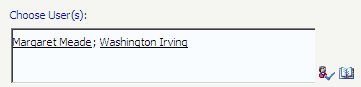
4In the Parameters section Choose User(s) field, select the user(s) that you want to add to the group(s).
5If you want to remove any user direct permissions from objects for which the selected group has permissions, check the Remove matching direct permissions box.

NOTE: Direct permissions for any objects within the scope of the action for which the selected SharePoint group does not have permissions will be retained.
Now you can:
·run the operation immediately (by clicking the [Run Now] button)
OR
·complete the Enforce Policy section and schedule the operation to run at a later time.
OR
·save the operation as XML Instructions that can be run at a later time.
If you chose the Run Now, option, after the operation has been processed:
·a confirmation message displays at the top of the page, and
·a ControlPoint Task Audit is generated for the operation and displays in the Results section.
If you schedule the operation, a link to the Task Audit is included in the scheduled action notification email.
See also The ControlPoint Task Audit.
Setting SharePoint Group Permissions
The Set SharePoint Group Permissions action lets you assign a permissions level to one or more SharePoint groups within a single site collection or site.
By default, only groups that have existing permissions within the site collection can be selected. In that case, the action adds to the existing permissions (it does not replace them). ControlPoint Application Administrators can, however, choose to display―and allow the selection of―groups that exist in the site collection but do not have permissions to the object. See the ControlPoint Administration Guide for details on changing the ControlPoint Setting Show SharePoint Groups with No Permissions in Hierarchy.
In a multi-farm environment, SharePoint group permissions can be set on a single farm; either the home farm or a remote farm.
This feature is not available at the farm (tenant) scope.
To set SharePoint Group Permissions
1Select the site collection or site whose SharePoint group permissions you want to set.
2Choose Users and Security > Set SharePoint Group Permissions.
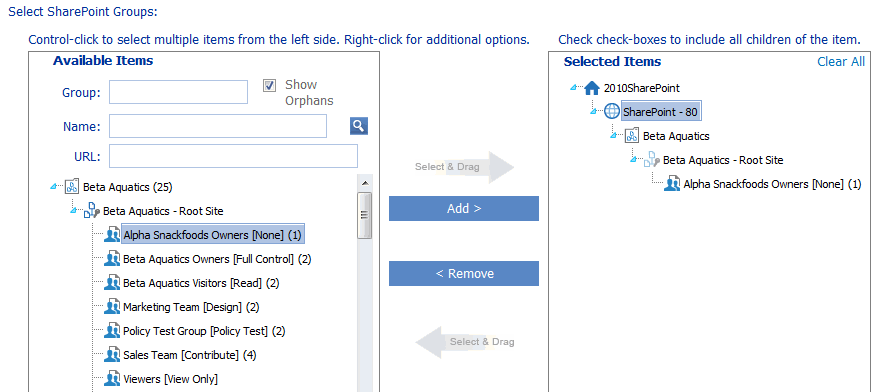
3Select the group(s) to which you want to add permissions as follows:
a)From the Available Items list, select the group(s) to which you want to set permissions and move them to the Selected Items list.
Note that all groups defined for the entire site collection that have at least one associated permissions level display beneath the root site. Groups with unique permissions also display beneath the site granting those permissions. Any group that does not have at least one associated permissions level for the site collection or site will not display in the list.
TIP: If your Available Items list is particularly long, you may find it useful to narrow the scope by searching based on Group name, site Name, and/or site URL) and searching for the group. For example, if you want to narrow your scope to all group owners, enter "owner" in the Group field.
b)Click [Apply].
4From the Permission Level drop-down, select the permissions level you want to add to the group.
REMINDER: This action will add to, but will not replace, an existing permissions level.
NOTE: All custom permissions levels that are currently assigned to at least one user within the scope of your selection display in the drop-down. (In a multi-farm environment, this list is populated from the permissions of the home farm.) If you want to assign a custom permissions level that has been defined for a site collection but either is not currently in use or exists only on a remote farm, you can type it into the drop-down.
5If your selection includes one or more sites and you want the permissions to be applied to all lists within the site(s) that have unique permissions, check the Propagate to All Lists with Unique Permissions box.
6If you have checked the Propagate to All Lists with Unique Permissions box and want the permissions to be applied to all items within the list(s) that have unique permissions, check the Propagate to List Items box.
NOTE: The "Propagate" options do not apply to lists that you selected explicitly. If you want to include items within explicitly-selected lists, use the Include Children or Choose option in the Selection panel. See also Selecting List Items on Which to Perform a ControlPoint Operation.
Now you can:
·run the operation immediately (by clicking the [Run Now] button)
OR
·complete the Enforce Policy section and schedule the operation to run at a later time.
OR
·save the operation as XML Instructions that can be run at a later time.
Deleting SharePoint Group Permissions
The Delete SharePoint Group Permissions lets you delete the permissions of one or more SharePoint groups from a single site collection or site without removing its members or deleting the group itself.
NOTE: This action deletes all permissions currently assigned to a group. Once permissions have been removed from a SharePoint group, the group will display in the SharePoint Group Analysis. Whether or not the group continues to display in the SharePoint Hierarchy or any ControlPoint group pickers depends on the Value of the ControlPoint Configuration Setting Show SharePoint Groups with No Permissions in Hierarchy.
This feature is not available at the farm (tenant) scope.
To delete SharePoint Group Permissions:
1Select the site collection or site whose group permissions you want to delete.
2Choose Users and Security > Delete SharePoint Group Permissions.
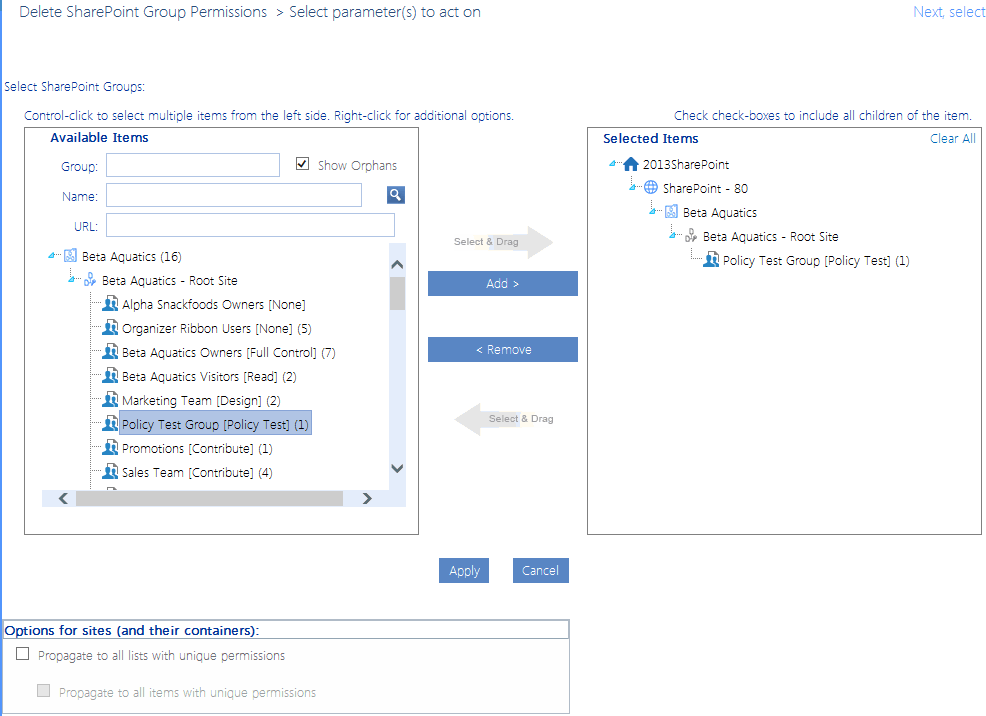
3Select the group(s) whose permissions you want to delete as follows:
a)From the Available Items list, select the group(s) to which you want to add users and move them to the Selected Items list.
Note that all groups defined for the entire site collection that have at least one associated permissions level display beneath the root site. Groups with unique permissions also display beneath the site granting those permissions. Any group that does not have at least one associated permissions level for the site collection or site will not display in the list.
TIP: If your Available Items list is particularly long, you may find it useful to narrow the scope by searching based on Group name, site Name, and/or site URL) and searching for the group. For example, if you want to narrow your scope to all group owners, enter "owner" in the Group field.
b)Click [Apply].
4If your selection includes one or more sites and you want the permissions to be deleted from all lists within the site(s) that have unique permissions, check the Propagate to All Lists with Unique Permissions box.
5If you have checked the Propagate to All Lists with Unique Permissions box and want the permissions to be deleted from all items within the list(s) that have unique permissions, check the Propagate to List Items box.
NOTE: The "Propagate" options do not apply to lists that you selected explicitly. If you want to include items within explicitly-selected lists, use the Include Children or Choose option in the Selection panel. See also Selecting List Items on Which to Perform a ControlPoint Operation.
Now you can:
·run the operation immediately (by clicking the [Run Now] button)
OR
·complete the Enforce Policy section and schedule the operation to run at a later time.
OR
·save the operation as XML Instructions that can be run at a later time.
If you chose the Run Now, option, after the operation has been processed:
·a confirmation message displays at the top of the page, and
·a ControlPoint Task Audit is generated for the operation and displays in the Results section.
If you schedule the operation, a link to the Task Audit is included in the scheduled action notification email.
See also The ControlPoint Task Audit.
Deleting SharePoint Groups
Use the Delete SharePoint Groups action to delete SharePoint groups from one or more site collections/sites in the farm.
To delete one or more SharePoint groups:
1Select the object(s) from which you want to delete SharePoint groups.
2Choose Users and Security > Delete SharePoint Groups.
3Select the SharePoint group(s) you want to delete as follows:
a)Select the group(s) from the Available Items list and move them to the Selected Items list.
Note that all groups defined for the entire site collection display beneath the root site. Groups with unique permissions also display beneath the site granting those permissions.
TIP: If your Available Items list is particularly long, you may find it useful to narrow the scope by searching based on Group name, site Name, and/or site URL) and searching for the group.
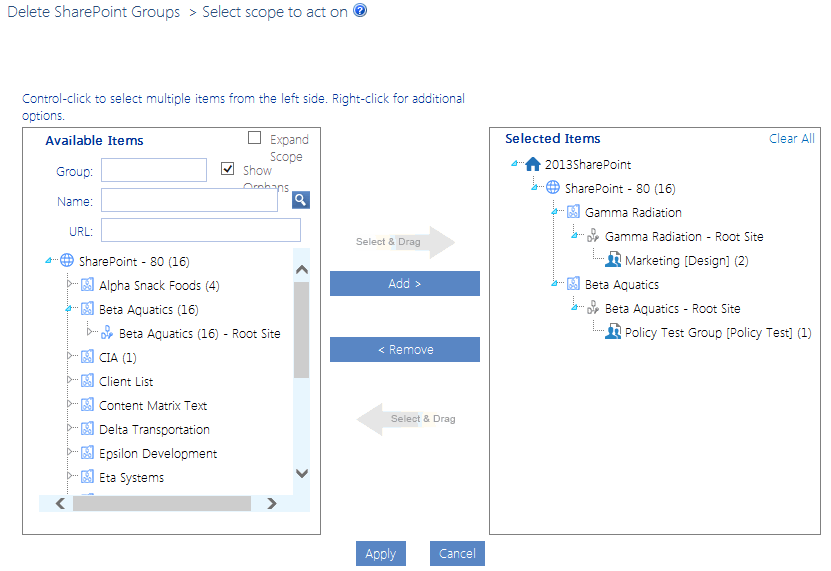
CAUTION: Because SharePoint groups are defined at the site collection level and may be used anywhere in the site collection, if you are performing the action on one or more individual sites that includes groups that are used elsewhere in the site collection, the groups will be deleted from unselected sites within the collection as well.
b)When you have finished adding groups to the Selected Items list, click [Apply].
Now you can:
·run the operation immediately (by clicking the [Run Now] button)
OR
·complete the Enforce Policy section and schedule the operation to run at a later time.
OR
·save the operation as XML Instructions that can be run at a later time.
If you chose the Run Now, option, after the operation has been processed:
·a confirmation message displays at the top of the page, and
·a ControlPoint Task Audit is generated for the operation and displays in the Results section.
If you schedule the operation, a link to the Task Audit is included in the scheduled action notification email.
See also The ControlPoint Task Audit.