
Running a Site Storage Analysis
The first analysis we will run is a Site Storage Analysis, which provides storage statistics for one or more selected sites, including the distribution of storage usage among sites within the selected scope.
To run a site storage analysis:
1In the left navigation frame, select the Hierarchy tab, then In the SharePoint Hierarchy, expand the Web application(
In keeping with ControlPoint security trimming , if you are a SharePoint Farm Administrator, all of the Site Collections within the Web applications display in the tree. Those for which you are not a Site Collection Administrators will appear greyed out.
If you are not a Farm Administrator, Site Collections for which you are not an Administrator will be absent from the tree altogetheralthough the number that displays to the right of the Site Collection name identifies the total number of sites within the collection, regardless of whether you have access to all of them.
2Right-click, and from the menu choose Storage > Site Storage Analysis.
Note that you may see menu items that are greyed out. These items rely on the ControlPoint Discovery operation, which collects information about your SharePoint farm and stores it in the ControlPoint Services (xcAdmin) database. Once Discovery is run, these menu items can be enabled.
3Click the Display with results expanded box.
4Click [Run Now].
The Site Storage analysis consists of two sections: Sites and Size Distributions
The Sites section lists the sites within the site collection, along with statistics for the number of Sites, Lists and Files, Size in KB, and % of Quota set for the site collection that is being used by the site. (If a quota was not set for the site collection this column will display N/A.)
The bottom of this section shows the total number of sites and lists and the combined size of the sites within the scope of your analysis.

The Size Distribution section consists of a pie chart that depicts the distribution of the storage space being used among the top ten sites within the scope of your analysis.
In this scenario you:
üLearned about ControlPoint security trimming.
üInitiated an operation for an object in the SharePoint Hierarchy.
üRan a ControlPoint analysis interactively
Running a Site Permissions Analysis
We will now run a Site Permissions analysis on the same Site Collection.
To run a site permissions analysis:
1Expand the Site Collection to display its subsites.
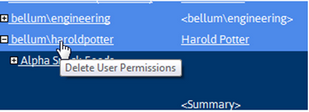
Notice that a site may be identified by one of the following icons:


2Right-click and choose Users and Security > Site Permissions.
3Run the analysis on all users within the Site Collection using the following parameters:
·Change the Group by: selection to Users
·Expand the Advanced Parameters section and make sure the following Parameters are checked:
§Calculate Total Users with Permissions
§Show unique permissions only (this parameter will filter out permissions that are inherited from a parent site)
Note that, since the analysis is being run on real-time (not cached) data, you can also choose to Include users with AD group membership and/or Include AD Group Members table, which requires a live call to Active Directory. In this scenario, however, we will leave these options unselected and instead view Active Directory Group membership via a link in analysis results..
4Click [Run Now].
Analysis results include users with permissions granted through Web Application policies as well as to sites within the scope of your analysis.
Total Users with Permissions includes Web application Service Accounts, users granted permissions through Web application policies, Site Collection Administrators, and users within Active Directory groups to which the ControlPoint Service Account has access.

Detailed information about a user include how the permissions were granted (for example, directly or through a SharePoint group).
Note that custom permissions levels, if any, display in the Other column.
To view Active Directory group membership (in a separate window or tab), click the Active Directory group link.

In this scenario you:
üLearned how sites are visually represented in the SharePoint Hierarchy, based on its permissions model.
üChanged default parameters used for the analysis.
üWorked with analysis results.
Running an Orphaned Domain Users Report and Deleting Orphaned Users
If you have (or think you have) users with permissions in SharePoint that are no longer in Active Directory, you can run an Orphaned Domain Users Report to identify them.
NOTE: You can also choose to have ControlPoint automatically submit a Delete User job to the ControlPoint scheduler. The job will be scheduled to run 30 minutes after the analysis has finished processing and will delete all users returned by the analysis. This is useful if, for example, you want to run the report on a large scope and/or on a recurring basis to keep your environment cleaned up.
To run an Orphaned Domain User Report:
1Select an object in the SharePoint Hierarchy which you believes contains orphaned users.
TIP: The identification of orphaned users can be an intensive processespecially the first time it is performedas ControlPoint must query Active Directory for each user with permissions to a site, sometimes in more than one domain. The smaller the scope you choose, the more quickly the report will be completed. Therefore, it is recommended that for evaluation purposes you run the report on a limited scope. (Note that, if you use ControlPoint to run an Orphaned Domain Users on a regular basis in order to keep your environment cleaned up, it will run increasingly more quickly.)
2Right click and select Users and Security > Orphaned Domain Users.
Note that you have the option of limiting your results only to users who are either disabled in or have been deleted from Active Directory. For this scenario we will keep the default option, Show all orphans, so that both types of users will be included.
3If you want to exclude objects whose permissions are inherited, make sure Show unique permissions only is checked.
TIP: This option is especially useful if your primary objective is to delete orphaned users, because your result set will be more targeted. (You can not delete permissions directly from an object that has inherited permissions.)
4For this scenario, uncheck the Display with results expanded box.

5Click [Run Now].
The top level of the analysis displays all of the orphaned users within the scope of your analysis.
Note that users who are disabled in Active Directory are flagged.
Expand a User name to see more detail about that users permissions.
Note that, as an alternative to creating a scheduled job to delete all users identified as orphaned (as described previously), from analysis results you have the option of initiating a ControlPoint Delete User action for an individual user.
In this scenario you:
üLearned that you can initiate a follow-on ControlPoint action from analysis results.
Scheduling an Activity by Document Analysis
In this scenario, we will schedule an Activity by Document analysis to run at a designated time and have output posted to a SharePoint document library.
To schedule an Activity by Document Analysis:
1.Expand a site within the current site collection, then expand the Lists folder. Highlight a document library within that folder, right click and choose Activity > Activity by Document.
2For Parameters:
§Keep the default Start date and End date.
§Expand the Advanced Parameters section and from the Include File Extensions only list box, select the following (document) file types:
§doc
§docm
§docx
§Check the Display with results expanded box.
1Click the Schedule tab.
2Enter a Job Name and Description.
3Keep the default Output Type (PDF).
4In the Distribution Details section, specify the SharePoint library to which you want to have analysis results posted as follows:
a)For Add to Library or List, click [Select] to display the Destination Selection Page.
b)From the Destination Farm tree, drill down to the library where you want to post analysis results.
c)Highlight the library then click [OK].
d)Click [Schedule].
You can view the status of the job via the Scheduled Monitor. Once the Status of the job is Retired, you can retrieve results from the document library you specified when you created the job. You can navigate to the library directly from the ControlPoint application interface.
In this scenario you:
üScheduled a ControlPoint analysis.
üReviewed the status of the scheduled job in the Schedule Monitor.
üOpened a SharePoint library from the ControlPoint application interface.