1.In the Activate License window, enter the license key.
2.If you want to activate the license online, select Online Activation , and then click Next.
|
|
NOTE: If your computer is behind a firewall, click the Set Proxy link. The Proxy Setup dialog appears. a.Select Activate Proxy and specify the proxy information as described below: b.Server Name - enter the name of your proxy server. c.Port - enter the port number of the proxy server. d.Username and Password - Specify the credentials of the user who is authorized to access the proxy server. e.Click Set to save the information, or click Close to return to the License Key Information dialog. |
3.If the license key is validated successfully, the confirmation message appears along with the license details. Click Finish to close the dialog.
Offline activation is available for customers who want to review the information sent to Quest. You will require an internet connection for this option as well.
1.In the Activate License window, enter the license key.
2.select Offline Activation. The License Key Information window displays additional steps that are required.
3.Step 1: Collect the activation data to the clipboard or to a file
a.Select from the two options described below:
Option 1: Copy Activation Data to Clipboard. The activation data is saved to memory. Use this option if you plan to follow through with the subsequent steps immediately.
Option 2: Click Save to File. The Windows File dialog appears. Specify a file name for the activation data file and click Save to save the file to a location of your choice. Use this option if you plan to activate the license at a later date.
4.Step 2: Submit collected data
a.Click Go. The Quest License Activation web page appears.
b.Follow the instructions to get the Activation Key file (with the file extension DAT) is made available for download. Save this file to a location of your choice.
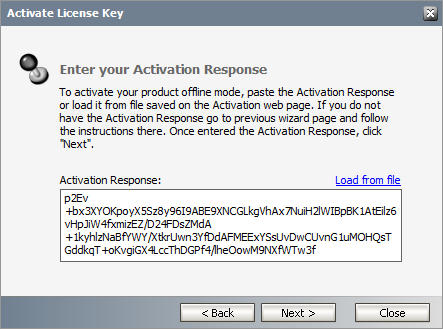
5.Step 3: Paste Activation Response
a.Click Load from File. The Windows file dialog appears.
b.Locate the activation key file and click Open. The text appears in the Activation Key File field.
6.Step 4: Activate offline
a.Click Next to complete the activation process.
7.If the license key is validated successfully, the confirmation message appears along with the license details. Click Finish to close the dialog.
A superuser account is a windows account with administrator privileges to work with Archive Manager for Exchange administration tools, run services, manage databases, manage extensions. It also has elevated privileges to interact with the on-premise or online Microsoft Exchange servers.
In this topic:
1.Steps to create the superuser account
2.Steps to add the superuser to the Administrators group of the servers
3.Steps to add the superuser as a database user with sysadmin role (for Windows authentication only)
4.Steps to grant Remote Desktop Access (optional)
Steps to create a superuser account
1.Log in to the domain controller.
2.Navigate to Start > Windows Administrative Tools > Active Directory Users and Computers.
3.From the Console Tree, expand the domain node.
4.Click the Users container. The list of users opens in the right-hand pane.
5.Click the Action menu and select New > User. The New Object - User window opens.
6.Verify that Create in title indicates the appropriate domain name and container, and then enter the details of the superuser. For example:
a.Full name: MAM Administrator
b.User logon name: mamadmin@democorp.com
7.Click Next.
8.Enter the password and confirm it. Then select Password never expires. Uncheck all other check boxes.
9.Click Next.
10.Verify the information and click Finish.
Steps to add the superuser to the Administrators group of the servers
The superuser must be able to run windows services and accomplish tasks that require administrator privileges on the Archive Manager for Exchange feature servers. Follow the steps described below to grant administrator privilege to the superuser on each feature server.
1.Log in to each server with its local administrator credentials.
2.Navigate to Start > Windows Administrative Tools > Computer Management
3.From the Console Tree, navigate to the System Tools > Local Users and Groups > Groups container.
4.From the list of groups in the right-hand pane, right-click Administrators and select Properties from the context menu. The Administrators Properties window opens.
5.Click Add.
6.In the Enter the object name to select field, enter the user logon name of the super user. For example, enter sales\mamadmin
7.Click Check Names to verify the logon name.
8.Click OK to add the superuser to the Administrator group.
9.In the Administrators Properties window, click Apply and OK to complete the process.
|
|
TIP: Log out of the server and log in again with the superuser's credentials to quickly verify that the superuser can access the server. |
Steps to add the superuser as a database user with sysadmin role
If you plan to use Windows authentication with a Microsoft SQL Server database, follow the steps described below:
1.Log in to the database server with your database administrator credentials.
2.Open the SQL Server Management Studio on your SQL server database server.
3.Log in to the server instance for Archive Manager for Exchange databases.
4.Open the Security folder.
5.Right-click on the Logins folder and select New Login. The Login - New user properties window appears.
6.If you want to assign rights to a Windows account, select Windows authentication.
7.Provide the login name in the text box. You can use the Browse button to select an existing account if you chose Windows authentication (eg. democorp\mamadmin)
8.In the user properties window, click Server Roles from the Select a page panel and select the check box Sysadmin.
9.Click OK to create the account.
|
|
NOTE: Follow the above steps to add the installer account (eg. democorp\domadmin) with the Sysadmin role. |
Steps to grant Remote Desktop Access
Follow the steps below to grant the required privilege to log on through Remote Desktop Services:
1.Log in to the server with the local administrator credentials.
2.Navigate to Start > Run. Enter secpol.msc and click OK.
3.From the Security Settings pane, navigate to Local Policies > User Rights Assignment.
4.From the right-hand pane, double-click on Allow log on through Remote Desktop Services to open the properties window.
5.Select the Local Security Settings tab and click Add User or Group...
6.Add the Enterprise Administrator account.
7.Click OK to save the changes and exit.