|
2 |
Click Start Data Collection. |
|
NOTE: To download or open the agent log file, click the Download Log File icon in the Log File column for a select agent. |
|
2 |
Click Stop Data Collection. |
|
2 |
Click the Edit icon on the Credentials column. |
|
3 |
On the Assign and Validate Domain Credentials page, review the available credentials, and edit them, as necessary. |
|
• |
To create a new credential, click Add domain to a new credential. |
|
a |
In the Create New Credential and Assign dialog box, create a credential that you want to use to access the monitored resource. Type a new credential name. |
|
c |
Click Submit. |
|
• |
To select an existing credential, click Add domain to an existing credential. |
|
• |
|
4 |
Click Finish. |
|
2 |
|
3 |
On the Update Permissions for Office 365 page, carefully read the instructions about the steps that you need to take before proceeding with the wizard, then click the link Click here to go to Office 365 web page for application permission consent. |
|
6 |
Click Finish. |
|
1 |
From the navigation panel, navigate to Dashboards > Administration > Agents > Agent Status. |
|
2 |
On the Agent Status dashboard, select an Office365Monitoring agent from the list and click Edit > Edit Properties. |
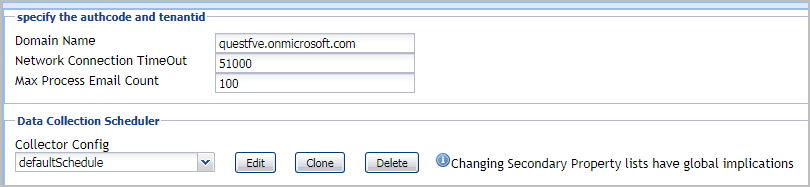
The following tables describe the properties that can be modified for either an individual Foglight for Office 365 agent instance or for all agent instances, by clicking Modify the private properties for this agent or Modify the properties of all Office365Agent agents links, respectively.
Use the specify the authcode and tenantid section to define the connection settings.
|
The fully qualified domain name (myServer.myDomain.com) of the Exchange Online environment from which data is to be collected. | ||
|
Specifies the maximum amount of emails to be processed when populating the following metrics: Message Send/Receive Time and Message Success/Failed Count. For more information, refer to Environment Summary - Exchange Online (Selected Object) view . |
The selection made in the Data Collection Scheduler section defines the data collection schedule to be used to collect performance metrics.
|
NOTE: The settings in this section are global and apply to all agents of type Office365AgentMonitoring. |
The following table lists the collectors being used by the cartridge and the default collection interval for each (as defined in the defaultSchedule).