-
제목
How to restrict user or group access to agents in the Databases dashboard -
설명
Does Foglight allow customized privilege control or access control in the console?
For example, a user wants to create a new DBA user and this user can only access one database in the database tab:
How would you set up access control for the databases dashboard?
How to restrict user access to a particular agents in the Databases dashboard?
-
해결 방안
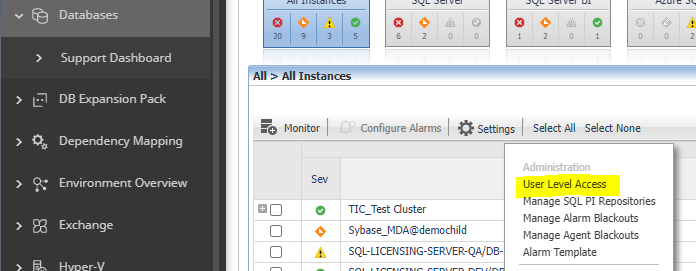
The User Level Access screen allows you to assign specific instances to users or groups. When users view their Databases dashboard, they only see the instances assigned to them.NOTE: The Status Indicators section filters the Databases Group table to display only instances that meet a criterion set in this section.The User Level Access screen displays all users and groups as they appear in the Foglight User & Security dashboard. By default each user is assigned to view All instances monitored in the Foglight Management Server.To assign instances to a specific user or group:- On the main Database dashboard, click Settings and select User Level Access from the menu.
The Users and Groups panes appears.
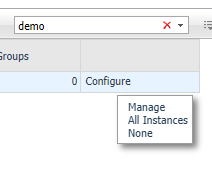
- To assign instances to a specific user or group, locate the user name in the table. Click the relevant value under the required domain in the Assigned instances column. You can also click Configure in the right column.
- Select one of the 3 options:
• Manage — allows you to manage which instances or groups to view
• All Instances — set the user to view All monitored instances
• None — block the user from viewing any monitored instances - Select Manage the instances to display the Assign Instances view.
1 Select the instances or the pre-defined groups of instances.
2 Click the arrow button to move the instances from the Assigned Instances box to the Available instances box. - Click Set save your choices and exit.
NOTE: A Reset button is available in the Users table toolbar. This button allows you to reset user level access to the default behavior. All users will be assigned to view all instances.
The following video provides more information on using the User Level Access screen
- On the main Database dashboard, click Settings and select User Level Access from the menu.


