Job definitions are stored in the Scheduler Database. You can view the job definitions for all scheduled, saved, completed, and active jobs from the Manage Job Definitions page.
|
1 |
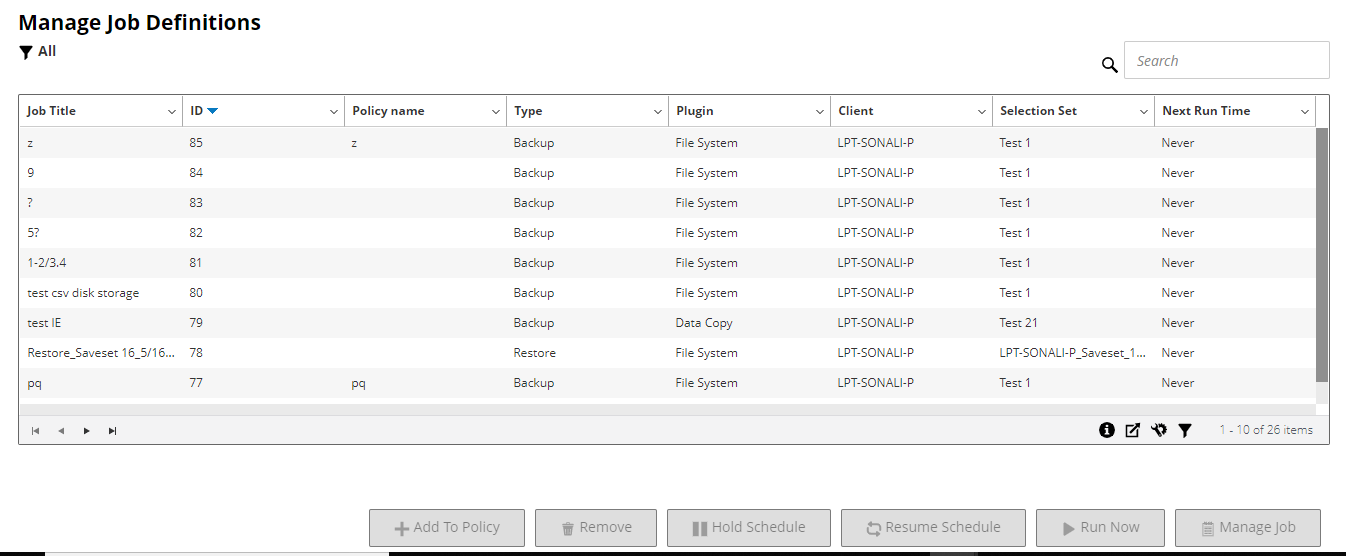
In the Navigation pane, click Manage Job Definitions. |
|
• |
Job Title: Name or title of the job. |
|
• |
Job ID: Job ID number (also shows the instance ID number and phase ID number). |
|
• |
Policy name: Name of the policy if the job belongs to a backup policy. |
|
• |
Type: Backup or restore. |
|
• |
Plugin: Name of the plug-in used to perform the job. |
|
• |
Client: Name of the NetVault Client for which the job was performed. |
|
• |
Selection Set: Backup or Restore Selection Set. |
|
• |
Next Run Time: Date and time when the next instance is scheduled to run. |
|
2 |
|
3 |
Optionally, use the Search option to filter the table data and quickly find entries that contain the specified string in any column values. You can also include wildcards (“?” or “*”) in the search filter string. |
|
• |
Job Details: This area shows the following information: job name, job ID, job type (backup or restore), and name of the client. |
|
• |
Configuration: This area lets you create, edit, and view the protection sets. It shows the selections, the plug-in options, schedule, source storage, target storage, and advanced options. |
|
• |
Recent Instances: This table lists the recent instances of the job. It shows the following information: Run time, duration, job size, instance ID, phase ID, and status (Succeeded, Failed, Aborted, and others). |
|
1 |
In the Navigation pane, click Manage Job Definitions. |
|
• |
For a policy job, Customize Policy Job dialog box displayed. |
|
• |
To edit a policy job without changing its job type, click No. Edit Policy Job wizard is started. |
|
• |
To edit a policy job by changing its job type (for example, changing it to a normal backup or restore job), click Yes. Backup or restore job wizard is started. |
|
4 |
|
• |
Schedule the job: To submit the job for scheduling, click Save & Submit. |
|
• |
Save the definition without scheduling the job: To save the job definition without scheduling it, click Save. |
|
7 |
If a new name was provided in Step 5, the Save Job dialog box is displayed. Select the applicable option in this dialog box: |
|
• |
Save changes creating a new job using the supplied name: Select this option to save the changes to a new job. |
|
• |
Save changes renaming this job to the supplied name: Select this option to rename the existing job. |
|
8 |
Click OK. |
|
1 |
In the Navigation pane, click Manage Job Definitions. |
|
3 |
You can add a non-policy job to an existing policy.
|
1 |
In the Navigation pane, click Manage Job Definitions. |
|
3 |
|
a |
|
b |
In the Select Policies dialog box, select the policy name ‘Policy1’. |
|
c |
Click OK. |