Creating Dashboards for Monitoring Statistics within Your SharePoint Farm
The ControlPoint Configuration site contains the following custom lists that ControlPoint Application Administrators can use to create "dashboards" of Web Parts for monitoring statistics within a SharePoint farm:
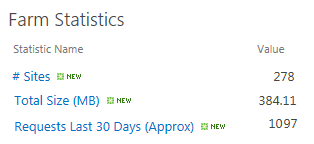
·Farm Statistics - Individual farm-wide metrics that are typically presented individually.
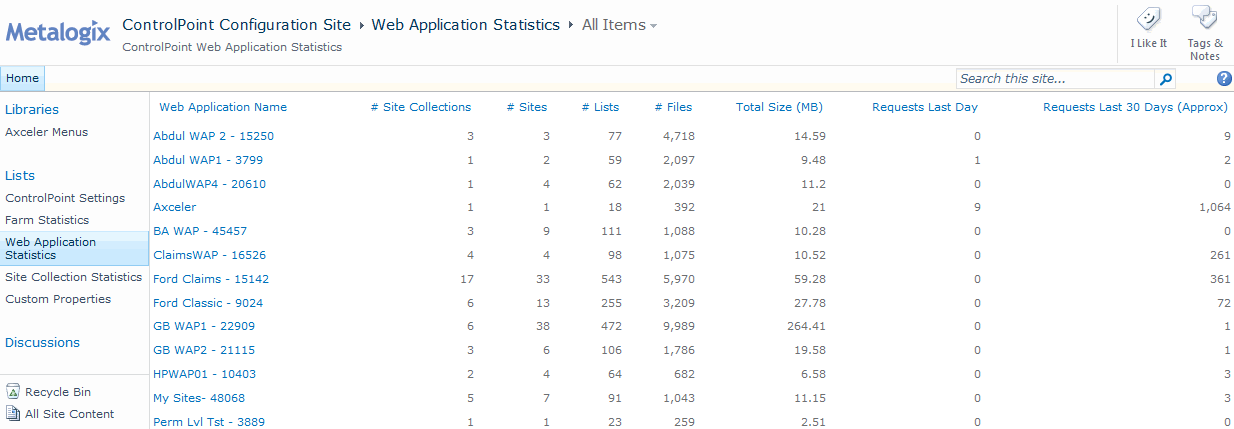
·Web Application Statistics - Rows of data about each Web application. Depending on your needs, you can present aggregate data (column sums, maximums, standard deviation, and so on).
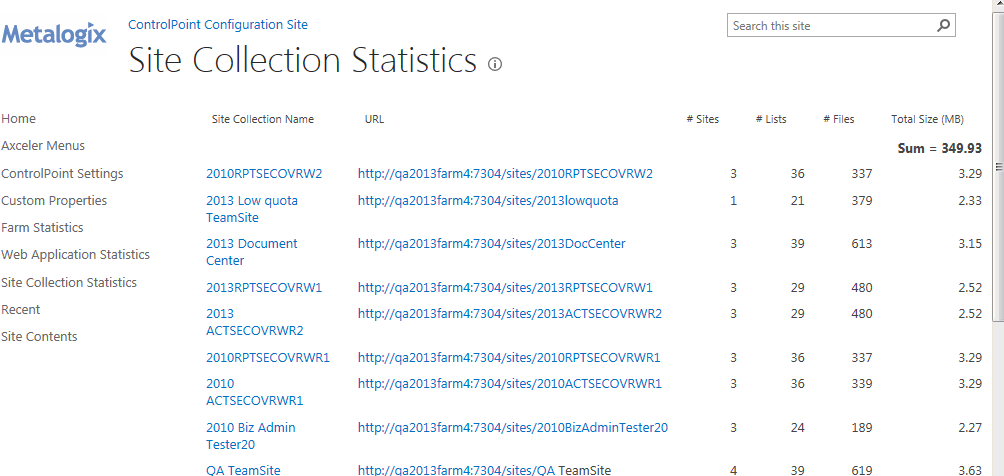
·Site Collection Statistics - Rows of data about each site collection which, like Web Application Statistics, can be customized to present aggregate data as well as key performance indicators (KPIs).
NOTE: by default, the Site Collections Statistics list includes all site collections in the farm. ControlPoint Application Administrators can, however, eliminate from the list groups of site collections that they do not want to monitor by excluding the Web applications that host them as described in the ControlPoint Administration Guide. This may be useful, for example, if the number of site collections in your farm exceeds the SharePoint recommended maximum number of list items.
You can configure an additional list, the Web Statistics KPI/Status List, to track key performance indicators for selected statistics if, for SharePoint 2010:
§you have a SharePoint Server Enterprise-based environment, and
§the feature "SharePoint Server Enterprise Site Features" has been activated on the ControlPoint Configuration root site.
NOTE: This list type has been deprecated as of SharePoint 2013.
How Statistics Lists are Populated
Statistics lists are populated as part of the nightly Full Discovery timer job. When this job runs, the lists are cleared and re-populated with current data.
NOTE: Because of the way in which they are populated, if any of these lists are copied or moved, statistics data will become static (that is, it will not be updated) in the new location.
To create a statistics dashboard on the ControlPoint Configuration root site main page:
NOTE: The steps below are intended to provide introductory guidelines for creating dashboards on the ControlPoint Configuration root site main page. Consult your SharePoint documentation and other available resources for more detailed instructions and/or guidance in using alternate tools and techniques.
1From the ControlPoint Configuration site main page, choose Site Actions > Edit Page.
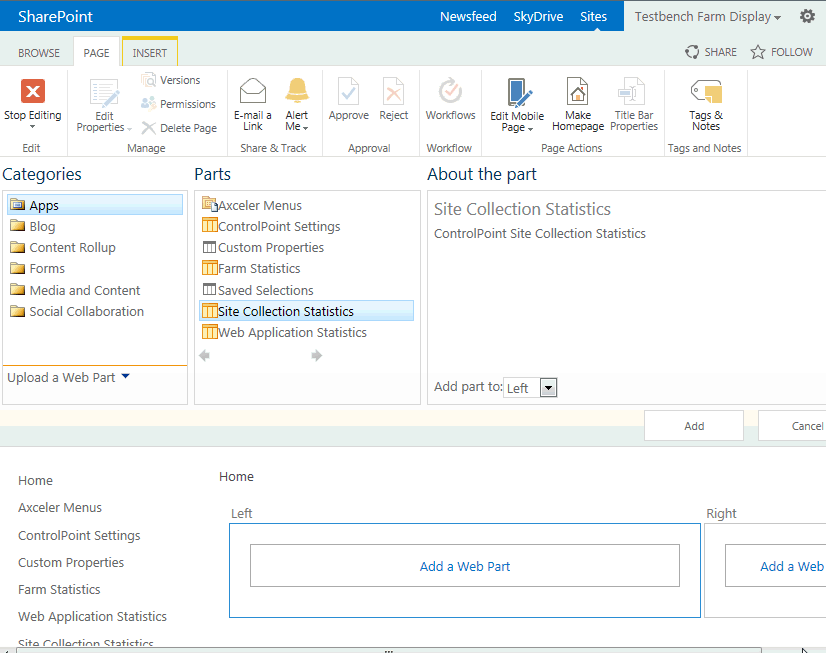
2Click Add a Web Part, then choose the list(s) that you want to add as Web Parts to that area of the page.
EXCEPTION: The Web Statistics KPI List is configured and added to the page using a different method. See "To configure the Web Statistics KPI, " following.
You can either use the default view that has been defined for the list or create a custom view.
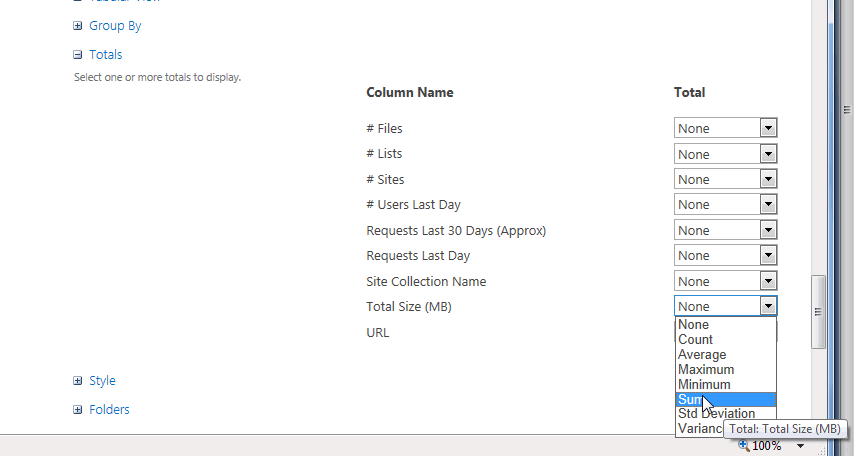
You can, for example, change the display order of columns; display a subset of columns; display columns that are not included in the default view; add a calculated column; display column totals.
·Example: Site Collection Statistics with calculated columns to track size and storage utilization.
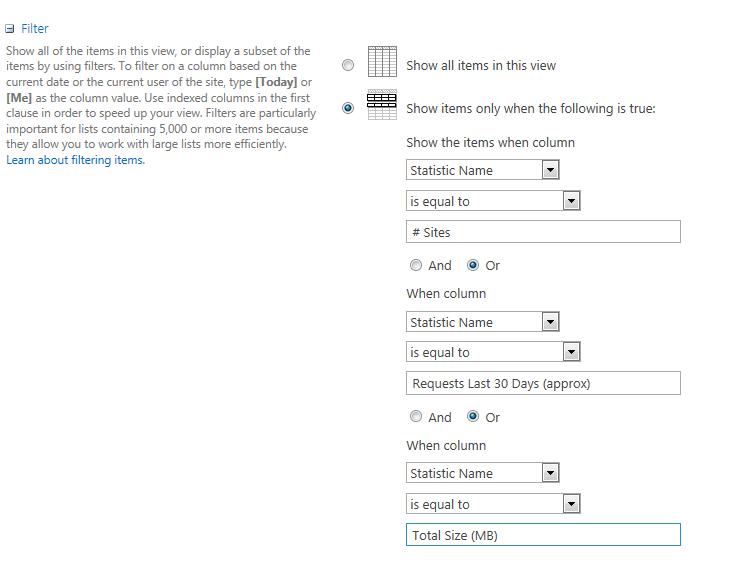
·Example: Farm Statistics filtered to show only "high priority" metrics.
To configure the Web Statistics KPI List (SharePoint 2010):
REMINDER: To use KPI lists and Web Parts, you must have an Enterprise-based environment with Enterprise Site Features activated on the ControlPoint Configuration root site. This list type has been deprecated as of SharePoint 2013.
1Create a new Status list entitled "Web Statistics KPI" (or another name of your choosing).
2Create indicators for the Web Statistics KPI List as follows:
a)In the ControlPoint Configuration root site, open the Web Statistics KPI List, choose New > SharePoint List based Status Indicator.
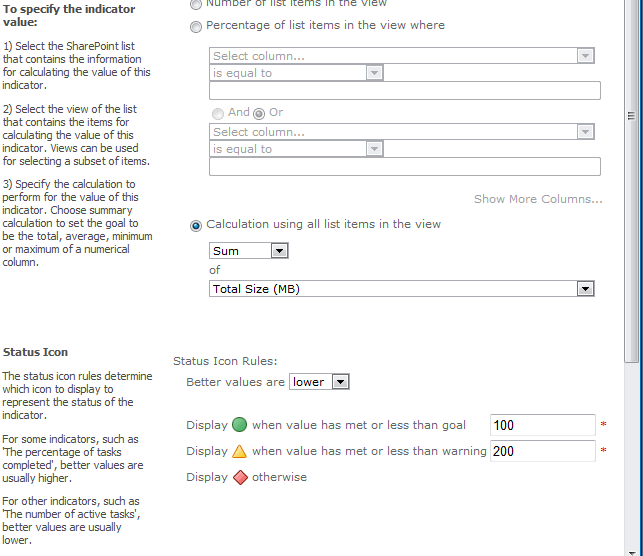
b)Complete the appropriate fields on the New Item page (including the List URL of the list containing the statistic for which you want to create an indicator). Consult your SharePoint documentation for complete instructions.
c)Complete substeps b and c for each indicator you want to create.
3Once the list has been set up, add a KPI Web Part to the dashboard, specifying the Web Statistics KPI List as the Indicator List.
Setting Object Properties
You can use ControlPoint to set properties for site collections, sites, and lists.
In a multi-farm environment, properties can be set across multiple farms; the user interface for the home farm is always used. Therefore, if your multi-farm installation includes different SharePoint versions (for example, both 2010 and 2016) or variations (for example, ControlPoint Standard and ControlPoint Online), which necessitates differences in the user interface, some options may be missingor not validfor the remote farm. For example, in a SharePoint 2010 farm you have the option of performing a Visual Upgrade, a setting that is not available inand therefore would be skipped for a SharePoint 2016 farm. Note that if a SharePoint 2016 farm were your home farm, the option to perform a Visual Upgrade would not be available.
Setting Site Collection Properties
Set Site Collection Properties is a ControlPoint action that lets you set the following properties for one or more site collections within a SharePoint farm:
·Site Collection Administrators
·Site Collection Quota
·Portal Site Connections
·Site Collection Audit Settings
·Site Collection Search Settings
·SharePoint Designer Settings (SharePoint Server)
·Audit Log TrimmingTo set site collection properties:
1Select the site collection(s) for which you want to set properties.
2Choose Configuration > Set Site Collection Properties.
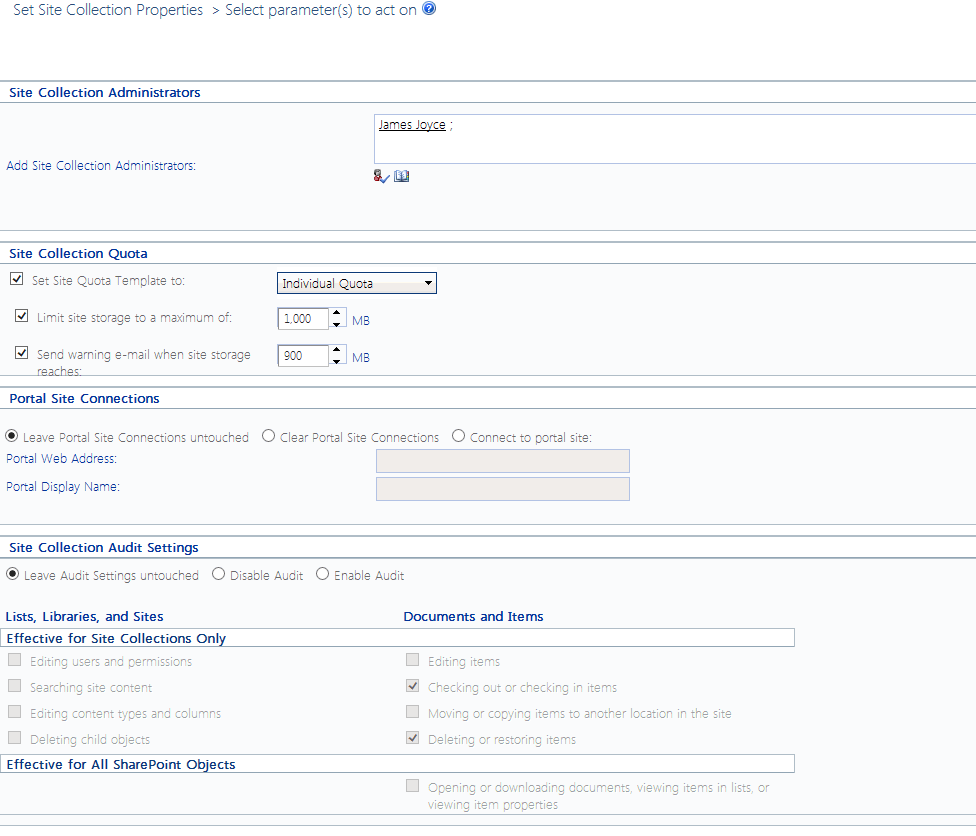
3In the Parameters section, specify each property you want to set as you would if you were performing Site Collection Administration via SharePoint Site Settings.
EXCEPTION: Set Site Collection Audit Settings as you would if you were using the ControlPoint Manage Audit Settings action.
NOTE: Changes to SharePoint Designer Settings will impact only users who are not Site Collection Administrators. SharePoint maintains SharePoint Designer Settings for Site Collection Administrators at the Web application (not Site Collection) level.
Now you can:
·run the operation immediately (by clicking the [Run Now] button)
OR
·complete the Enforce Policy section and schedule the operation to run at a later time.
OR
·save the operation as XML Instructions that can be run at a later time.
If you chose the Run Now, option, after the operation has been processed:
·a confirmation message displays at the top of the page, and
·a ControlPoint Task Audit is generated for the operation and displays in the Results section.
If you schedule the operation, a link to the Task Audit is included in the scheduled action notification email.
See also The ControlPoint Task Audit.
Setting Site Properties
You can use the ControlPoint Set Site Properties action to set the following properties of one or more sites within a SharePoint farm:
·theme (only if you are using the SharePoint 2007 user interface for SharePoint 2010; this means that a Visual Upgrade has not been performed*)
·icon (that is, the logo used for the site)
·site access settings
·site navigation settings
·the left navigation panel (tree view)
·regional settings
·whether or not to include the site(s) in SharePoint search results
·whether or not to enable RSS feeds for the site(s).
*NOTE: If you are running SharePoint 2010, you can use this action to run a Visual Upgrade on sites across your farm.
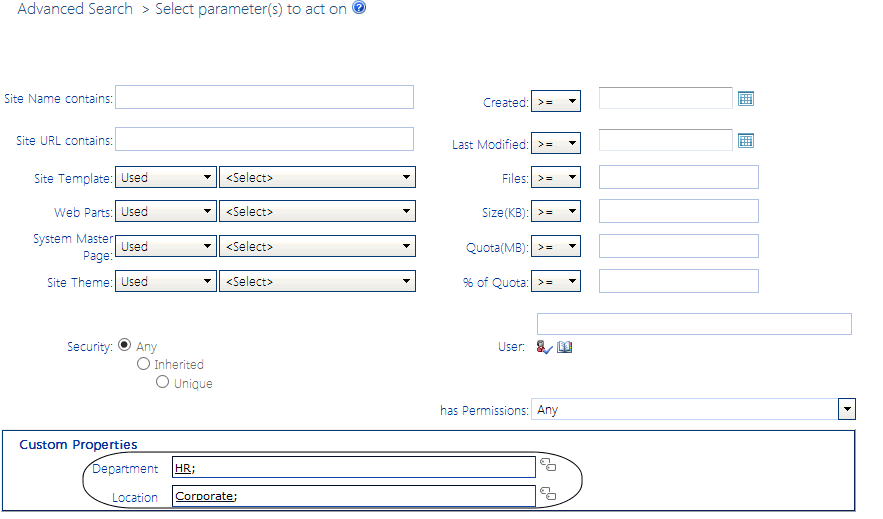
For SharePoint Server farms running the Managed Metadata Service Application, you can also "tag" sites with Custom Properties that have been defined by the ControlPoint Application Administrator, for use as parameters in ControlPoint Advanced Searches. The procedure for defining Custom Properties is covered in the ControlPoint Administration Guide.
To set site properties:
1Select the object(s) for which you want to set site properties.
2Choose Configuration > Set Site Properties.
3In the Parameters section, expand the node for the category of properties you want to set.
4Check the box that describes the property you want to set.
NOTE: If you do not check the applicable property box, ControlPoint will not carry out that action.
5Specify the parameter(s) for the selected property as you would if you were setting it via SharePoint Site Settings. Consult your SharePoint documentation for detailed instructions.
Note that if you are running SharePoint 2010, in addition to adding a Site Icon (as shown in the example above) you can perform a Visual Upgrade.
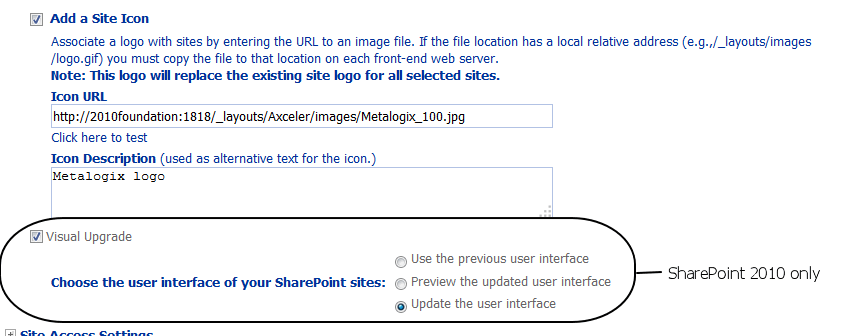
If you have a SharePoint Server farm running the Managed Metadata Service Application and the ControlPoint Application Administrator has defined Custom Properties, they are selectable from within the Custom Properties section. (This section is not included for Foundation farms.)

Custom Properties can be used as ControlPoint Advanced Search parameters to locate sites with which they have been associated via this action.
6Complete Steps 2-5 for each category of properties you want to set.
Now you can:
·run the operation immediately (by clicking the [Run Now] button)
OR
·complete the Enforce Policy section and schedule the operation to run at a later time.
OR
·save the operation as XML Instructions that can be run at a later time.
If you chose the Run Now, option, after the operation has been processed:
·a confirmation message displays at the top of the page, and
·a ControlPoint Task Audit is generated for the operation and displays in the Results section.
If you schedule the operation, a link to the Task Audit is included in the scheduled action notification email.
See also The ControlPoint Task Audit.


