The following steps detail how to perform a restore/live recovery of a data volume.
Initiating Restore on the Rapid Recovery core Console
- Launch the Core Console.
- From the list on the left, select the machine data is restoring from, and click the Recovery Points tab.
- Locate the desired recovery point to restore from; on the rightmost column, click … and select Restore.
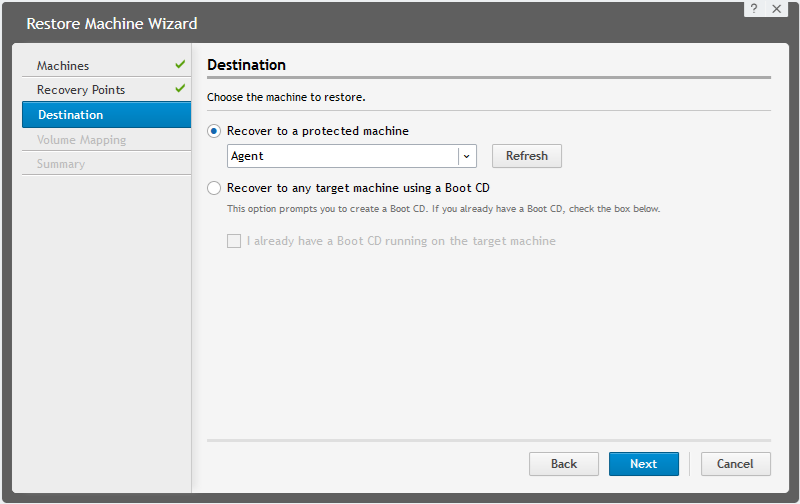
- In the Restore Machine Wizard, from the drop-down list, choose the Agent where the volume will be restored.
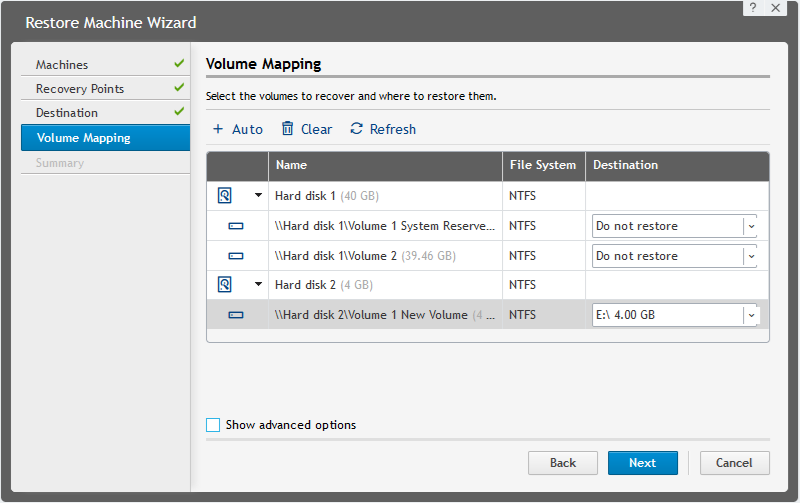
- In the Volume Mapping pane, map the correct data volume in the recovery point to an available volume on the target Agent. If necessary, click on "Show advanced options" and uncheck any unnecessary option (Live recovery and Force Dismount). Then, click the [Next] button.
- NOTE: Only one volume can have Live Recovery enabled per machine that is being restored. There is no way to enable Live Recovery of multiple volumes for the same Agent.
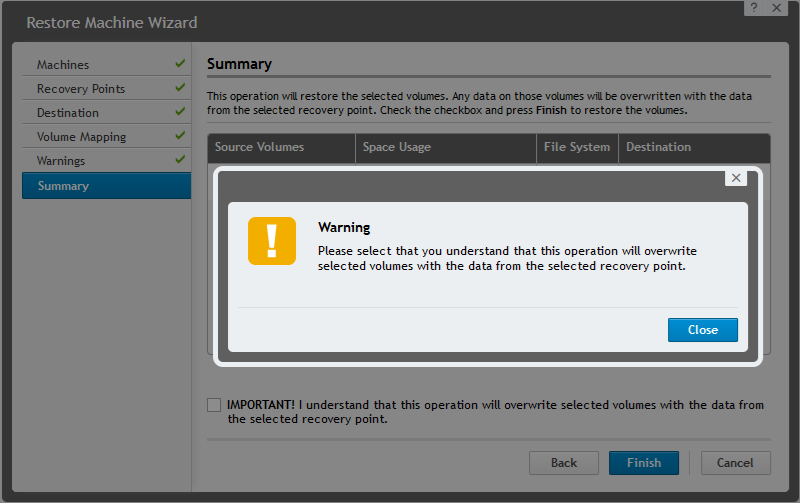
- A warning message will be displayed if the checkbox acknowledging that information on the destination volume will be overwritten is not selected. Click the [Finish] button.
The data on the volume will be restored and should be available when the job completes.
