Method 1: Automatically select backups based on your criteria
You can use the Forest Recovery Console to automatically select backups for multiple domain controllers in your recovery project. This method allows you to specify a time period, and then automatically select the latest backup created in that period for particular domain controllers in the project.
To automatically select backups
Specify your backup selection criteria:
-
Create or open a recovery project.
-
On the Forest Recovery Console toolbar, click Backup Criteria.
-
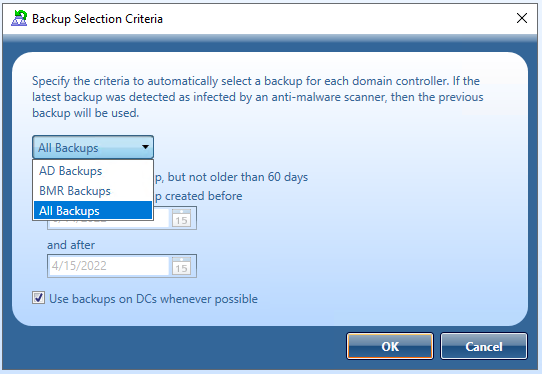
Automatic backup selection criteria can be defined based on backup type:
Select All Backups to apply the same search criteria to both BMR and AD Backups,
Select BMR Backups to apply specified search criteria to BMR backups only.
Select AD Backups to apply specified search criteria to AD backups only.
Automatic backup selection options
Option Description Use the latest backup, but not older than 60 days Allows you to use the most recent backup registered with Recovery Manager for Active Directory (RMAD) for a given domain controller. Use latest backup created before <Date> and after <Date> Allows you to specify a date range and use the most recent backup from that range for a particular domain controller. Use backups on DCs whenever possible (enabled by Default) Not supported for BMR backups. When this check box is selected, RMAD first searches for DCs to be restored from the backups that meet the criteria you have specified. If no suitable backups are found for the DCs, RMAD will then search the Remote Storage (UNC path) for Backups. If no suitable backup are found on Remote Storage, RMAD then looks for backups on the local storage located on the Forest Recovery Console computer. With this check box selected by default, you can avoid any unnecessary backup files being copied from the Forest Recovery Console to the DCs, to be restored, and thus speed up the recovery process.
When you are finished, click OK.
Specify the domain controllers for which you want to automatically select backups:
-
Hold down CTRL, and then click to select such domain controllers in the list of domain controllers.
-
On the General tab, and then select the Use backup criteria to automatically select a backup check box (selected by default).
To view which backup was automatically selected for a domain controller, select that domain controller in the list, view the info bar and look to the right and view the backup file name in Selected Backup. You can also see the backup file selected by mousing over the Use backup criteria to automatically select a backup data in the General tab.
To view which backup that was automatically selected for a domain controller, select the domain controller in the list and view the info bar. You can then view the backup file name found in the Selected Backup column. You can also see the backup file that is selected for recovery by mousing over the Backup: field from the General tab.
If the automatically selected backup file is not to be used, you can manually select a different backup. To do so, clear the Use backup criteria to automatically select a backup check box and click the Select button located to the right of the backup field. A list of registered backups will be displayed within the Select Backup dialog, select the backup you want to use for Recovery for the domain controller.
Method 2: Manually select backups
This method allows you to manually select any backup for a given domain controller in the recovery project. You can only select from backups registered with Recovery Manager for Active Directory.
To manually select a backup
-
Create or open a recovery project.
-
In the list of domain controllers, select the domain controller for which you want to backup.
-
On the General tab, clear the Use backup criteria to automatically select a backup check box (selected by default).
-
Click the Select button located to the right of the Backup field. A list of backups that are registered will be displayed with the Select backup dialog, select the backup you want to use for Recovery for the domain controller.
Recovery Manager for Active Directory Disaster Recovery Edition provides secondary storage options for critical backups with Secure Storage Server and Cloud Storage features. Using a Secondary Storage in your disaster recovery plans helps prevent unauthorized modifications or malware attacks on backup data.
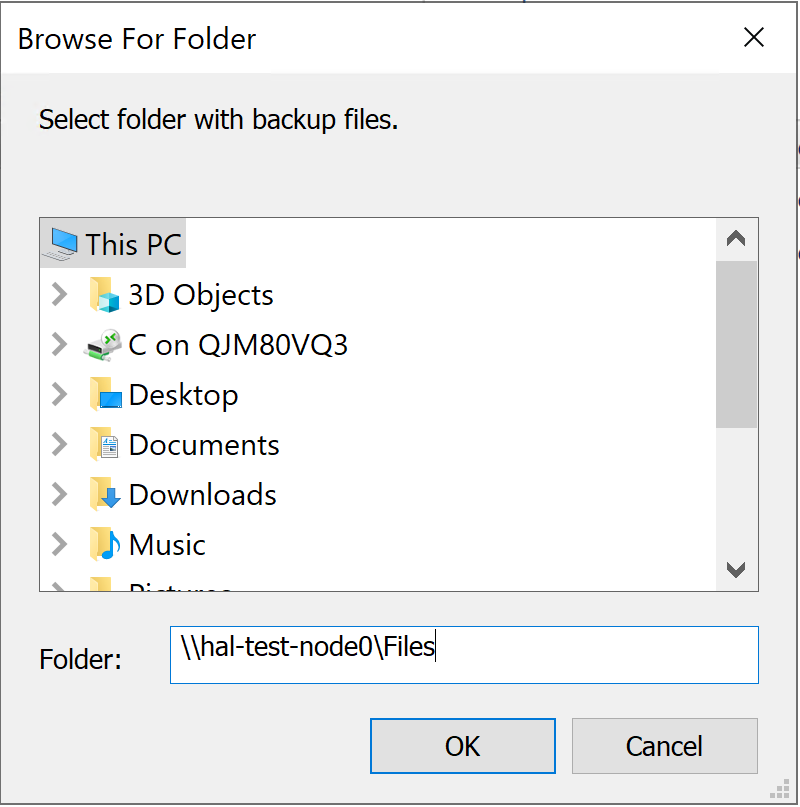
Backups on Secure Storage Server and Cloud Storage must be copied from these services to the Forest Recovery Console system into a folder or the can be copied to a share on another system. Selecting Register Backups in Folder you can access the folder when the backups were copied.
If the backups from the Secondary Storage were copied to a share on another machine you can enter the share name into the Register Backups in Folder which will automatically return and list the backups.

Using recovery alerts
Recovery alerts provide you with the real-time information about the recovery of domain controllers in your project. You can configure a recovery alert to inform you when particular domain controllers complete the recovery stage you specified in the alert settings.
For a recovery project, you can create and configure multiple alerts, each having different settings. You can also modify settings of existing alerts or delete alerts as necessary. To manage recovery alerts, click the Configure Alerts button on the toolbar of the Forest Recovery Console.
For each alert, you can select one or more domain controllers to which the alert will apply. You can configure an alert to inform you about the completion of one or more of the following recovery stages on the target domain controllers:
Recovery stages for which you can use alerts
Prepare to restore from backup
During this stage, Recovery Manager for Active Directory (RMAD) verifies that the backup files you selected for recovery are available on the target domain controllers. If necessary, RMAD copies the backup files that are missing. Also, RMAD disables Microsoft Windows Update if it is enabled on the domain controllers.
Perform restore from backup
During this stage, RMAD performs the following steps:
-
Detect current mode (DSRM or normal)
-
Reset DSRM administrator password
-
Restart domain controller in DSRM
-
Enable domain controller isolation
-
Disable BitLocker
-
Disable custom password filters
-
Restore data from backup
-
Restart domain controller in normal mode
-
Reset DSRM administrator password
Configure domain controller
During this stage, RMAD performs the following steps:
-
Get information about domain controller
-
Select preferred DNS server
-
Remove global catalog (if you did not specify to keep the existing global catalog)
-
Raise RID pool
-
Invalidate RID pool
-
Seize FSMO roles
-
Clean up metadata of removed domain controllers
-
Reset the Krbtgt password
-
Reset password for users in privileged groups
-
Reset computer account passwords
-
Enable custom password filters
-
Restart domain controller in normal mode
-
Reset trust passwords
Make domain controller available
During this stage, RMAD performs the following steps:
-
Ensure that domain controller isolation is disabled
-
Clean up metadata of unrecovered domains if necessary
-
Change global catalog partition occupancy level
-
Add global catalog (if you did not specify to keep the existing global catalog)
-
Wait for a global catalog server to become available
-
Restore initial global catalog partition occupancy level
-
Enable the use of global catalog for user authentication
-
Enable BitLocker
-
Enable Windows Update (if it was enabled before the recovery)
-
Remove temporary files
Uninstall Active Directory® Domain Services
During this stage, RMAD uninstalls Active Directory® using the tools provided by Microsoft. For domain controllers running Windows Server® 2008 or earlier, RMAD uses the Dcpromo.exe tool. For Windows Server® 2012-based domain controllers, RMAD uses the Windows PowerShell® cmdlet:
Uninstall-ADDSDomainController.
Also, RMAD disables Microsoft Windows Update if it is enabled on the domain controllers.
Reinstall Active Directory® Domain Services
During this stage, RMAD performs the following steps:
-
Select preferred DNS server
-
Wait for a global catalog server to become available
-
Reinstall Active Directory® Domain Services
-
Remove temporary files
-
Enable Windows Update (if it was enabled before the recovery)
In this section:
Creating an alert
To create an alert
-
Create or open a recovery project.
-
On the toolbar, click Configure Alerts.
-
In the dialog box that opens, click Create Alert.
-
Under Alert properties, do the following:
-
Use the Alert name box to type a descriptive name for the alert.
-
Use the Alert me about completion of the specified stage list to select a recovery stage.
-
Under the Use this alert for domain controllers list, click Add, and then select the check boxes next to the domain controllers to which you want to apply this alert. When you are finished, click OK.
By default, the created alert informs you when all specified domain controllers complete the selected recovery stage, regardless of whether or not the stage succeeded. To modify this behavior, complete the next steps.
-
If you want to be informed when any of the domain controllers complete the recovery stage, select the Alert me when any DC in the list completes specified stage check box.
-
If you only want to be informed about the successful completion of the stage, select the Only alert me when specified stage is completed successfully.
-
-
Click OK to apply your settings.


