Migrating large numbers of folders requires careful planing. The folders could belong to different offices and geographical locations or sensitive departments. Migrating Public Folders of Finance or Legal departments require special care. Organize the Public Folders into collections to make large Public Folder lists more manageable.
In this topic:
Adding Public Folders to Collections
You can add Public Folders to collections in several ways:
To add selected Public Folders to a new collection:
- From the project dashboard, click Open in the Public Folders tile to open the Public Folders migration workspace.
- Click the Public Folders tab.
- Select the Public Folders you want to add to the collection.
- From the actions toolbar, click Collections > New Collection. The New Collection dialog opens.
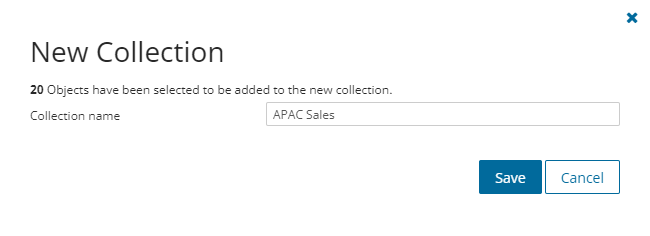
- Enter a collection name in the Collection name field and click Save to add the selected Public Folders to the collection.
To add selected Public Folders to an existing collection:
- From the project dashboard, click Open in the Public Folders tile to open the Public Folders migration workspace.
- Click the Public Folders tab.
- Select the Public Folders you want to add to an existing collection.
- From the actions toolbar, click Collections > Add To Collection. The Add to existing collection dialog opens.
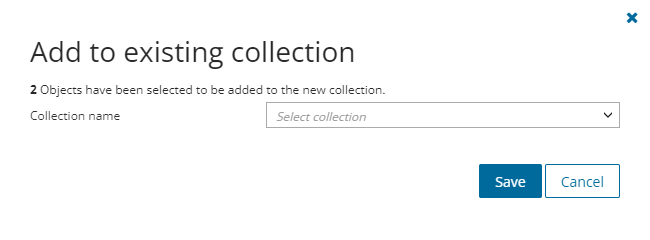
- Select a collection from the Collection name dropdown and click Save to add the selected Public Folders to the collection.
To add Public Folders from a CSV file to a new or existing collection:
Using a CSV file provides the following additional benefits:
- Multiple collections can be created with the same CSV file.
- Existing collections can be specified in the CSV file to add additional Public Folders.
- Public Folders can be listed in multiple collections.
This is a two-step process as described below to add Public Folders to one or more collections:
Step 1: Prepare the CSV file
- From the actions toolbar, click Collections > Import Collections. The Import Collections from File wizard starts.
- From the Mapping File step, click Download Example File. A ZIP file is downloaded.
- Extract the CSV file and use it to prepare your import file in one of three formats described below:
|

|
NOTE: CSV file names with non-ASCII characters are not supported. Public Folders in the CSV that have not been discovered cannot be added to a collection. |
Use the format shown below to prepare the CSV file. The minimal set of columns required are shown.
|
|
TIP: You can export the selected Public Folders to a CSV file and then add the Collection column and retain the Source MailNickname column. All other columns in the exported CSV file will be ignored so you can remove those columns if you want. |
- SourcePath - relative path of the Public Folder.
- Collection - Column header for the collection name. If a collection in the CSV does not exist, a new collection will be created with the name specified in the CSV.
Step 2: Import the CSV file
- Open the Public Folders tab.
- From the actions toolbar, click Collections > Import Collections. The New Import Collections from File Task wizard starts.
- Mapping File
- Click Browse and select the CSV file. The selected CSV file name appears.
- Schedule
- Choose from one of three options to schedule the task. The scheduler will be activated after you complete the task wizard.
- Run now - task runs immediately.
- Run later - task must be started manually.
- Schedule - task will be started at a future date and time entered in the corresponding calendar field.
- Click Next.
- Summary
- Verify the task specifications as described below:
- Name - name of the task. The default name is Import Collections From File. You can specify a custom name.
- Scheduled start - date and time when the task will start. Now indicates that the task will start immediately.
- Click Back to revise or review a previous step or click Finish to complete the task wizard and start the task as scheduled.
- Click Finish.
To verify the addition of the Public Folder to a collection:
- Check the Collections column in the Public Folders List View that indicates the most recent collection where the Public Folder has been added and the number of additional collections that also contain the Public Folder.
- Select a Public Folder from the Public Folders List View to open the Public Folder Detail pane. Check the Collections property that lists all the collections where the Public Folder has been added.
Working with the Collections Dashboard
The Collection Dashboard shows the collection-specific summary, allows you to see Public Folders added to it, create tasks for them, and monitor the progress of tasks.
To view the collection dashboard for an existing collection:
- From the project dashboard, click Open in the Public Folders tile to open the Public Folders workspace.
- From the top-right corner of the workspace, click Select Collection and then select the collection to view. The collection Dashboard is displayed.
- Open the Public Folders tab. You will see the list of Public Folders that belong to the collection.
To remove items from a collection:
- From the actions toolbar, click Collections > Remove from Collection.
- In the confirmation dialog click Remove to remove the selected Public Folders from the collection.
To rename the collection:
- Click Collections > Rename Collection in the Actions toolbar of the collections dashboard.
To delete the collection:
- Click Collections > Delete Collection in the Actions toolbar of the collections dashboard.
To see the tasks for collection-specific Public Folders:
- Open the Tasks tab.
To see the events related to the collection:
- Open the Events tab.
To return to the Public Folders migration workspace:
- Click the collection dropdown at the top-right corner of the page, and select Show All.
You can temporarily remove any source public folders from the migration project, if necessary. Consider, public folders cannot be removed permanently from the migration project, all existing source public folders will be added in after next discovery.
To temporarily remove public folders from the migration project:
- Go to the migration project Dashboard in case you use new migration UI. In case you are using classic experience or you are already on the Public Folders migration Dashboard, go to step 3.
- Click Public Folders widget.
- Open Public Folders and select the items you want to remove from the migration project.
- Click Delete
- Click Delete to confirm the action.
The provisioning task helps you with the following premigration preparations:
- Provision public folders in the target tenant.
- Resolve naming conflicts.
Starting the provisioning task
- Log in to Quest On Demand and choose an organization if you have multiple organizations.
- From the navigation pane, click Migrate > Projects to open the My Projects list.
- Create a new project or open an existing project.
- Click Public Folders from the project tiles, or click Open from the Public Folder tile to open the Public Folder Migration Workspace.
- Select one or more public folders from the Public Folders List View.
- Click Provision > Provision Public Folders. The New Public Folder Provision Task wizard starts. Each step is described below:
- Options
- Include subfolders in provision scope - select this option to include all sub-folders during migration of selected public folders.
- Migrate mailbox permissions - select this option to migrate permissions of selected public folders (and sub-folders if included).
- Migrate mail enabled - select this option to migrate the mail-enabled property of selected public folders (and sub-folders if included). If this option is not selected, the mail-enabled property of selected public folders or sub-folders will not be migrated.
- Re-use target public folder - select this option if a folder with the same name already exists in the target tenant. When this option not checked and the same folder already exists in the target, the service returns the error “Folder already exists”, and the public folder with all its sub-folders is not provisioned.
- Notification
- Send notification email once the task is completed - select this option to send a notification email when a provisioning task completes.
- Only in a case of failure - Select this option to send the email if the provisioning task fails to complete successfully.
- Recipients - enter the email address of the recipients of this email. You can specify multiple recipient email addresses separated by semicolon.
- Click Next.
- Step 4. Schedule
- Choose from one of three options to schedule the task. The scheduler will be activated only after you complete the task wizard.
- Run now - task runs immediately.
- Run later - task must be started manually.
- Schedule - task will be started at a future date and time entered in the corresponding calendar field.
- Priority - select a priority from the dropdown for the objects scheduled for migration with this task . Values are: Highest, High, Medium, Low and Lowest. The default priority is Medium. If the system is busy, the objects are queued (Migration state = Queued). When the system accepts new migration work, objects are taken from the queue based on the assigned priority and age in the queue.
- Click Next.
- Summary
- Verify the task specifications as described below:
- Name - name of the task. You can specify a custom name. The default name is Public Folder Provision Task.
- Source tenant - name of the tenant in this project.
- Target tenant - name of the target tenant in this project.
- Include subfolders in provision scope - indicates whether or not subfolders are included.
- Migrate mailbox permissions - indicates whether or not mailbox permissions are provisioned.
- Migrate mail enabled - indicates whether or not the mail-enabled property of the selected public folders (and sub-folders if included) are migrated.
- Re-use target public folder - indicates whether a target folder with the same must be reused.
- Scheduled start - date and time when the task will start. Now indicates that the task will start immediately.
- Priority - the priority of this task.
- Click Back to revise or review a previous step or click Finish to complete the task wizard and start the task as scheduled.
- The provisioning task is created. You can track its progress from the Tasks tab, view the summary on the Dashboard or monitor alerts and notifications from the Events tab.
Use this method to map specific public folders from the source to existing public folders in the target tenant that do not have any matching attributes. The CSV file lets you specify the public folders that you want to map and ignore the rest. You can then use this file in the New Mapping from File Task wizard to map the public folders from the source to the target tenant. This is a two-step process:
Prepare the CSV file
- Create a new CSV file and specify the column header in the first row and then enter the relative path in the subsequent rows manually. Since paths in a mapping file are case sensitive, this method must be used with caution.
|
|
NOTE:
- You need to map only the public folder paths that will change in the target Tenant.
- You can download a CSV template when you start the New Public Folder Mapping from File Task wizard and click Download Example File from the Mapping File step.
- CSV file names with non-ASCII characters are not supported.
|
- In the first column, specify the header as either Source Path.
- In the second column, specify the header as either Target Path.
- Enter the source and target paths manually in the subsequent rows . Ensure that only relative paths are used.
- Save the CSV file. You may rename the file if needed.
Start the Mapping from File Task
- Log in to Quest On Demand and choose an organization if you have set up multiple organizations.
- From the navigation pane, click Migrate > Projects to open the My Projects list.
- Create a new project or open an existing project.
- Click the Public Folders tile, or click Open from the Public Folders tile to open the Public Folders Migration Workspace.
- Go to the Public Folders tab. Then click Provision > Map from File. The New Public Folder Mapping from File Task wizard starts. Each step is described below:
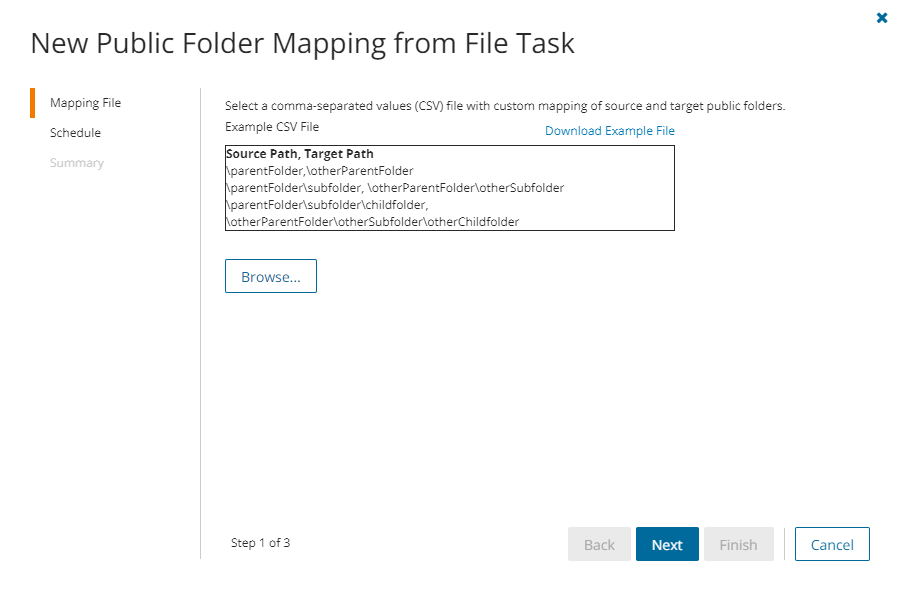
- Mapping File
- Click Browse and locate the CSV mapping file.
- Click Open in the File Explorer window to load the file into the wizard.
- Click Next.
- Schedule
- Choose from one of three options to schedule the task. The scheduler will be activated after you complete the task wizard.
- Run now - task runs immediately.
- Run later - task must be started manually.
- Schedule - task will be started at a future date and time entered in the corresponding calendar field.
- Click Next.
- Summary
- Verify the task specifications as described below:
- Name - name of the task. The default name is Public Folder Mapping from File Task. You can specify a custom name.
- Source tenant - name of the tenant where the source URLs exist.
- Target tenant - name of the tenant where the target URLs may or may not exist.
- Scheduled start - date and time when the task will start. Now indicates that the task will start immediately.
- Click Back to revise or review a previous step or click Finish to complete the task wizard and start the task as scheduled.
You can track the progress in the Tasks tab, monitor alerts and notifications in the Events tab and view the summary on the Dashboard.
When the task completes, the Public Folders list is updated. Compare the Source Pathcolumn with the Target Path column for the selected public folders. The Status is set to Mapped.
