
Managing ADFS agents
ADFS (Active Directory® Federation Services) agents collect data from the Exchange Online environment, which is then used to populate the performance metrics presented in the Office 365 Environment dashboard and views.
This section describes how to:
Add and configure ADFS agents
|
1 |
Click Create Agent on the Agents management toolbar. |
|
2 |
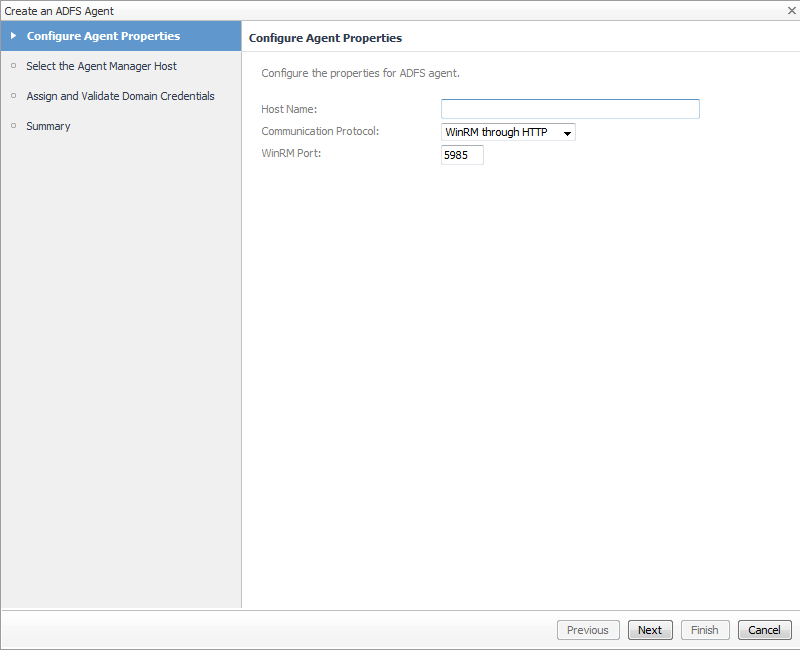
On the Configure Agent Properties page, configure the properties for the ADFS agents. |
|
• |
Host Name. The fully qualified domain name (myServer.myDomain.com) of the target server from which data is to be collected. |
|
• |
Communication Protocol. Selects to run the WMI query through DCOM or WinRM. |
|
• |
WinRM Port. The WinRM port number on the monitored server. This property only appears if the Communication Protocol is set to WinRM through HTTP or WinRM through HTTPS. |
|
3 |
On the Select the Agent Manager Host page, select the Foglight Agent Manager host to be used for the new ADFS agent instances. |
|
• |
|
4 |
On the Assign and Validate Domain Credentials page, review the available credentials, and edit them, as necessary. |
|
• |
To create a new credential, click Add domain to a new credential. |
|
• |
In the Create New Credential and Assign dialog box, create a credential that you want to use to access the monitored resource. Type a new credential name, domain, user name, password, and lockbox, and click Submit. |
|
• |
To select an existing credential, click Add domain to an existing credential. |
|
• |
|
5 |
Edit ADFS agents properties
The Agent Edit wizard guides you through the process of editing the ADFS agent properties.
|
1 |
In the Agents management table, click the Edit icon in the Edit column for the agent whose properties you want to edit. |
|
2 |
On the Configure Agent Properties page, configure the properties for the selected agent. |
|
• |
Communication Protocol. Selects to run the WMI query through DCOM or WinRM. |
|
• |
WinRM Port. The WinRM port number on the monitored server. This property only appears if the Communication Protocol is set to WinRM through HTTP or WinRM through HTTPS. |
|
3 |
On the Assign and Validate Domain Credentials page, review the available credentials, and edit them, as necessary. |
|
• |
To create a new credential, click Add domain to a new credential. |
|
• |
In the Create New Credential and Assign dialog box, create a credential that you want to use to access the monitored resource. Type a new credential name, domain, user name, password, and lockbox, and click Submit. |
|
• |
To select an existing credential, click Add domain to an existing credential. |
|
• |
|
4 |
Configuring ADFS agent properties
|
1 |
From the navigation panel, navigate to Dashboards > Administration > Agents > Agent Status. |
|
2 |
On the Agent Status dashboard, select an ADFSAgent agent from the list and click Edit > Edit Properties. |
The following tables describe the properties that can be modified for either an individual ADFS agent instance or for all agent instances, by clicking Modify the private properties for this agent or Modify the properties of all ADFSAgent agents links, respectively.
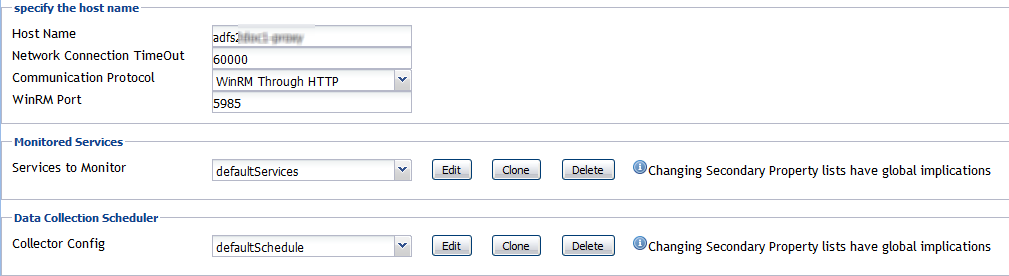
Use the specify the hostname section to specify the target server from which data is to be collected.
|
The fully qualified domain name (myServer.myDomain.com) of the target server from which data is to be collected. | ||
|
Selects to run the WMI query through DCOM, WinRM Through HTTP, or WinRM Through HTTPS. | ||
The selection made in the Monitored Services section defines the services that are to be monitored by the selected agent(s). The services monitored by default are listed in the following table.
The selection made in the Data Collection Scheduler section defines the data collection schedule to be used to collect performance metrics.
The following table lists the collectors being used by the cartridge and the default collection interval for each (as defined in the defaultSchedule).