|
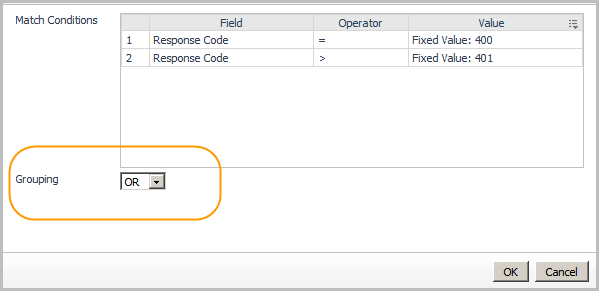
2 |
Click Grouping. |
|
3 |
|
4 |
Click OK. |
|
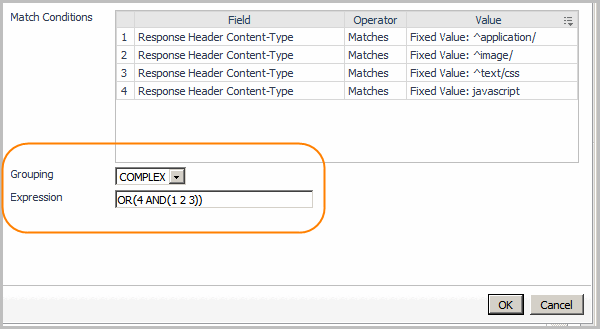
2 |
Click Grouping. |
|
3 |
From the Grouping list, select Complex. |
|
5 |
Click OK. |
|
1 |
Expand Metrics. |
|
2 |
Deselect the Generate Standard Metrics check box. |
|
3 |
Click Save. |
|
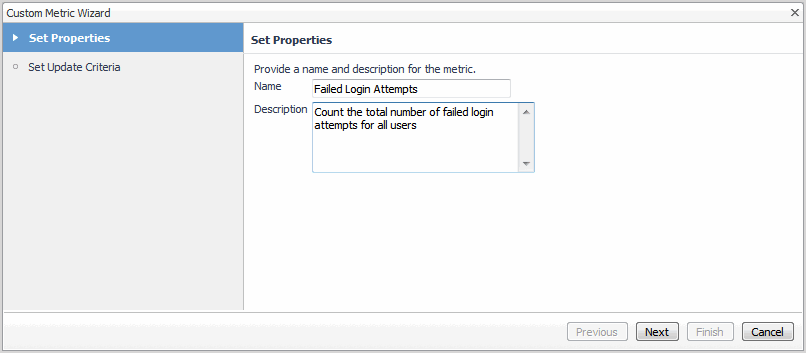
1 |
When defining an analyzer, expand Metrics. |
|
• |
Name: Specify a name. |
|
• |
Description: Summarize the reason you created the metric. |
|
• |
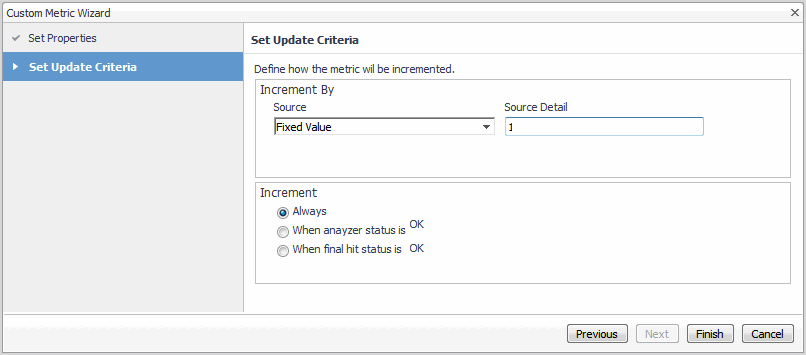
Source: Select the source of the value used to increment this metric—such as Fixed Value, Script Output, Session Custom Field, or one of the hit details. The other available fields change depending on the selected Source. |
|
• |
Source Detail: If available, specify some detail to further refine the Source selection. For example, if you selected Fixed Value, you need to specify the amount by which you want to increment/decrement the metric. |
|
• |
Extraction Expression: Optional—if available, you can create an expression that extracts a portion of the source’s value. For example, if your source contains “$99,” you can extract “99” as your increment value. For more information, see Defining extraction expressions. |
|
• |
Increment: By default, a custom metric is always incremented. You can change the update policy based on the analyzer status or the final hit status (which is the worst status of all the analyzers that match a hit). For more information, see Updating custom metric values. |
|
5 |
Click Finish. |
