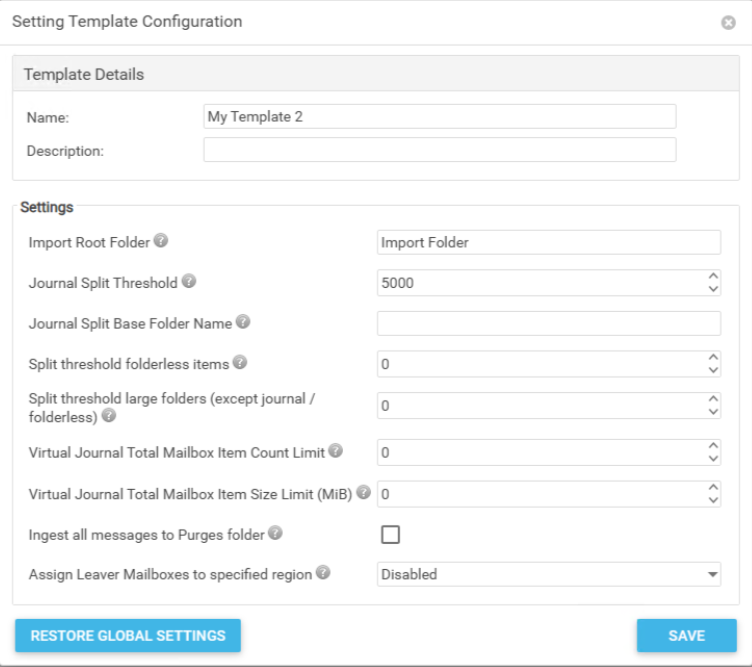
Create a setting template before creating a mapping by following these steps:
1.Select Configuration, then Templates, then Mapping Templates from the left menu bar.
2.Click Add.
3.Enter a name/description and desired limits using the Mapping Template Configuration window (shown below).
4.Save the template.
|
|
NOTE: The Assign Leaver Mailboxes to specified region setting is applied to normal leavers only. Journal transformation is not currently supported. |
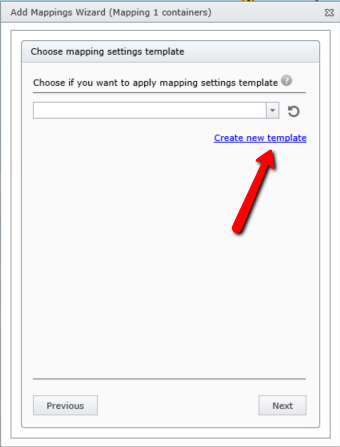
Or, if you dont create a mapping template in advance, you can create one using the Create new Template link available on the Add Mappings Wizard (shown below).
For new mappings, the Add Mappings Wizard prompts you to choose the mapping template you want to assign (see image above).
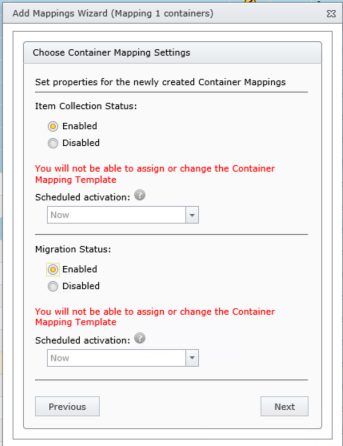
If you do not assign a template (or an empty one is assigned) during mapping and item collection/migration is enabled, youll see this warning message (in red) within the wizard:
If you opt to not choose a mapping template, the default settings configured in SysConfig Office 365 Module are applied.
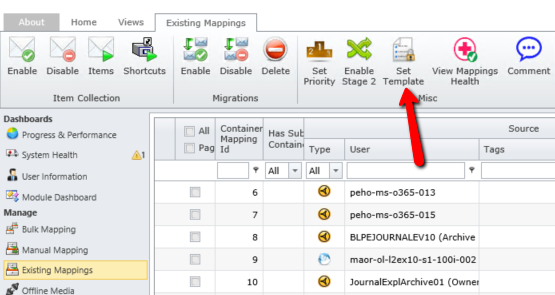
If you havent enabled item collection/migration for the mapping, you can change or assign a mapping template on Existing Mapping page using the Set Template button shown below.
The Offline Media configuration helps support the process whereby the source and target staging areas need to be different.
This is currently supported for:
·Enterprise Vault to Enterprise Vault, Office 365 or Exchange
·EAS to EV, Office 365 or Exchange
·Dell Archive Manager to EV, Office 365 or Exchange
Some examples of when this might occur are:
·Source and target environments are in different non-trusted forests
·Slow WAN links mean that the bulk of the data will be migrated via disk shipping
There are a number of steps to follow in order to successfully use the Offline Media feature in Archive Shuttle, and these are described below:
Create mapping set
On the Offline Media a new source and target mapping set can be created by clicking on Create in the Actions bar. This is the first step and in the mapping the source link is specified along with the target link, and name can be given to the set.
Add Export and Import Locations
With the Mapping Set selected multiple export and import paths can then be defined. Export paths can be configured to be one of three states:
|
Status |
Description |
|---|---|
|
Open |
Data can be written to this path |
|
Closed |
Data will not be written to this path |
|
Ready |
Data path is on standby |
If an open export path becomes full, then the next ready container will be used.
Configure the links to use offline media
|
|
NOTE: The import path is restricted to UNC paths only. Local disk paths are not supported. |
The source and target links need to have Offline Mode enabled. This is performed by selecting the links on the Links page in the Admin Interface and selected Enable in the Offline Mode of the Actions bar.
When this has been enabled the Staging Area Path for those links will no longer be used. Instead, the paths used are those defined on the Offline Media page.
Creating container mappings
The container mappings are configured in the same way as ordinary mappings.
Export data
Data will then begin to be collected and exported from the source containers and placed on the staging areas defined in the Offline Media set.
Ship the data
Periodically during the export, or at the end of the export, the exported data then needs to be shipped to the target import path. This can be simply a case of copying the data manually or by shipping the disk and performing the necessary actions to make it available on the given name in the target environment.
If the data is copied, ensure that the very top level (below the share name itself) is copied to the target.
Enable scanning of the import location
When the data is ready to be imported the Import Path has to be enabled for scanning on the Offline Media page.
When scanning is enabled, the location is scanned by the import module each hour for new data. If found, the data is then made available for the import module to process.
Once the scanning has occurred the data will be made available for the Import Module.
Import data
Once the target Import Path has been scanned and data recorded in the Item Database as being available for import, the import module will process the data in the container mapping as normal.
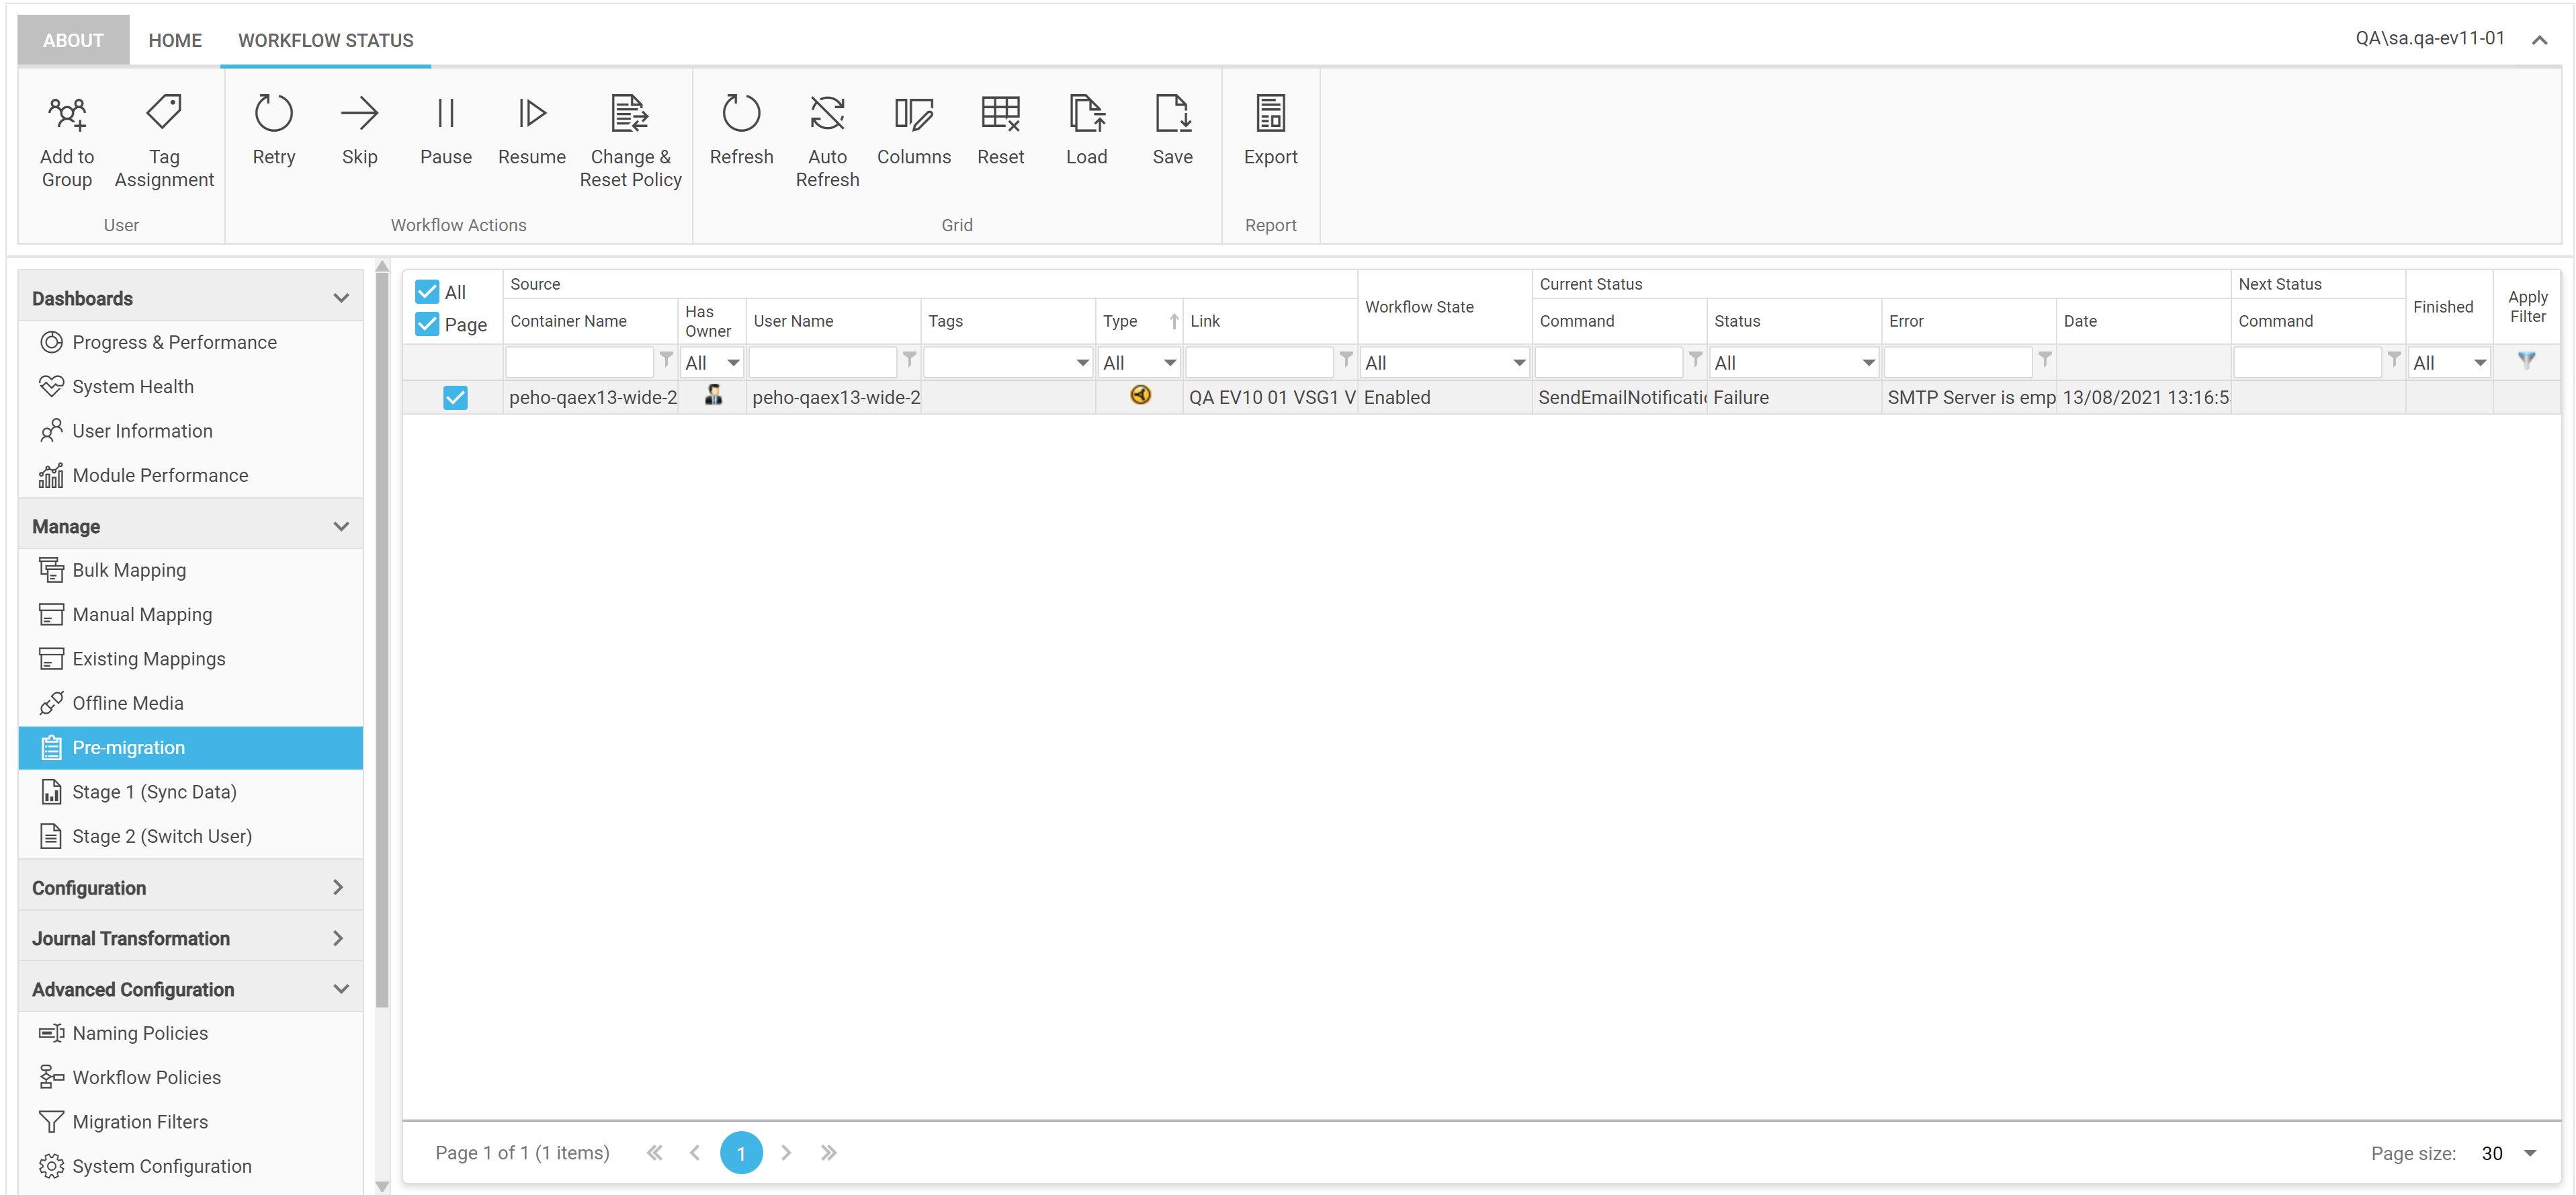
The pre-migration page gives an overview on pre-migration workflow policies that have been created. Pre-migration policies that allow you to automate a series of commands prior to beginning a migration on a per mapping basis.
|
|
NOTE: You cannot change or set a pre-migration workflow policy for a mapping already enabled in Stage 1. |
Pre-migration workflow commands
There are several pre-migration workflow commands to choose from. These are:
·CloseDACase - Collect cases from EV Discovery Accelerator
·DellArchiveManagerDisableArchive - Disable Dell Archive Manager archive for archiving
·DisableMailbox - Disable mailbox for Enterprise Vault archiving
·DisableOrphanedArchive - runs SQL commands to set an Enterprise Vault archive to 'closed' and the archiving state (MbxArchivingState) to 'disabled'
·EasDisableArchive - Disable EAS archive for archiving
·Office365RevertPendingShortcuts - Revert 'Pending' Enterprise Vault shortcuts back to the origin message class in the Office 365 mailbox
·PowerShellScriptExecutionRunScript - Execute custom PowerShell script
·RestoreSourceOneForeignShortcuts - Restores SourceOne foreign shortcuts
·RevertPendingShortcuts - Revert 'Pending' Enterprise Vault shortcuts back to the origin message class in the Exchange on-premises mailbox
·SendEmailNotification - Send an email notification
User interface
This is where your pre-migration workflow policies will be visible.
Actions you can take on the pre-migration page are:
·Add to Group: One or more containers can be added to an existing or new group. This group membership can then be used for filtering and batching of users for migration.
·Tag Assignment: You can assign tags to workflows to identify special subset of containers.
·Retry: Retries the selected processing/failed workflow status and reprocesses them.
·Skip: Skips the workflow.
·Pause: Pauses the workflow for the mapping.
·Resume: Resumes the workflow for the selected mapping (needs to be in a Paused state).
·Change & Reset Policy: You can change the workflow policy for the mapping and reset the workflow immediately.
·Refresh: Refresh the current screen.
·Auto refresh: Choose time parameters to refresh the current screen automatically.
·Columns: Choose which columns to display in the grid.
·Reset: Reset the grid to its default state.
·Load: Load grid layout.
·Save: Save grid layout. Click the Shared box to share the layout to other users.
·Export: Export the grid in a .pdf, .xls, .xlsx or .csv format.
The table grid shows the following information for each workflow policy:
·Container name
·Has Owner
·User Name
·Tags
·Link
·Workflow State
oManually Switched: state assigned manually in the user interface
oAuto Switched: state assigned automatically via CheckPremigrationAutoSwitch scheduled task
·Command(s)
·Command status
·Error message
Create a pre-migration workflow policy
Follow the instructions below to create a pre-migration workflow policy. Go to the Workflow Policies page to find out more about workflow policies.
1.Go to the Advanced Configuration tab, and select Workflow Policies.
2.Select Add, then click Pre-migration. Then select Create.
3.Enter a name and, optionally, a description for your workflow policy.
4.Select the container types to apply the workflow policy to.
5.Click on the commands on the right hand side in the order you would like the workflow to process.
a.In Edit options, you can set retry parameters if the command fails.
6.Once you have created your policy, click Save. This will appear in the list of workflow policies.
Apply a pre-migration workflow to a bulk mapping
1.Go to the Manage tab, then select Bulk Mapping.
2.Select the container to add the mapping to, then select Add Mappings.
3.Create the mapping as usual. Go to the Bulk mappings page for more information.
4.On the Workflow Policy section, under Pre-migration, select your pre-migration policy from the drop down list.
|
|
NOTES: ·By using a pre-migration policy, the option to enable a migration is disabled by default. ·If you would like to apply a pre-migration policy to your mapping, but have not created one yet, in Container Mapping Settings, ensure that Item Collection and Migration are both set to Disabled. ·You will need to manually enable stage 1 after pre-migration is complete. If you would like to automate this process, go to Advanced Configuration > System Configuration, then check the Autoenable Stage 1 box. ·Pre-migration workflows can also be enabled via PowerShell. Go to the PowerShell guide for more. |