The product licensing is based on the number of unique source mailbox types that are processed by the migration tasks. The licenses are only consumed once the migration task is started.
License consumption data is available as you work through your migration project.
The trial license is permanently assigned to the source account and may only be used for one migration project. You can use this account in any number of tasks (migration, re-matching, etc.) from one environment to another environment.
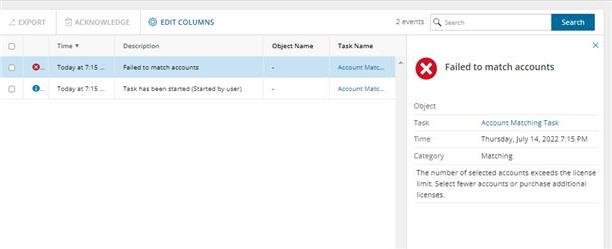
If the number of users in the task exceeds the number of available license, and error occurs. For example, a matching task will result in the following error.

There are no data limits for content migration of OneDrive, SharePoint, mailbox and public folders.
To view your subscription and license consumption
- Log in to Quest On Demand and choose an organization if you have set up multiple organizations.
- From the navigation pane, click Settings and then click Subscriptions.
When you sign up for the On Demand service for the first time, you create an organization and you are granted the On Demand Administrator role. You can add additional organizations and administrators.
For more information about managing your organization see Managing organizations and regions in the On Demand Global Settings User Guide.
Some common actions with Organizations are reproduced here for your reference:
Creating an organization
- Sign in to Quest On Demand using the credentials you used to sign up for On Demand.
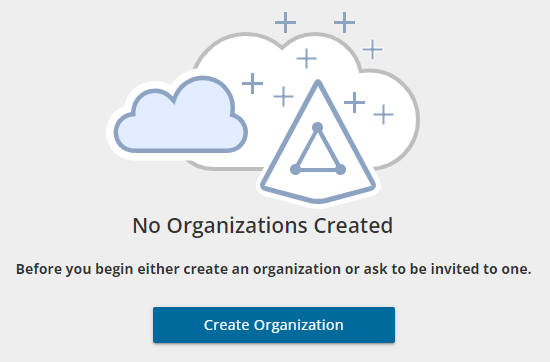
- If you have not yet created an organization, click Create Organization.

If you have created one or more organizations, the Choose an Organization page opens. Click Create New Organization.
If you have already selected an organization, click your email address at the top right-hand corner of the page and the select Create Organization.
- In the Create Organization page, specify the following information:
- Organization Name - name of your organization. For example, Bamboo Box Inc.
- Deployment Region - A Microsoft Azure region or geographic area where data centers are deployed. Not all On Demand modules are available in all regions.
- Click Create Organization.
Switching to another organization
If you have multiple organizations associated with your email address, you can select an organization from the Choose an Organization page when you sign in. If you have already selected an organization but want to work with another organization, you can switch to another organization.
- Click your email address at the top right-hand corner of the page.
- Select Switch Organization. The Choose an Organization page opens.
- Highlight and click the organization to which you want to switch.
Renaming an organization
You can rename the organization to which you are currently signed in. You must be an On Demand Administrator to rename an organization.
- Sign in and select the organization that you want to change.
- Click your email address at the top right-hand corner of the page.
- Click the organization name. The Edit Organization page opens.
- In the Organization Name field, enter the new name.
- Click Update Organization Name. The organization name is updated.
Deleting an organization
|

|
caution: Deleting an organization cannot be undone. |
- Sign in and select the organization that you want to change.
- Click your email address at the top right-hand corner of the page
- Click the organization name. The Edit Organization page opens.
- Click Delete Organization. A confirmation page opens.
- Select the following check boxes to confirm that you understand the impact of deleting an organization.
- All tenants will be removed
- All user information will be lost
- Click Delete Organization.
Quest On Demand uses the Role-based Access Control (RBAC) security policy that restricts information system access to authorized users. Subscribers can create specific roles based on job functions, with the permissions to perform needed operations on the assets of the organization. When users are assigned to On Demand roles, they inherit the authorizations or permissions defined for those roles. RBAC simplifies permission administration for subscribers because permissions are not assigned directly to every user (which can be a significant number of individuals for mid- to large-size organizations) but are instead acquired through role assignments.
The following are some key Quest On Demand and tenant roles that you will need to work with On Demand Migration for Hybrid Exchange.
On Demand Administrator
This role is assigned to users who have full access to the Quest On Demand application. They can manage organizations and tenants, initiate the migration of tenant assets, manage licenses, audit records and perform many other functions through the Quest On Demand application. Some of the key permissions associated with this role are as follows:
| Create, Rename and Delete projects |
Required permission to create, rename and delete migration projects from the Projects Dashboard |
On Demand Migration |
| View projects and manage selected services |
This permission must be select to activate the individual permissions to view and manage services. Services selected for this permission will be inherited by all child permissions |
On Demand Migration |
| View projects |
Required permission to be able to view objects tasks and events for the selected services. Only the tiles for the selected services will be shown in the project dashboards.
Always inherited from parent permission |
On Demand Migration |
| Edit project properties |
Permission to edit properties associated with project services. |
On Demand Migration |
| Run content discovery tasks |
Permission to enable the actions that allows users to run the task that will discover objects based on a list contained in a prepared CSV file. |
Mailboxes |
| Run provision and migration tasks |
Permission to enable the actions that allow user to provision and migrate selected objects to the target. |
Mailboxes |
| Manage collections |
Permission to enable actions for creating and manage the Collection feature. |
Mailboxes |
| Update and delete migration objects |
Permission to enable the action that allows the user to remove selected objects form the list of services object grid. |
Mailboxes |
| Acknowledge and clear task events |
Permission to enable the action that allows the user to acknowledge and clear events from the Events grid. |
Mailboxes |
| Manage Desktop Update Agent |
Permission to enable all management actions in Desktop Update Agent. |
Desktop Update Agent |
| View Migration Reports |
Required permission to be able to view migration reports |
Mailboxes |
On Demand predefined roles
Quest On Demand is shipped with many predefined roles. On Demand Administrator, Migration Administrator, Audit Administrator, License Management Administrator and Recovery Administrator are some examples.
On Demand custom roles
You can create more roles with specific permissions to allow other users to work with On Demand Migration. See the On Demand Global Settings Current User Guide for more information about setting up roles.
Tenant Administrator
In this document the term Tenant Administrator refers to the Microsoft Entra ID user account for the source or target tenant that is assigned the Global administrator security role and has full access to the tenant. Each tenant that you add to a project requires the credentials of the Tenant Administrator. The Tenant Administrator may require additional roles to grant the necessary consents to various On Demand service principals that are created in the tenant to access various assets in the tenant during the migration lifecycle. See Consents and Permissions for more details. For more information about user and service principals see the Microsoft article Application and service principal objects in Microsoft Entra ID.
Tenant Administrator accounts must have a mailbox with a valid Microsoft Exchange Online license.
To use On Demand Migration for Hybrid Exchange, the Tenant Administrator for each tenant in a project must grant Azure consents and permissions to the On Demand Migration for Hybrid Exchange service principals.
Multi-factor authentication
Multi-factor authentication (MFA) is supported for tenant administrators. For On Demand users, MFA support depends on how your organization has set up your access.

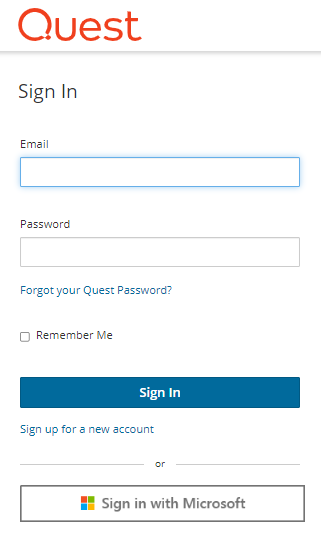
If you sign-in with your email and password, MFA has not been activated. If you click Sign in with Microsoft, MFA has been activated. If your organization requires multi-factor authentication and you receive an authorization error, your conditional access policy may not be configured correctly. You can do one of two things:
- Contact your IT administrator to deactivate MFA for during migrations.
- Contact "Azure Identity" support for help with configuring conditional access policies.
On Demand Migration for Hybrid Exchange (ODMHE) provides intuitive project management for migrating mail content from one environment to another. You can create a migration project that provides a full range of migration features, and track content migration in one comprehensive migration project dashboard. You can create multiple migration projects and use the My Projects list view for a summarized list of all your migration projects.
Migration steps


