In the Azure user interface, complete the following steps.
|
1 |
On the Basics tab, enter the details described in the following table. |
|
For procedure instructions, consult Microsoft Azure documentation | |
|
Enter a name for the virtual machine that you want to create. | |
|
Select No infrastructure redundancy required. | |
|
Select the QoreStor tier you want to use to create the virtual machine. | |
|
Select the Recommended by image publisher option. | |
|
Select Password, and then enter the following information:
|
|
2 |
Click Next. |
|
3 |
On the Disks tab, keep the following default options: |
|
• |
OS Disk Type — Premium SSD |
|
• |
Encryption Type — Encryption-at-rest with a platform-managed key |
|
|
NOTE: Quest does not recommend using read/write caching for Azure deployment. |
|
4 |
Click Next: Networking. |
|
|
NOTE: The QoreStor image supports accelerated networking. A pre-configured network security group is provided. |
|
6 |
Click Next: Management. |
|
|
NOTE: The default for the Boot diagnostics option is Disable, but this setting is not required. | ||
|
8 |
Click Next: Advanced. |
|
9 |
On the Advanced tab, select Enable user data. |
|
|
NOTE: A pre-existing cloud container is not required. If you already created the container, it should be empty. You can find the connection string for your Azure Storage account in the Azure UI under Access Keys. |
|
11 |
Click Next: Tags. |
|
13 |
Click Review + Create. |
|
Enter the name of the point of contact for the Azure account. | |
|
15 |
Click Create. |
|
16 |
After the deployment is complete, click Go to resource. |
|
|
NOTE: If you recently created the virtual machine, it is recommended that you wait 3 or 4 minutes before you begin this procedure. |
|
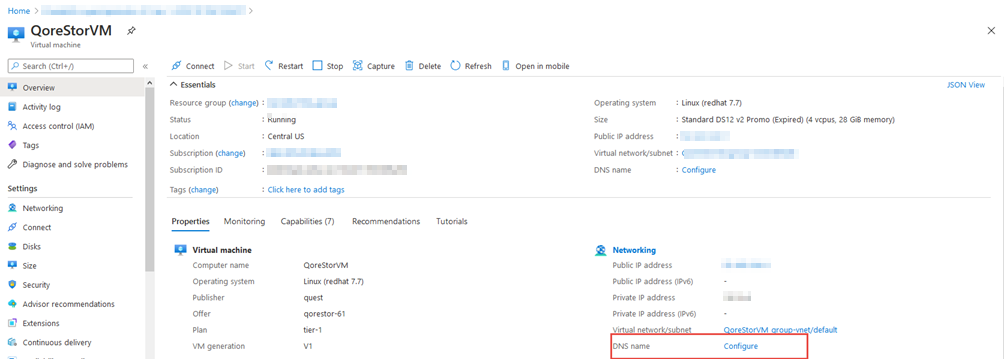
1 |
By default, the instance does not have the DNS name configured. To configure the DNS name, find the DNS name field in the Networking section, and then click Configure. |
|
2 |
By default, Azure provides the <region>.cloudapp.azure.com domain. Edit the options for the name based on your Public IP configuration, and then click Save. |
|
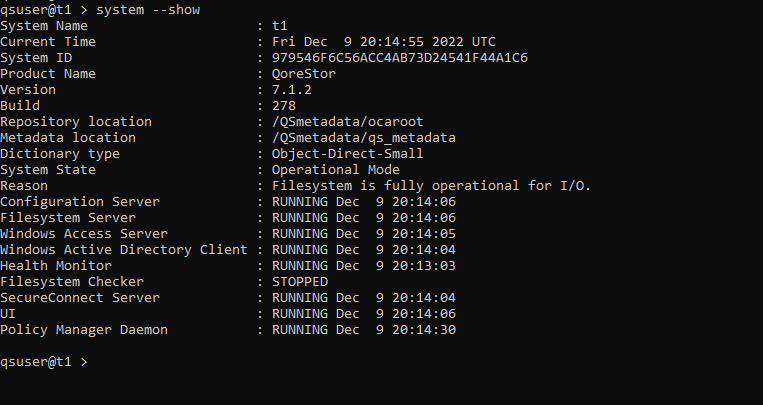
5 |
After you log in, verify the filesystem is operational for I/O using the system --show command. |
|
|
NOTE: The system prompts you for the connection string in secret. |
|
7 |
To access the QoreStor UI, use the public IP assigned in the section Creating the virtual machine. The URL for accessing QoreStor UI would be https://<public_ip_of_virutal_machine>:5233. |
|
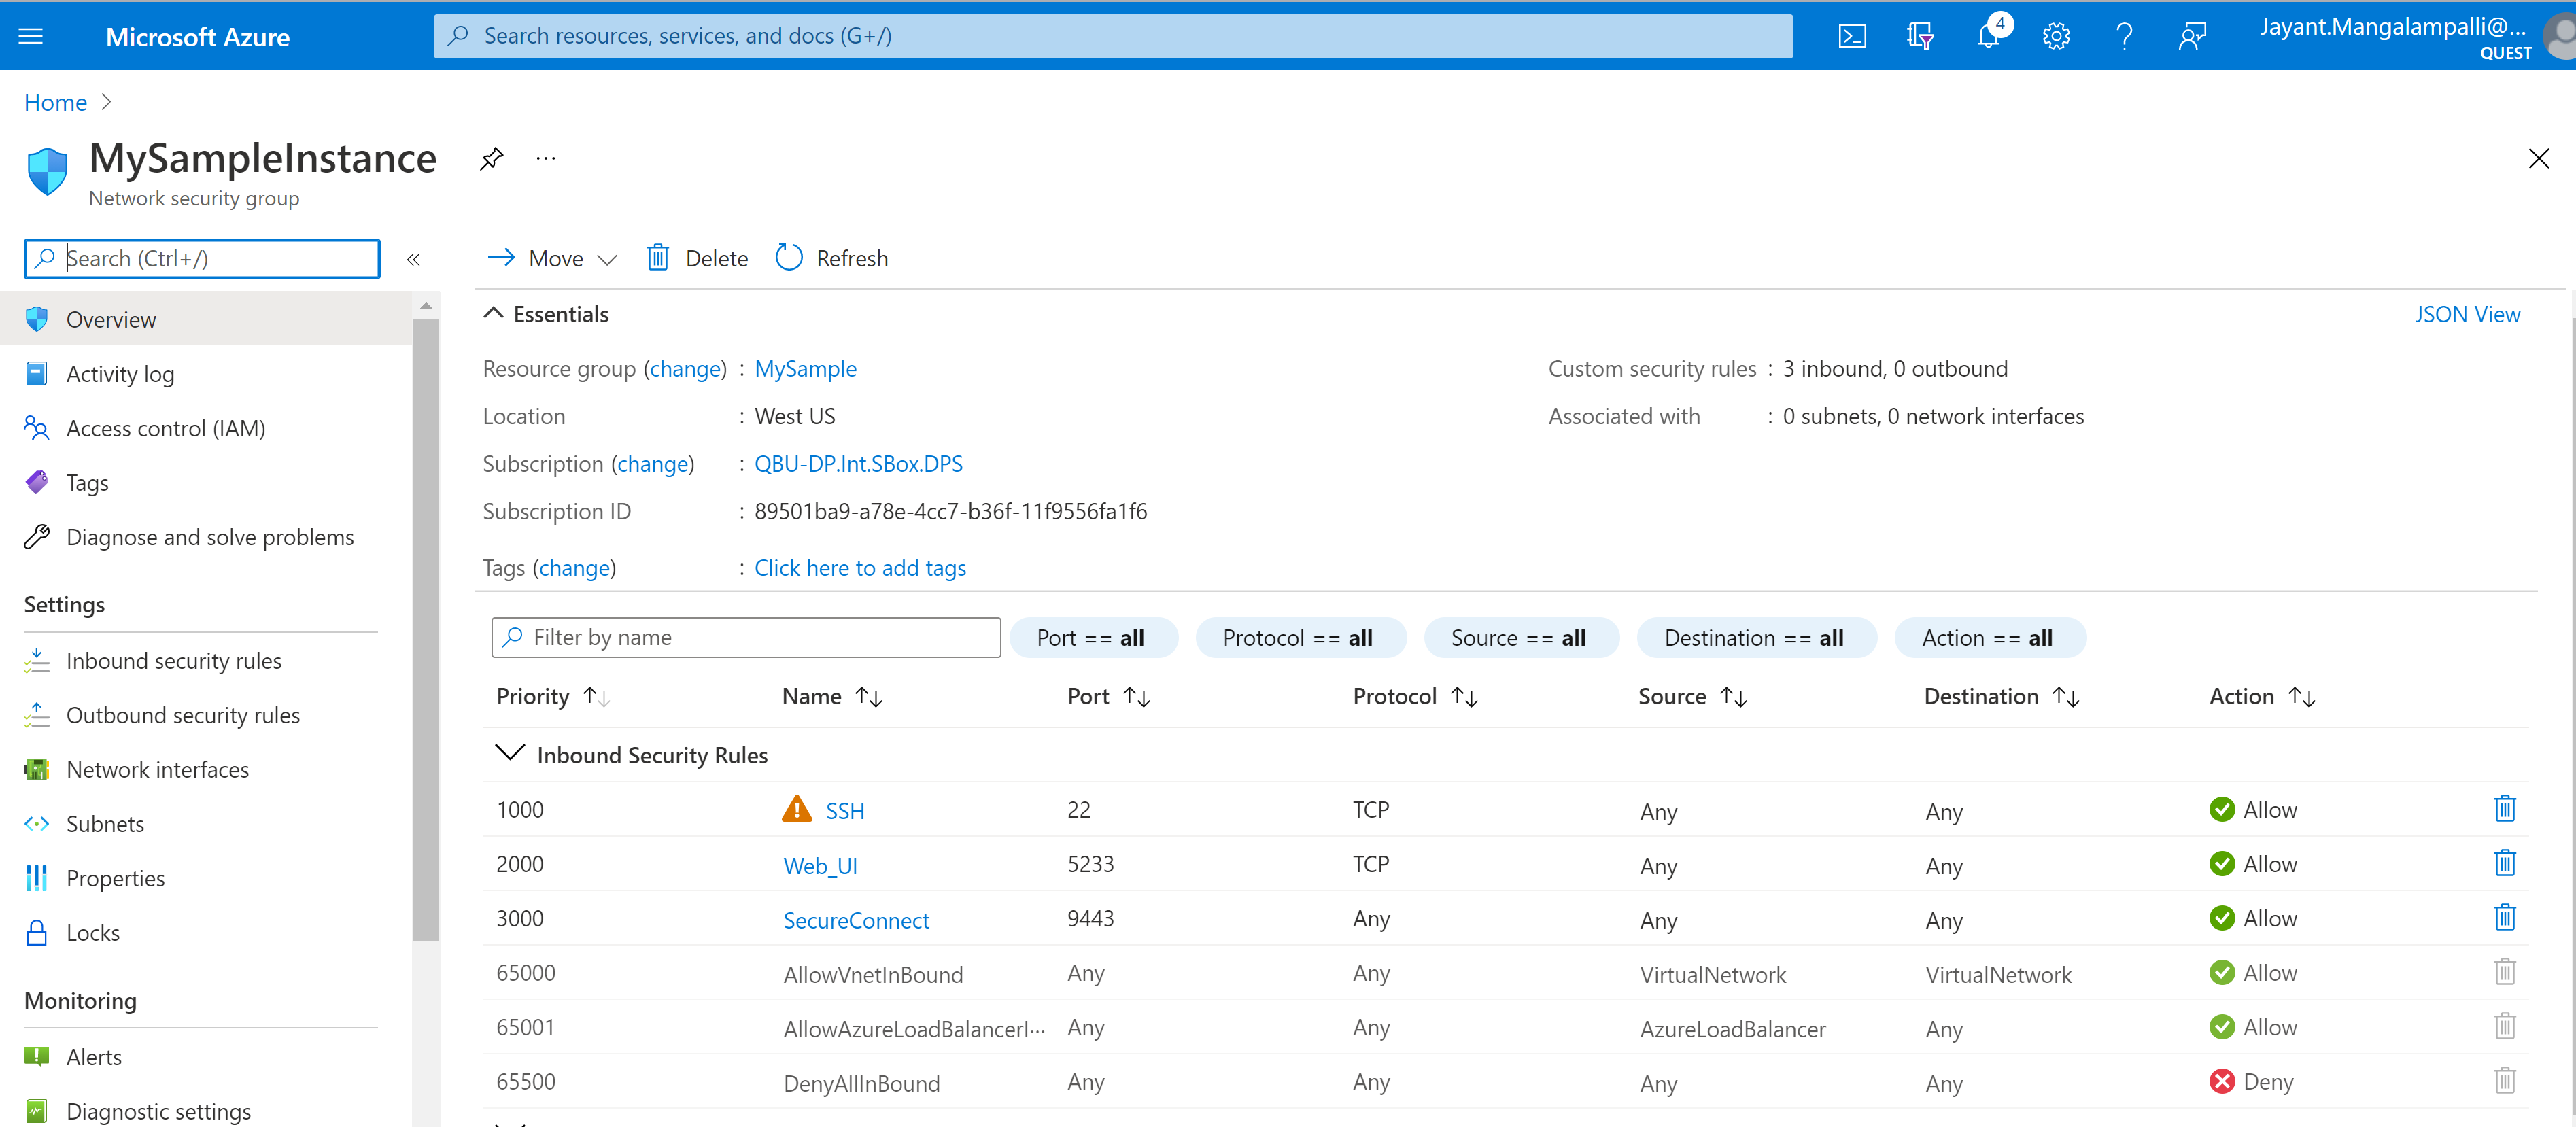
1 |
In Azure console, find “Services” and click Network security groups. |
|
|
NOTE: Any modification to this NSG will change the default settlings recommended by QoreStor. |
|
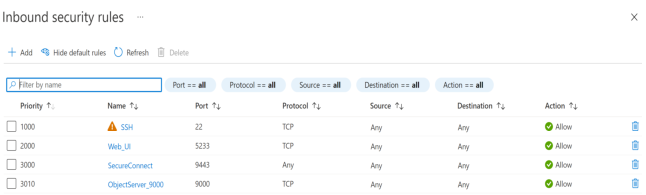
4 |
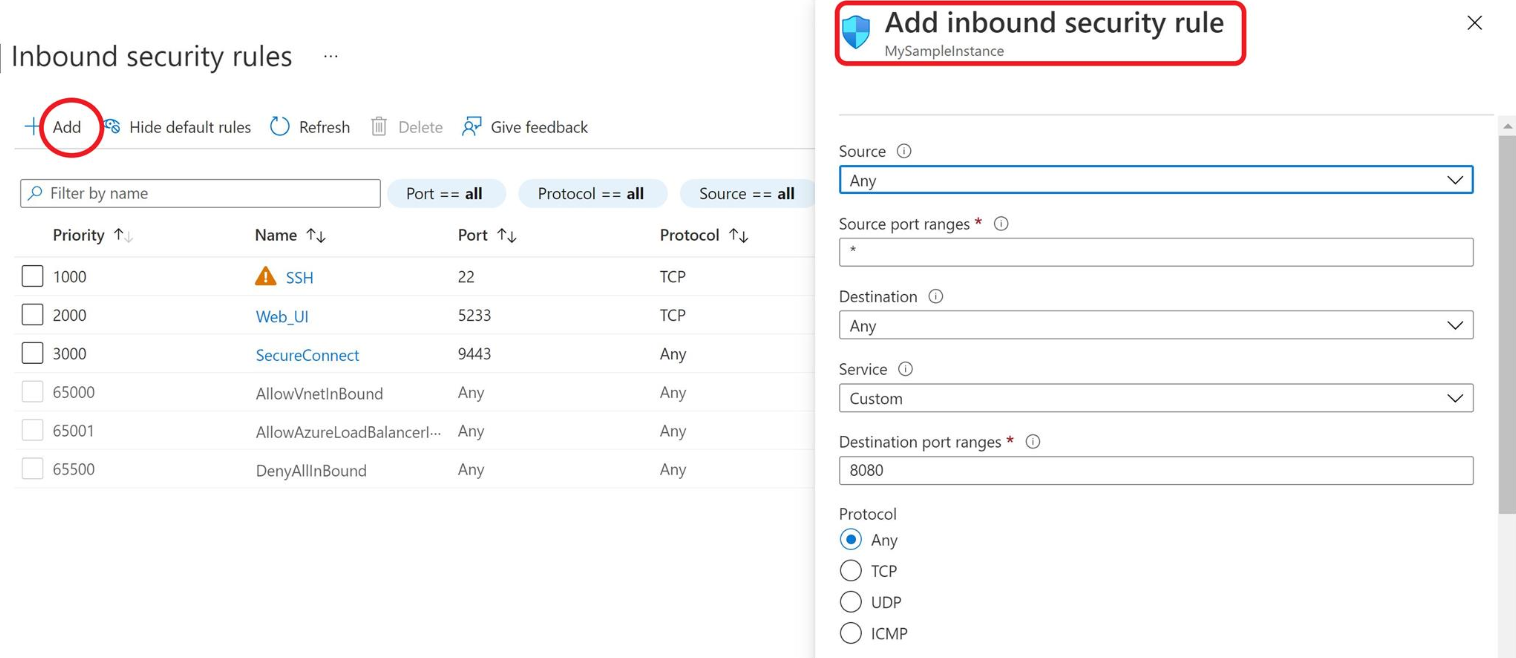
When opening an additional port, to add inbound rules for that specific port, click Inbound security rules on the left side, and then click the Add tab on the top side of the page. |
|
6 |
Click Add. |