Monitoring Web transactions
Start by installing Foglight Web Monitor on the Management Server, deploying the Web Monitor Agent package, and creating agent instances on one or more hosts. For installation instructions, see the Foglight Infrastructure Utilities Release Notes.
If you are planning to monitor transactions from any Web sites that require user authentication, you need to configure appropriate user credentials. For more information, see Configuring credentials for Web sites requiring user or proxy authentication.
At this point you have an option of providing to the agent the list of URLs that you want to monitor, or you can do that later using the Transaction Management dashboard. In addition to managing the collection of monitored Web sites, this dashboard allows you to drill down on individual Web site transaction details, edit the settings that control alarm generation, and provide authentication details, when needed. For more information, see Exploring your collection of monitored Web sites.
Next, navigate to the Performance Browser. This dashboard displays the state of your system performance, providing a visual representation of the status of the monitored transactions and locations. Using this dashboard on a daily basis you can obtain an in-depth understanding of the state of your monitored environment. Monitoring the same collection of Web sites from different agent locations allows you to rule out any issues that may be related to host connectivity rather than Web site response issues. For more information, see Investigating the performance of Web transactions and monitoring locations.
The Web Monitor Agent is equipped with a set of properties that affect its running state. You can make changes to them, as required. For more information about the Web Monitor Agent properties, see Configuring Web Monitor agent properties.
For additional information, see the following topics:
Configuring credentials for Web sites requiring user or proxy authentication
|
2 |
|
3 |
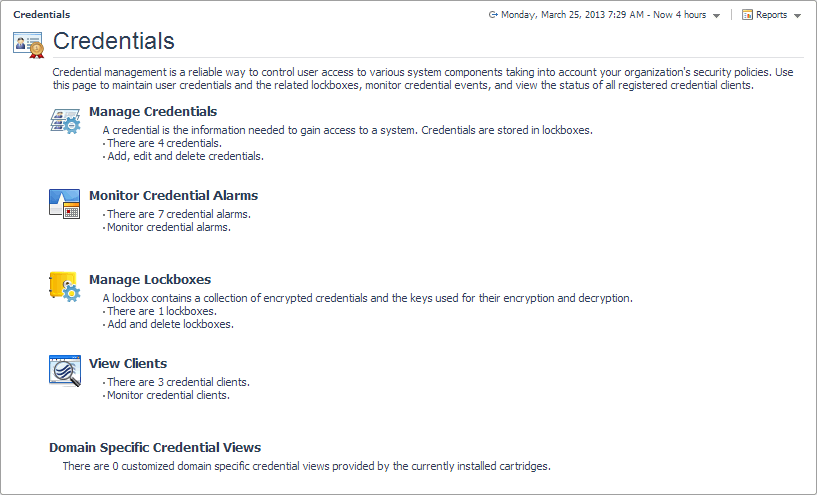
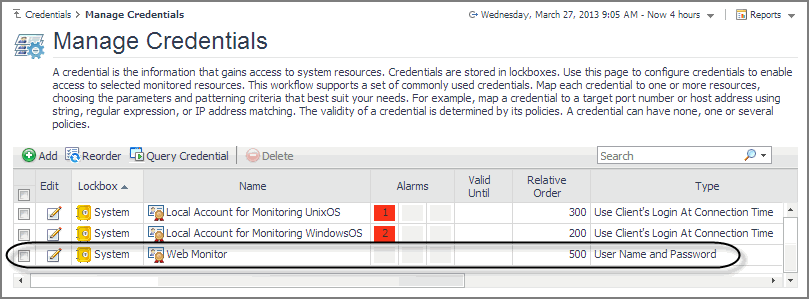
On the Credentials page, click Manage Credentials. |
For complete information about credentials, see the Administration and Configuration Help.
For more information, see the following topics:
Configuring credentials to access Web sites requiring user authentication
|
• |
To get started, create a new credential of the User Name and Password type containing a resource mapping with the Web Monitor Authentication usage. Next, provide the URL address that requires these credentials, and save changes to the credential.
|
2 |
|
3 |
On the Credentials page that appears in the display area, click Manage Credentials. |
|
5 |
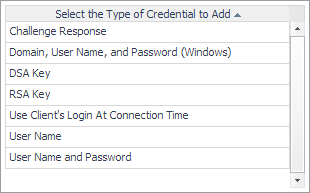
In the Select the Type of Credential to Add list, click the credential appropriate for your authentication type. |
|
• |
User Name and Password for Basic authentication. |
|
6 |
On the Credential Properties page, type the required properties, and click Next. |
|
7 |
On the Credential Name and Lockbox page, select the lockbox in which you want to store the Web Monitor credential, and optionally change the credential name. |
|
a |
|
b |
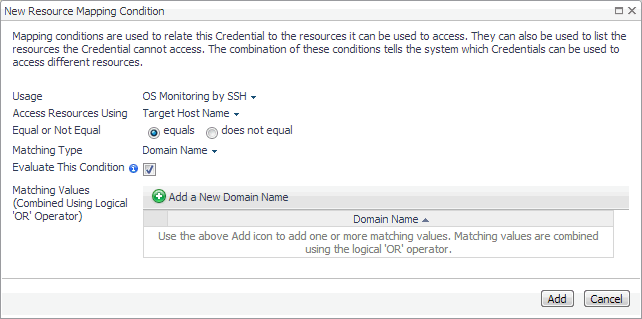
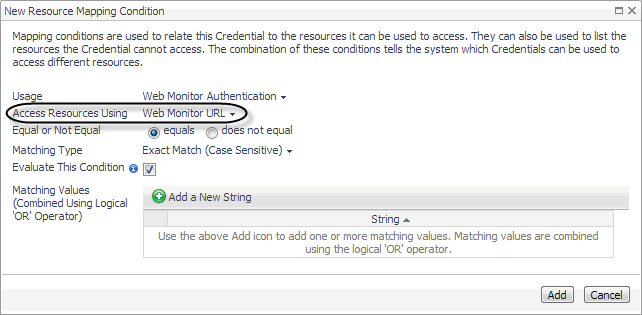
In the New Resource Mapping Condition dialog box, click Usage, and select Web Monitor Authentication from the popup that appears. |
|
c |
|
d |
|
e |
Click Add. |
|
f |
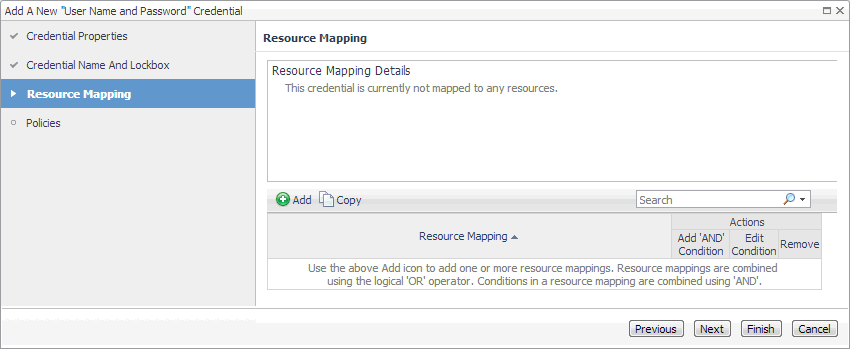
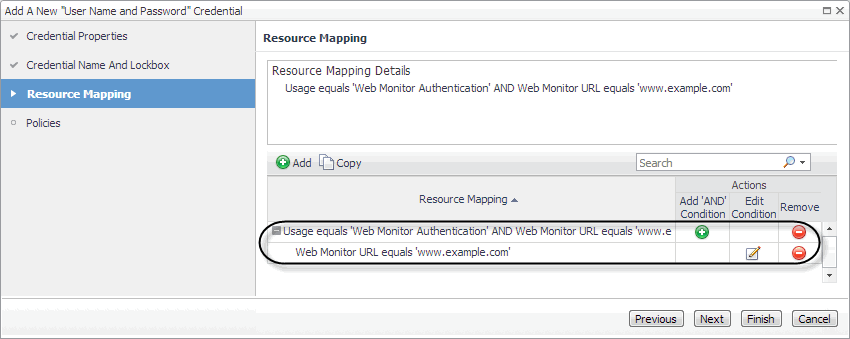
The New Resource Mapping Condition dialog box closes and the Resource Mapping page refreshes, showing the newly specified resource mapping. |
|
g |
Optional—At this point you can refine your credential settings to specify, for example, the time during which the credential is valid, the number of failed attempts after which the credential is locked, the number of times the credential can be used, or the period of time during which the credential data is cached on the server. For complete information, see the Administration and Configuration Help. |
|
h |
Click Finish. |
Configuring credentials for accessing Web sites through proxy servers
To get started, create a new credential of the User Name and Password type containing a resource mapping with the Web Monitor Proxy Authentication usage. Next, specify the host name or IP address of the proxy server and the port number, and save your changes.
|
2 |
|
3 |
On the Credentials page that appears in the display area, click Manage Credentials. |
|
5 |
In the Select the Type of Credential to Add list, click the credential appropriate for your authentication type. |
|
• |
User Name and Password for Basic authentication. |
|
6 |
On the Credential Properties page, type the required properties, and click Next. |
|
7 |
On the Credential Name and Lockbox page, select the lockbox in which you want to store the Web Monitor credential, and optionally change the credential name. |
|
a |
|
b |
In the New Resource Mapping Condition dialog box, click Usage, and select Web Monitor Proxy Authentication from the popup that appears. |
|
c |
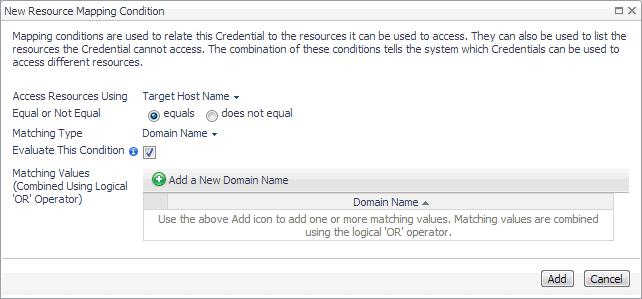
Specify the host name or IP address of the proxy server. Click Access Resources Using, and in the popup that appears, select one of the following options, as required: |
|
d |
|
• |
Domain Name: Select this option if you want to use a literal expression to specify the host name or IP address. |
|
• |
Regular Expression: Select this option if you want to use a regular expression to specify the host name or IP address. |
|
g |
Click Add. |
|
h |
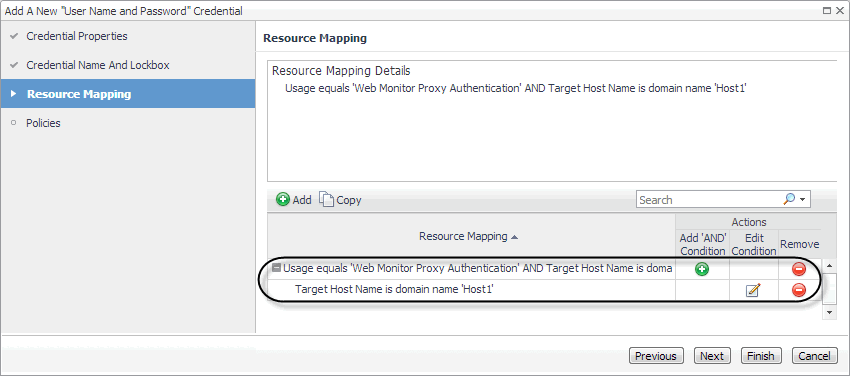
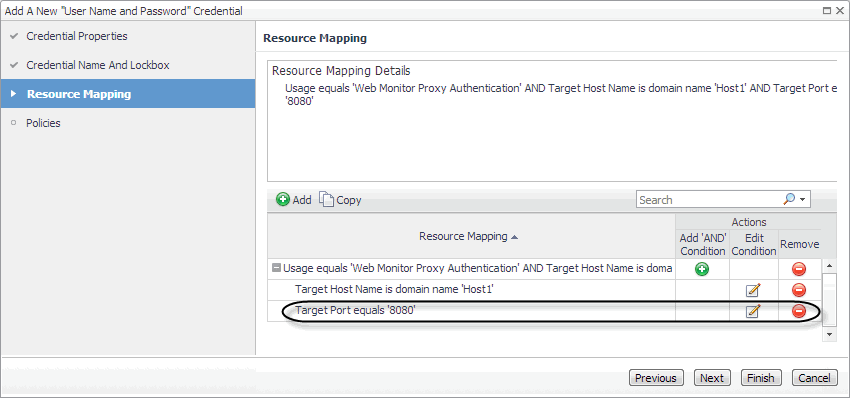
The New Resource Mapping Condition dialog box closes and the Resource Mapping page refreshes, showing the newly specified proxy server. |
|
b |
Specify the port number the proxy server uses to listen for incoming requests. Click Access Resources Using in the New Resource Mapping Condition dialog box, and in the popup that appears, select Target Port. |
|
c |
|
• |
Exact Match (Case Sensitive): Select this option if you want to use a literal expression to specify the port number. |
|
• |
Regular Expression: Select this option if you want to use a regular expression to specify the port number. |
|
f |
Click Add. |
|
g |
The New Resource Mapping Condition dialog box closes and the Resource Mapping page refreshes, showing the newly specified port number. |
|
h |
Optional—At this point you can refine your credential settings to specify, for example, the time during which the credential is valid, the number of failed attempts after which the credential is locked, the number of times the credential can be used, or the period of time during which the credential data is cached on the server. For complete information, see the Administration and Configuration Help. |
|
i |
Click Finish. |

