The following article provides an in-depth look into the process of scheduling and automating SQL Server instance index defragmentation policies.
Due to the constant load and heavy traffic that a SQL Server may be exposed to, its indexes are becoming more fragmented by the minute.
That being said, having an option to schedule an index defragmentation activity and stand aside while those fragmented database indexes got cured automatically, without further interference, is a very neat feature to have.
This endeavor can be easily accomplished by using the SQL index maintenance software.
Before proceeding with setting up scheduled index defragmentation operations, make sure to establish connection between SQL index application and local or remote SQL Server instance(s) which indexes needs to be repaired.
Upon initial launch, click the Add button that is located in the ribbon menu of the Home tab:

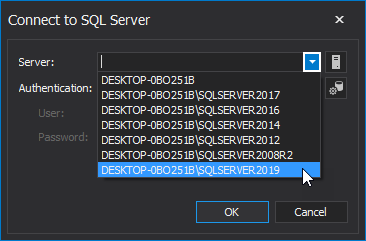
This will open the Connect to SQL Server window, where the options to choose the target SQL instance and its authentication type are presented. Choose an instance from the local machine, the one running the SQL index tool, by clicking the Server drop-down button:
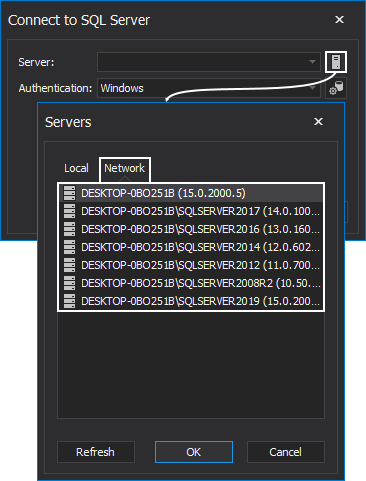
To connect a remote SQL instance, click the Browse for SQL Server button. In the Servers window, click the Network option where all SQL Server instances, visible through the network, will be listed:
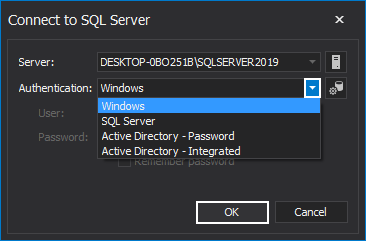
Once the target SQL instance is selected, choose the preferred authentication type by clicking the Authentication drop-down button. Once done, click the OK button to add the selected SQL instance and close the Connect to SQL Server window:
Quick tip: For users that are having the Azure Active Directory accounts, check the Using ApexSQL tools with Azure Active Directory authentication guide on how to use this type of SQL instance authentication within the ApexSQL tools. |
Once desired SQL Server instance is added, head over to the Policies tab to initiate the process of index defragmentation policy creation. Click the Create drop-down button and from its menu choose the Custom option:

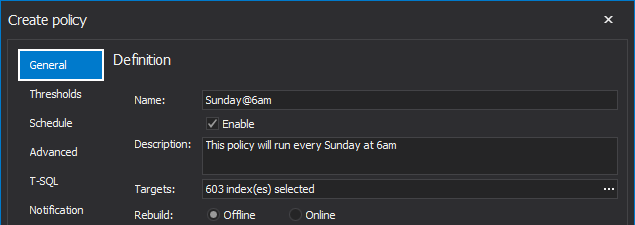
In the General tab of the Create policy window, provide policy name, optionally its description and the target indexes for defragmentation. Also, choose offline or online index rebuild, offline is selected by default:
Quick tip: To learn about differences between online and offline index rebuild operations, consult the Online vs offline SQL Server index rebuild in SQL Server instance article. |
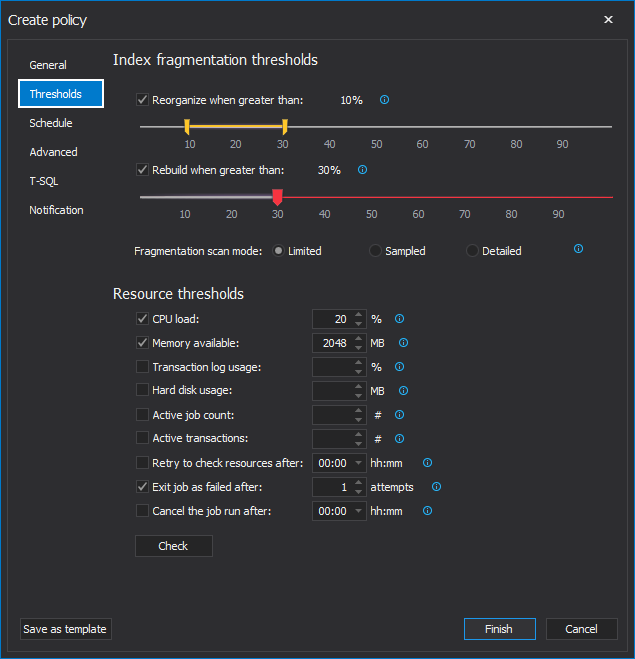
Under the Thresholds tab, move the corresponding sliders left or right to increase or decrease thresholds for both, index reorganize and the index rebuild operations. Choose the desired Fragmentation scan mode and set one or more of the Resource thresholds:
The next step, under the Schedule tab, will be to set the date and time of index defragmentation policy inception. Under the Frequency area, configure the desired task frequency by choosing a one of the four different types of schedule: once, daily, weekly, or monthly:
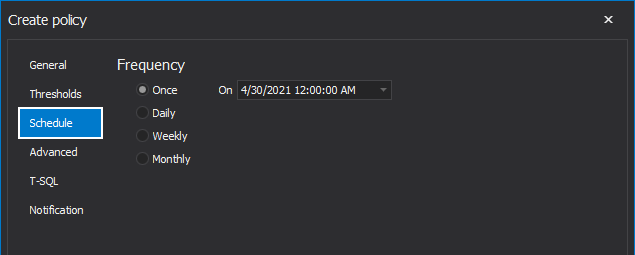
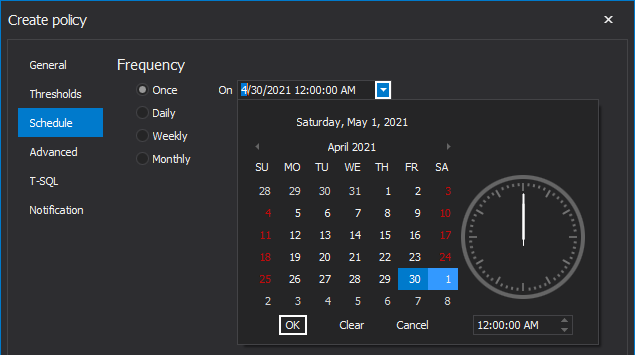
When Once schedule frequency is selected, in the On selection box set manually, by typing, date and time of SQL Server instance policy initialization or choose the same from the calendar form by clicking its drop-down button:
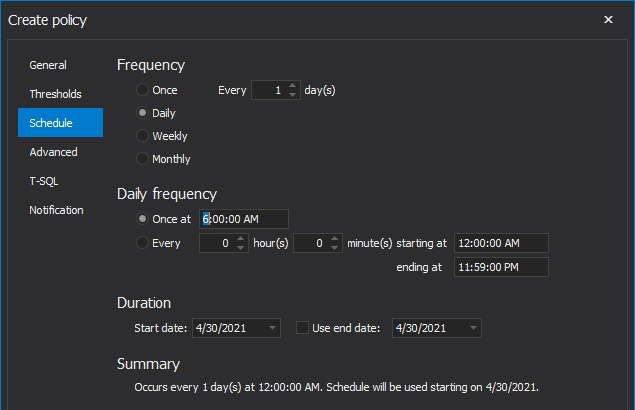
The Daily schedule frequency provides a daily automation. In the Daily frequency, set the policy to run once every day or every “x” number of hours and/or minutes with the exact starting and ending time if more convenient. In the Duration area set the start date, when policy will start its life cycle, and optionally an end date, the date when policy will stop performing.
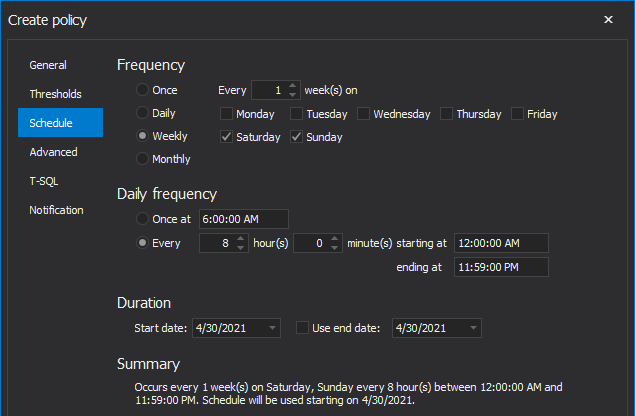
The Summary area is a display of the above-chosen parameters:
The Weekly SQL Server policy schedule frequency is a slightly different variation of the Daily frequency option with the addition of the days and option to choose policy to run every “x” number of weeks:
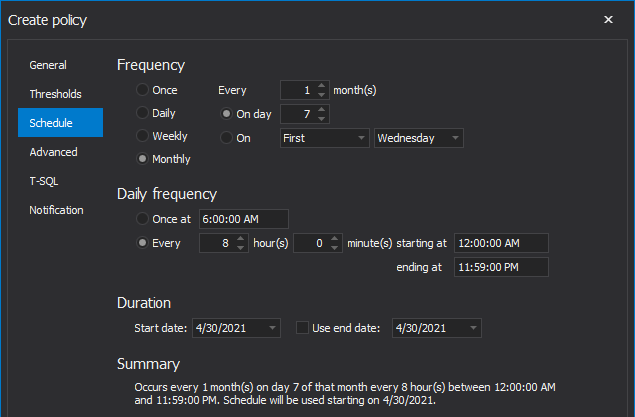
By choosing the Monthly schedule frequency there is an option to run policy every ”x” number of months, with the option to set the exact date or a specific day of the week:
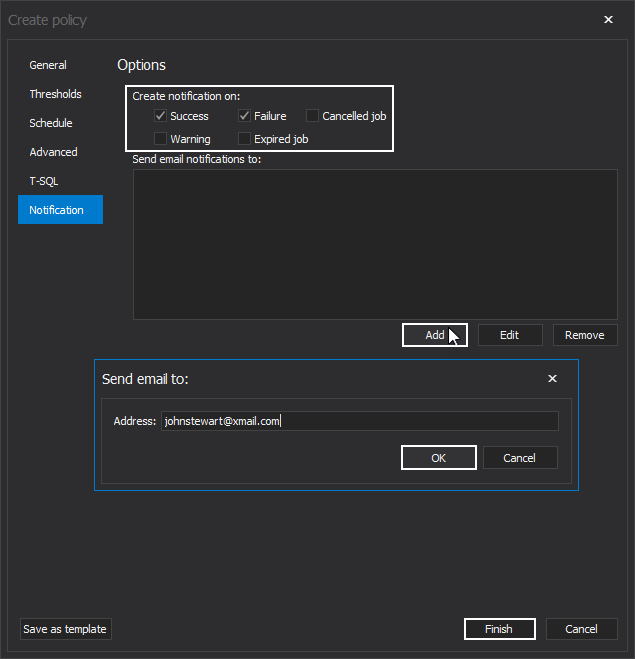
Once the desired policy schedule frequency is set, to get an e-mail notification on job outcome, head over to the Notification tab of the Create policy window. Here, check the appropriate check box to be notified on the desired SQL Server instance policy outcome. Add an e-mail account as a target of a notification by clicking the Add button and typing the recipient’s address in the Send email to dialog. Click OK to confirm the address input. Click Finish to create the policy and close the window:
Once the policy is created, it will be listed in the policy grid list and will run based on its set schedule and frequency occurrence. To run it manually, and outside of its schedule, check it from the grid the click the Run button from the Policy toolbar category: