About On Demand Recovery
Quest® On Demand Recovery cloud application lets you perform the following operations:
- Backup Microsoft Entra ID and Microsoft 365 users, groups, contacts, service principals, device information, Conditional Access policies, navigation properties, and Application Proxy settings.
- Support for Microsoft Entra B2C tenants.
- Restore Microsoft Entra ID and Microsoft 365 users, groups, service principals, devices, Conditional Access policies, and Application Proxy settings. The application can process two types of Microsoft 365 groups: Microsoft 365 groups and security groups. Group membership and ownership is restored for both types of groups.
- View differences between the selected backup and live Microsoft Entra ID or Microsoft 365 and revert unwanted changes in the Differences report.
- Configure integration with Quest Recovery Manager for Active Directory to restore on-premises Active Directory objects.
The objects can be selected in a backup and then restored to Microsoft Entra ID or Microsoft 365 without affecting other objects or attributes. Using the granular restore, objects that were accidentally deleted or modified can be recovered in a few minutes.
On Demand Recovery can be started from Quest On Demand single SaaS command point. For more information about Quest On Demand, see the Quest On Demand product documentation.
To access On Demand, you need to provide On Demand credentials or use your existing Quest Software account. For more details, see Signing up for Quest On Demand in the On Demand Global Settings User Guide.
The following sections describe how to configure and work with On Demand Recovery:
On Demand Recovery Module Overview
On Demand Recovery Module Overview
The main screen, called Dashboard, is opened after you connect to your Microsoft Entra tenant. The user interface of the administrative console consists of four main screens:
- Dashboard
This is the main screen in the module. It is a source of all general information regarding current project status. You can view and open tasks from the Dashboard, view and manage available connections, view object charts and monitor recent errors. The toolbar provides links to most general tasks such as managing tenants, unpacking backups and browsing objects to restore.
- Backups
This screen shows a list of backups that were created for the selected tenant.
- Unpacked Objects
This screen contains all objects that were extracted from the selected backup and operations you can perform on them.
- Differences
This screen allows you to compare the current state of objects in live Microsoft Entra ID or Microsoft 365 with their state in a backup and roll back unwanted changes. This helps when troubleshooting problems that may result from the deletion or modification of critical objects.
- Events
This screen provides you with detailed information about errors and warnings that occur during backup creation and restore operations.
- Tasks
This screen allows you to view task statuses and manage them.
Before You Start
To access your Microsoft Entra or Microsoft 365 tenant via On Demand Recovery, use an Administrative account that has the Global Administrator role. If you do not have an account with the Global Administrator permissions, you should create the account by using one of the procedures described below. Once consent has been granted in On Demand Recovery, the account can be downgraded if necessary.
To create an administrative user account with the Global Administrator role in Microsoft 365 Admin Center
- Sign in to Microsoft 365 with your administrative account using this link https://login.microsoftonline.com.
- Click the Admin tile.

- From the home screen, in the User management tile, click Add user.
- Specify all necessary user information. In Optional settings, click Roles, then Admin center access, and check Global Administrator.
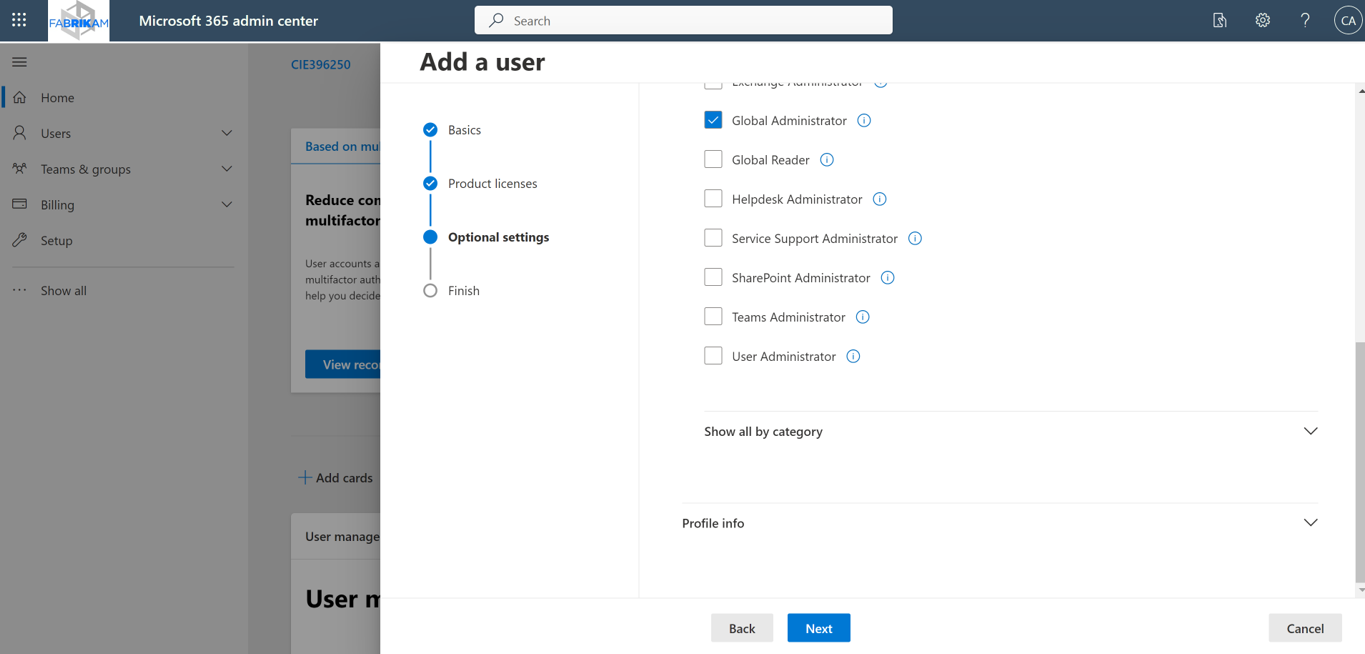
- Click Next.
- Once you have reviewed the information, click Finish adding.
- Now you can use this user account to access your Microsoft 365 tenant in On Demand Recovery.
To create an administrative user account with the Global Administrator role in Azure Management Portal
- Log into the Azure Management Portal (https://portal.azure.com/) with your individual account.
- Select your tenant from the list of available tenants. To view the list of tenants, click on your profile icon in the upper-right corner of the screen.
- Navigate to the Microsoft Entra ID section in the left pane.
- In the Users tab, click New user, then Create new user. Enter your basic details.
- On the Assignments tab, click Add role.
- In the Directory roles section, check Global Administrator and click Select.
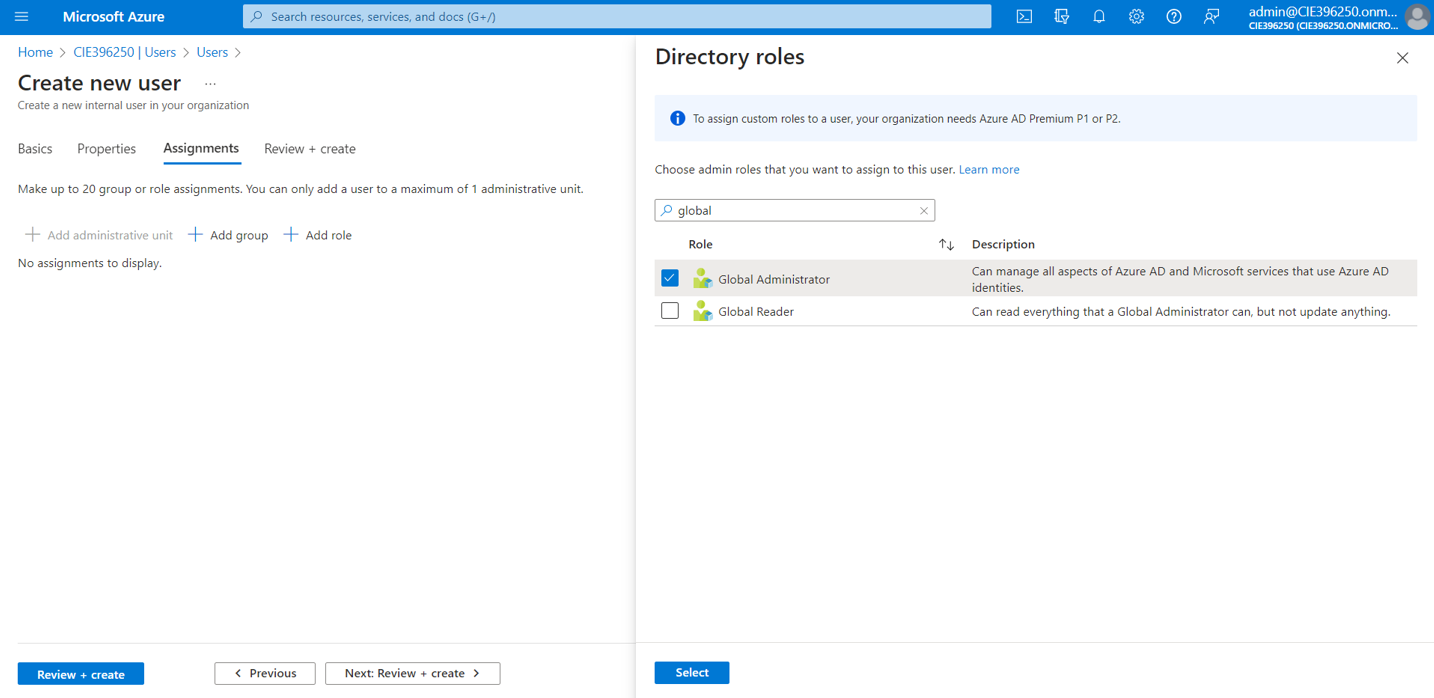
- Click Review + create.
- Click Create.
Sign up for Quest On Demand
Sign up for Quest On Demand
To get access to On Demand Recovery, you need to sign up for the Quest On Demand service and create an organization. For that, go to Quest On Demand and use one of the following options:
- Sign up using the existing Quest account
- Create a new Quest account and sign up for Quest On Demand
- Join an existing On Demand organization
For more details, refer to the Signing up for Quest On Demand section in On Demand Global Settings User Guide.
