Policy view
The Policy view includes the following elements:
|
• |
Total Potential Savings: Shows the total potential savings of this month under the policies. The potential savings are calculated by the total hours the VMs has been stopped by the policy multiply the unit price of each VM. |
|
• |
Total resources under policy: Shows the total number of resources managed under the policies. For a detailed resource list, refer to Resource view . |
|
• |
Alarms: Shows the number of alarms (multiple-severity rules only) generated by the policy. Clicking the numbers, an alarm list will be displayed. The list shows the severity of each alarm, when the alarm was generated, and the detailed alarm message. |
|
• |
Execute Now: Click Execute Now to execute the selected policy immediately. |
|
• |
Filters. Including by Schedule, by Resource Action (Start or Stop), and by Policy Status (Enable or Disable). |
|
• |
Add Policy. Click Add Policy and an Add Policy dialog box appears. It includes the following elements: |
|
• |
Policy Name: Specify a policy name. |
|
• |
Description: Add descriptions about the policy. |
|
• |
Enable: Select the checkbox to enable the policy. |
|
• |
Action: Select an action for the policy. You can either start a VM or stop a VM. |
|
• |
Schedule: Select a schedule. You can either assign the policy to a new schedule or assign the policy to an existing schedule. |
|
• |
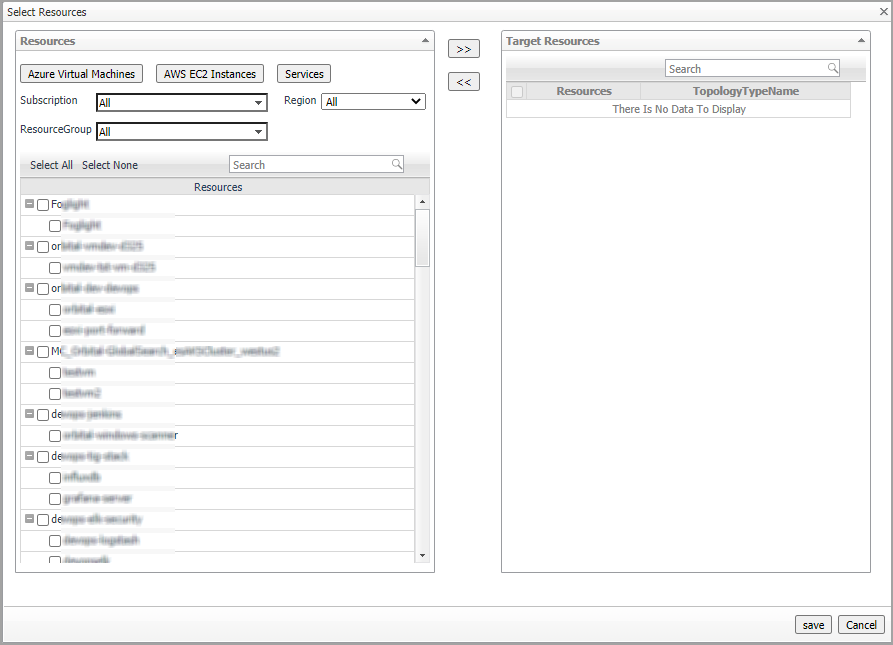
Apply Resources: Select the resources you would like to apply the policy. Click Apply Resources and a Select Resources dialog box appears. |
|
• |
Azure Virtual Machines: A tree table lists VMs by Resource Groups. |
|
• |
AWS EC2 Instances: A Tree table lists Instances by Auto scaling group. |
|
• |
|
• |
Email Notification: Enter e-mail addresses to notify the users when the policy is executed. |
|
• |
Process Service Dependencies: If applying resources by a service and the resources are collected by the same agent, the VMs under the child service will be executed first. |
|
• |
Edit: Click the icon and an Edit Policy dialog box appears. Update the policy and save the changes. |
|
• |
Policy Name: Lists the name of the policy. |
|
• |
|
• |
Schedule: Shows the schedule of the policy. |
|
• |
Next Enforcement: Shows the time when the policy will be executed again. |
|
• |
Last Status: Shows the last status after the policy was executed. Click the status and a Policy Executed History by Agent dialog box will appear. |
|
• |
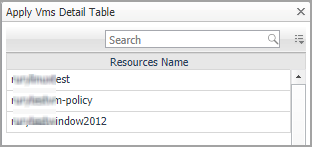
Apply Resources: Shows the selected resources by object type. Click the resources and an Apply VMs Detail Table will appear. |
|
• |
Potential Saving: Shows the total potential savings of this month under the policy. The potential savings are calculated by the total hours the VMs stopped by the policy multiply the unit price of each VM. |
Resource view
The Resource view shows all the VMs which are managed by the polices. Users can add resources to polices or remove resources from polices.
The Resource view includes the following elements:
|
• |
|
• |
Edit: Click the icon and an Edit VM dialog box will appear. |
|
• |
Resource Name: Shows the name of the resource. |
|
• |
Cloud Platform: Shows the cloud platform the resource belongs to. |
|
• |
Policies: Shows the policy that manages the resource. |
|
• |
Last Executed Time: Shows the last time when the policy was executed. Click the time and a Policy Executed History by VM dialog box will appear. |
|
• |
Executed Status: Shows the last status after the policy was executed. Click the status and a Policy Executed History by VM dialog box will appear. |
|
• |
Power State: Shows the power status of the resource. |
Schedule view
The Schedule view enables users to create, edit, delete, or copy a schedule.
|
• |
|
1 |
Occurrence: Select the start date and start time and click Next. |
|
2 |
Recurrence: Select the recurrence and click Next. |
|
a |
Specify the Recurrence Pattern according to the screen prompt. Click Next. For detailed information of the Recurrence Pattern, see Recurrence Pattern . |
|
b |
|
3 |
Summary: Specify a name for the schedule and descriptions for the schedule. Click Finish. |
|
• |
Click Copy and a Copy [Schedule name] dialog box appears. Edit the schedule name and description. Click OK. |
The schedule list refreshes and the newly-created schedule will be displayed in the list.
|
2 |
A Delete Schedules Confirmation dialog box appears. |
|
3 |
Click OK. |
|
1 |
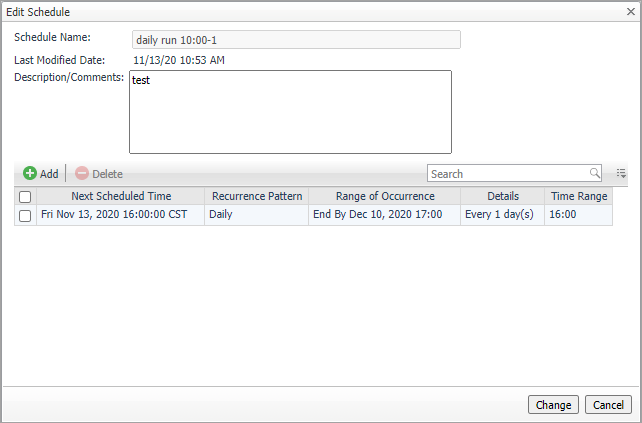
Click the schedule you want to edit and an Edit Schedule dialog box appears. |
|
2 |
Click the schedule and an Edit Schedule Item dialog box appears. |
|
3 |
Recurrence Pattern
|
Specify Every xx and select from Days, Hours, Minutes, or Seconds. | ||
|
Specify Every xx days. | ||
|
Specify Every xx week (s) and select the weekdays. | ||
|
Select by Day or Week. Specify Day xx of Every xx month(s). | ||
|
Select by Day of Month or Week of Month. |


