Purging Historical Activity and Storage Data from the ControlPoint Services (xcAdmin) Database
The Purge Historical Data action lets you purge SharePoint activity and storage datawhich is captured by the ControlPoint Discovery process and is used in analyzing historical datafrom the ControlPoint Services (xcAdmin) database.
Data is purged from one farm per operation, and you can specify how many months' worth of data you want to retain.
IMPORTANT: Once data is deleted from the xcAdmin database it cannot be recovered and will no longer be available for inclusion in future ControlPoint activity and storage analyses. Therefore, it is recommended that you back up the database before performing this operation.
To purge activity and storage data:
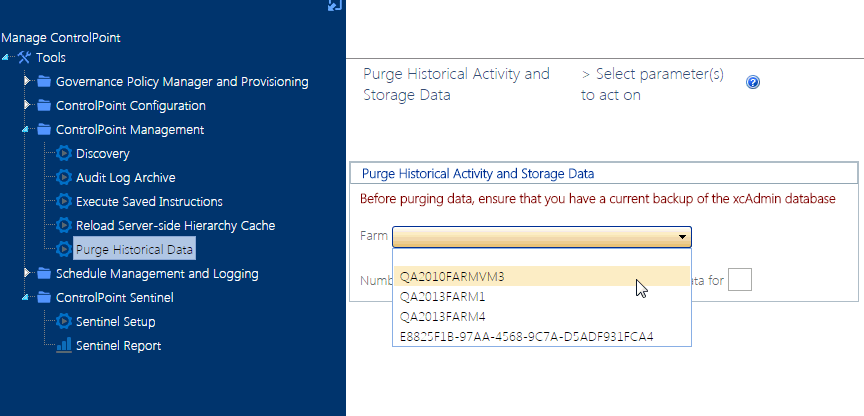
1From the Manage ControlPoint panel, choose ControlPoint Management > Purge Historical Data.
2Select the Farm from which you want to purge historical data.
3Enter the Number of Number of months to keep historical activity and storage data for.
CAUTION: If you enter 0, all historical activity and storage data will be deleted from the database.
Now you can:
·run the action immediately (by clicking [Run Now]),
OR
·schedule the action to run at a later time
OR
create an xml file with instructions for the action that can be run at a later time (by clicking [Save Instructions]). See "Saving, Modifying and Running XML Instructions for a ControlPoint Operation" in the ControlPoint User's Guide.
If you chose the Run Now, option, after the action has been processed:
·a confirmation message displays at the top of the page, and
·a ControlPoint Task Audit is generated for the action and displays in the Results section.
If you schedule the action, a link to the Task Audit is included in the scheduled action notification email.
See also "The ControlPoint Task Audit" in the ControlPoint User Guide.
Enabling Server Details to Display in the SharePoint Summary Report
If you want to be able to include details about servers in your SharePoint farm in the SharePoint Summary report, the ControlPoint Service account must have permissions to request status information from each server that you want to include.
NOTE: Because the reporting of server details is a time-consuming process, it is an optional parameter in the SharePoint Summary Report user interface.
To ensure that the ControlPoint Service account has permissions to request server information, verify that:
·the ControlPoint Service account is a member of the local Administrators group on the target server
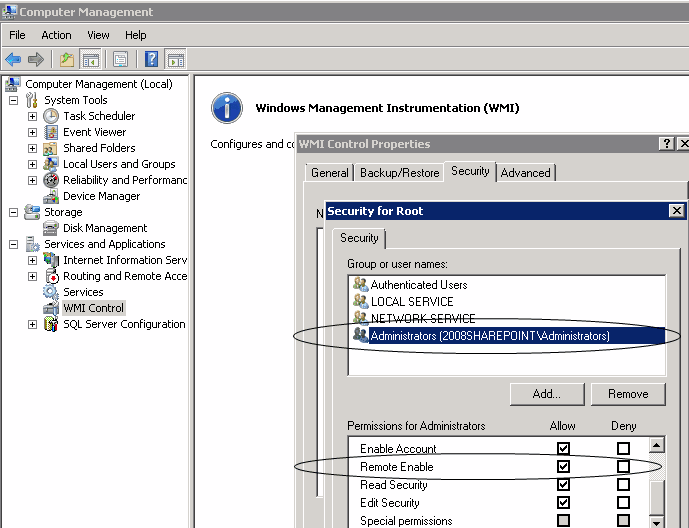
·the local Administrators group has "Remote Enable" Permissions for WMI on the target server
·remote WMI requests can be made on the target server.
Ensuring the Local Administrators Group has Remote Enable Permissions for WMI
NOTE: Remote Enable permissions is granted to the Local Administrators group by default.
1From the server whose statistics you want to display, choose All Program > Administrative Tools > Computer Management.
2Expand the Services and Applications node.
3Select WMI Control, right-click, and choose Properties.
4Click the Security tab.
5Click [Security].
6Make sure Remote Enable is allowed for the local Administrators group.
7If the target server is running Windows Firewall (a.k.a Internet Connection Firewall), run the following from the command prompt to allow remote WMI requests:
netsh firewall set service RemoteAdmin enable
Modifying ControlPoint Configuration Settings
ControlPoint Application Administrators can modify a number of ControlPoint configuration settings, including
·elements of the user interface
·environmental settings that can be "fine-tuned" to improve performance, and
·default security settings.
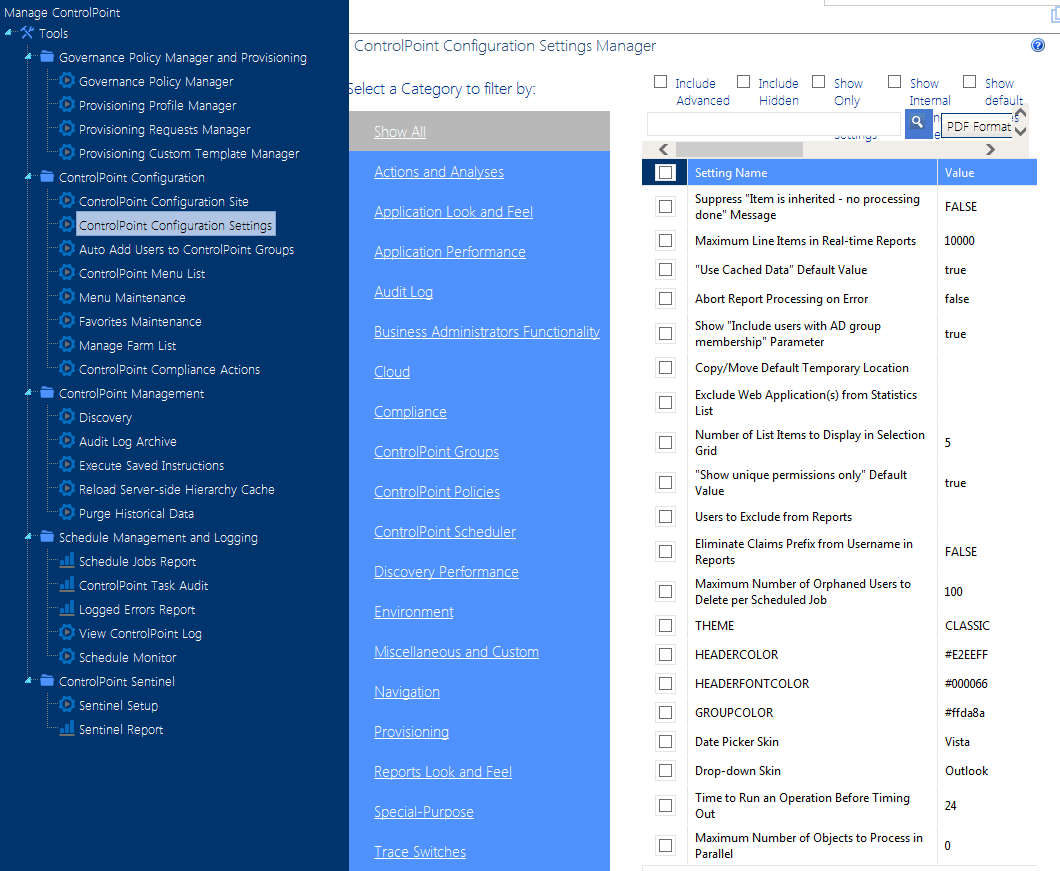
ControlPoint Application settings are modified via the ControlPoint Configuration Settings Manager page.
NOTE: If you first installed ControlPoint prior to version 6.0 and prefer to modify settings using the ControlPoint Configuration Site's ControlPoint Settings list, you may continue to do so.
ControlPoint Configuration Settings are farm-specific. If you are using ControlPoint in a multi-farm installation, these settings are managed separately for each farm.
To access the ControlPoint Settings list:
From the Manage ControlPoint panel, chose ControlPoint Configuration > ControlPoint Configuration Settings.
Permissions for this list are inherited from the ControlPoint Configuration site. Therefore, members of ControlPoint Application Administrators group have full control access and can modify settings.
Members of the Administrators group have read-access to the list, and therefore can view, but not modify, settings.
NOTE: ControlPoint Settings can also be edited via the ControlPoint Configuration Site - ControlPoint Settings list. ControlPoint Application Administrators may prefer this option if they have been using ControlPoint prior to version 6.0 and are accustomed to editing settings this way.
Setting Classifications:
ControlPoint Settings fall into the following classifications:
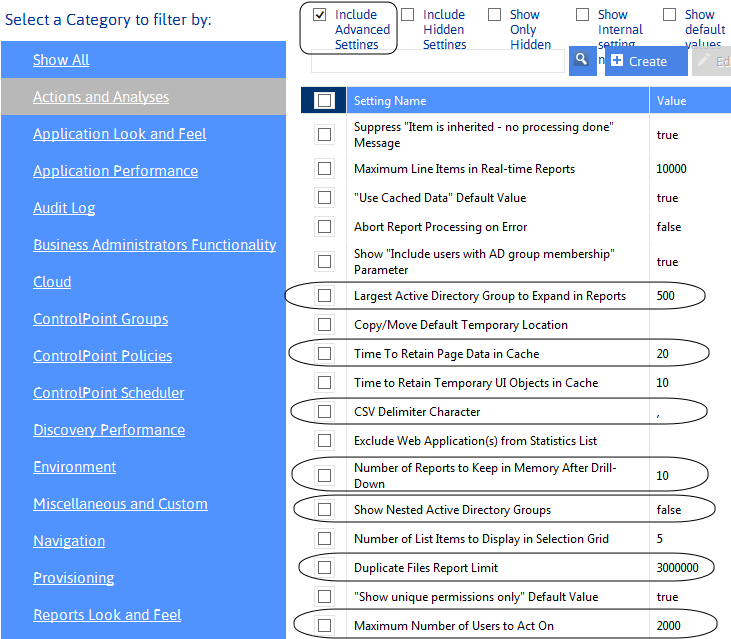
Basic - Generally the most commonly-configured settings,. Only Basic settings display in the ControlPoint Configuration Settings Manager page by default.
Advanced - Less commonly-used settings that you may want to modify to further customize ControlPoint to meet particular needs of your SharePoint environment or users. [
Created - Special-purpose settings that you can add to the ControlPoint Settings list if needed. Generally, these settings should only be configured under special circumstances and with guidance from Quest Support.
Filtering the ControlPoint Configuration Settings List
You can filter the ControlPoint Settings list using one or more of the following options:
·By choosing a Category
·By choosing to Include Advanced Settings
·If special-purpose settings have been created:
§Include Created Settings, or
§Show Only Created Settings
TIP: You can view created settings Include Created Settings and selecting the Special Purpose category.
Showing Additional Columns and Sorting by Column
By default, the ControlPoint Configuration Settings list displays the Setting Name and current Value, but you can also choose to Show Internal setting name and/or Show default values. You can sort on any column.
For example, if you are a long-time ControlPoint user and are already familiar with internal setting names, you can sort by this column.
To search for a ControlPoint Setting by Setting Name:
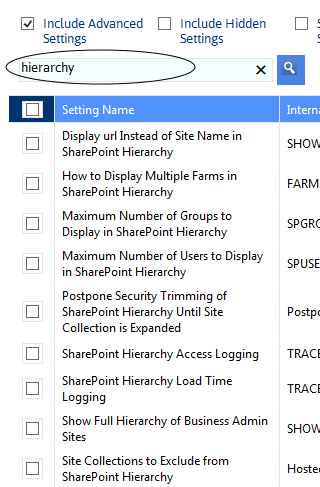
Enter a full or partial text string in the search box, then click the magnifying glass icon 
To edit a ControlPoint Setting:
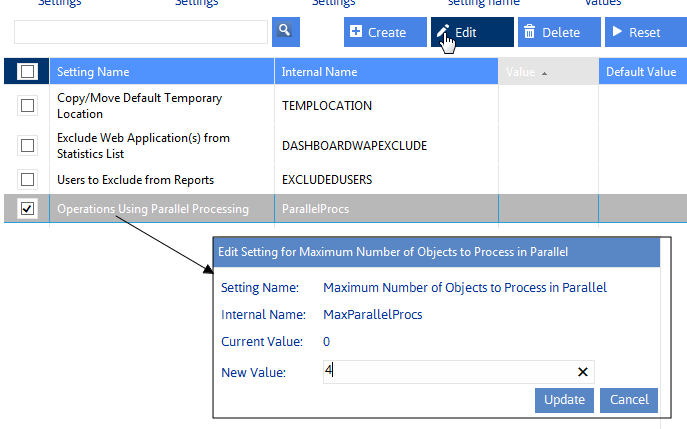
1Check the box to the left of the setting that you want to edit.
NOTE: You can edit only one setting at a time. If you select more than one, the [Edit] button becomes disabled.
2Click [Edit].
3Update the Value field as appropriate. (Descriptions of configurable settings, along with guidelines for changing parameter values, follow.)
4Click [Update].
Changes to ControlPoint Settings take effect immediately.
Deleting ControlPoint Settings
Only Created settings can be deleted.
To restore ControlPoint Setting default values:
1Check the box to the left of each setting for which you want to restore the default value.
NOTE: For this operation, you may select multiple settings.
2Click [Reset].
Changing Default Settings for Actions and Analyses
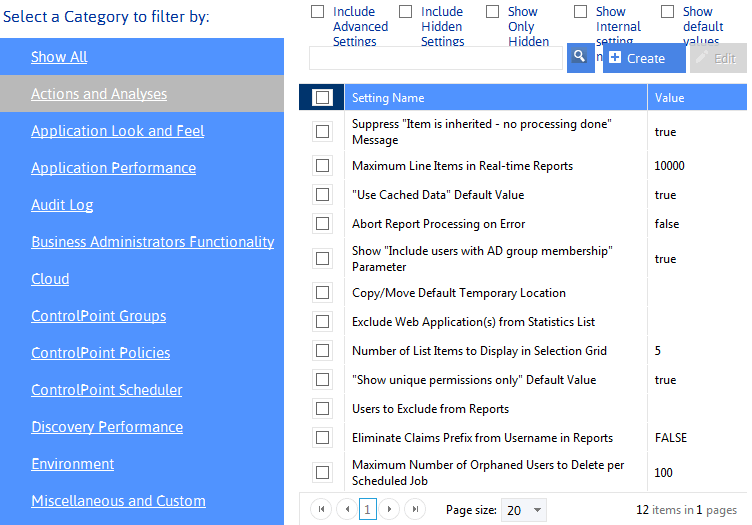
These configuration settings display in the ControlPoint Settings list under the category Actions and Analyses.

