Tchater maintenant avec le support
Tchattez avec un ingénieur du support

Collaboration Services 3.9 - User Guide

Getting started with Collaboration Services Organizing objects for synchronization Resolving synchronization conflicts Managing the synchronization process Transport management Fine-tuning and maintenance Backup, restore, and troubleshooting Appendix A: Customizing the format of synchronized data Appendix B: Collaboration Services events

Enabling or disabling a collection

Enabling a collection means all objects included in it should be immediately synchronized by Collaboration Services. By default, a collection is created as enabled and synchronization starts right after the Publication Wizard is completed.

However, you may need to create a collection without enabling it (that is, synchronization does not start upon publication), and other branches subscribe to it as required in advance. Then on the day when the synchronization needs to be started, all you need to do is enable the collection.

Ensure that the Collection is disabled check box on the Set Permissions step of the Publication Wizard is cleared.
Select the Collection is disabled check box on the Set Permissions step of the Publication Wizard.
Select the Disabled check box on its shortcut menu.

Editing a collection

After a collection is published, you may need to add objects to it, remove objects from it, or change some of its properties.

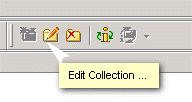
Run the Edit Collection Wizard by selecting the Edit Collection icon from collection's shortcut menu.
After you edit a collection, the updates are automatically sent to the HQ forest and distributed to all branch subscribers; then the modified collection is automatically re-republished.

Subscribing to a collection

To receive collection data, synchronization partners need to subscribe to collections. As soon as a forest subscribes to a collection, the Collaboration Services instance creates the following items for each member of the collection in this forest:

Use the Subscribe Wizard to subscribe to the collections published by the HQ and branch forests.

1
Select the Subscription node in the management tree, and select Action | Subscribe.
b
Select the Apply mappers to synchronized objects check box.
c
Click Add and select the mappers you want from the list of available mappers. For more information about mappers, see Appendix A: Customizing the format of synchronized data .

Modifying subscription properties

4
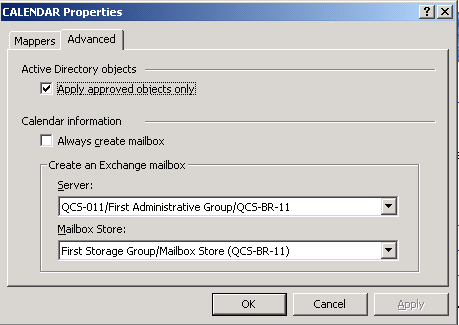
If you subscribe to a collection for calendar information synchronization, you should also select the Always create mailbox check box and specify the Exchange server and mailbox store that mailbox will be created on.
Documents connexes

The document was helpful.

Sélectionner une évaluation

I easily found the information I needed.

Sélectionner une évaluation