
Evolve Suite Addendum
Map Imported Associations to Existing Source and Target Objects
Map Imported Associations to Existing Source and Target Objects
When importing data into an existing model using the XML file import format, the user can now [2020.1.1] choose to map associations by the source and target object for an existing user-defined association, as opposed to by the Unique Identifier.
NB: Traditional associations such as Reason for involvement, Data Model Usage, and Entity Synonym are not affected.
This means that when a user imports an association from another model, if an association of the same type exists between the same source and target objects (having the same source and target, Unique Identifiers) in the target model, the importer will consider it to be the same association, even if the Association's Unique Identifier is different. Without this option, duplicates are created if for example, the same association between the same two objects is created separately in two models, and then the data is merged. This is because they were created separately, so will have different Unique Identifiers and when one is imported into the other, they will be treated as separate Associations and thus be duplicated.
This option, when it has identified an Association that matches by Source, Target and Association Type, irrespective of Association Identifier, will then proceed to update the Target Association, rather than duplicate it.
For the user to be able to do this, there is a new check box in the import options called "Map associations to existing source and target object" (it only applies to the import wizard for XML), as shown on the image below.

Note: Choosing this option does not change the original XML in any way.
For example, a user creates a new model, say "Master." Within that model, the user creates their own Association Type between Application and Process. They create one instance of Process and one instance of the Application and then Associate the two items using the this new Association Type.
The model is exported to another model, say "Working", and some work is done on it. In this "Working" model, they remove the user-defined Association between the original Process and Application. Do some further work, including making changes to the actual Process and Application, and then decide they need the Association between the original Process and Application back, so recreate it. As it has been recreated, it will now have a different unique identifier. This working model now needs importing into the "Master" model. If the "Working" model is imported using any standard options, the user will now have two Associations between the original Process and Application.
Ticking the check box will stop this and map any changes made to the Association in the "Working" model to the Association in the "Master" model.
Communicator for Word Filtering
Communicator for Word Filtering
Communicator for Word is an application that allows users to export the data from the Evolve Suite to a Word document. As part of this process, the data is initially exported in XML format using the application CMXMLApp
Depending on the model's size, this export can potentially produce a huge XML file, which may take a long time to load or may even exceed memory limits.
To reduce the XML files' size, the user can select the specific objects and the properties to export. In addition, the ability to filter objects based on a property value is also available. These filter options are saved with the filter configuration [2020.1.1 onwards].
How to apply filter
Start the application CMXMLApp from the erwin bin folder, usually "C:\Program Files (x86)\erwin\CM10\bin".
Run through the wizard until you get to the "Filter by Properties" page.

Click on "Show Filter" in the top right, then the filter options will appear on the right side as shown in the picture below.
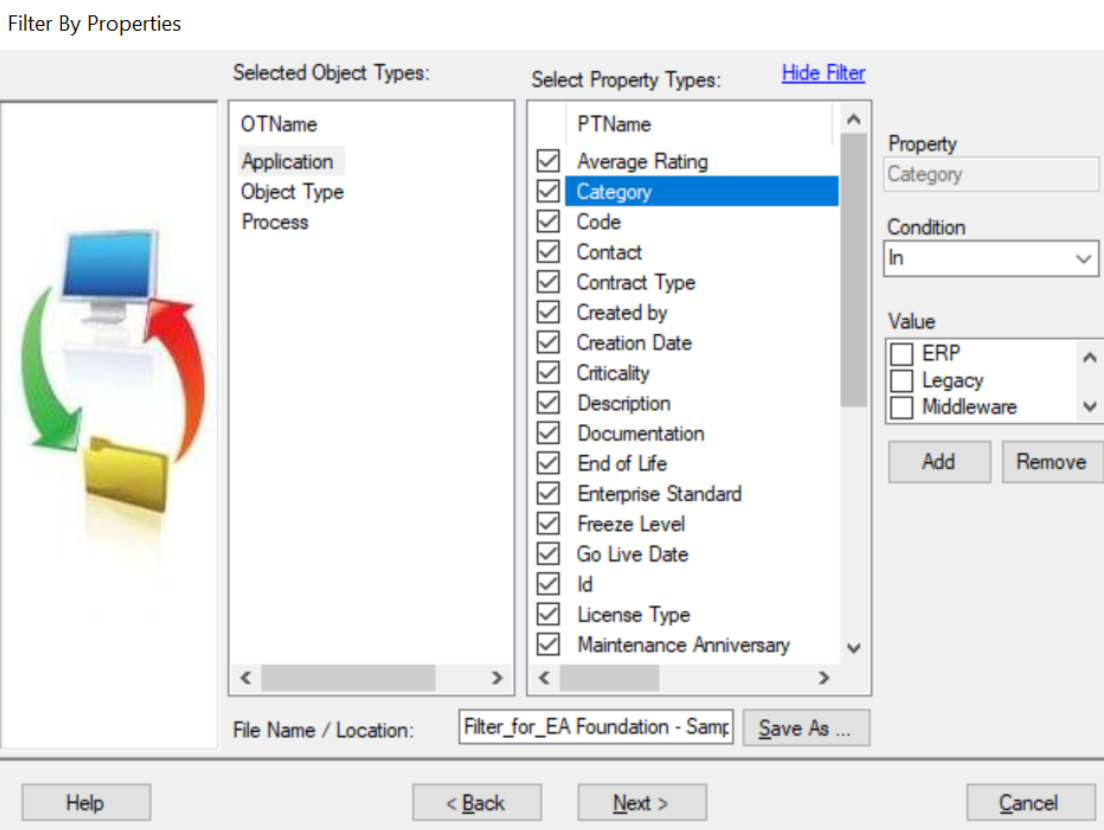
The type of filter shown and the data entered will depend on the property. In the example above, it is a category property with know values and the user can choose one or more. The application will then only output results where the category matches this selection. If the user chooses to save this file by clicking the "Save As" button, opening the file again will show the user's original selection.