
Advanced configuration
Naming policies
File Name Policy
The File Name Policies page in the Admin Interface allows an administrator to customize file name policies to be used in migrations where the target is PST. Tokens are used to construct the file name of the PST file when it is renamed/moved to the PST Output Path. The possible tokens can be seen above.
When creating or editing a policy a live example of a file name will be shown to help with the policy design.
Folder Name Policy
The Folder Name Policies page in the Admin Interface allows an administrator to customize folder name policies to be used in a journal archive migration. Tokens are used to construct the folder name of the place in the mailbox where items are migrated to. The possible tokens are:
|
Token |
Description |
|---|---|
|
*Original SMTP address* |
The SMTP address of the original recipient |
|
*Mapped SMTP address* |
The SMTP address of the mailbox where data is being migrated to |
There is also a checkbox to indicate whether the purges folder should still be used as a root, and then the constructed folder name is used as a subfolder from that.
When creating or editing a policy a live example of a name will be shown to help with the policy design.
Archive Name Policy
The Archive Name Policies page in the Admin Interface allows an administrator to customize archive name policies to be used when the RenameSourceArchive command runs in the Stage 2 part of a migration. Tokens are used to construct the name of the archive. The possible tokens are:
|
Token |
Description |
|---|---|
|
*firstname* |
First name of the owning user |
|
*lastname* |
Last name of the owning user |
|
*fullname* |
Full name of the owning user |
|
*upn* |
User principal name of the owning user |
|
*SMTP address* |
The primary SMTP address associated with the owner |
|
*SAM Account Name* |
The SAM Account Name associated with the owner |
|
*Container Mapping ID* |
The Archive Shuttle container mapping ID |
|
*Archive Name* |
The name of the Enterprise Vault archive. |
When creating or editing a policy a live example of will be shown to help with the policy design.
The policy can be used when editing the RenameSourceArchive command as part of a Workflow Policy.
Considerations when migrating to the recoverable items folder
The default location for active mailboxes is the following folder location Recoverable Items\Purges\ this is a hidden folder from the end user.
|
|
NOTEs: ·Items in the Recoverable Items folder arent calculated toward the users mailbox quota. In Exchange Online, the Recoverable Items folder has its own quota ·Recoverable Items\Purges folder has its own quota soft limit 20GB, hard limit 30GB. If litigation hold is enabled the quota is automatically increased from 30GB to 100GB for the primary mailbox and unlimited for the EOA (auto expanding feature is required) ·Currently you can only ingest into the Primary Mailbox |

The default location for leaver mailboxes is the folder Journal Items.
Changing the target folder
If you are planning to ingest into another folder, that is different from the default system policy Recoverable Items\Purges & Journal Items folder. A Folder Name Policy will be required.
Navigate to Configuration, then Naming Policies then Folder Name Policy.
Workflow policies
The Workflow Policies page in the Admin Interface allows an administrator to customize Workflows and create new ones. These can either be new, original workflows or copies of existing workflows with some amendments. You can create either a Stage 2 policy, or a Pre-migration policy.
Creating a new policy
A new policy can be created by clicking on New the Actions Bar, choosing either a Stage 2 or Pre-migration policy, and entering a name for the policy.
New policies can contain any of the commands list on the right hand side of the Workflow Policies screen.
When creating a new policy it is required to indicate the types of mapping that can use this particular workflow by selecting the check boxes at the top right of the Workflow Policies screen.
For information on the detail relating to each command, see below.
|
|
NOTE: Remember to save before leaving the screen in order to commit the changes to the Workflow Policy to the Archive Shuttle database. |
Copying a policy
When a policy is being viewed it is sometimes desirable to copy the policy and then make some small alterations to it. This is achieved by using the Copy button in the Actions Bar. Once a copy of the policy has been made, it can be given a new name, and saved to the Archive Shuttle database.
Editing a policy
A policy can be edited by clicking on Edit in the Actions Bar, and selecting an existing policy from the list. If appropriate, the types of mapping that the policy can be used with can be adjusted. All changes are only committed to the Archive Shuttle database when the Save button is clicked.
Adding a new command
A new command can be added to the bottom of the list of current commands in the Workflow by single clicking on it in the list on the right hand side of the page.
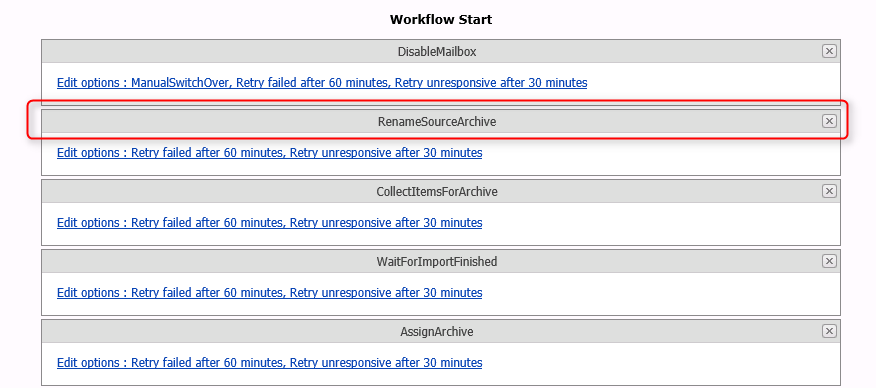
Moving a command
A command can be moved from its current position in the list by clicking on the grey title area and dragging it to a new position in the list:
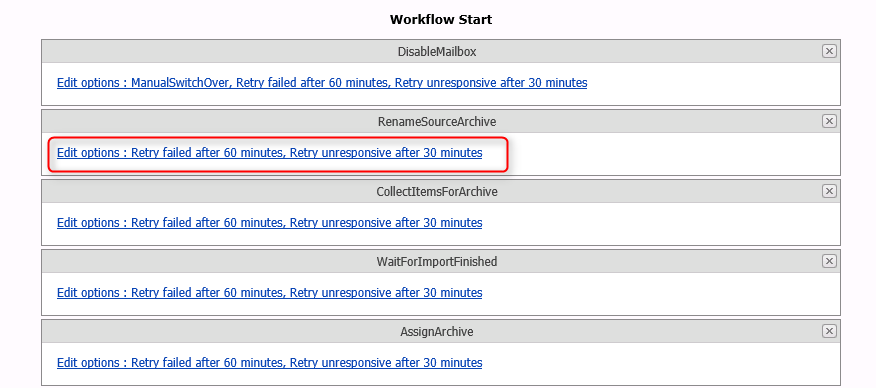
Editing the Details of a Command
The details behind a command such as the number and frequency of retries can be edited by clicking on the hyper link relating to the command, as shown below:
Recommendations
·Built-in workflows should be left as-is, and copies can be made if required.
·Existing policies should be reviewed before creating new ones.
·New policies should contain the command-pair CollectItemsForArchive and WaitForImportFinished, as these perform the last-sync of the container.