
Mounting a SQL Server Backup (BAK) File
The SQL Server Backup (BAK) File option mounts databases from a SQL server .BAK files. This option includes full, differential, and transaction log backups. You can mount several .BAK files of the same content database.
In order to mount a SQL Server Backup File, do the following:
1.From the Management Console workspace selector click Granular Restore.
2.Launch the Content Database Mount and Link Wizard by doing one of the following:
·Click the Overview tab and then click Mount and Link Content Database from the ribbon.
·Click the Import and Mount tab and choose the Mount and Link Content Database from the ribbon.
3.Click Next in the Content Database Mount and Link Wizard Welcome step. The Source Type step appears.
4.Select SQL Server Backup (BAK) File - including Full, Differential, and Transaction logs.
5.Click Next. The Target SQL Server step appears.
6.Enter the name of a SQL Server, or click Browse and select a SQL Server. Either use the Backup Service credentials or enter the server's credentials.
7.Click Next. The BAK Import Options step appears.
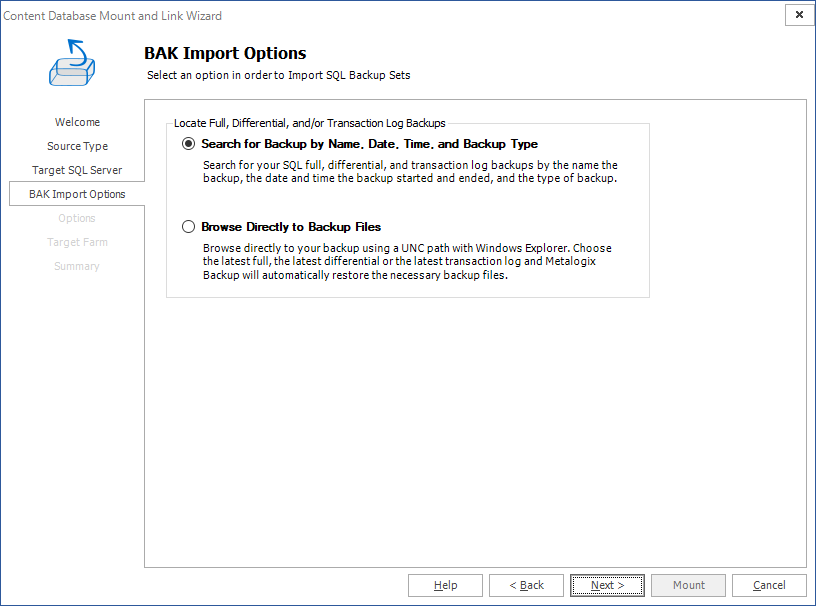
8.Select the method by which you would like to locate full backups, differential backups, and transaction logs.
·If you selected Search for backup by Name, Date, Time, and Backup type please continue to the Search for Backup section for further instructions.
·If you selected Browse Directly to Backup Files please continue to the Browse for Backup section for further instructions.
Search for Backup
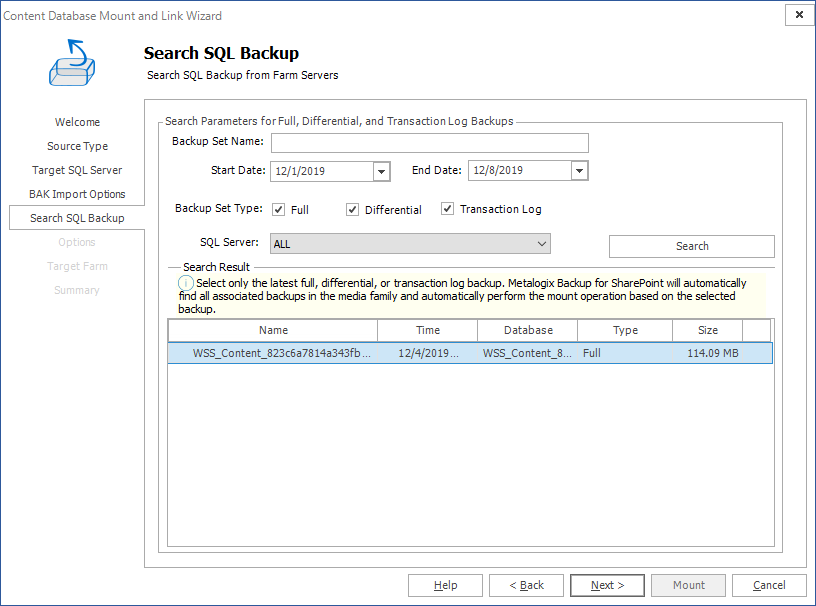
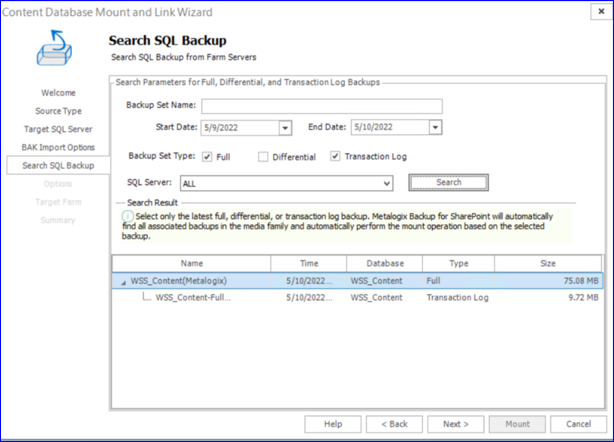
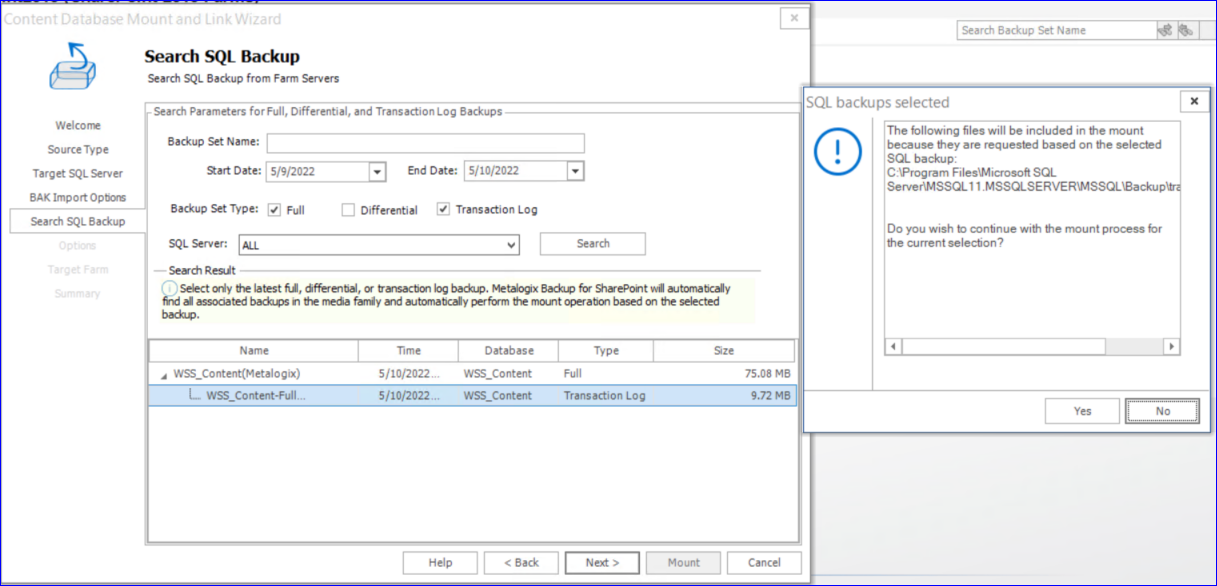
1.In the Search SQL Backup step, use the available search parameters to find specific full, differential, and transition log backups. You can search by name, date, backup set type and SQL Server. Select a Backup and click Next.
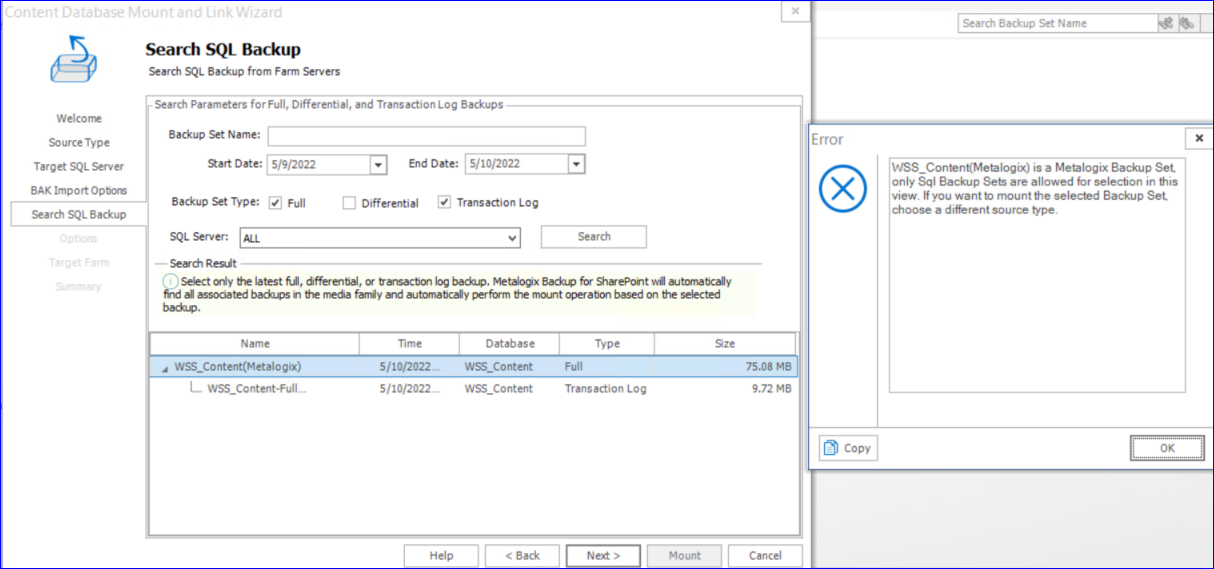
Metalogix Backups are available and can be identified by (Metalogix) in the Backupset Name. This can be used to search.
The Metalogix backup is not to be selected. Otherwise an error message will be displayed.
The Transaction Log needs to be selected to use Metalogix Backups with SQL backup options.
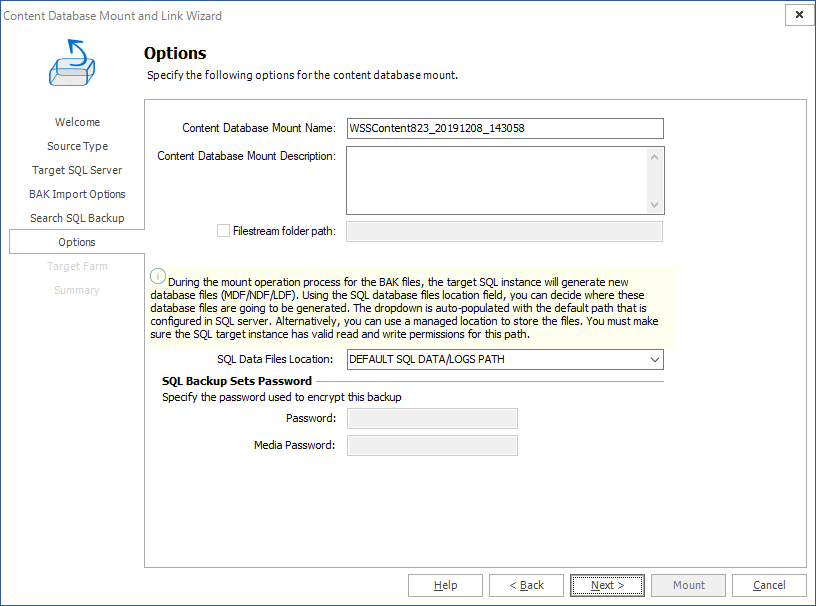
2.In the Options step, enter a Content Database Mount Name, and a Content Database Mount Description. Select the location for the SQL data files from the drop down list, and enter the Password and/or Media Password for any backups that were created with passwords. Click Next to continue.
3.In the Target Farm step, select the target farm. Click Next.
4.In the Summary step, click Mount to mount the BAK File.
5.You can now view the mount operation details of the mounted content database from the Overview tab and view the contents of the backup set from the Import and Mount tab.
Browse for Backup
1.In the File Location step, click Add to add a backup file. You may add multiple backup files but they must be on the same content database. Click Next.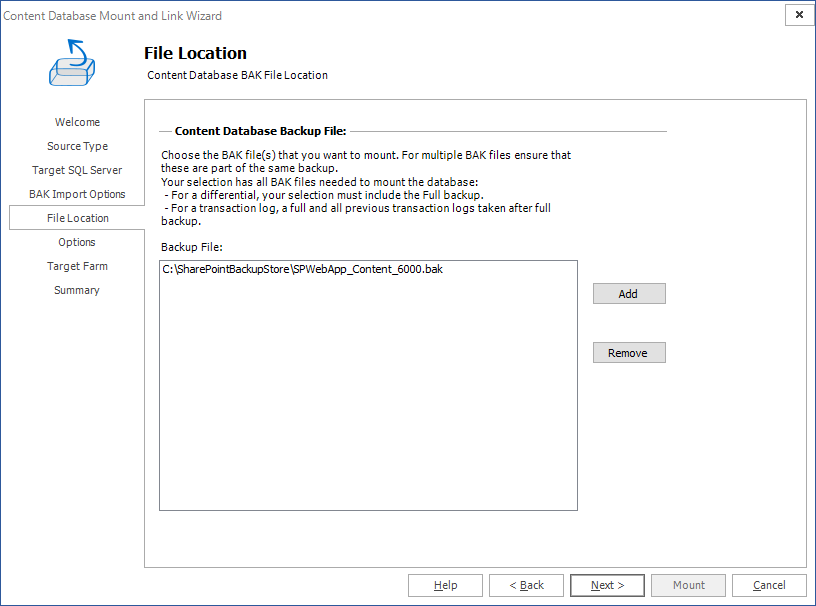
2.In the Options step, enter a Content Database Mount Name, and a Content Database Mount Description. Select the location for the SQL data files from the drop down list, and enter the Password and/or Media Password for any backups that were created with passwords. Click Next to continue.
3.In the Target Farm step, select the target farm. Click Next.
4.In the Summary step, click Mount to mount the BAK File.
5.You can now view the mount operation details of the mounted content database from the Overview tab and view the contents of the backup set from the Import and Mount tab.
Mounting a SQL Server Data and Log (MDF/LDF) File
The SQL Server Data and Log (MDF/LDF) File option allows you to mount content databases from data (MDF) and log (LDF) files.
In order to Mount a SQL Server Data and Log File, do the following:
1.From the Management Console workspace selector click Granular Restore.
2.Launch the Content Database Mount and Link Wizard by doing one of the following:
·Click the Overview tab and then click Mount and Link Content Database from the ribbon.
·Click the Import and Mount tab and choose the Mount and Link Content Database from the ribbon.
3.Click Next in the Content Database Mount and Link Wizard Welcome step. The Source Type step appears. Select SQL Server Data and Log File (MDF/LDF) File as the content database source type.
4.Click Next. The Target SQL Server step appears.
a.Enter the name of a SQL Server, or click Browse and select a SQL Server.
b.For authentication, either use the Backup Service credentials or enter the server's credentials.
5.Click Next. The File Location step appears. Click Add to add Data and Log files.
6.Click Next. The Options step appears. Enter a name for the content database and a description. If the backup was created using Microsoft SQL Server Filestream, select the checkbox Filestream folder path and specify the location.
7.Click Next. The Target Farm step appears. Select the target farm.
8.Click Next. The Summary Page, click Mount to mount the MDF/LDF File.
9.You can now view the mount operation details of the mounted content database from the Overview tab and view the contents of the backup set from the Import and Mount tab.