
Notes Server Access Validation:
The Notes client being used to manage the Migrator for Notes application will require access to the Notes Servers on which the mail files and resource application are located.
To verify the Notes client connectivity to the Notes Mail Server that is specified in an account document, in Migrator for Notes you can check the network connectivity in the Notes client. To do this use File | Preferences | Notes Ports to perform a trace to the Notes Mail Server. If there are any connection errors reported then the network connectivity should be reviewed for the Windows Operating System on which the Notes client is installed.

Notes Template Validation:
To perform a migration of Notes mail file and resource data, the source Notes mail files must have a valid Notes email template applied. This must be a standard Notes email template (.ntf) and meet the required version from the Migrator for Notes Requirements Guide.
To verify the mail file template, check the account document in Migrator for Notes after the mail file is audited:

The template can also be checked directly on the mail file properties by opening the mail file and using File | |Application | Properties.

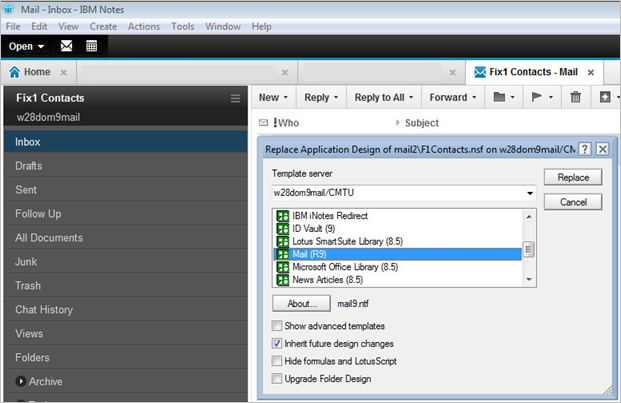
The Notes template on a mail file can be changed by opening the mail file and using File | Application | Replace Design. This will open a dialog box to select the template server (can be the same as the Notes Mail Server) and then the template to apply. This template should be a standard mail template such as Mail (85) or Mail (9):
This can also be completed through a console command on the Notes Mail Server using the Notes Mail File Name from the Migrator for Notes account document. Additional details on running Notes server console commands can be in the Notes Administration client help topics.
For example, on the Notes Mail Server console run: Load convert –u mail2\f1contacts.nsf * mail9.ntf
|
|
|

Office 365 Account Validation:
Migrator for Notes allows for a pre-migration validation process of accounts to be migrated. This will check the target migration system for mail enabled user accounts that do not have mailboxes associated with them in Office 365.
This validation will use the Internet Address field value for the Notes accounts and check this against Office 365.
|
|
|
Accounts that do report an error during validation should be checked in the Office 365 Administration portal to be sure that the corresponding account entry does exist, has the correct match value data and that the account matching is unique.
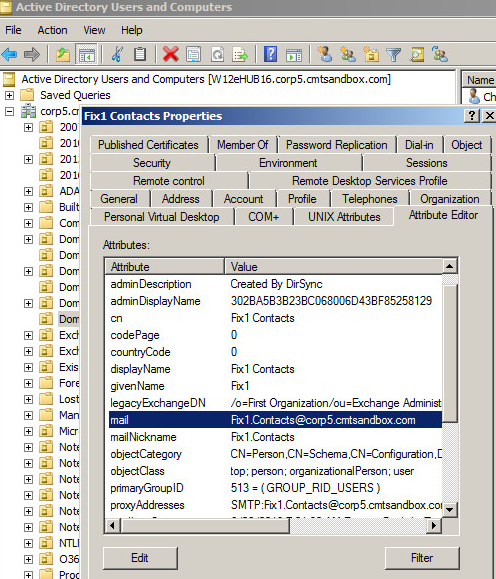
The matching value data can be checked in Migrator for Notes by opening the account document and checking the Internet Address field data value. This field value can then be verified in Office 365 using the Search function and entering the Notes matching field data value.
For Office 365 deployments that have Microsoft Active Directory integration using the Microsoft Azure Active Directory Connect tool the accounts can also be checked and validated in Active Directory. In cases where an account is correct in Active Directory but is not correct in Office 365 the Active Directory sync to Office 365 should be checked with Microsoft support.

If there are multiple accounts returned in Office 365 for the Notes matching field data then the accounts should be verified to determine which account is correct for the Notes account to be migrated to. Then any additional accounts returned should be checked and the email addresses verified, with the address corrected for other Office 365 accounts.
If there are no accounts returned, then Office 365 should be checked for the correct account and the Notes Internet address added to the Office 365 account email addresses.
Appendix C: Work with Files (Import/Export)
Migrator for Notes allows users to set specific field data through an Excel import and for export view data to Excel or comma separated text files (csv).
These options can be access through the Notes Action menu under the 1. Work with Files drop down menu:

|
|
|