Configuring an Azure AD Application Registration for Microsoft Graph
-
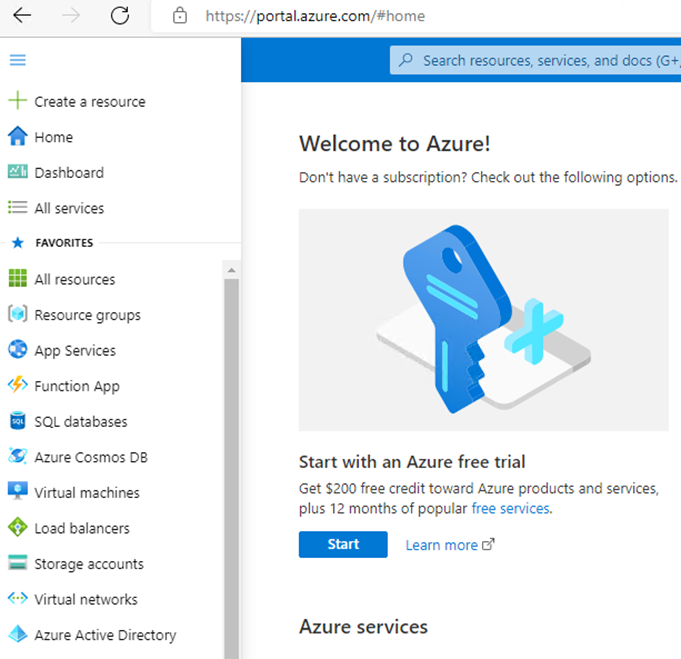
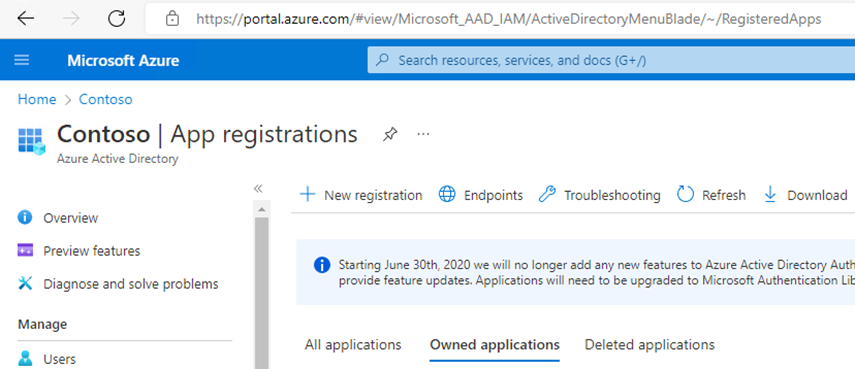
Navigate to the Azure administration portal at https://portal.azure.com and sign in with an admin account.
-
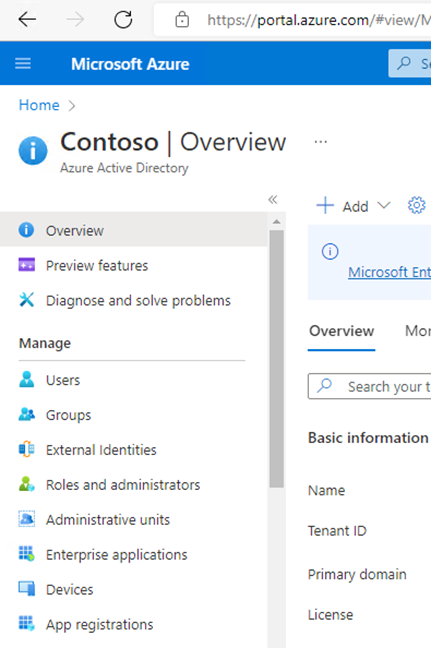
Use the navigator to access Azure Active Directory.
-
Select App registrations to begin the process of creating an Application ID for use with the Migrator for Notes Delegation migrations.
-
Choose to create a New registration.
-
Provide a name for the App registration and use the default ‘Accounts in this organizational directory only’ for the supported account types.
-
In the Redirect URI section, select Public client/native (mobile & desktop) and set the URI to: urn:ietf:wg:oauth:2.0:oob
-
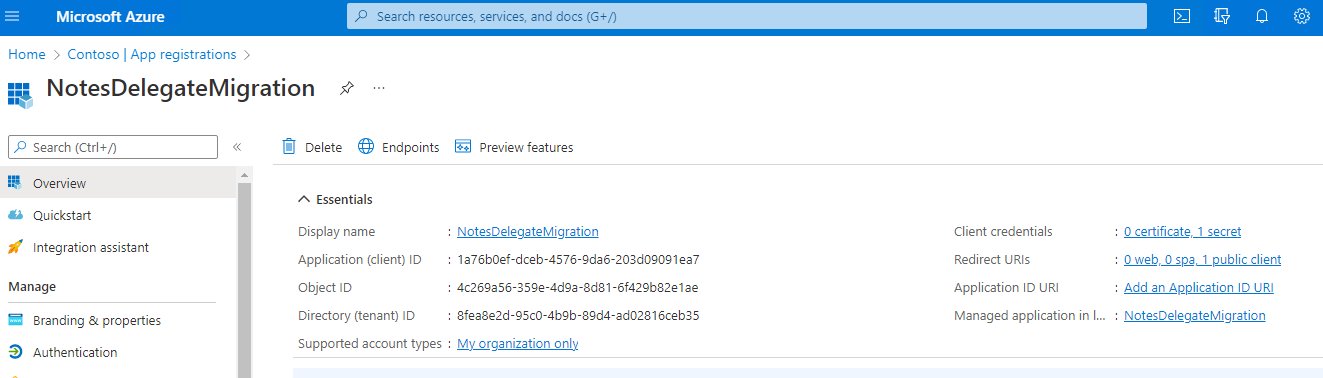
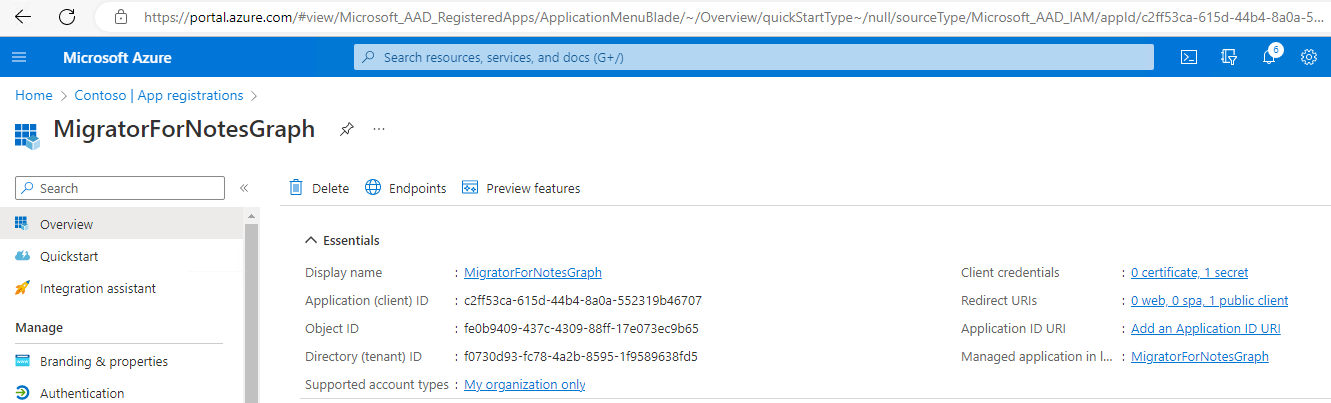
Click the Register button. Notice two of the four items needed for configuration, the Application (client) ID and the Directory (tenant) ID.
-
Notice when hovering over these two values, a Copy icon will appear to copy the values with a single click.


-
Click the Copy icon to copy the values before continuing. These will be required for the Migrator for Notes Settings so ensure that these values are retained. The values can be viewed later in the process if they are missed.
-
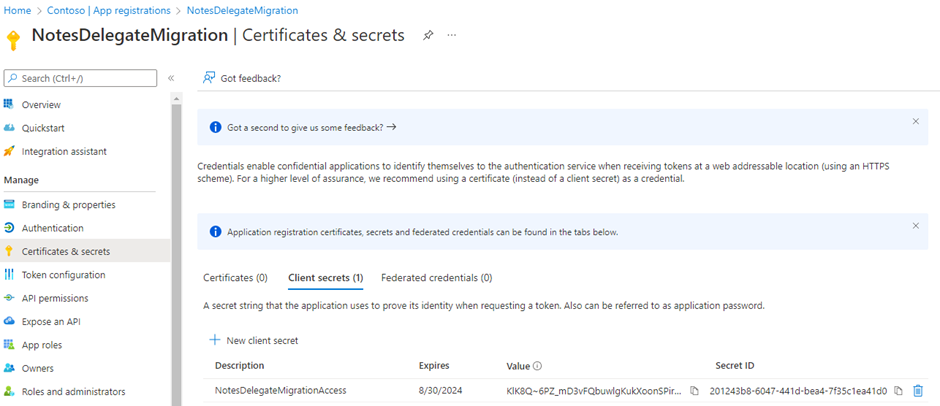
Use the navigator to click on Certificates & Secrets. Use the New client secret to Add a client secret.
Provide a name for the new secret and then select the length of time that the secret will be valid for. 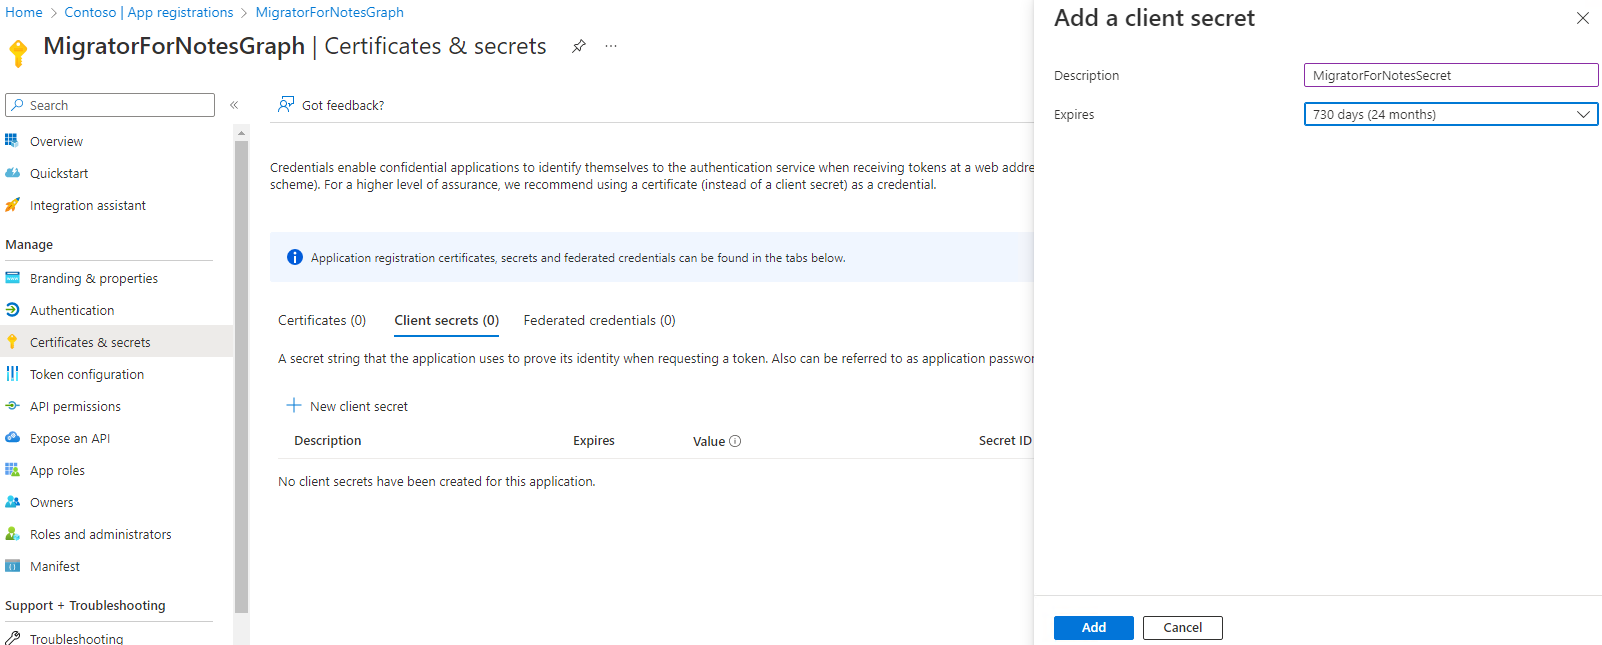
|
|
|

-
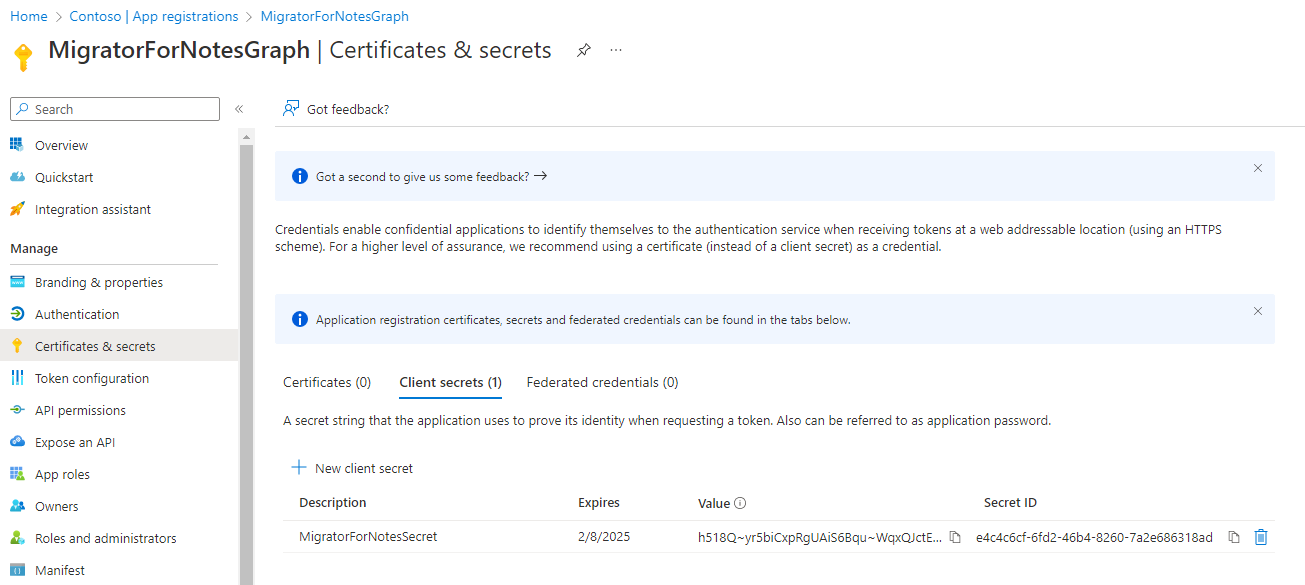
After adding the secret, the Value for the secret will be displayed. Click the copy icon and save the client secret wherever you saved the application ID and directory ID or apply it directly to the Migrator for Notes Settings.
|
|
|
-
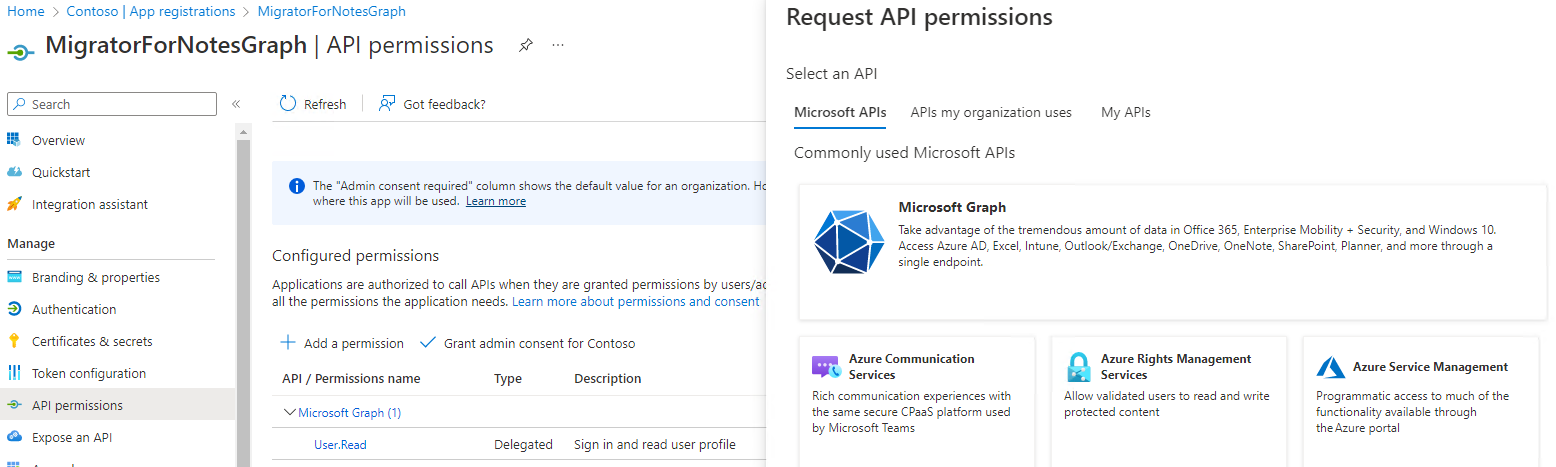
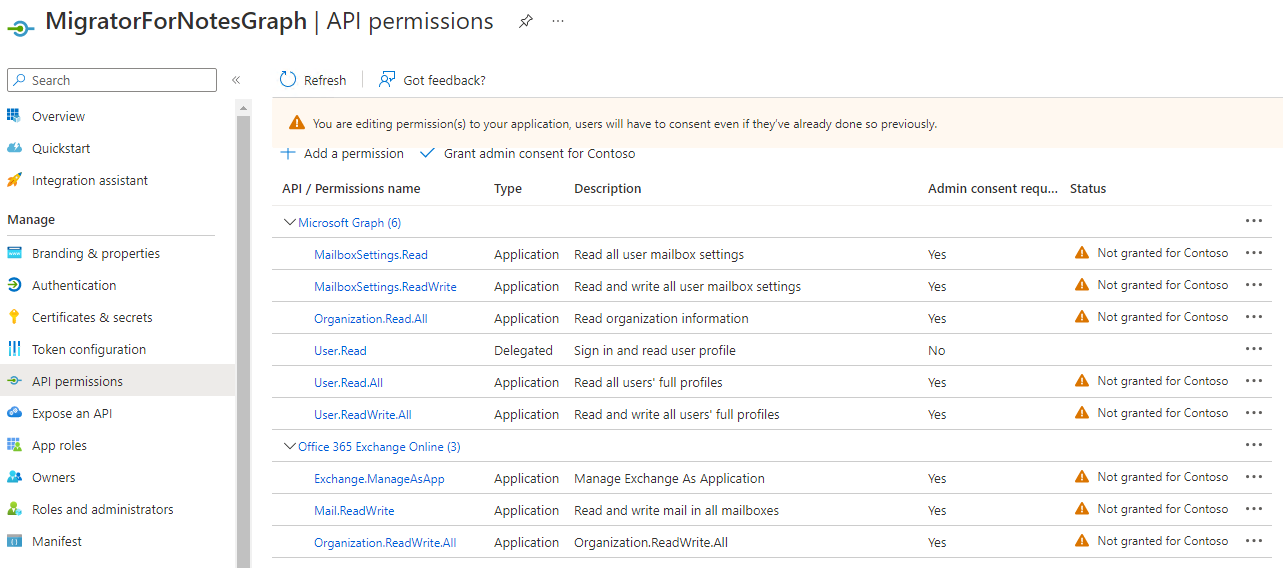
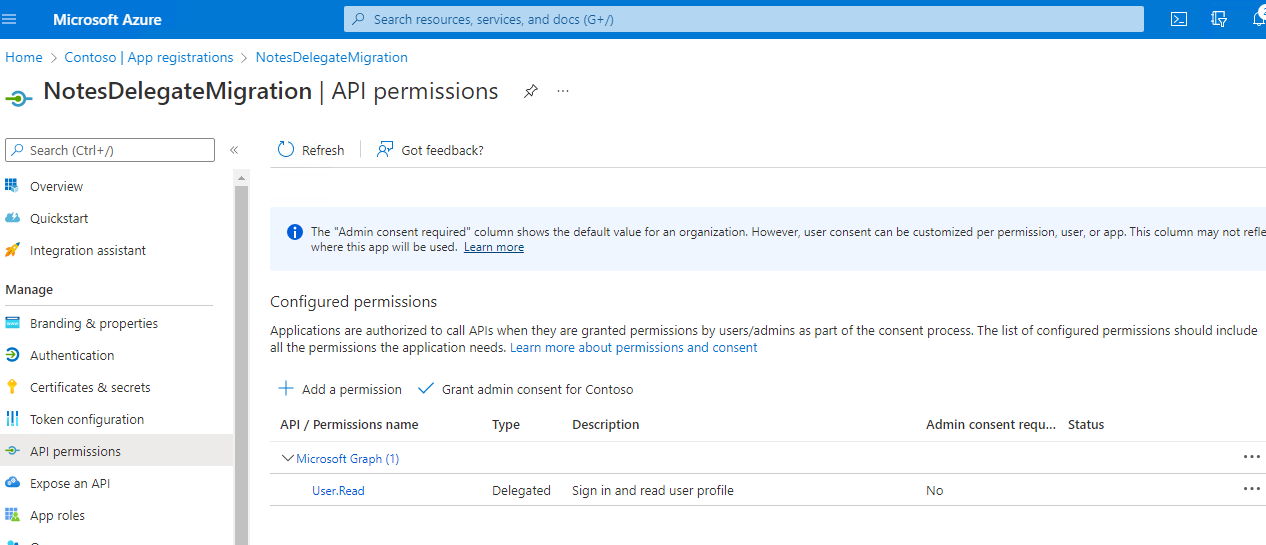
Next the permissions for the application need to be set. To do this, use the navigator to select API permissions.
-
Use the Add a permission button to select the permissions that will be used for Graph. For the permissions select Microsoft APIs and then select Microsoft Graph.
-
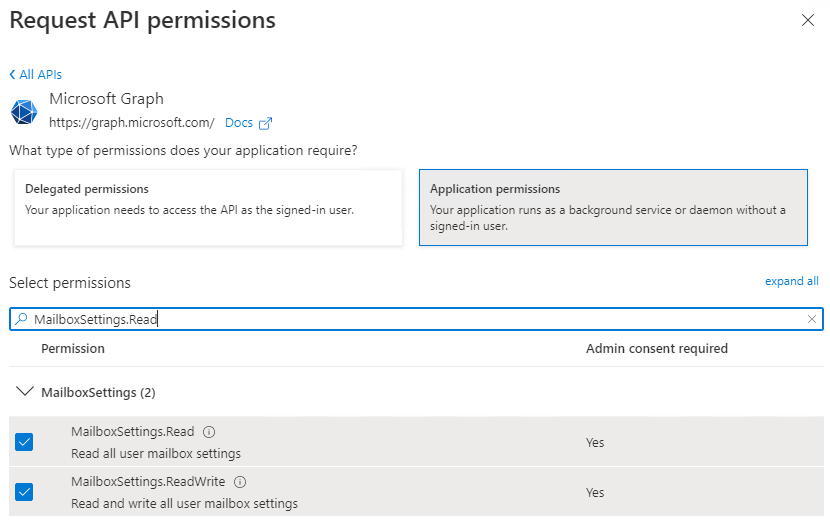
For the API permissions select Application permissions.
-
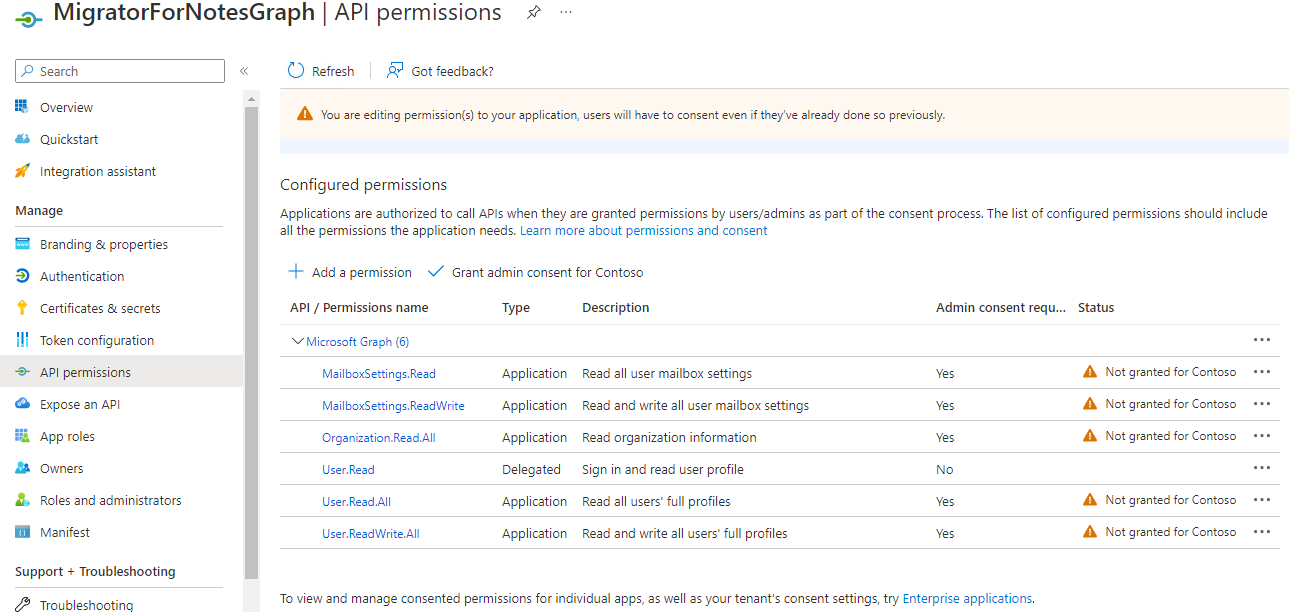
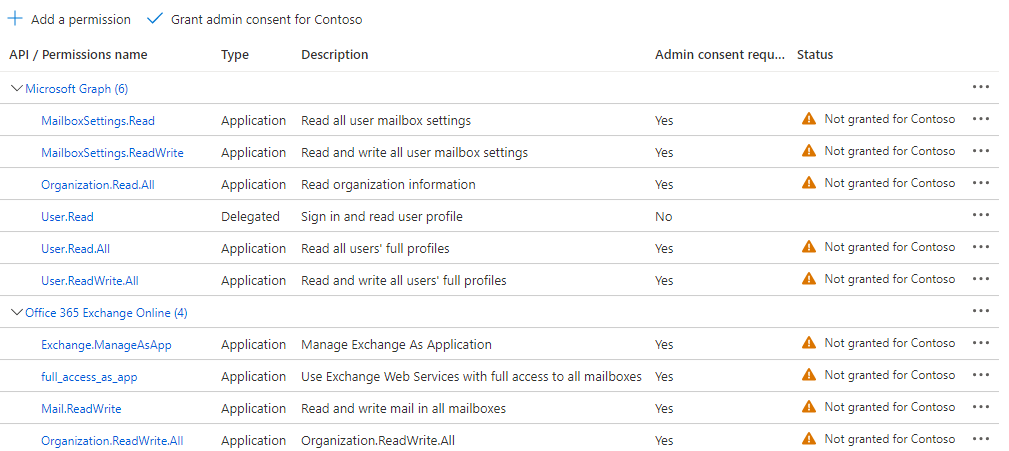
Then enable the below permissions from the options available and Add permissions. The permissions items can be entered into the Search bar to locate each one directly.
Permissions to add: MailboxSettings.Read , MailboxSettings.ReadWrite , Organization.Read.All , User.Read.All , User.ReadWrite.All
-
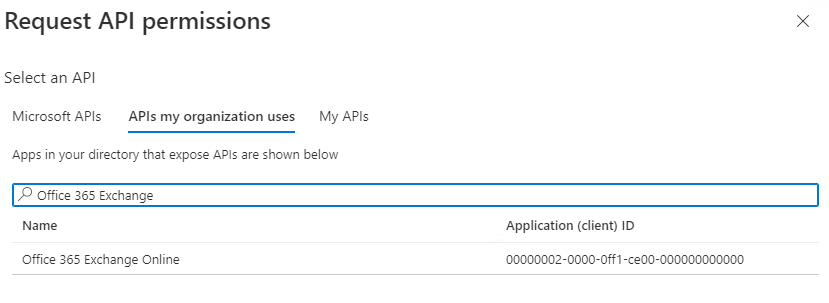
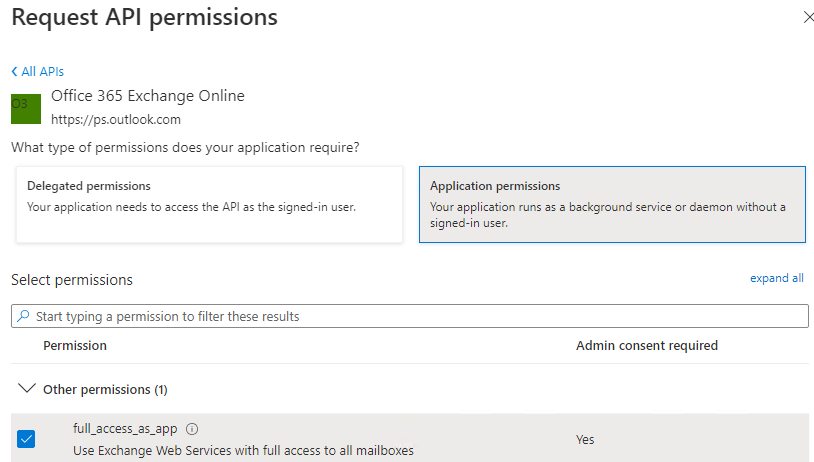
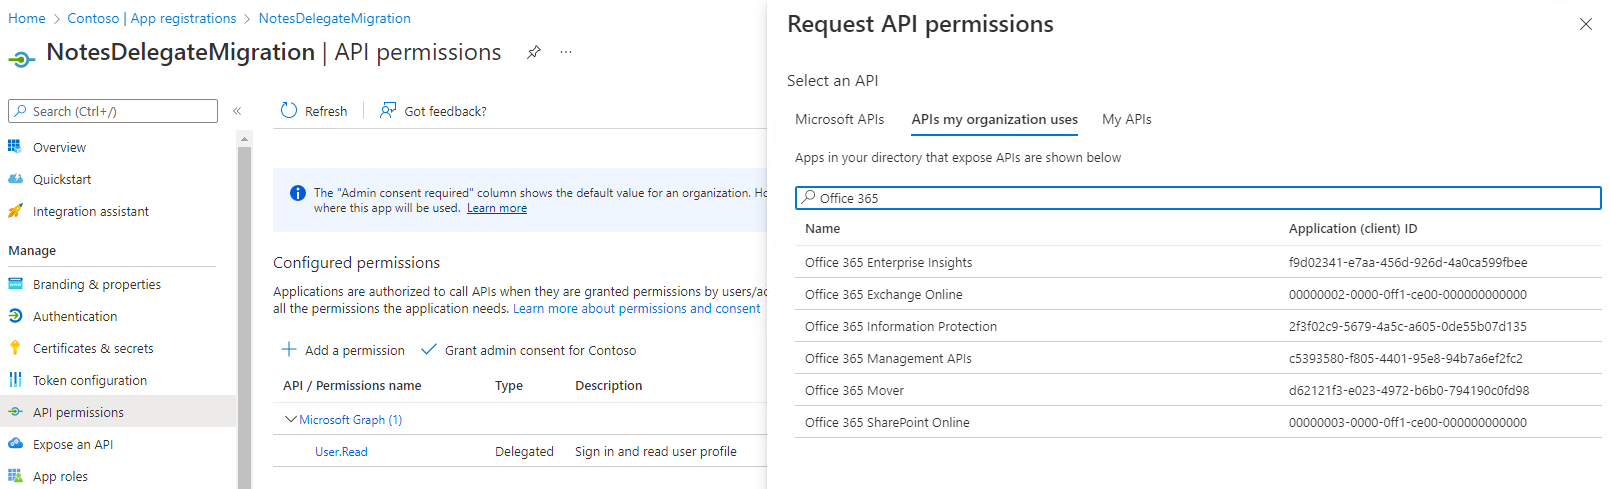
Use the Add a permission button again and for the permissions select APIs my organization uses and then locate and select Office 365 Exchange Online.
-
Then enable the below permissions from the options available and Add permissions. The permissions items can be entered into the Search bar to locate each one directly.
Permissions to add: Exchange.ManageAsApp , Mail.ReadWrite , Organization.ReadWrite.All.
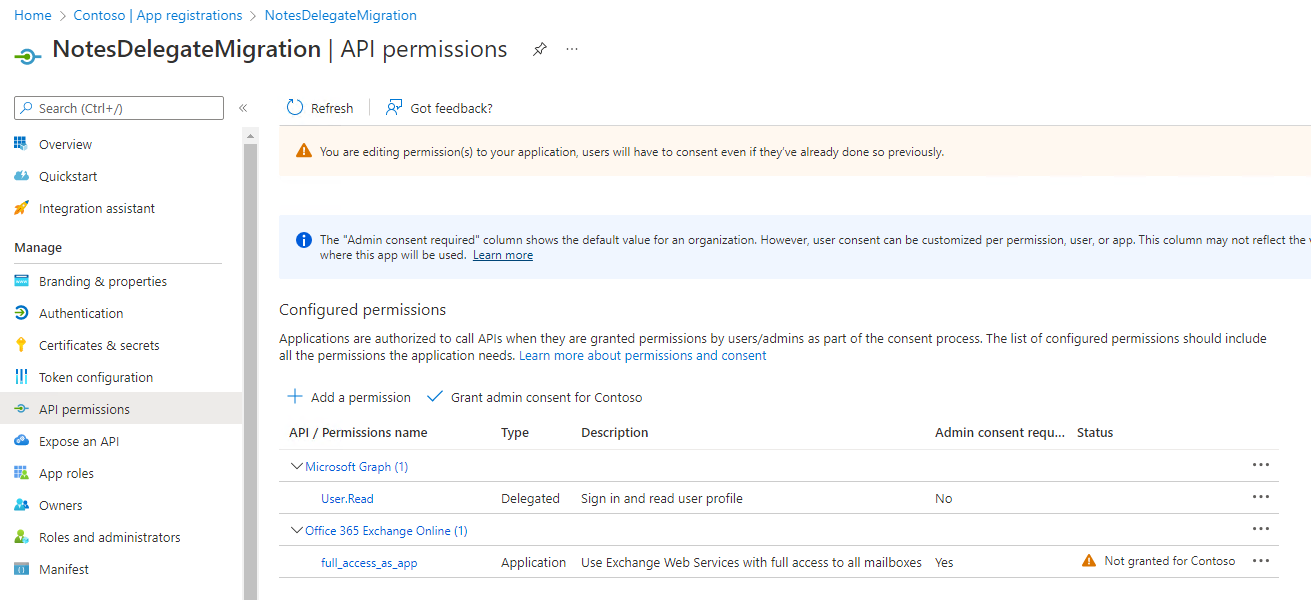
If delegation migration for permissions will be used for the migration process then Other Permissions | full_access_as_app can also be added. This will allow the Application ID to be used for the delegation migration and replace the configuration for a second Application ID in Appendix F.
-
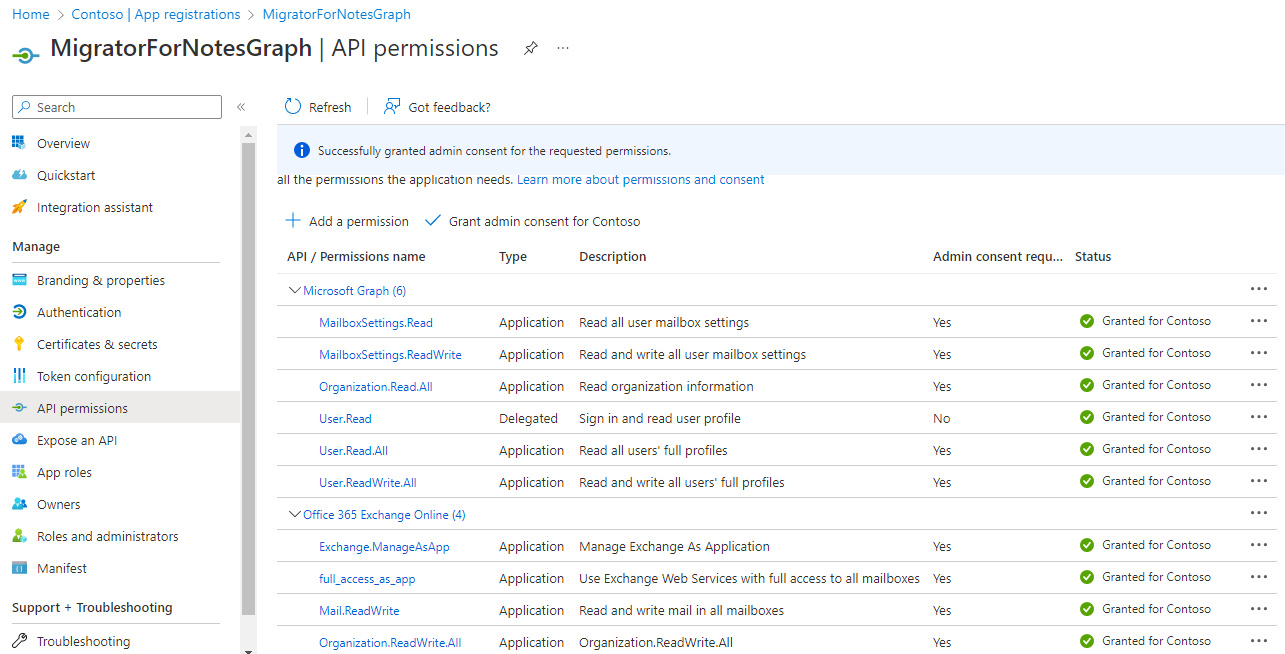
This will then require consent to be granted by a tenant admin account.
-
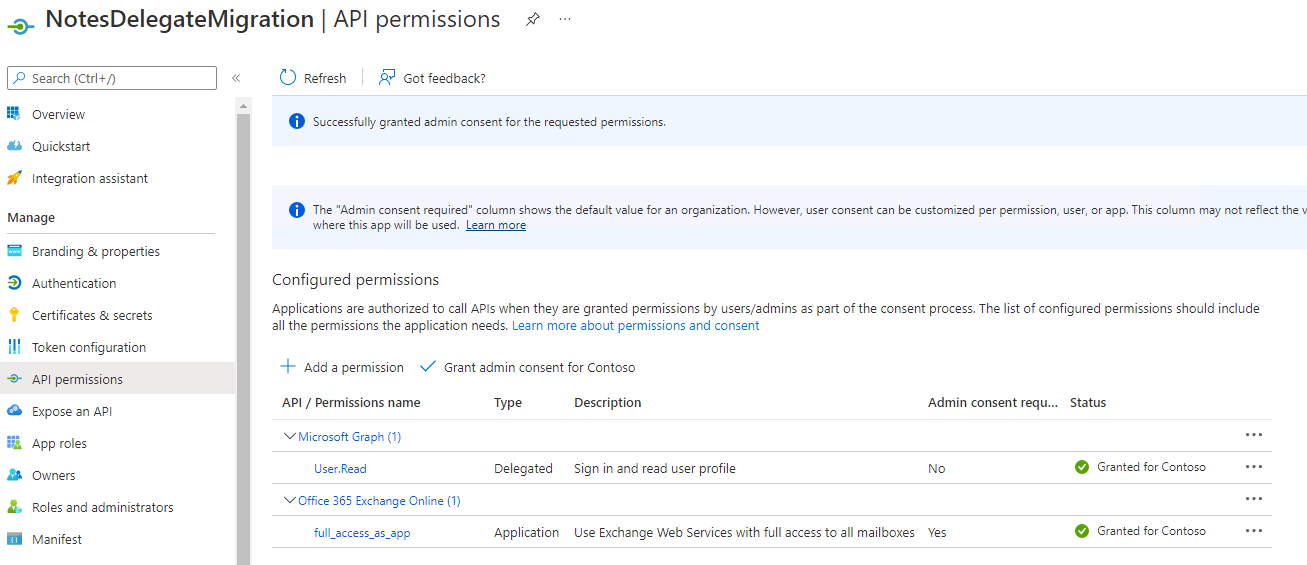
Use the Grant admin consent for <tenant> button to complete the process.
-
This concludes the Application ID setup in the tenant. Details for the application can be viewed on the Overview page.


Appendix F: Modern Authentication Delegation Migration
The delegation migration does require an Application (client) ID to be created in the tenant to process mailbox folder level permissions. The process to set up an Application ID can be found in the Configuring an Azure AD Application Registration section. The steps are based on Microsoft configuration at the time of release, refer to Microsoft documentation if these are changed.
The details for the Application ID are applied to the Migrator for Notes Settings | Delegation | Application ID tab.
|
|
This is an additional step that must be completed for the delegation migration. The account setup must still be completed and the general Modern Authentication requirements and configuration followed. |
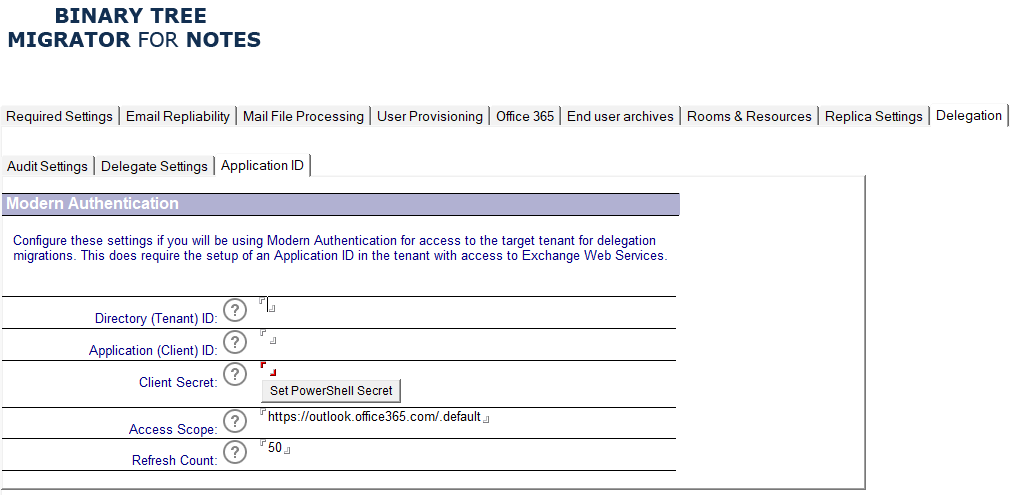
The following table describes the values for each setting.
|
Settings |
Description |
|
Directory (Tenant) ID |
Target Tenant ID, this is displayed with the Application ID setup. |
|
Application (Client) ID |
Exchange Online EWS Application ID created in the target tenant. Review the configuration guide for Modern Authentication to create this. |
|
Client Secret |
EWS Application ID secret. Review the configuration guide for Modern Authentication to create this. Use the button to input this value to ensure that it is hashed when it is stored using the AsSecure PowerShell method. |
|
Access Scope |
MSAL Token Access Scopes for the Application ID. This is the App ID URI for accessing EWS and the permissions scope for the token used to access Exchange Online. The default scope can be used for the Application ID that is created unless Microsoft documentation advises changing the scope in cases of tenants that have differing configurations. |
|
Refresh Count |
The number of minutes to process for delegation updates before the PowerShell will request a refresh token for the Modern Authentication access to the tenant. This can be adjusted if there are authentication failures during the processing which can occur if there are a large number of delegates for each account. |
Install MSAL PowerShell Authentication Module
-
On the server that will be performing the PowerShell processing for the delegation migration the MSAL PowerShell module will be required, this can be added through PowerShell using the Run As Administrator option.
Install-Module MSAL.ps
Configuring an Azure AD App Registration
-
Navigate to the Azure administration portal at https://portal.azure.com and sign in with an admin account.
-
Use the navigator to access Azure Active Directory.
-
Select App registrations to begin the process of creating an Application ID for use with the Migrator for Notes Delegation migrations.
-
Choose to create a New registration.
-
Provide a name for the App registration and use the default ‘Accounts in this organizational directory only’ for the supported account types.
In the Redirect URI section, select Public client/native (mobile & desktop) and set the URI to: urn:ietf:wg:oauth:2.0:oob

-
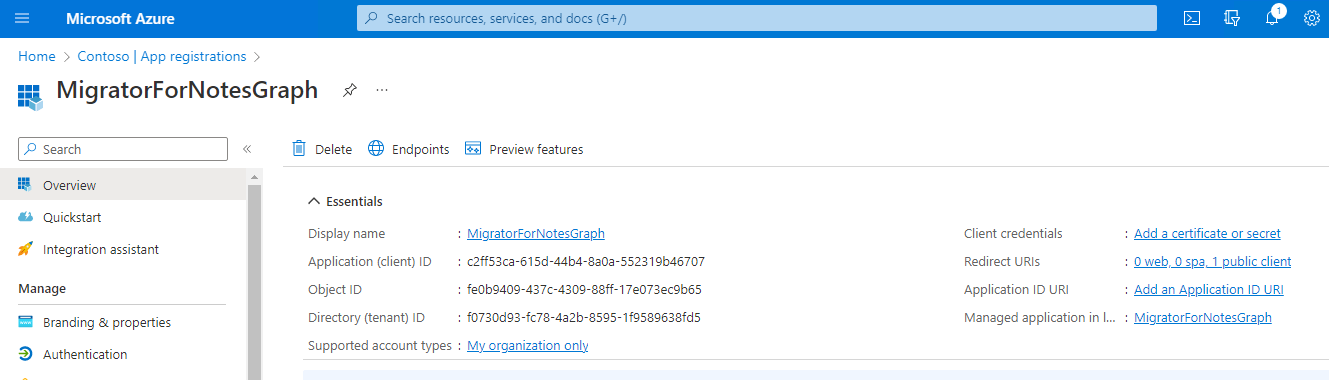
Click the Register button. Notice two of the four items needed for configuration, the Application (client) ID and the Directory (tenant) ID.

-
Notice when hovering over these two values, a copy icon will appear to copy the values with a single click.
Click this icon to copy the values before continuing. These will be required for the Migrator for Notes Settings so ensure that these values are retained. The values can be viewed later in the process if they are missed.
-
Use the navigator to click on Certificates & Secrets. Use the New client secret to Add a client secret.
Provide a name for the new secret and then select the length of time that the secret will be valid for.
|
|

-
After adding the secret, the Value for the secret will be displayed. Click the copy icon and save the client secret wherever you saved the application ID and directory ID or apply it directly to the Migrator for Notes Settings.
|
|
|
-
Next the permissions for the application need to be set. To do this, use the navigator to select API permissions.
-
Use the Add a permission button to select the permissions that will be used. For the permissions select APIs my organization uses and then locate Office 365 Exchange Online.
-
For the API permissions select Application permissions.

-
Then select Other permissions | full_access_as_app from the options available and Add permissions.
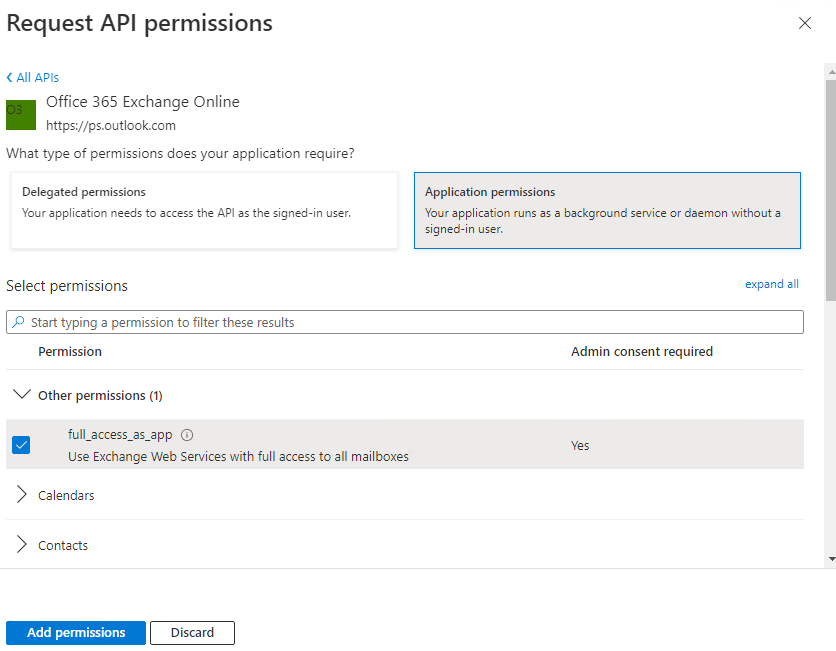
-
This will then require consent to be granted by a tenant admin account.
-
Use the Grant admin consent for <tenant> button to complete the process.
-
This concludes the Application ID setup in the tenant. Details for the application can be viewed on the Overview page.