-
标题
Mask SQL Server data using regular expression generator with ApexSQL Mask -
说明
This article explains how to use the application to mask SQL Server data with a regular expression generator and replace a certain amount of the original data with masked one.
Description
The substitution mask type allows the database developers to mask SQL Server data using data generated by different generators. Among those generators is located Regular expression generator. How to mask and replace sensitive data with the Regex generator will be explained further in the article.
-
解决办法
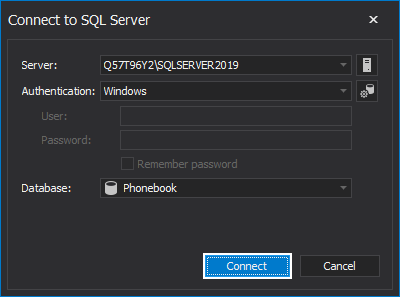
By starting the application, the Connect to SQL Server window will appear, where are the necessary fields must be fulfilled with information about a SQL Server, type of the Authentication, and Database whose data need to mask. When everything is set, click on the Connect button, will connect ApexSQL Mask to the selected database:
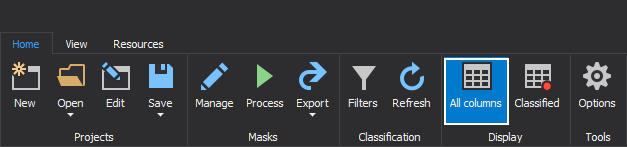
The selected database will be loaded, and in the panel grid will be presented automatically classified columns by default:
With ApexSQL Mask, next to automatically added masks to the classified columns, a new mask can be created and added to anyone column from the selected database. To see all columns in the selected database, click on the All columns button in the Home tab:
For this article, the Name column from the dbo.Phone table of the Phonebook database will be used. In the primary grid, next to classified table columns will be appeared other columns. To add a non-classified column to classified check the checkbox in front of the name of the column:
Creating the substitution type of the mask with a regular expression generator
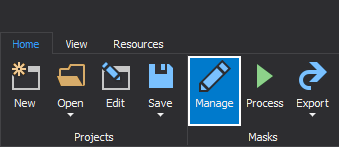
To create and add a mask to the selected table column, click on the Manage button in the Home tab:
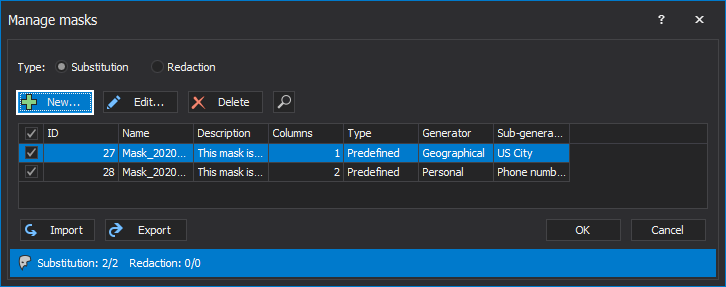
The Manage mask window will be shown, with the Substitution type of mask selected by default. To create a new mask, click on the New button:
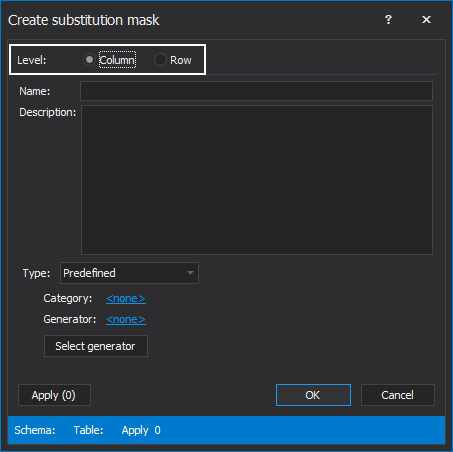
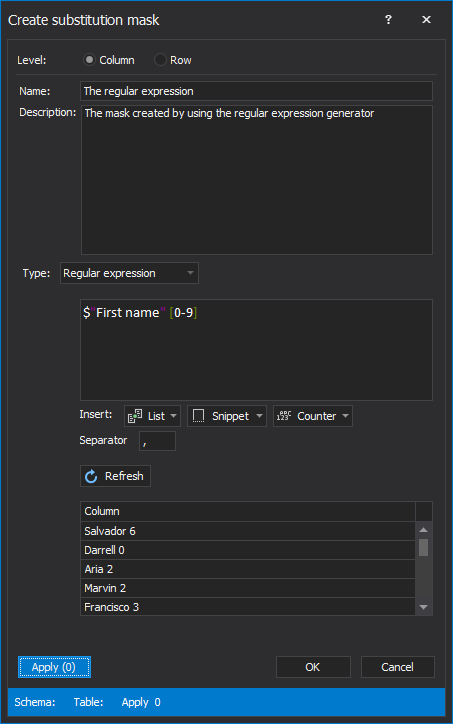
The Create substitution mask window will appear. By default, under the Level section, the Column level of masking is selected:
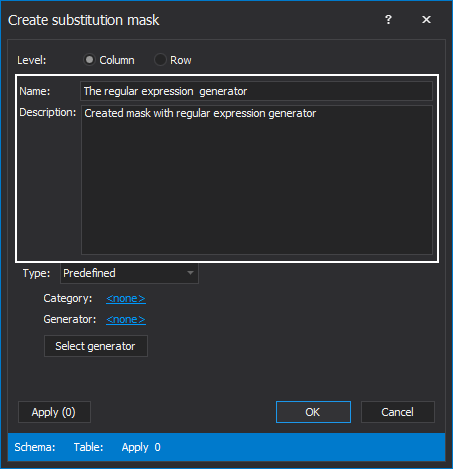
Enter a name for the new mask in the Name field, and optional, the description of the newly mask in the Description field:
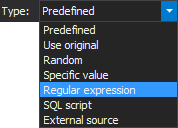
From the Type drop-down list, select the type of generator which will be used for masking the SQL Server data. For this article, the Regular expression generator will be explained:
The Regular expression generator
The regular expression generator creates and inserts values by following a pattern provided by users. When a regular expression generator from the Type drop-down list is chosen in the place below the Type drop-down list will be shown the following:
- Text box – where will be displayed the pattern which will be used for creating data
- Insert – a section that contains three different sets of options. Applying these options creates a pattern, that will be used to mask SQL Server data:
List – this option allows users to include a list of values from the Predefined generator, the text, or CSV file, and to use that data in creating the pattern:
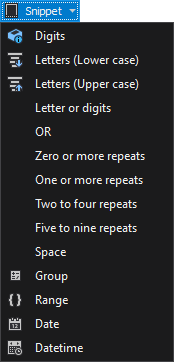
Snippet – a small section of text or source code that can be inserted in the pattern. Snippets provide an easy way to implement commonly used code or functions into a larger section of code(pattern):
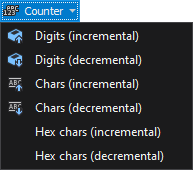
Counter – this option imitates the incremental generator and when is used inserts the expression that will create increment or decrement sequence of number, letters, or combination of those two:
- Separator – text box for separator in CSV file
- Refresh – button for refreshing the Preview window, in which data from the newly created pattern will appear
- Preview window – data from the newly created pattern will be presented in this window
For the purpose of the article from the List drop-down menu will be used the First name generator and Digit from the Snippet drop-down menu. When all is set, click on the Apply button:
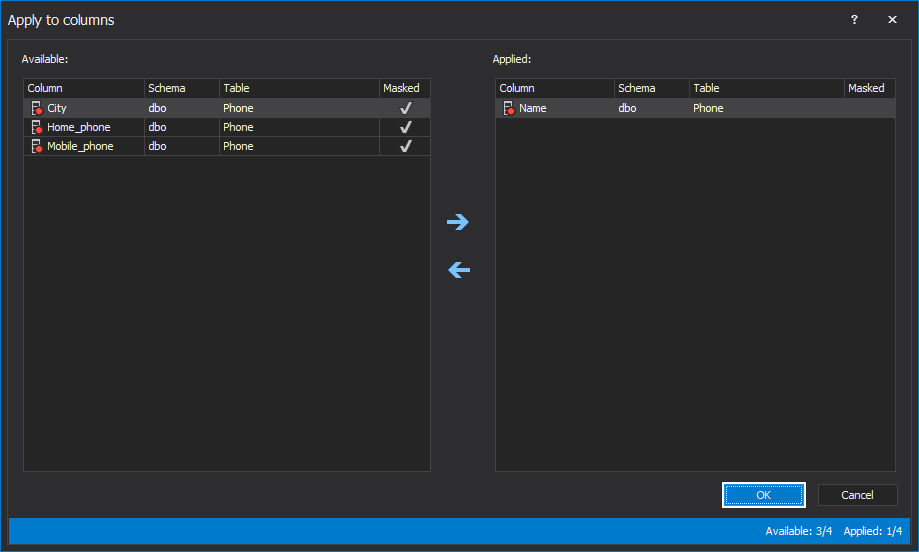
The Apply to columns window will appear. From the Available section, select the columns that want to be masked (the Name column in this case), and click the right blue arrow, that action will move selected columns to the Applied section on which the newly created substitution mask will be applied. The Apply to columns window will be closed by click on the OK button:
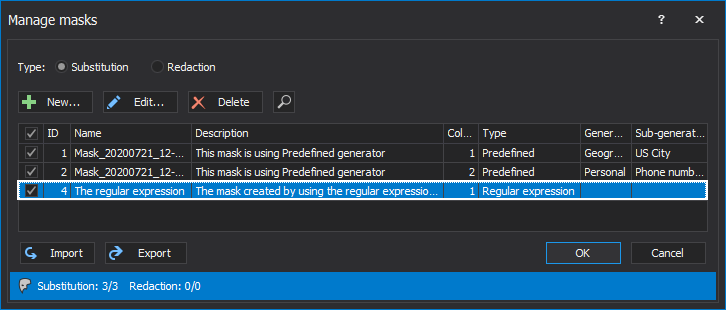
The Create substitution mask window will appear again. Click on the OK button will be closed the Create substitution mask window and the newly created mask will be shown in the Manage masks window:
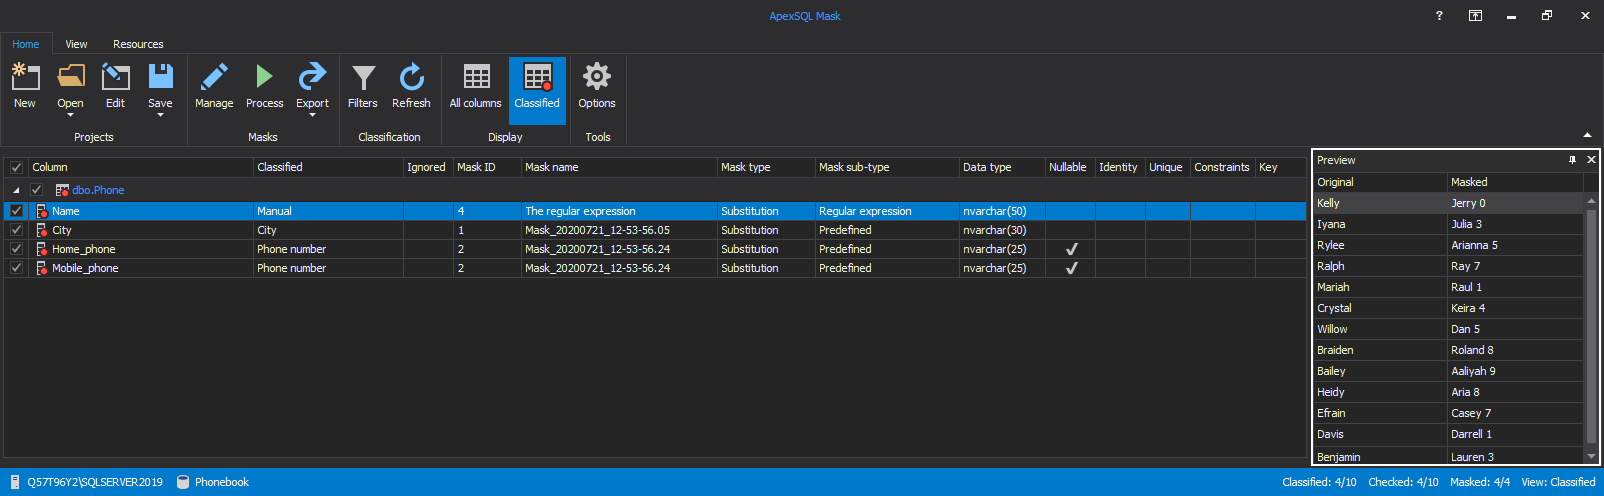
When the Manage mask window is closed, the Name column will appear in classified table columns in the main grid. And when that column is select in grid panel, from the Preview window will see the results of the masking original data with regular expression generator: