-
标题
How to schedule a SQL Server backup -
解决办法
Having a good backup and restore plan is an important part of a disaster recovery strategy. This article will describe 3 different solutions/approaches for creating a scheduled backup in SQL Server
As a part of a backup strategy several types of backup can be used together.
Backup types
- Full database backups include all database objects, system tables, data, and transactions that occur during the backup. Full database backups allow performing a complete restoration to a state before the backup is performed.
- Differential backups contain data that has changed since the last full backup was performed and transactions that occur during the backup process. A differential backup is used alongside with the last full database backup. After taking a differential backup, as it is taken after the last full backup all of the old differential backups become obsolete.
- Transaction log backups records all the transactions that have occurred on a database since the previous transaction log backup and then truncates the transaction log and then truncates a transaction log. A transaction log backup ensures database recovery to a specific point of time e.g. to a moment prior to data loss.
- File and filegroup backups option is most suitable for backing up very large databases. A file backup will contain all the data in one or more files or filegroups. A transaction log backup has also be performed to span all the file backups from start to finish when using file backups to restore a database.
- Copy-only backups are mostly used when it’s needed to backup a database without affecting the processes of backup and restore for a specific database. Functionality of a copy-only backup is the same as full database with a difference that a transaction log backup will backup all transactions since the last full backup is performed and ignore the existence of the copy backup, therefore a copy backup cannot be used as the basis for differential and transaction log backups.
Recommended backup strategy practices
Backup location
It is advisable that backups are not stored on the same location (physical drive) where database files are stored. In cases when a physical drive fails use the drive or a network location to perform restore. If a file location is not specified when creating a database SQL Server will store database files on the default database locations.
Note that changing the default locations won’t move the current data and log files to a new location. This will only be applicable to databases created after this change.
Scheduled and automated backups
To prevent and backup safety and reliability is to set up (automate) the backup process through the means of schedules. Creating backup schedules is important as the time passes current backups get obsolete and out of time.
Keep yourself protected and be sure that you always have at hand a way to reestablish your data up until the point where the database failed. Scheduled backups provide an accurate data history.
The specified frequency of a backup depends on the company business needs etc., and is defined by Recovery Point Objective (RPO). For example, if an organization’s Service Level Agreement (SLA) specifies that no more than an hour’s data can be lost from a database, the RPO is one hour.
Test backups
Backup and recovery strategy cannot be complete until backups are successfully restored on a test server and verified that backup can be restored to fulfill all the requirements and conditions including all the combinations that the recovery strategy requires. There is a variety of factors to consider such as: the organizations requirements regarding the usage of data, protection etc.
Backup verification
Verifying backup ensures that a backup is created correctly, intact physically, that all the files in the backup are readable and can be restored in the event that the user needs to use it, and that all the transactions are consistent. It is important to understand that verifying a backup does not verify the structure of the data on the backup. However, if the backup was created using WITH CHECKSUMS, verifying the backup using WITH CHECKSUMS can provide a good indication of the reliability of the data on the backup.
By using T-SQL:
Including the CHECKSUM statement ensures consistency of data on the backup destination. To include CHECKSUM use the following query:
BACKUP DATABASE [AdventureWorks2012]
TO  DISK = N'F:\Backup\AW12.bak'
WITH CHECKSUM;
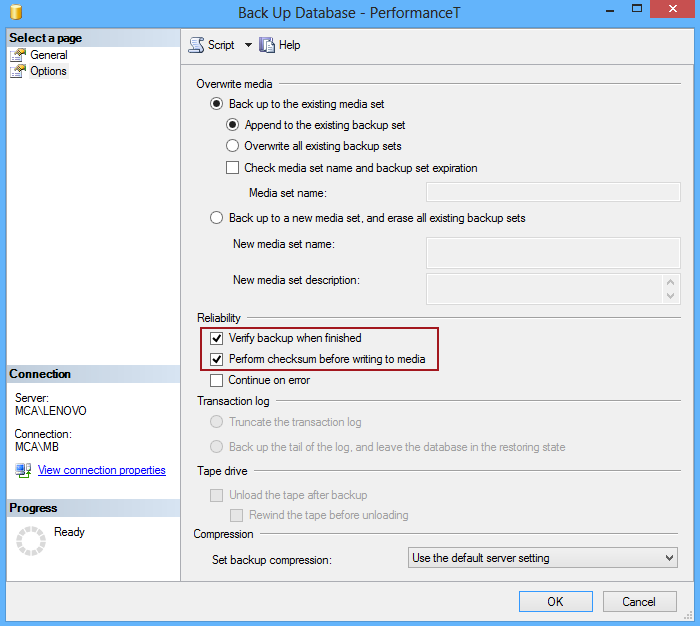
SQL Server Management Studio also provides options to include backup verification a CHECKSUM check when creating a backup as a task:
The Verify backup when finished option and Perform checksum before writing to media are used as an insurance that both backup and its data are consistent.
We will also show how to include verifications when scheduling backups.
In this article we will create a SQL Server scheduled backup by using a SQL Server Agent job, SQL Server Maintenance Plans, and ApexSQL Backup.
Create a SQL Server scheduled backup by using a SQL Server Agent job
To automate and schedule a backup with SQL Server Agent:
In the Object Explorer pane, under the SQL Server Agent node, right click Jobs and select New job from the context menu:
- In the New Job dialog enter a job’s name
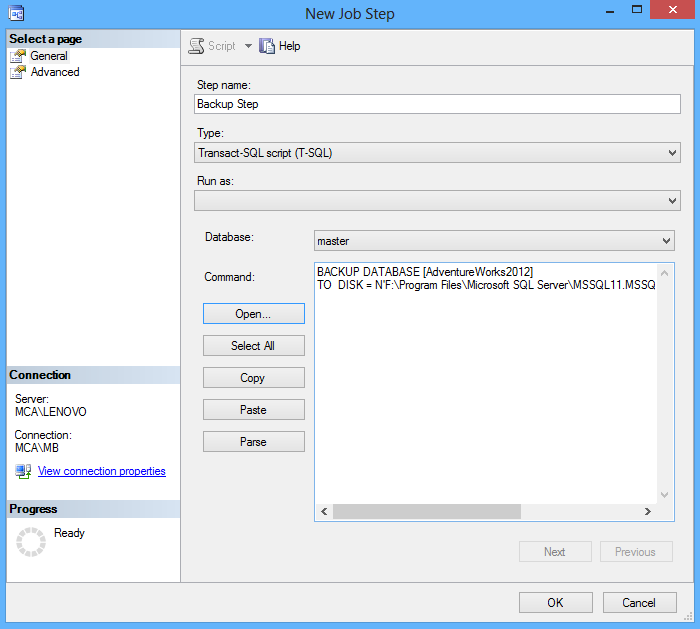
- Under the Steps tab click on the New button and create a backup step by inserting a T-SQL statement. In this case the CHECKSUM clause has to be included in T-SQL code:
USE AdventureWorks2012
GO
BACKUP DATABASE [AdventureWorks2012]
TO  DISK = N'F:\Backup\AW12.bak'
WITH CHECKSUM;
To create a differential backup use the following T-SQL script:
USE AdventureWorks2012
GO
BACKUP DATABASE [AdventureWorks2012]
TO  DISK = N'F:\Backup\AW12.bak'
WITH CHECKSUM;


BACKUP DATABASE [AdventureWorks2012]
   TO  DISK = N'F:\Backup\AWD12.bak'
   WITH DIFFERENTIAL;
   WITH CHECKSUM;

GO
To backup transaction log use the following script:
BACKUP LOG [AdventureWorks2012]
   TO  DISK = N'F:\Logs\AWD12.log';
GO
Note: To create a differential or a transaction log SQL Server database backup a full database backup has to exist. If a desired database has never been backed up, before creating differential backups, first create a full database backup. Differential and transaction log backups can be used along a full database backup. For example, a full backup can be scheduled every 24 hours, a differential backup can be performed every 5 hours, and a transaction log backup every 15 minutes.
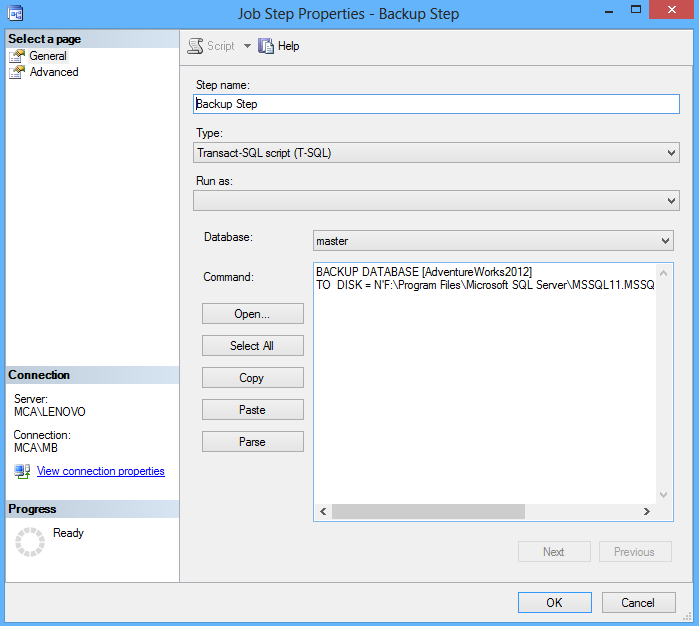
Click ok to add a step, and click OK to create a job:
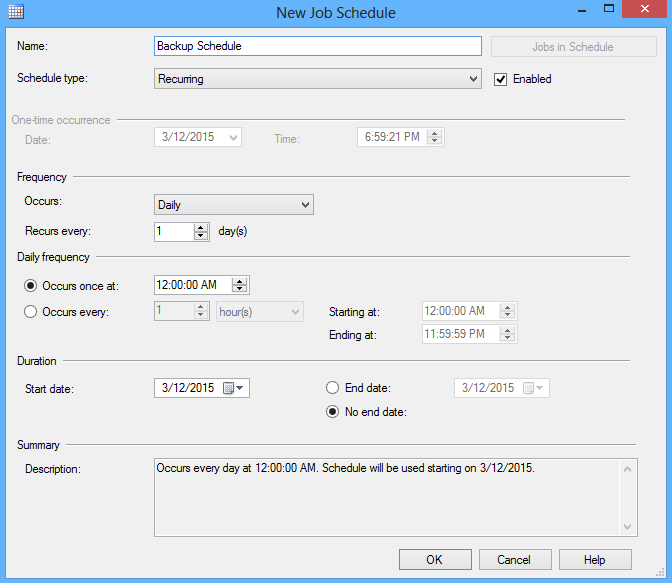
- To schedule a job, in the New Job dialog, under the Schedule tab click New.
In the Job Schedule select an occurring frequency and a start date and click OK:
To check a created job in the Object Explorer pane and under the SQL Server Agent ➜ Jobs node right click the job create above and select the Start job at step option:
To use SQL Server Agent for backing up all databases under one instance there are two approaches, both of which require some manual work. One approach is to create a SSIS package using the Backup Database Task option from the SSIS toolbar and create a SQL Server Agent job to schedule it.
The other approach is to write a T-SQL script to backup all databases in the SQL Server Agent Job Step dialog.
Create a SQL Server scheduled backup by using SQL Server Maintenance Plans
There are two options to create a scheduled backup task by using SQL Server Maintenance Plans: manually by creating a new plan and by using the Maintenance Plan Wizard.
To manually create a scheduled backup task:
In the Object Explorer pane under the Management node right click Maintenance Plans and select the New Maintenance Plan option:
From the Maintenance Plan Tasks toolbox select Back Up Database Task:
The Maintenance Plan Wizard also provides the Check database integrity task that can be included in Maintenance Plan:
Double click on an added plan and set backup options:
- To schedule a SQL Server Agent job use the Sub plan scheduling option.
- When a plan is created click save and this action will create a corresponding job under the SQL Server Agent ➜ Jobs folder.
A method to create a new maintenance plan through the Maintenance Plan Wizard guides the user through the process, but this option provides fewer options for fine tuning.
To automate and schedule a backup by using the SQL Server Maintenance Plan Wizard:
- In the Object Explorer pane under the Management node right click Maintenance Plans and select the Maintenance Plan Wizard option:
In the Select Plan Properties window specify a plan name. To schedule a SQL Server Agent job click the Change button:
In the Select Maintenance Plan Tasks select the Back Up Database option and the Check data integrity option. The check data integrity tack performs internal consistency check of the data and index pages within the database :
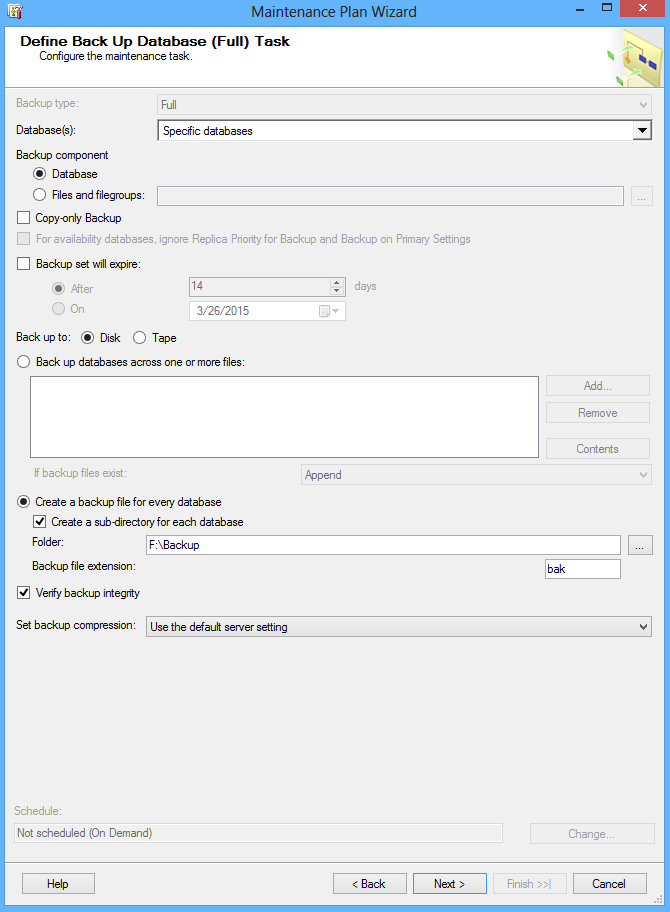
In the following window configure the maintenance task by specifying a database for backup and the backup options. In the Define Back Up Database Task window also check the Verify backup integrity option:
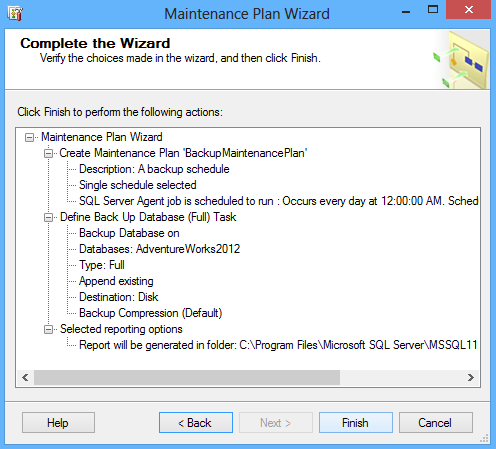
After verifying the choices and actions click Finish:
Maintenance Plans are more suitable for less experienced DBAs because they provide an easy to use GUI, and do not require manually written maintenance scripts. The downside of Maintenance Plans is that the tasks that Maintenance Plans provide are basic and don't leave space for customization.
A Maintenance Plan is also atomic and is therefore not able to run multiple tasks. Each type of maintenance task within a single Maintenance Plan can only be configured to run once within that Plan. For example, if a task that is made to delete older backup files it will only delete one file type at a time. Because of this multiple Maintenance Plans have to be created just to perform a single task, in some cases, and every Maintenance Plan has to have a corresponding SQL Server Agent job to be scheduled.
Create a SQL Server scheduled backup by using ApexSQL Backup
As we saw when scheduling a SQL Server backup as a SQL Server Agent job we have to write a T-SQL script. Also, to fulfil the organizations SLA we would have to make two more jobs, one for a differential and one for a transaction log job.
To save time from having to write T-SQL scripts and eliminate the need to maintain both back up plans and their corresponding jobs when using SQL Server Maintenance Plans, a 3rd party tool, ApexSQL Backup, can be used.
ApexSQL Backup is a SQL Server backup manager that enables automating and scheduling SQL Server backup jobs in one task while preserving the backup chain for easy point-in-time restoration (database rollback).ApexSQL Backup is also able to run multiple tasks at the same time and provides an out of the box solution for scheduling a database backup for one or all databases in just a few clicks.
To create a SQL Server scheduled backup in ApexSQL Backup:
In the Home tab of the main menu select the Backup option:

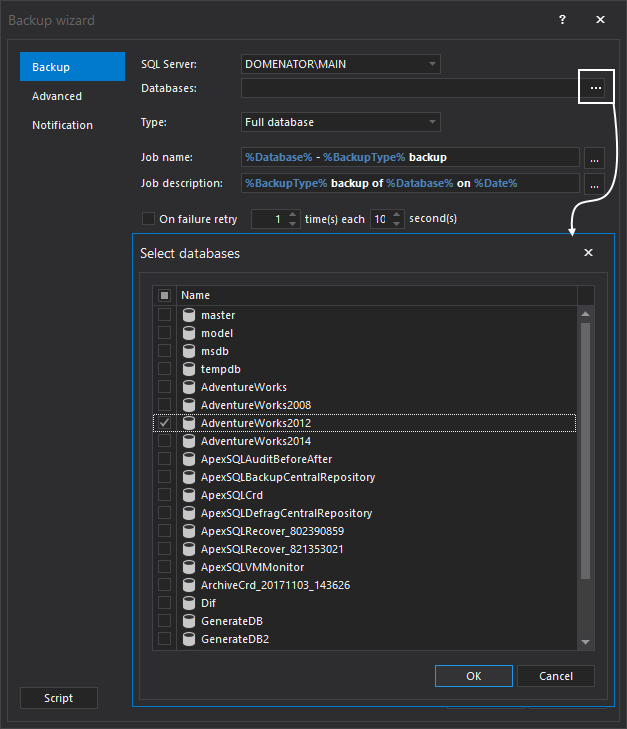
In the Backup wizard specify a server name, a database name, and a backup type. ApexSQL Backup supports all backup types and provides an option to select all databases:
After the databases are selected, click on Add destination button to specify backup destination:
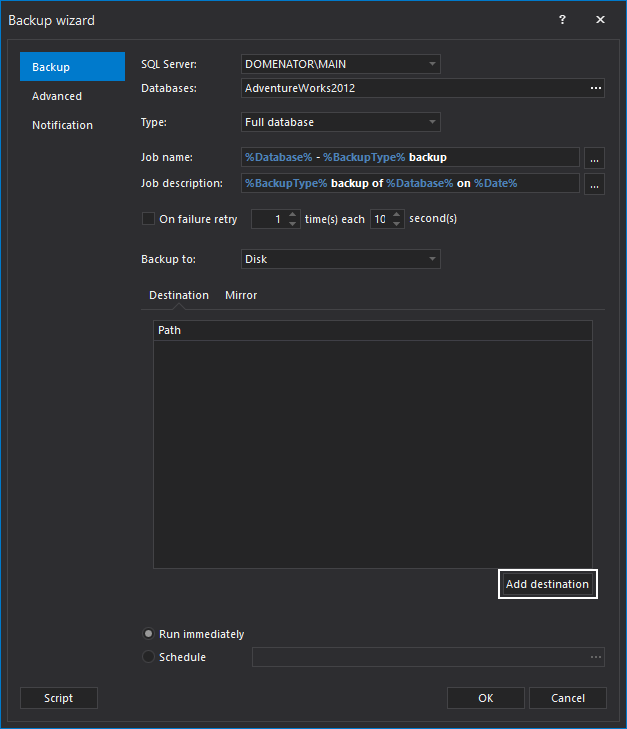
In Add backup destination form, paste the backup destination path in Folder box, or use built-in folder browser to pick the backup destination manually. Click OK to save the backup destination.

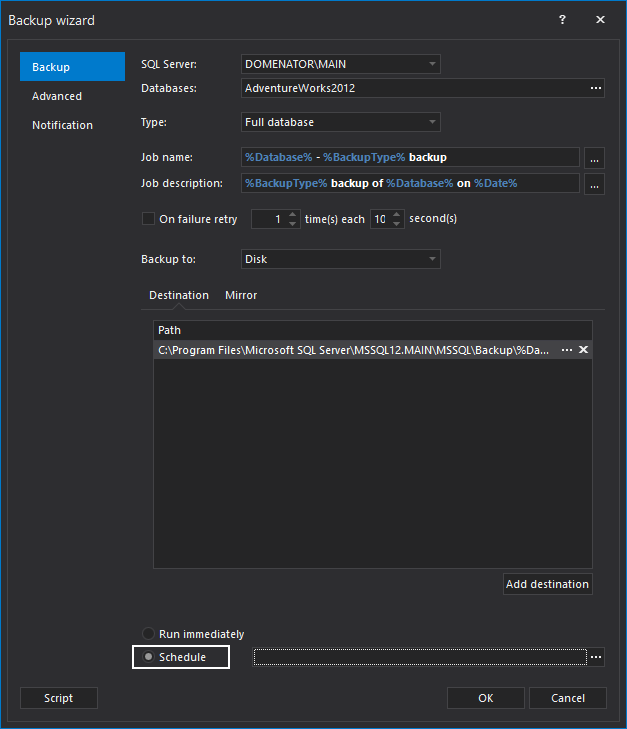
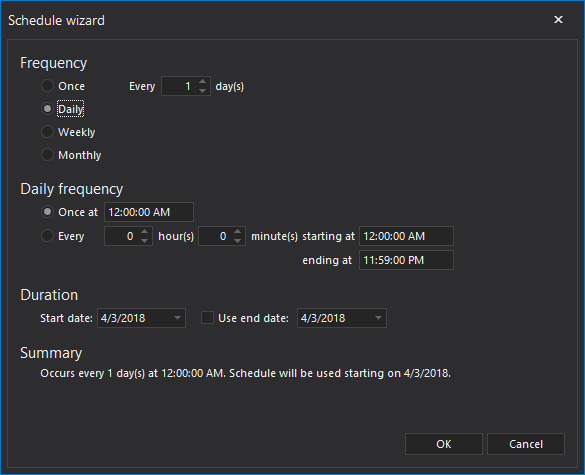
To set the schedule for the backup job, click on the Schedule radio button. Schedule wizard will open automatically. Set the frequency for the schedule, and click OK to save the settings.
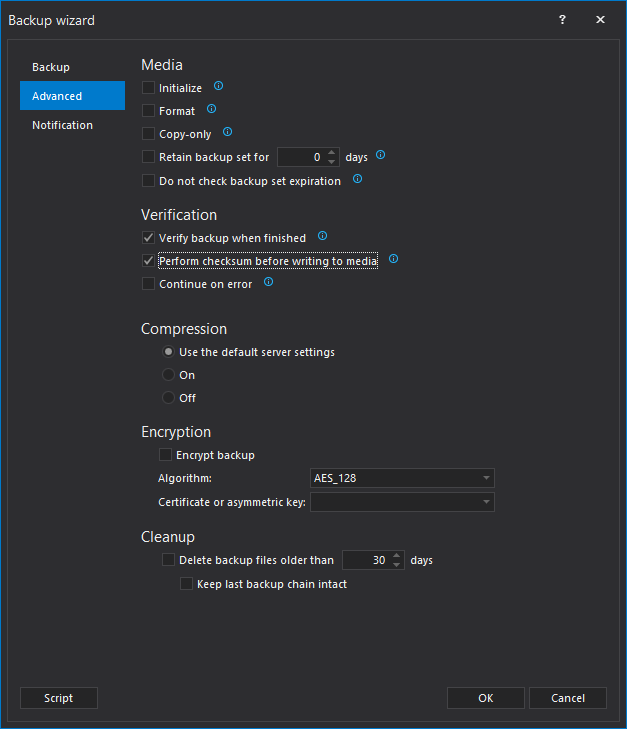
In the Advanced tab specify backup options such as backup verification, compression, encryption etc. ApexSQL Backup offers options to include both the Verify backup step when finished, and the Perform checksum step before writing to media option during the process of creating a backup task without the need for writing a separate script:
To finish the process, click OK button of the backup wizard. If everything is configured properly, the info message will appear. Click Finish to complete the wizard.
Here’s a review of all three approaches to schedule a database backups:
SQL Server Agent
Maintenance Plans
ApexSQL Backup
T-SQL script needed
Yes
No
No
Can backup all databases without a script
No
Yes
Yes
Can execute a task without an additional job
Yes
No
Yes
Can run multiple tasks at once
No
No
Yes
Useful resources:
Backup Overview (SQL Server)
Maintenance Plans
Schedule a Job