Chat now with support
Chat with Support

Quest Protect 6.0.0 - User Guide

Delete a certificate

Remove a certificate referred to by an alias.

bin/fglam --delete-certificate "user alias 1"

A full example for managing certificate for FglAM


Virtual Machine Automation

The Protect Virtual Machine Automation provides you with an approach to perform the Protect, Replicate, and Virtual Standby operations on virtual machines from either of the following dashboards, without interfacing with the Rapid Recovery console.

3
On the navigation panel, under Homes, click VMware Environment or Hyper-V Environment.
The VMware Environment or Hyper-V Environment dashboard opens.
4
Select a Virtual Machine from the Monitoring > Virtual Machine Quick View > Virtual Machines tree view.
The VM Automation (Data Protection) view appears in the middle of Virtual Machine Summary view.

The Protect Virtual Machine Automation includes the following three options:

Automation of VM Protection

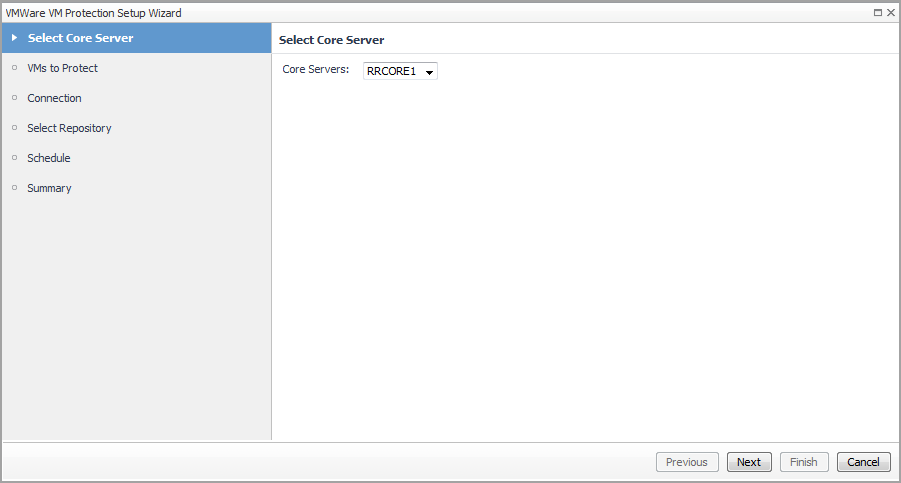
The VMware VM Protection Setup Wizard guides you through the procedure for identifying virtual machines that you want to protect. This wizard also enables you to customize the schedule for performing the protection automation.

3
On the navigation panel, under Homes, click VMware Environment or Hyper-V Environment.
The VMware Environment or Hyper-V Environment dashboard opens.
4
Select a Virtual Machine that you want to protect from the Monitoring > Virtual Machine Quick View > Virtual Machines tree view.
The VM Automation (Data Protection) view appears in the middle of Virtual Machine Summary view.
5
Click Protect. The VMware VM Protection Setup Wizard opens.
6
In the Select Core Server step, select a Core Server from the drop-down list, and then click Next.
7
In the VMs to Protect step, select VMs from the left vCenter table, click >> to move selected VMs to the right table, and then click Next.
8
In the Connection step, specify the port number as needed, and then click Next.
9
In the Select Repository step, select a repository from the Core Repositories drop-down list, and then click Next.
10
In the Schedule step, select either of the following schedule options, and then click Next:
Default protection: The automation will be performed hourly for all volumes.
Periods: The automation will be performed on specified weekdays or weekends.
Daily protection time: The automation will be performed on a daily basis.
11
In the Summary step, review all configurations and click Finish.
The selected VM will be added into Protect Rapid Recovery Protected VMs list and Rapid Recovery Core Server list after the VM protection automation is complete. The first time when a VM protection is added, its snapshot with the customized schedule will be transferred to the repository on the Rapid Recovery Core. You might need to wait for a while to see the VM’s status update and to collect data back to Foglight from Rapid Recovery server.
Related Documents

The document was helpful.

Select Rating

I easily found the information I needed.

Select Rating