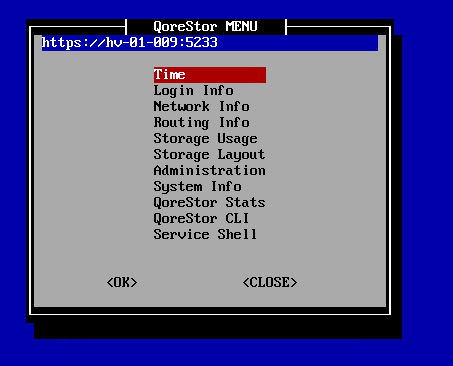
The sections below contain the steps and information required to configure the QoreStor
After the QoreStor
username: qsservice
password: changeme
After changing the default password, you will be prompted to provide the initial networking information for your environment.
|
|
NOTE: Hostnames must comply with the standards RFC 1123 and RFC 952. Hostnames may only contain the letters a-z, the numbers 0-9, the "-" (hyphen), and the "." period (or dot). |
After the initial configuration, the QoreStor menu will be displayed.

The table below details the configurations available for each menu item. The Administration , QoreStor Maintenance, and QoreStor Stats menu items provide access to additional sub-menues, and are documented separately in the topics linked to below.
|
|
NOTE: To navigate the menu, use the arrow keys to select an entry, then press [Enter]. To return to the menu, use the [Tab] key to select Ok or Back, then press [Enter]. |
| Menu item | Available configurations | ||
|---|---|---|---|
|
Time |
| ||
|
Login Info |
Displays information about which accounts are currently logged into the QoreStor server, and the processes those accounts are using. | ||
|
Network Info |
Displays the current network configuration. | ||
|
Routing Info |
Displays the current routing table. | ||
|
Storage Usage |
Displays the current storage configuration for each filesystem, including:
| ||
|
Storage Layout |
Displays the layout per storage device, including:
| ||
|
Administration |
Provides options to configure networking, storage, application and operating system configurations. Refer to the section QoreStor Administration | ||
|
System Info |
Displays information about the QoreStor system, including:
| ||
|
QoreStor Stats |
Provides access to QoreStor system statistics. Refer to QoreStor Statistics for more information. | ||
|
QoreStor CLI |
Allows access to the QoreStor CLI commands using the qsadmin account. Refer to the QoreStor Command Line Reference Guide for more information. To return to the QoreStor Menu from the CLI, type exit at the prompt.
| ||
|
Service Shell |
Allows access to the Service Shell using the qsservice account. The Service Shell is intended for OS and storage maintenance, and as such, the qsservice account has sufficient privileges for those tasks. To return to the QoreStor Menu from the shell, type exit at the prompt.
|