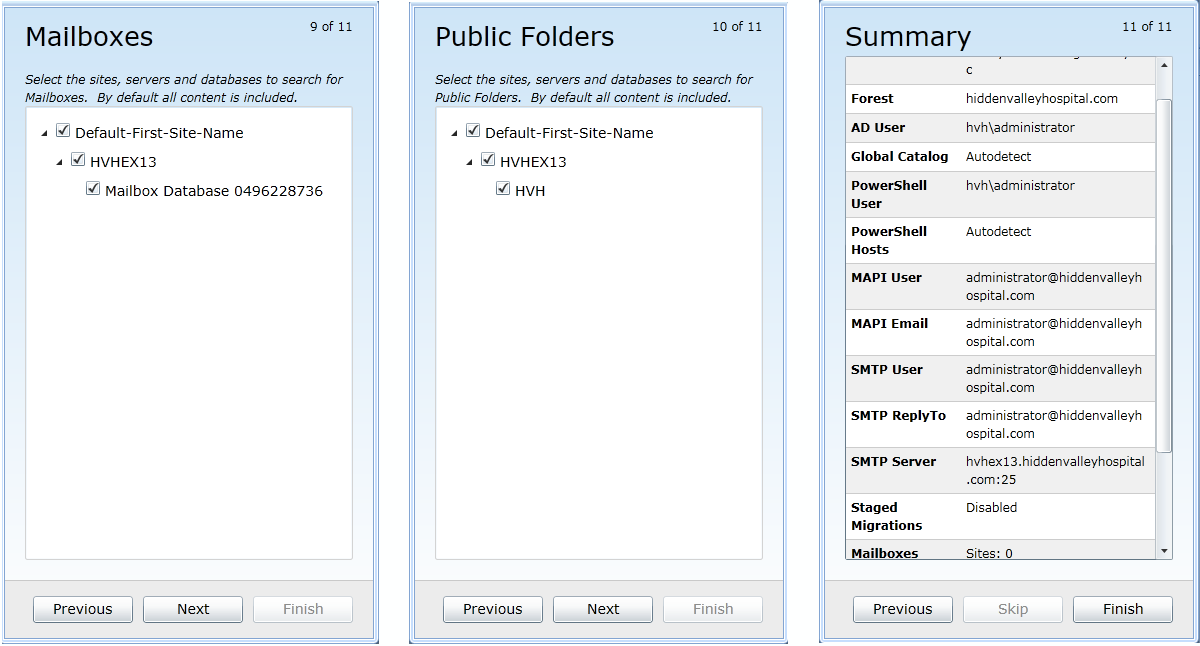
The first time you run the Migrator Pro for Exchange Admin Portal, Migrator Pro for Exchange prompts you to enter your program license and then to configure your target forest—the forest you are migrating TO. Your target forest can be either a local (on-premises) or a tenant (Office 365) forest. Migrator Pro for Exchange’s New Forest Wizard asks you which type you want to define, and your answer determines which series of configuration screens you will see to define your target forest. You will later configure your source forest(s)—where you are migrating FROM.
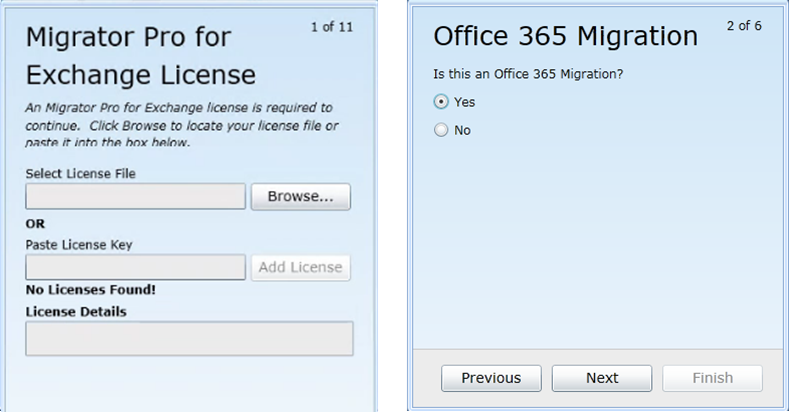
The screen sequence begins with:
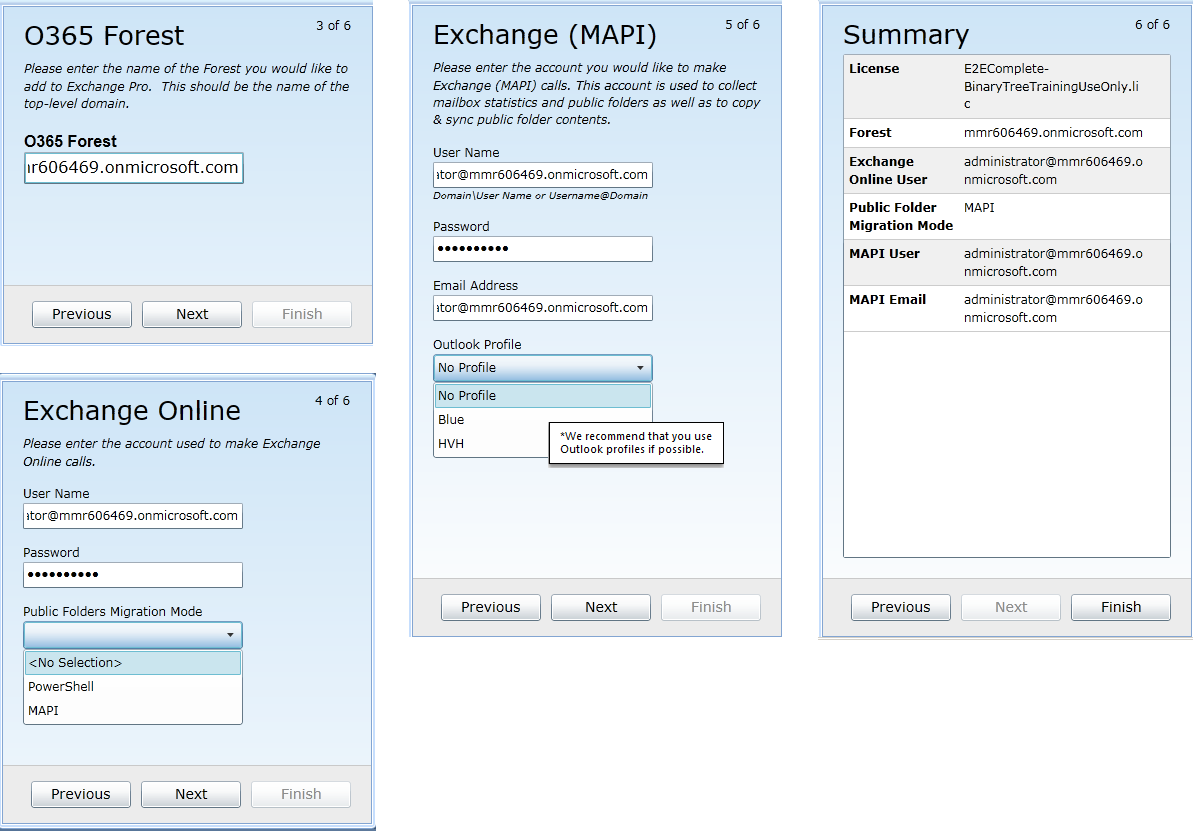
If you answer Yes to the Office 365 question (to define a target tenant forest), the sequence continues with:
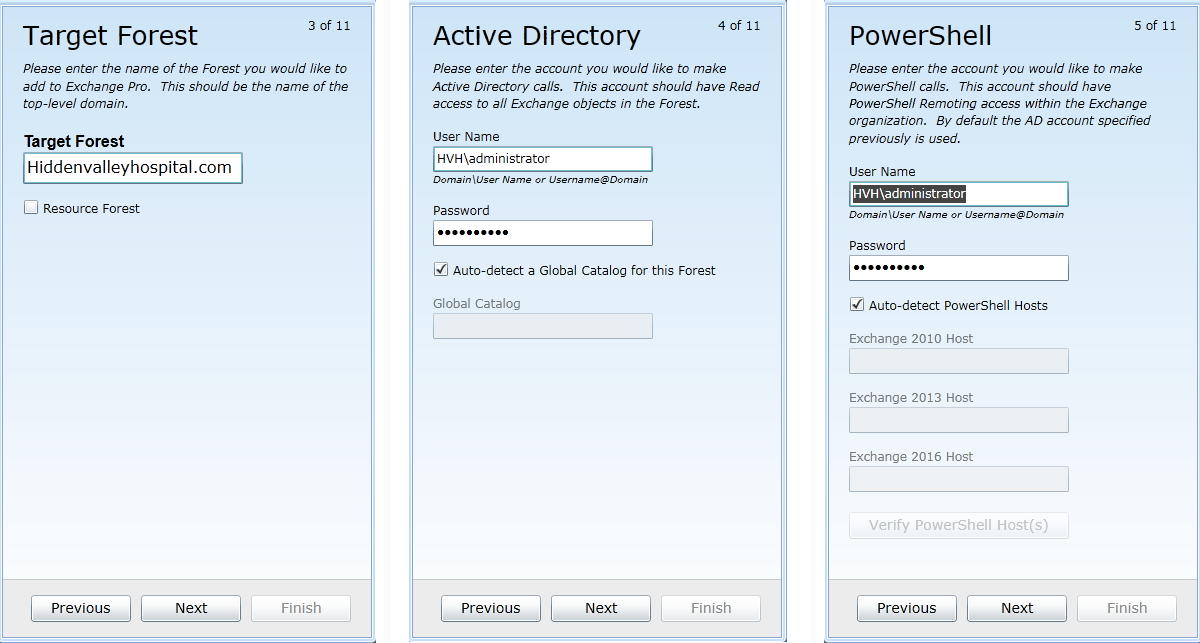
If you answer No to the Office 365 question (to define a local target forest), the sequence continues with:
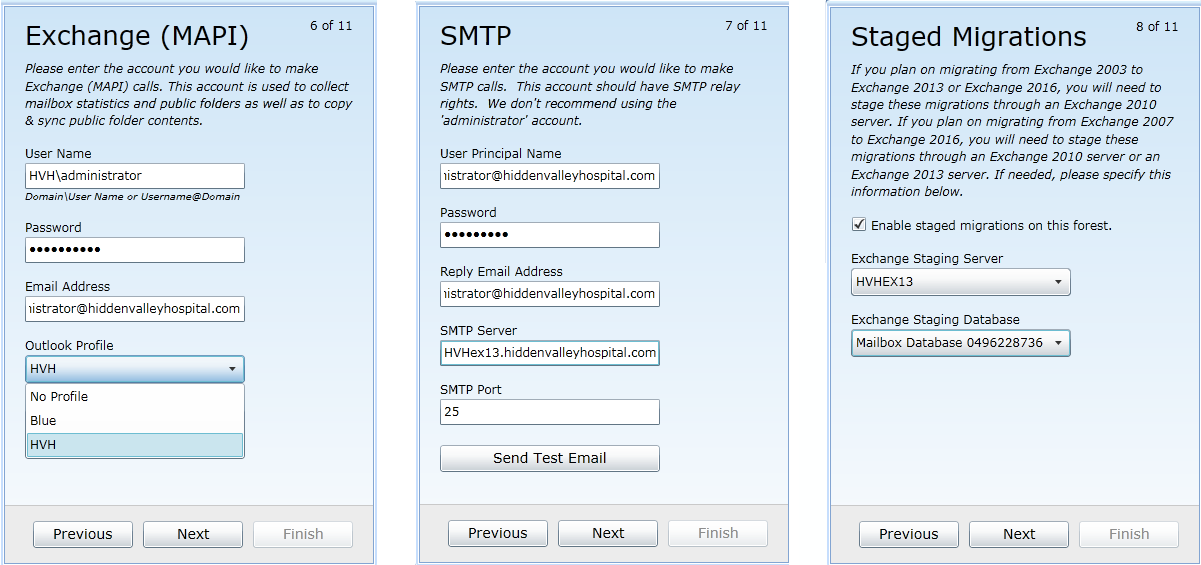
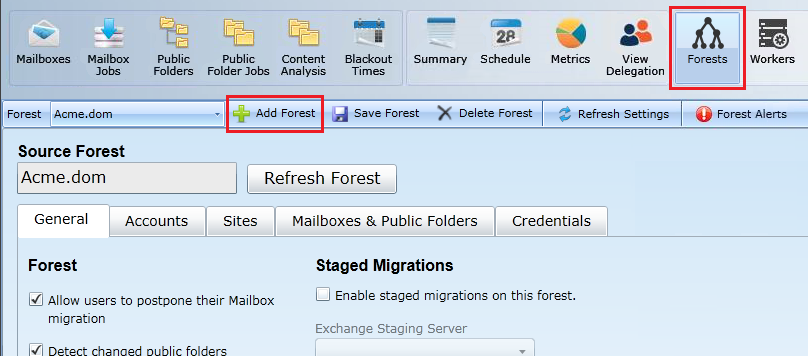
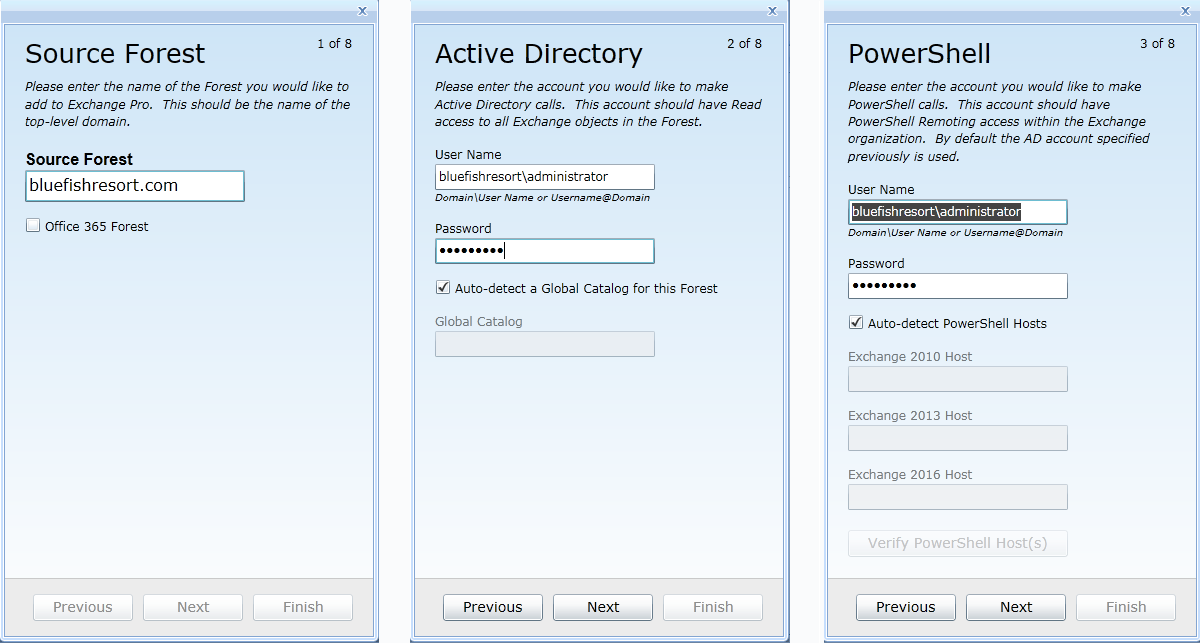
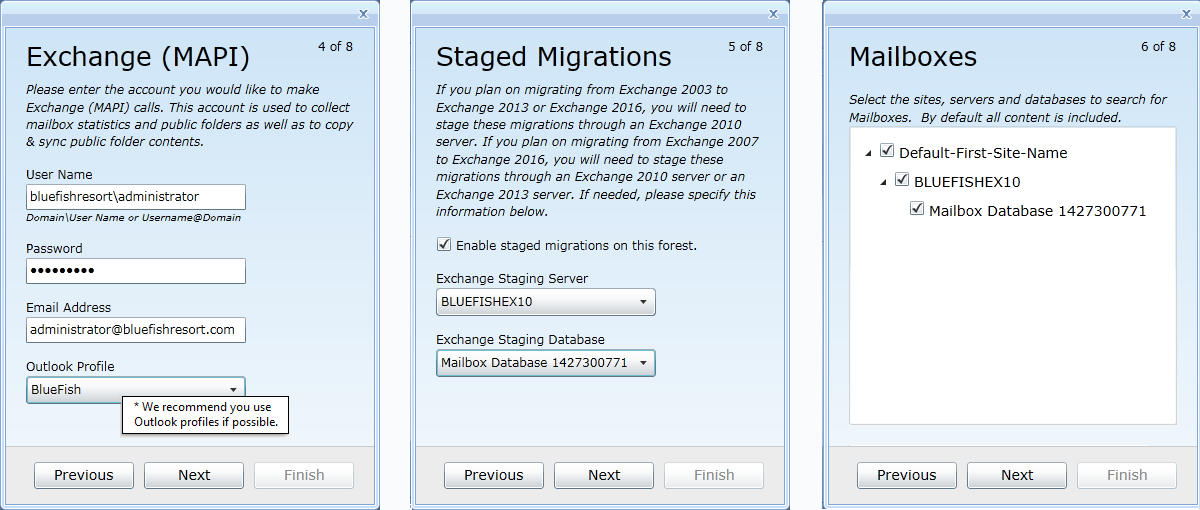
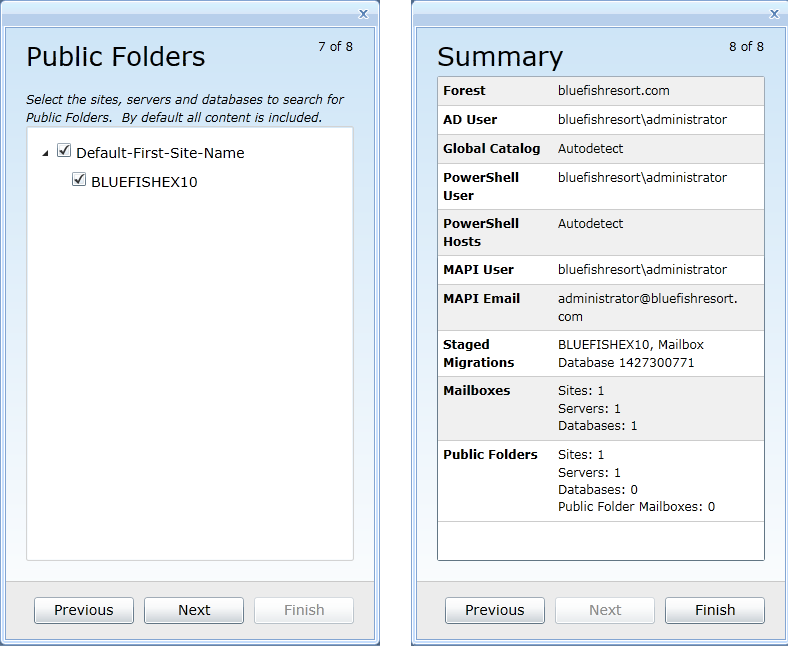
Now configure your first Source forest. From the Forest view, choose Add Forest. The dialog boxes are similar to the target forest dialog boxes, but this time the requested information is about the on-premises source where you would like to migrate from.
Templates are used to send automatic email notifications to users and administrators about the progress of their migrations. Go the Settings view, and the Notifications Tab. You can select and/or edit the templates and types of notifications (if any) that you choose to use during the project.
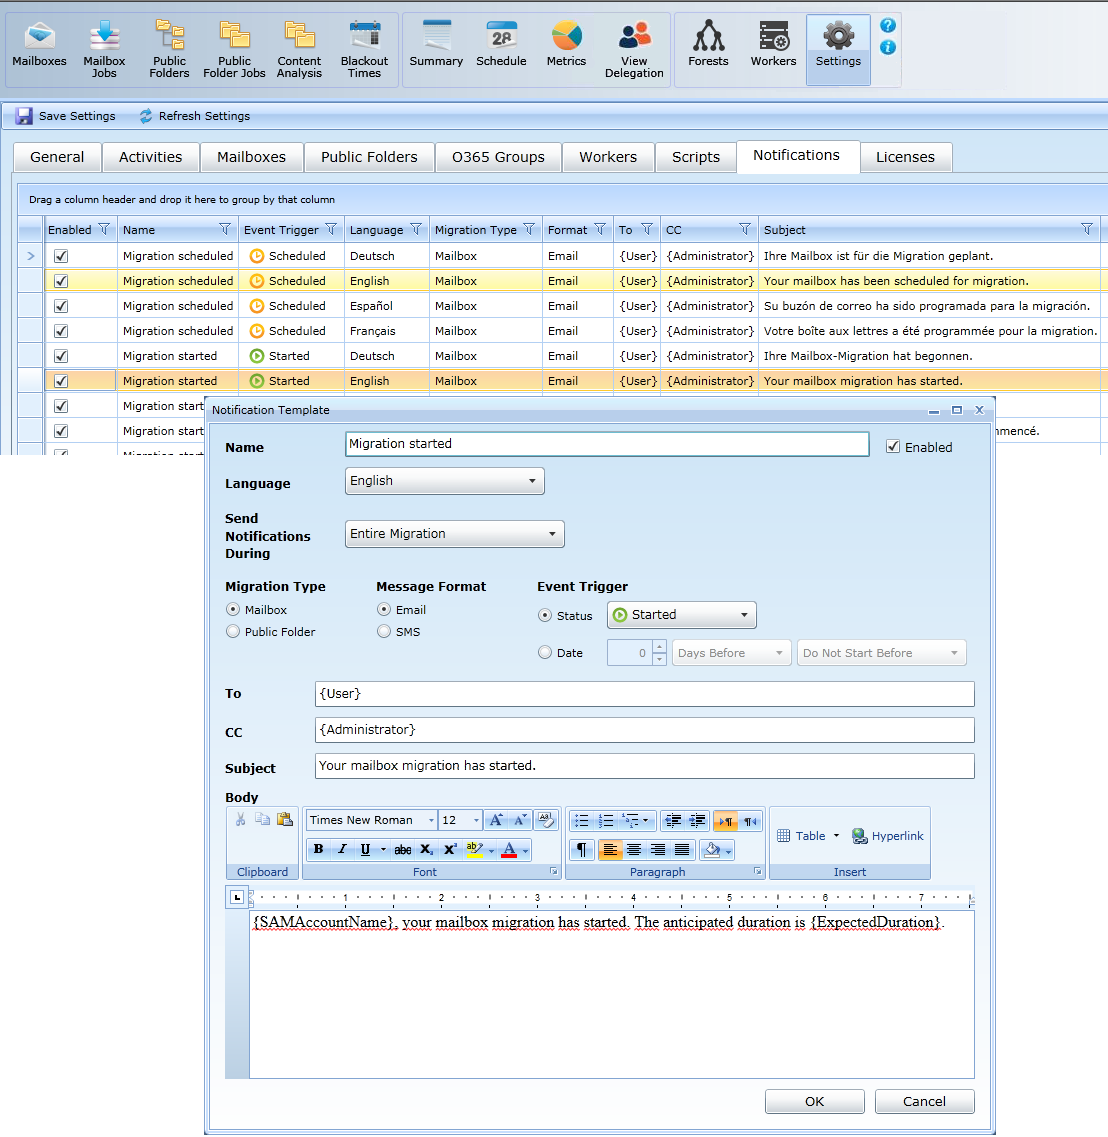
Templates are used to send automatic email notifications to users and administrators about the progress of their migrations. Go the Settings view, and the Notifications Tab. You can select and/or edit the templates and types of notifications (if any) that you choose to use during the project.
