Connecting the Source and Target Exchange Organizations Using SMTP Connectors
To ensure that users do not lose their mail during the migration period, and to make the migration from source Exchange organization to target smooth, Migration Manager establishes mail redirection between the source and the target Exchange servers.
Accordingly, Migration Manager requires the source and target Exchange organizations be connected using SMTP connectors.
For more details, see the related topics:
Setting Up the SMTP Connectors
Create SMTP connectors between the bridgehead servers of your source and target Exchange organizations by taking the following steps:
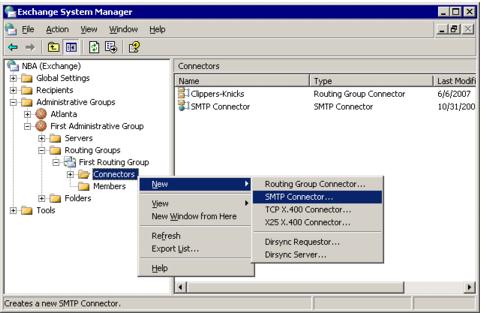
- In Exchange System Manager, right-click the Connectors node, select New, and then select SMTP Connector.
|

|
NOTE: The following is an example of connector configuration for a source Exchange 2003 server. |
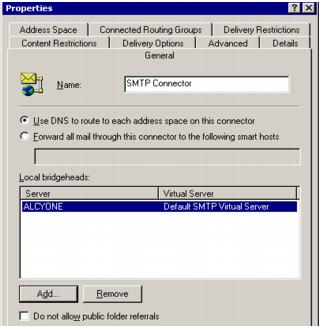
- Go to the General tab of the new connector’s properties, and click Add to specify the name for the connector and local bridgehead server. Select the Use DNS to route to each address space on this connector option to use DNS to route mail to the address spaces specified for this connector.
- When Migration Manager for Exchange is configured to use SMTP for mail redirection, mail is forwarded to additional SMTP addresses generated by the Directory Synchronization Agent and based on the address templates you provide when setting up the directory synchronization jobs.
Go to the Address Space tab and click Add to add a new address space. It is recommended that you use the same SMTP prefix that was specified in the Target SMTP address template in the directory synchronization settings. 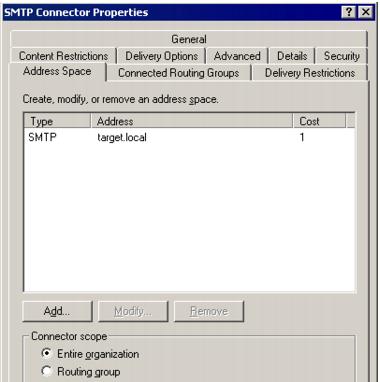
- Configure other options if needed and click OK. This example shows the other options keeping their default values.
Forcing Exchange to Accept Redirected Mail as Inbound Mail
Migration Manager for Exchange provides for uninterrupted user collaboration using the technology of mail redirection between the source and target organizations. Additional SMTP addresses are used for mail redirection. These addresses are automatically added by the Directory Synchronization Agent.
For mail redirection to work, the mail destined to the additional addresses must be accepted as inbound mail. For that, create a recipient policy to make the Exchange organization responsible for all mail delivery to the specified addresses.
Creating a Recipient Policy
To make Exchange consider the redirected mail to be inbound mail and search for the recipients in Active Directory, configure your recipient policy as follows:
- In Exchange System Manager, expand Recipients in the left-hand pane tree, and then right-click the Recipient Policies node and create a new policy.
- In the New Policy dialog box that opens, make sure only the E-Mail Addresses option is selected.
- Provide a name for the new policy and leave the list of filter rules blank.
- Add a new SMTP entry. In the Address field, type the address space that you plan to specify for the source or target Exchange organization when setting up the directory synchronization job (for example, @source.local or @target.local, respectively).
- Verify that the This Exchange Organization is responsible for all mail delivery to this address check box is selected. Then click OK.
Modifying Name Resolution Parameters on the Bridgehead Servers in Exchange
To provide for zero-impact migration, recipients of the redirected mail must be resolved to the corresponding directory objects whose addresses are contained in the Global Address List (GAL). To make Exchange resolve SMTP addresses into the directory objects, modify the name resolution parameters on the bridgehead servers in the Exchange organization.
Turn on the Resolve Anonymous E-mail option on each Exchange 2003 bridgehead server, as follows:
- In Exchange 2003 System Manager, expand Servers node, and then expand the server's node.
- Expand the Protocols node, and then expand the SMTP node.
- Right-click the SMTP virtual server and then click Properties.
- In the Properties dialog box, go to the Access tab. Click Authentication, and then select the Resolve anonymous E-mail check box.
- Repeat this procedure for each Exchange 2003 bridgehead server.
For more details, refer to the Resolve Anonymous Senders Functionality in Microsoft Exchange 2003 Microsoft Knowledge Base article.
