This option allows administrators to create a mapping report, matching the source Google accounts (users or groups) with Target Office 365 users.
This operation has the following requirements for use:
·The account used to perform the report needs to be a Global Administrator in this Office 365 tenant.
To create a mapping report, perform the following:
1.On the Migration Analysis tab click Mapping Report.
The Mapping Report wizard opens.
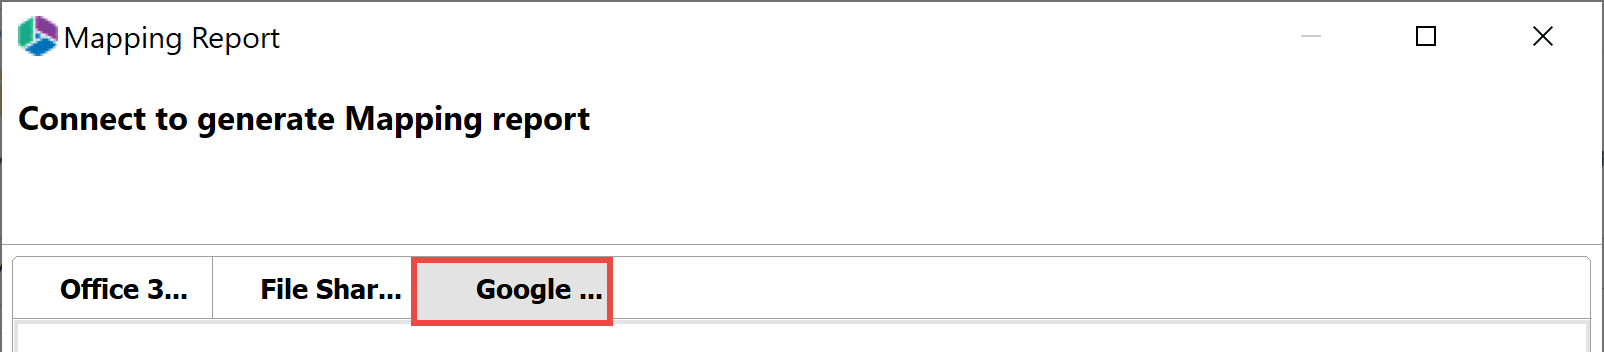
2.In the wizard, select the Google tab.
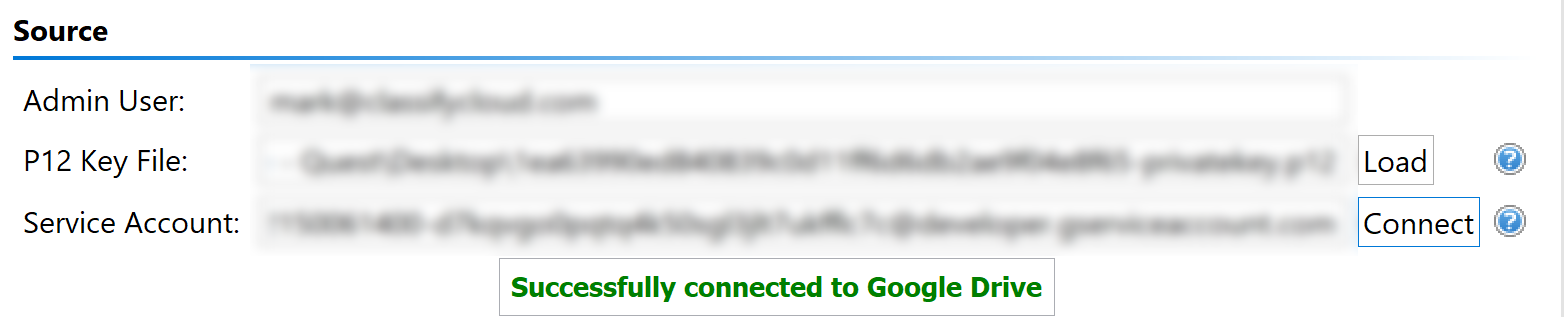
3.Enter your the Admin user, p12 file key, and service account information for your google drive or google shared drive. Click Connect.
4.Enter your SharePoint Admin URL for the Target Office 365 connection and click Connect. On the Connect to SharePoint popup, enter your SharePoint credentials and click Connect. If you receive any message other than "Successfully connected to SharePoint Admin URL", please double check your credentials or contact support. If you would like to add additional Administrator accounts to this report, click Admin+.
5.Click the Select button to specify a location and a name for this report.
6.Click Finish to begin the analysis.
7.The report generated will folllow the following rule:
userloginname@*.* OR Shared Group ID number (ie: 0ABDWpGG8AGwXUk9PV) , userloginname@*.*
The mapping is done by matching accounts with the same name, or by matching accounts with the same display name.
8.In order to use the mapping report generated within Essentials, open it in excel, delete the source and target workbook sheets, and the first line with the headers from the user mapping report worksheet. Go to File > Save As> Select file type as CSV UTF-8.
9.You can now use the .csv file in the Copy Google Drives/Google Shared Drives to Office 365 wizard and the Google Drives/Google Shared Drives to Microsoft Teams wizard, by selecting Load from CSV on the wizard's first page.
Please visit the following link for an overview on how to script and schedule jobs such as User Mapping Report.
Essentials for Office 365 Migrator is intended for both large scale migration activities including lists, libraries, sites, site collections, web parts, views, permissions, navigation and other objects; as well as re-organization and categorization tasks such as tagging/classification and moving/copying content between sites, lists and folders.
|
|
NOTE: A Global or SharePoint Administrator account must be used in order to perform full migrations. An account with less privileges will only be able to perform a limited set of migrations. |
The application consists of two primary panes and one optional pane: (1) Navigator, (2) Hyper Migration/Contents/Progress, (3) Connections. A set of wizards is automatically generated when items or objects are tagged, copied or moved.
An additional method for executing many migration and replication activities is through the use of the Live Compare! feature. See the Live Compare! for additional information on this feature.
|
|
NOTE: We have found this to be the ideal configuration, but the individual panes may be rearranged, minimized or maximized. |
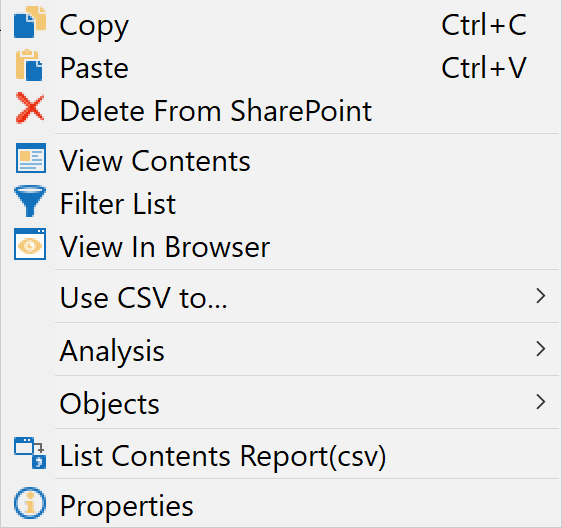
The objects displayed in the Navigator area are limited to sites, sub-sites, lists and libraries. Double-clicking on any of the sites, lists or libraries will trigger the application to display the content for that object. In addition, a set of options is available from the right-click menus.
|
|
|
|
Site Level Right-Click Menu |
List Level Right-Click Menu |
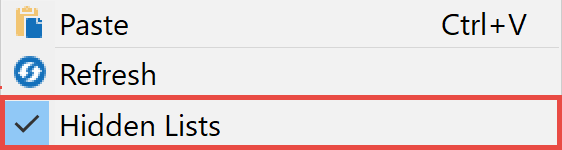
Hidden Lists
To expose hidden lists (e.g. the Master Page Gallery) in the Navigator Pane, right click on the "Lists" node and choose the "Hidden Lists" option. After this is enabled, you will see the hidden lists for this location.