Summary
This tutorial walks you through the process of automating the task of exporting query results to simple Excel reports. You will create three different, and very useful, simple Excel reports.
In this tutorial you will learn:

After creating a result set in Toad, you may need to send the results to your end users. The easiest way to create a report containing query results is to export the data to an Excel file by right-clicking the data grid and selecting Quick Export | File | Excel File. This action creates a basic Excel spreadsheet containing the result set from the data grid.
If you want to create more than a basic spreadsheet and automate the process, Toad Automation helps you build a variety of Excel reports, from simple worksheets to complex and attractive Excel reports.
In this introduction to automating Excel reports, you will learn how to automate the process of exporting data to a variety of simple Excel reports.
Note: To learn how to get started with Automation, see Getting Started with Automation.
Click the Select to File activity in the Database Activities pane of the Toolbox, or drag the activity from the Toolbox to the Automation design window.

 to browse to and select a SQL file.
to browse to and select a SQL file.
to browse to and select a SQL file.
 to open the SQL file (you previously selected) in an editor where you can modify the SQL.
Click
Note: To specify more-detailed options for the Excel file, click the Export options button.
 to build an expression.
Select Overwrite if you want to overwrite the file.
Note: If you did not add a suffix, you can deselect Overwrite to append a new worksheet to the Excel file with each script execution.
That was simple, wasn't it. Now move on to the next example to learn how to create a slightly more complex Excel report.
Suppose you want to create a new report each week from the same query while retaining the previous week’s results. In this case, you want to append each week’s results as a new worksheet to a single Excel file. This is an excellent option if you want to compare the results each week (or each day, month, etc.) to see how the data is changing. (And Toad has several data compare features in the application to let you do that.)
to select a location and enter a name for your file.
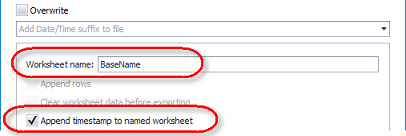
Select Append timestamp to named worksheet. This will append the date and time (that the data was exported) to the base worksheet name. Click OK to save your settings and close the dialog.
Click
The output of this script is one Excel file containing multiple worksheets. Each worksheet contains a result set from one execution of the script. And each worksheet name records the date and time the result set was exported.
Another variation of the multi-page Excel report is to export the results of multiple queries. Each worksheet in the Excel file will be populated with the result set of a different query. This can be accomplished by using a SQL file that contains multiple SQL statements as the input file.
in the Name field to select a location and enter a name for your new Excel file.
Click Export options and make sure the Worksheet name field is blank.
Note: If the Worksheet name field is not blank, your script will export both result sets into the named sheet, and the second result set will overwrite the first.
Click
The output of this script is one Excel file containing multiple worksheets. Each worksheet contains the result set of a different query.
Note: To learn how to export the result sets of multiple queries into a single worksheet (using Automation), see Automate Complex Excel® Reports.
Toad Data Point 6.4.1 introduces a new capability: the ability to export data directly to Excel or CSV files stored on a SharePoint Online Server - as part of your Automation script.
This enhancement is supported in the following Automation script steps:
Pivot (Note: Excel Pivot and Excel Pivot View export formats are not supported)
T&C
Dimensional Viewer
For most of these steps (except Export and Import Wizard steps, where export settings are defined in the template), you have access to the Export to file option. This allows you to export data from that step to various file formats, including Excel and CSV.
Previously, Automation scripts could only export data to files saved locally. With this update, you can now export directly to SharePoint Online, making it easier to collaborate and centralize data access.
To export data from an Automation step (e.g., Pivot Grid, Clean Data, or Dimensional Viewer):
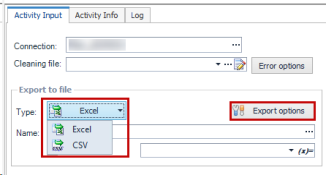
In the Activity tab, under the Automation step, choose your desired file format (Excel or CSV) from the Type drop-down
Open the Export options dialog
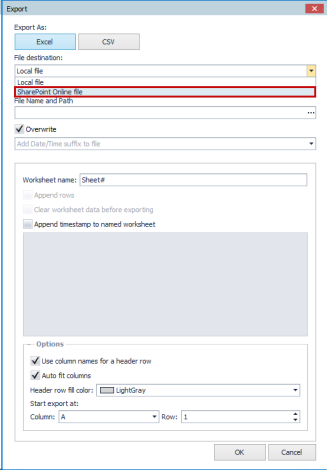
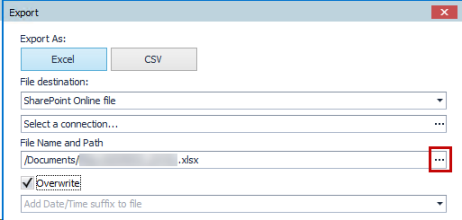
From the File destination drop-down, select SharePoint Online file
Select or create a SharePoint Online Server connection
Note: Based on the chosen Output format, only connection to that type will be listed – if it is Excel selected, only the Excel connections will be listed.
If you have an existing SharePoint Online Server connection:
• Click the Eclipse button (...) in the Select a connection field
• Choose your connection from the list
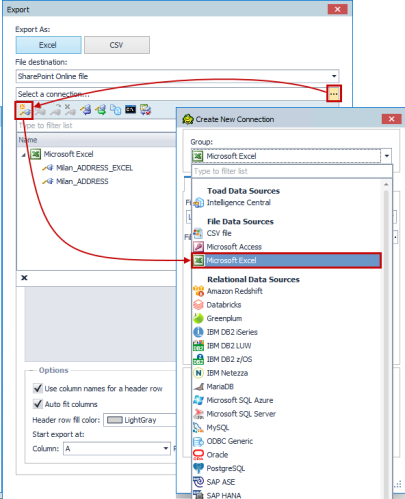
If you need to create a new connection:
• Click Create to open the Connection dialog
• In the Connection group, select either Microsoft Excel or CSV file, depending on your export format
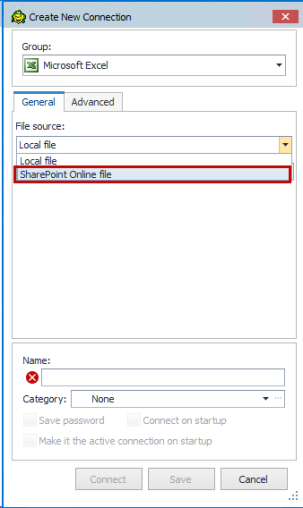
• In the File source drop-down, choose SharePoint Online file
• Fill in the required connection parameters:
o SharePoint URL
o Client Id
o Tenant Id
o Client Secret
• Select a file from the SharePoint Online Server
Note: Since the Excel connection is selected, only Excel files will be listed. If you choose the CSV connection, only the CSV files will be listed.
• Click Connect
Your new connection is automatically saved and will appear in the Navigation or Connection Manager tab for future use.
Note: A file must be specified to establish the connection, but you can change it or create a new one in the Export dialog.
Specify an Excel or CSV file to export your data
After a successful connection, you'll be back in the Export dialog. You can:
o Choose an existing file on the SharePoint Online Server (already specified through connection, or you can choose a different one), or
o Create a new file directly from this interface
To create a new file:
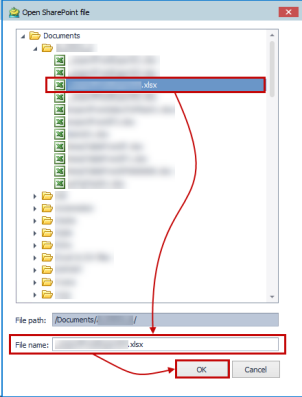
• Click the Eclipse button at the end of the File Name and Path field
• Select folder where you want to save an Excel or CSV file on SharePoint Online Server and in the File name field, type the desired name for your new file
• Click OK to proceedr your new file
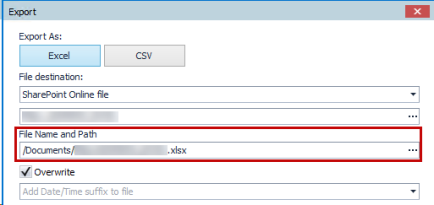
• The chosen file will be written in the File Name and Path in the Export dialog:
• When everything is set, click the OK button to close the Export dialog.
Note: When exporting data to an Excel or CSV file stored on SharePoint Online Server, the file path will be greyed out as a distinct difference between locally stored files.
Now you can continue with the automation script activities.
As you can see, with Toad Automation you can easily create basic Excel reports, but with a few more script configurations and the use of templates, you can also create attractive and more complex reports. To learn how, see the following tutorials on Automating Excel Reports.
See Schedule Your Script to learn how to schedule the Automation script.