This tutorial shows you how to create a custom dashboard using the Create Dashboard wizard. This wizard includes the following features:
Also, you can create your own views based on data in the particular object that is selected.
The Web Component Guide describes how Foglight® organizes the data it collects. These objects (and metrics) are displayed using a special-purpose framework.
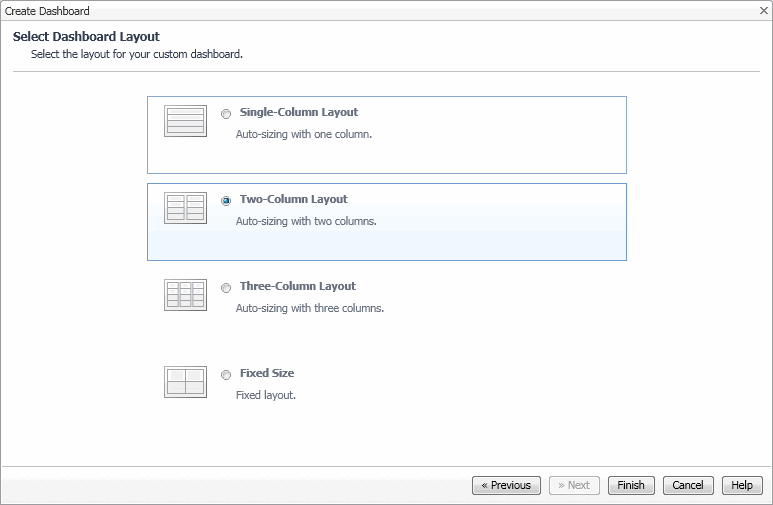
The standard Foglight® dashboards have been designed to satisfy most monitoring needs, however Foglight is also highly extensible and, if your role allows it, it gives you the capability of designing your own custom dashboards. The simplest method for creating a custom dashboard is to use the Create Dashboard link available on the action panel’s General tab.
|
1 |
|
• |
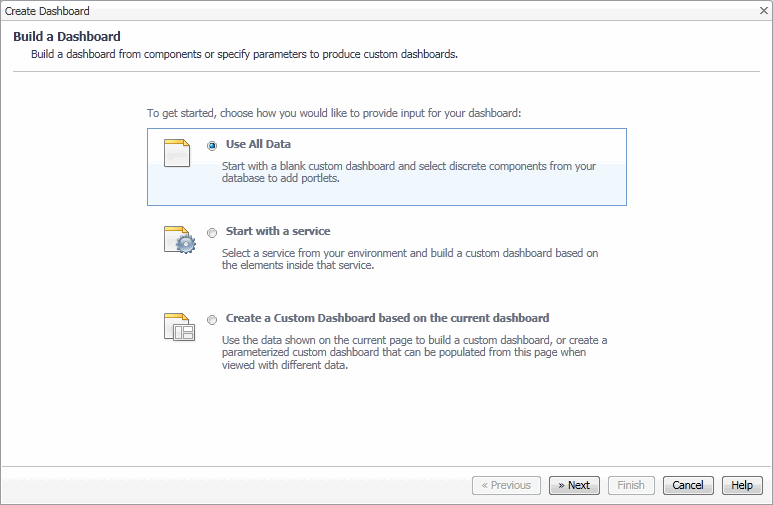
Use All Data: Select this option to build a dashboard from various data elements, and click Next. |
|
• |
Start with a Service: Select this option to build a dashboard from service elements. On the Select a Service page that appears, select the service, and click Next. |
|
• |
Create a Custom Dashboard based on the current dashboard: Select this option to build a dashboard from the current dashboard. On the Select Objects page that appears, select the data inputs from the current dashboard that you want to include in the new dashboard, and click Next. |
|
3 |
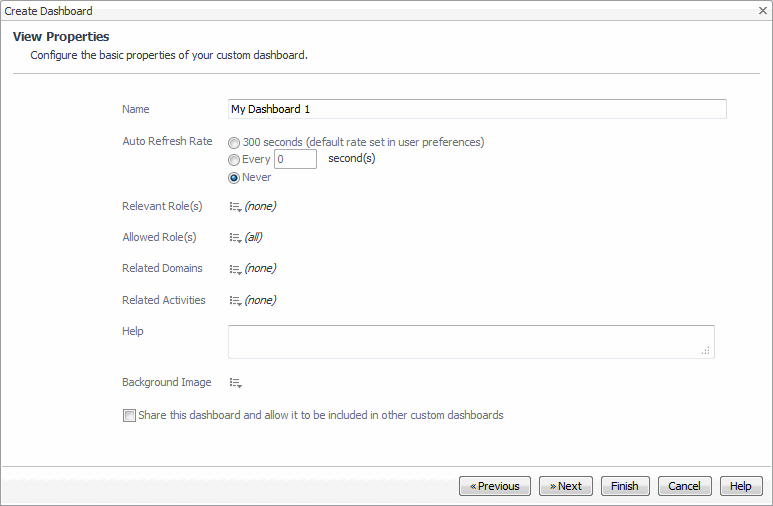
In the Create Dashboard wizard, on the View Properties page that appears, edit the dashboard properties, as required. |
|
a |
In the Name box, type the dashboard name. |
|
b |
Specify the dashboard’s Auto Refresh Rate to one of the available options: |
|
• |
The default number of seconds set in User Preferences |
|
• |
|
d |
Optional—Associate the monitored data with a specific domain. |
|
e |
Optional—Associate the monitored data with specific monitoring activities. |
|
i |
Click Next. |
|
a |
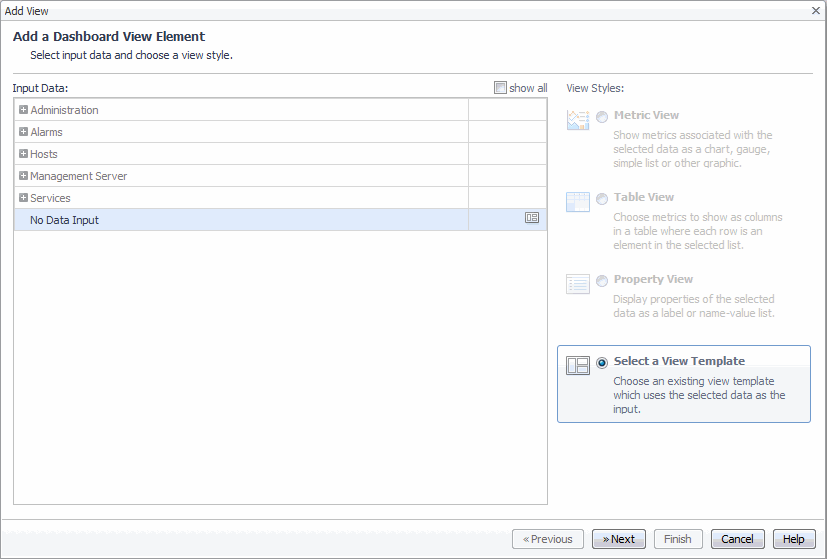
On the Add a Dashboard View Element page, in the Input Data area, expand the applicable node and select it in the tree. |
|
b |
In the View Styles area, select an available view style. |
|
c |
Click Next. |
|
7 |
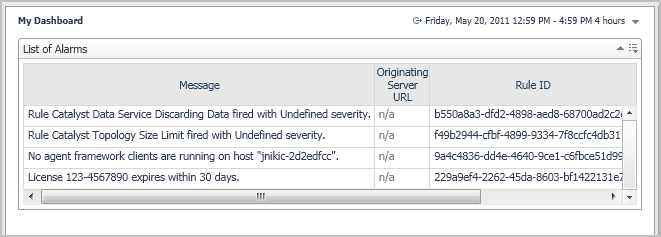
When completed, click Finish. |
To help you with adding data to your dashboard, several functions are available:
|
• |
|
• |
This topic describes the process of using the Add View wizard. This wizard is provided for the same function needed when creating a custom report.
|
1 |
If the dashboard is not already opened, select the dashboard from the My Dashboards node. |
|
2 |
