|
• |
For Windows - SharePlexManager-3_0_0-windows.zip |
|
• |
For Linux - SharePlexManager-3_0_0-linux-ia32.tar |
|
• |
For Windows, open SharePlexManager-3_0_0-windows.zip |
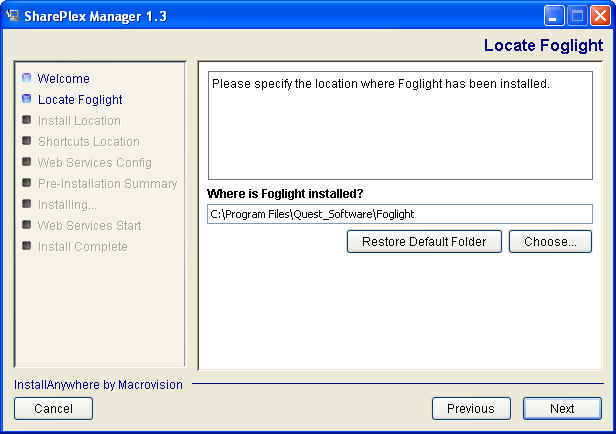
If you are upgrading from SharePlex Manager version 2.2 to version 3.0, it is strongly recommended that you back up your Foglight 5.5.8 server and database before attempting to upgrade it to version 5.9.2. If upgrading from Foglight 5.5.8.3, you must upgrade to Foglight 5.7.5.8 before you can upgrade to Foglight 5.9.2. For upgrade instructions, see “Upgrade Foglight 5.5.8.3 to Foglight 5.7.5.8” on page 3.
|
1 |
Start the installation process by initiating the appropriate executable file located in the FoglightManagementServer-5.9.2 directory of the SharePlex Manager install media. |
|
2 |
Follow the installation instructions provided in the appropriate Foglight Installation Guide located in the FoglightServer-5_9_2\Documentation directory of the SharePlex Manager install media. |
|
• |
At the end of a standard install, the Foglight server is started automatically. You must shut down the server before installing SharePlex Manager, either by selecting the Stop Foglight option on the Start Menu (for Windows) or by executing the shutdown script FmsShutdown.sh (for Linux) located in the bin directory, |
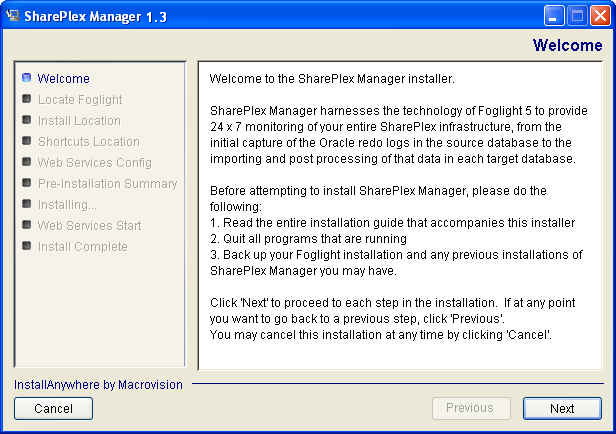
You can run the SharePlex Manager installer in either GUI mode or in console mode (Linux only). The instructions in this guide are based on a GUI installation. However, since the sequence of steps are the same, you can still perform a console installation by following these instructions. The only differences are operational. For example, in GUI mode you click Cancel, Previous, and Next, while in console mode you type ‘quit’ and ‘back’ and press <Enter>.
|
• |
Windows - SharePlexManager-3_0_0-install-windows.exe |
|
• |
Linux - SharePlexManager-3_0_0-install-linux-ia32.bin |
|
2 |
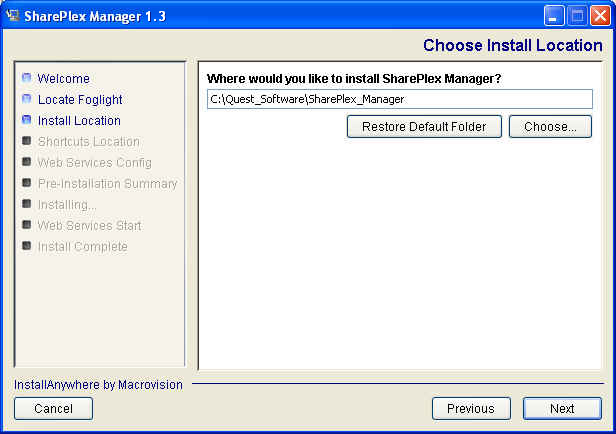
Click Next. |
|
4 |
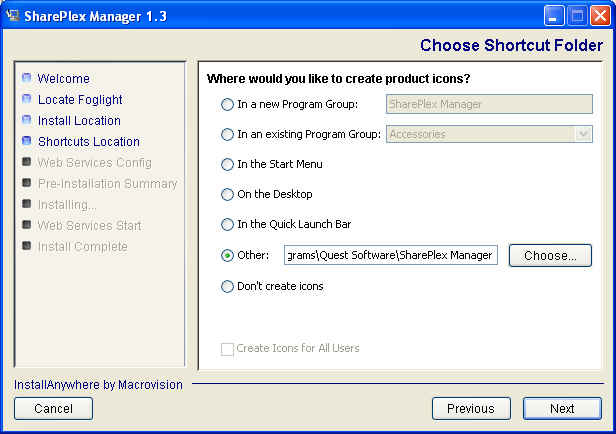
Click Next. |
|
6 |
Click Next. |
|
8 |
Click Next. |
|
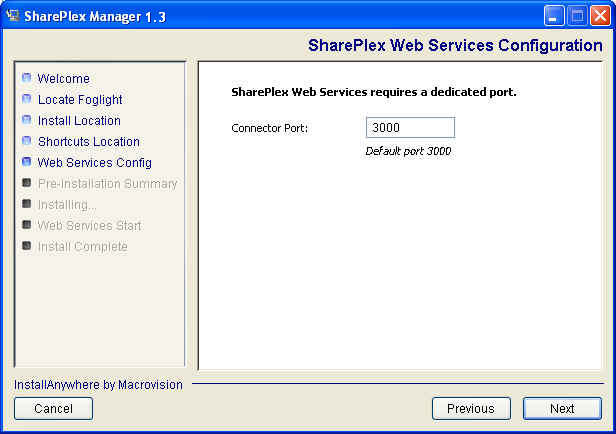
10 |
Click Next. |
|
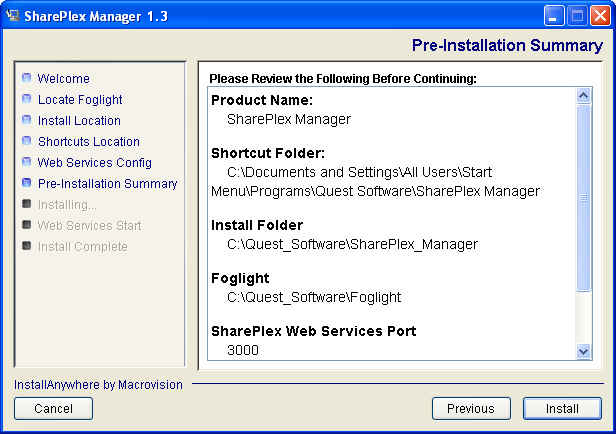
• |
Click Install to continue. |
|
• |
Click Previous if you want to go back and change an installation setting |

|
• |
Select Start SharePlex Web Services Now to have the installer start SharePlex Web Services immediately |
|
• |
Select Not Now to start SharePlex Web Services yourself at a later time |
|
13 |
Click Next. |
|
Note |
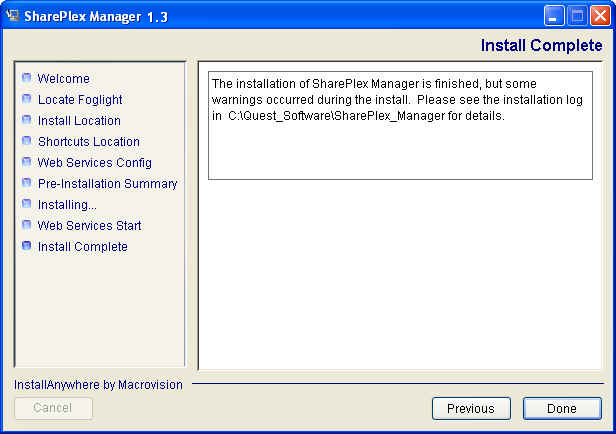
If you selected the Start SharePlex Web Services Now option, the installer displays a warning messages if for any reason it is unable to start SharePlex Web Services. This may be because the port number you specified previously is unavailable. When this is the case, you will need to start SharePlex Web Services manually after you complete the installation and make the port available. See the next section for more information on starting SharePlex Web Services manually. |
|
14 |
|
15 |
Click Done. |
|
3 |
Enter "SharePlexManager-<version_number>-install-windows.exe -i GUI" where version_number is the version of SharePlex Manager you are installing. |
|
2 |
Select the Compatibility tab and select Run this program in compatibility mode for. Then select Windows 7. |
|
3 |
|
• |
Occasionally you may receive an error message that SharePlex Web Services is not available at the specified port. This may be because SharePlex Web Services is down, or it may be because SharePlex Web Services is running but not responding. In either case, you should make sure SharePlex Web Services is not running by executing a stop command before executing a start command. If you execute a stop command when SharePlex Web Services is already stopped you will receive an error message which you can safely ignore. |
|
• |
By going to the Start menu and selecting All Programs>Quest Software>SharePlex Manager>Start SharePlex Web Services. |
|
Note |
To stop SharePlex Web Services, select the Stop SharePlex Web Services option. |
|
• |
By executing the command web-services start from the web-services.bat file located in the <install_dir>\Webservices\bin directory. |
|
Note |
To stop SharePlex Web Services, execute the command web-services stop. |
|
Note |
To stop SharePlex Web Services for Linux, execute sh <install_dir>/Webservices/bin/web-services.sh stop. For Windows, close the window it is running in. |
|
a |
Create the file /etc/init.d/spo-web-services with the following content (assumes that Java is installed in the default <install_dir>/jre directory and the SharePlex Web Services is installed in <install_dir>/Webservices/bin): |
