Using the BMR Plug-in to Back Up a Windows System
A. If running the backup for the first time, install the Windows BMR Live plug-in on the system that will be protected:
- Download NetVault Bare Metal Recovery Plug-in Live Client for Windows from Quest Support Portal. Make sure that the downloaded file is supported by your NetVault Client version and system architecture.
- Open the NetVault Server WebUI.
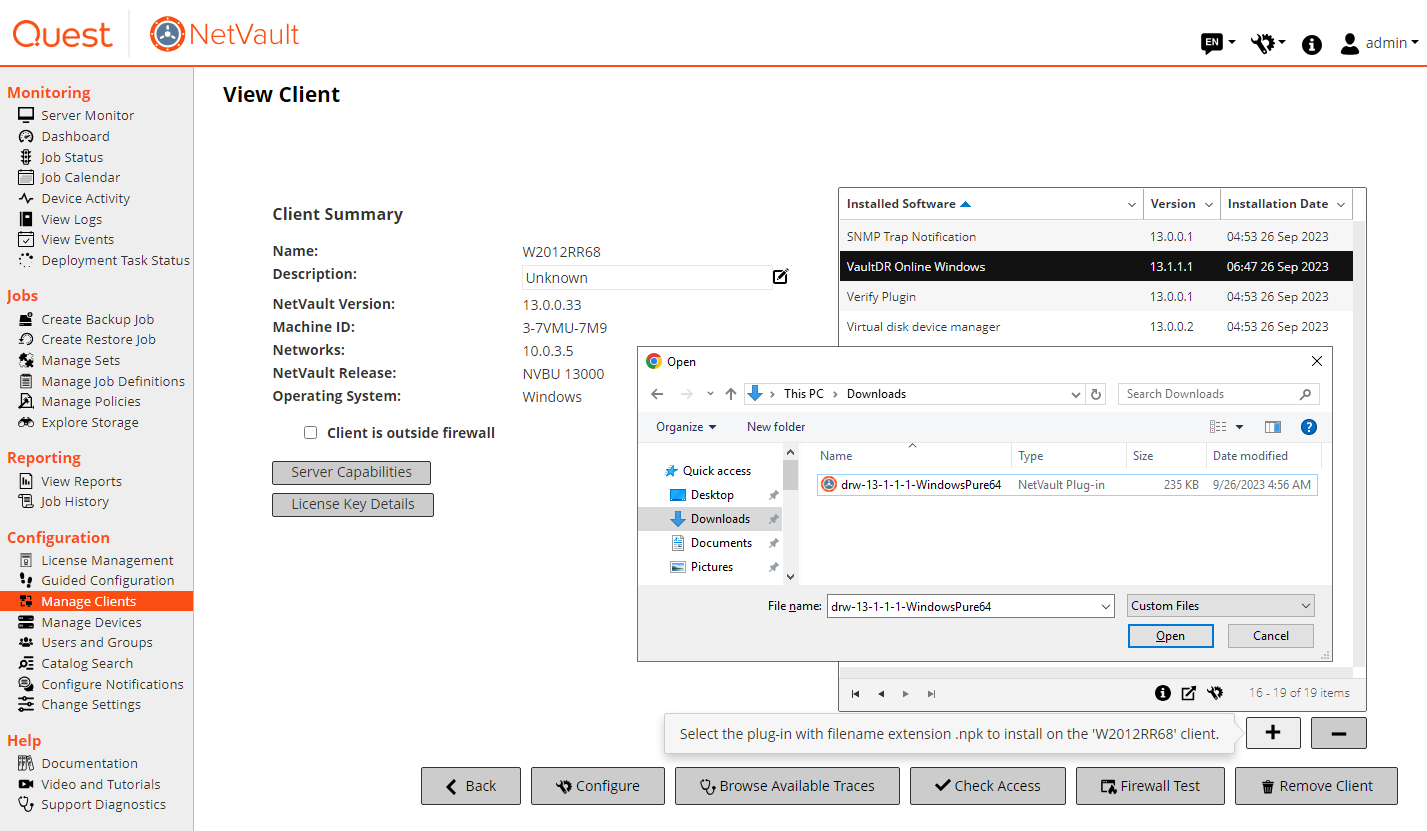
- From the left navigation pane, select Manage Clients.
- On the Manage Clients screen, select the Windows client that will be backed up and press the [Manage] button.
- On the View Client screen, press [➕] to install a plug-in.
- Select the plug-in file that was downloaded on step 1.
- Press the [Open] button to initiate the plug-in installation. Once installed, it will be listed as VaultDR Online Windows.
B. Create and run the backup job:
- From the left navigation pane, select Create Backup Job.
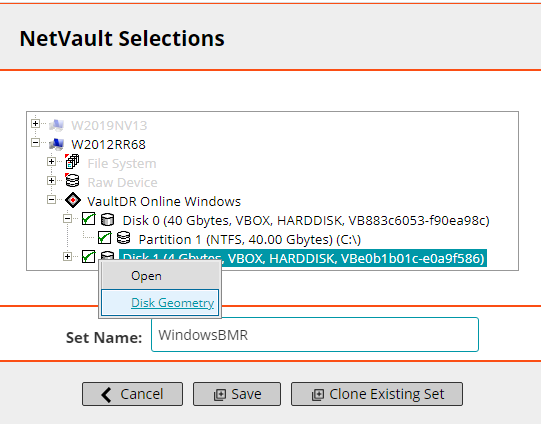
- On the Create Backup Job screen, press ➕ on the Selections row to create the Backup Selection Set.
- Expand the Windows client to be backed up to show the list of installed plug-ins.
- Expand the VaultDR Online Windows plug-in to show the list of system disks and partitions. Optionally, you can click on a disk and select Disk Geometry for information about the drive.
- Select the items to be backed up.
- Input the Selection Set name.
- Press the [Save] button to save the Selection set.
- Back on the Create Backup Job screen, select the appropriate Schedule, Target Storage, and Advanced Options sets for the job.
- Press the [Save & Submit] button to run the job using the selected sets.
Using the BMR Plugin to Restore a Window System
A. Prepare the NetVault Server to run the restoration job:
- Download NetVault Bare Metal Recovery Plug-in Server from Quest Support Portal. Make sure that the downloaded file is supported by your NetVault Server version and system architecture.
- Open the NetVault Server WebUI.
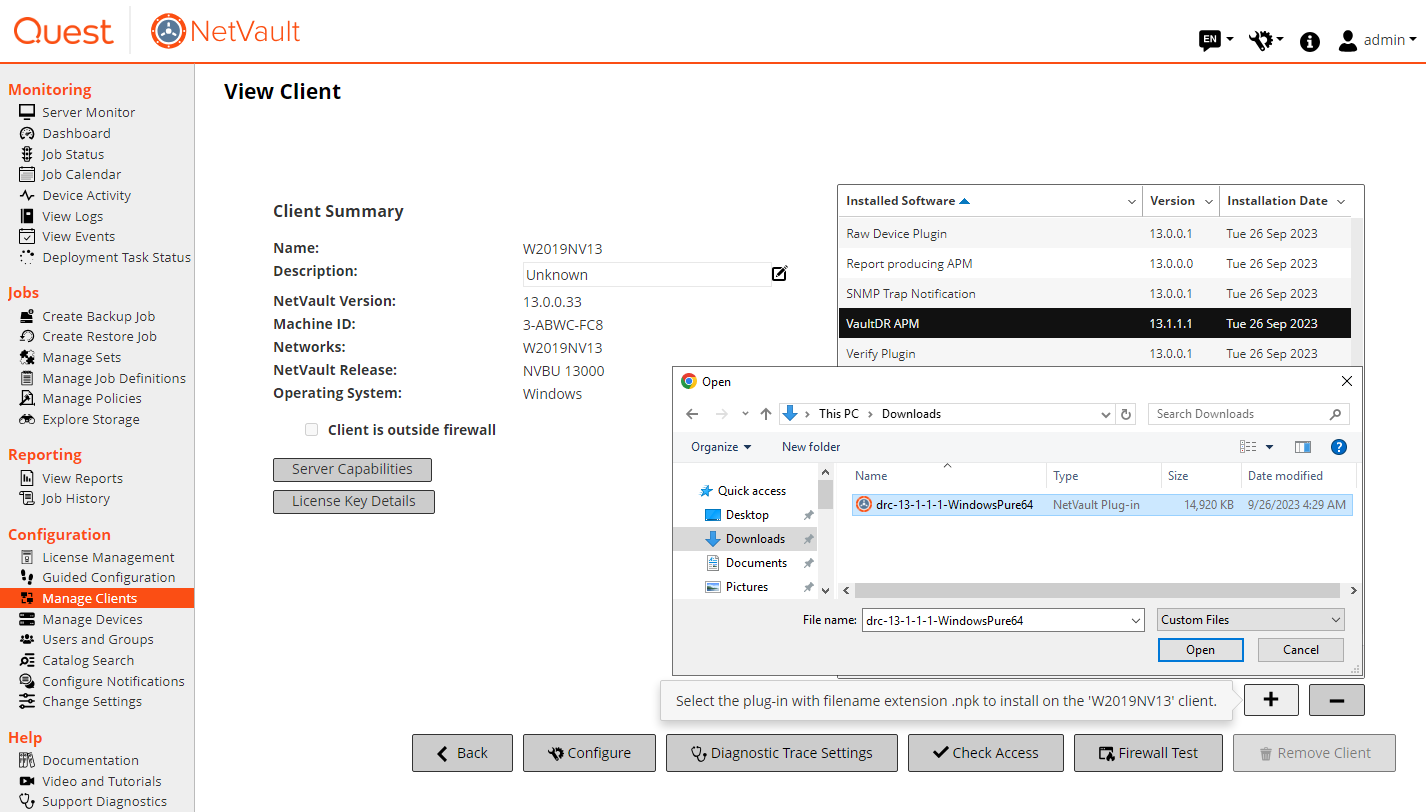
- From the left navigation pane, select Manage Clients.
- On the Manage Clients screen, select the NetVault Server and press the [Manage] button.
- On the View Client screen, press [➕] to install a plug-in.
- Select the plug-in file that was downloaded on step 1.
- Press the [Open] button to initiate the plug-in installation. Once installed, it will be listed as VaultDR APM.
B. Create the BMR Boot media
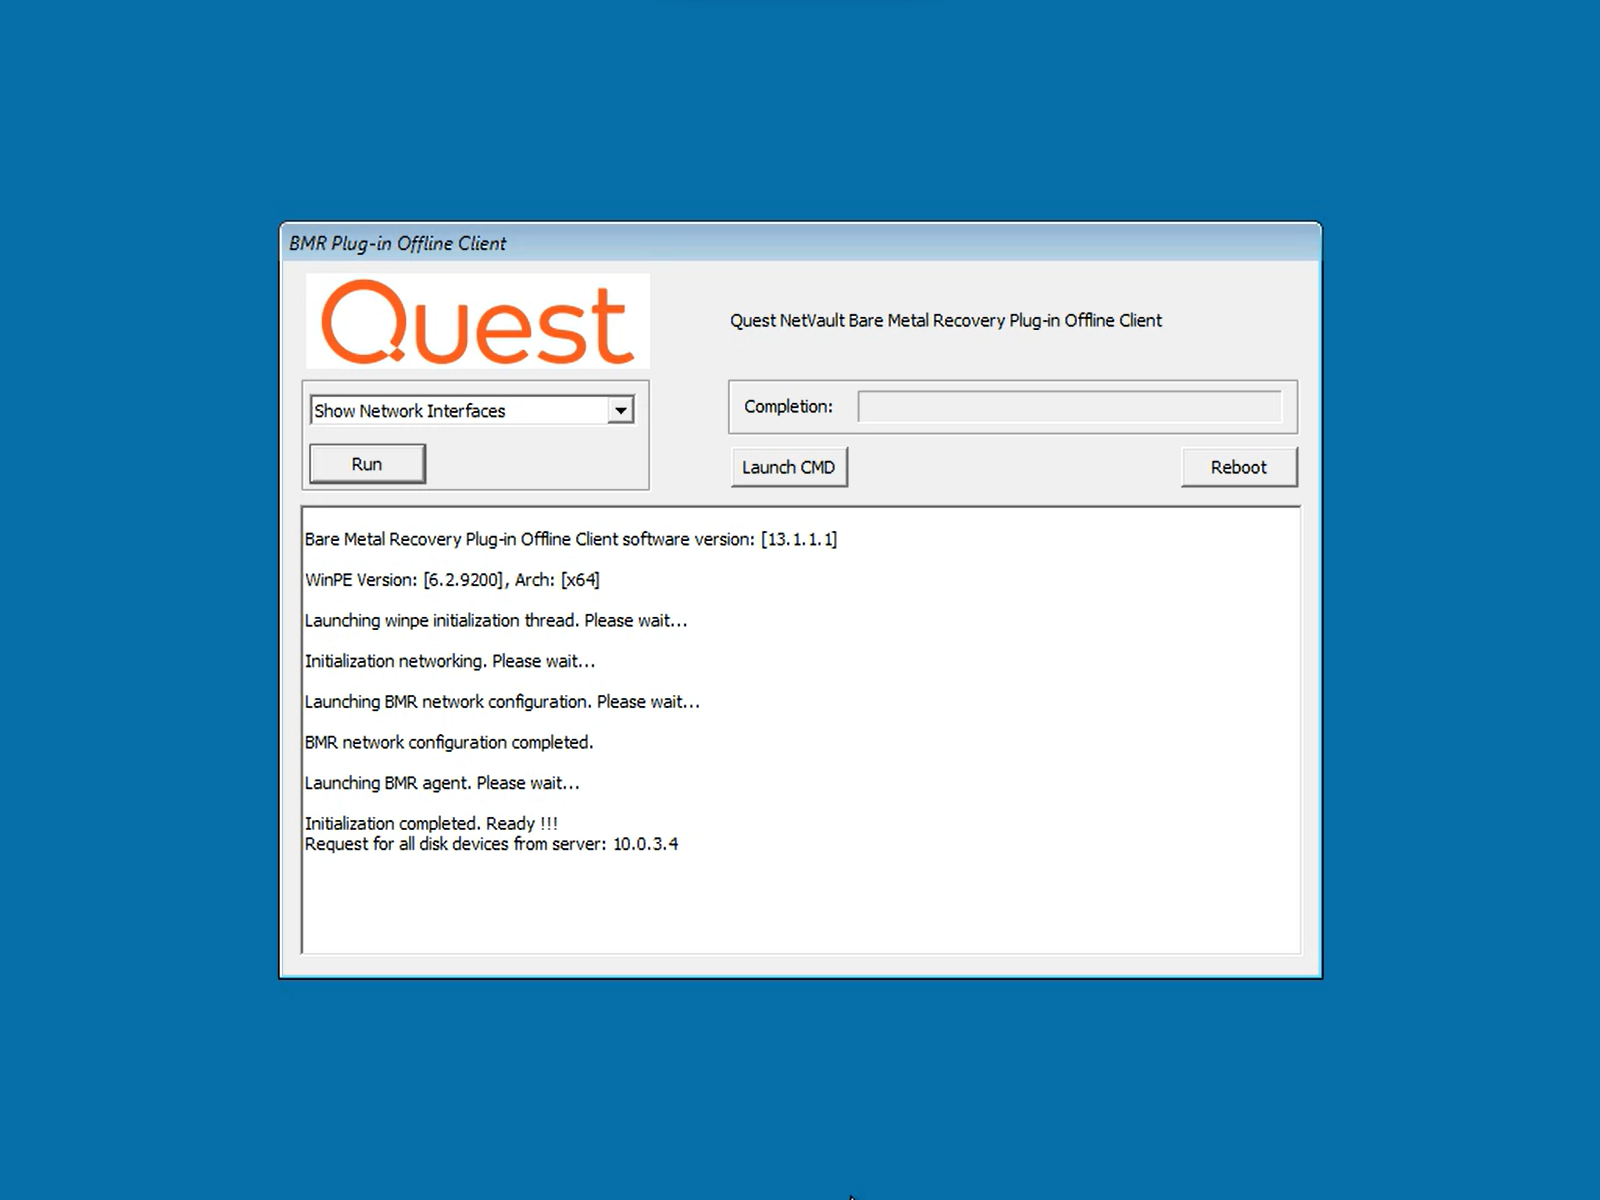
C. Boot the Windows system using the media created on the previous step:
- Check the system manual for instructions on how to boot the system from an external device or optical drive.
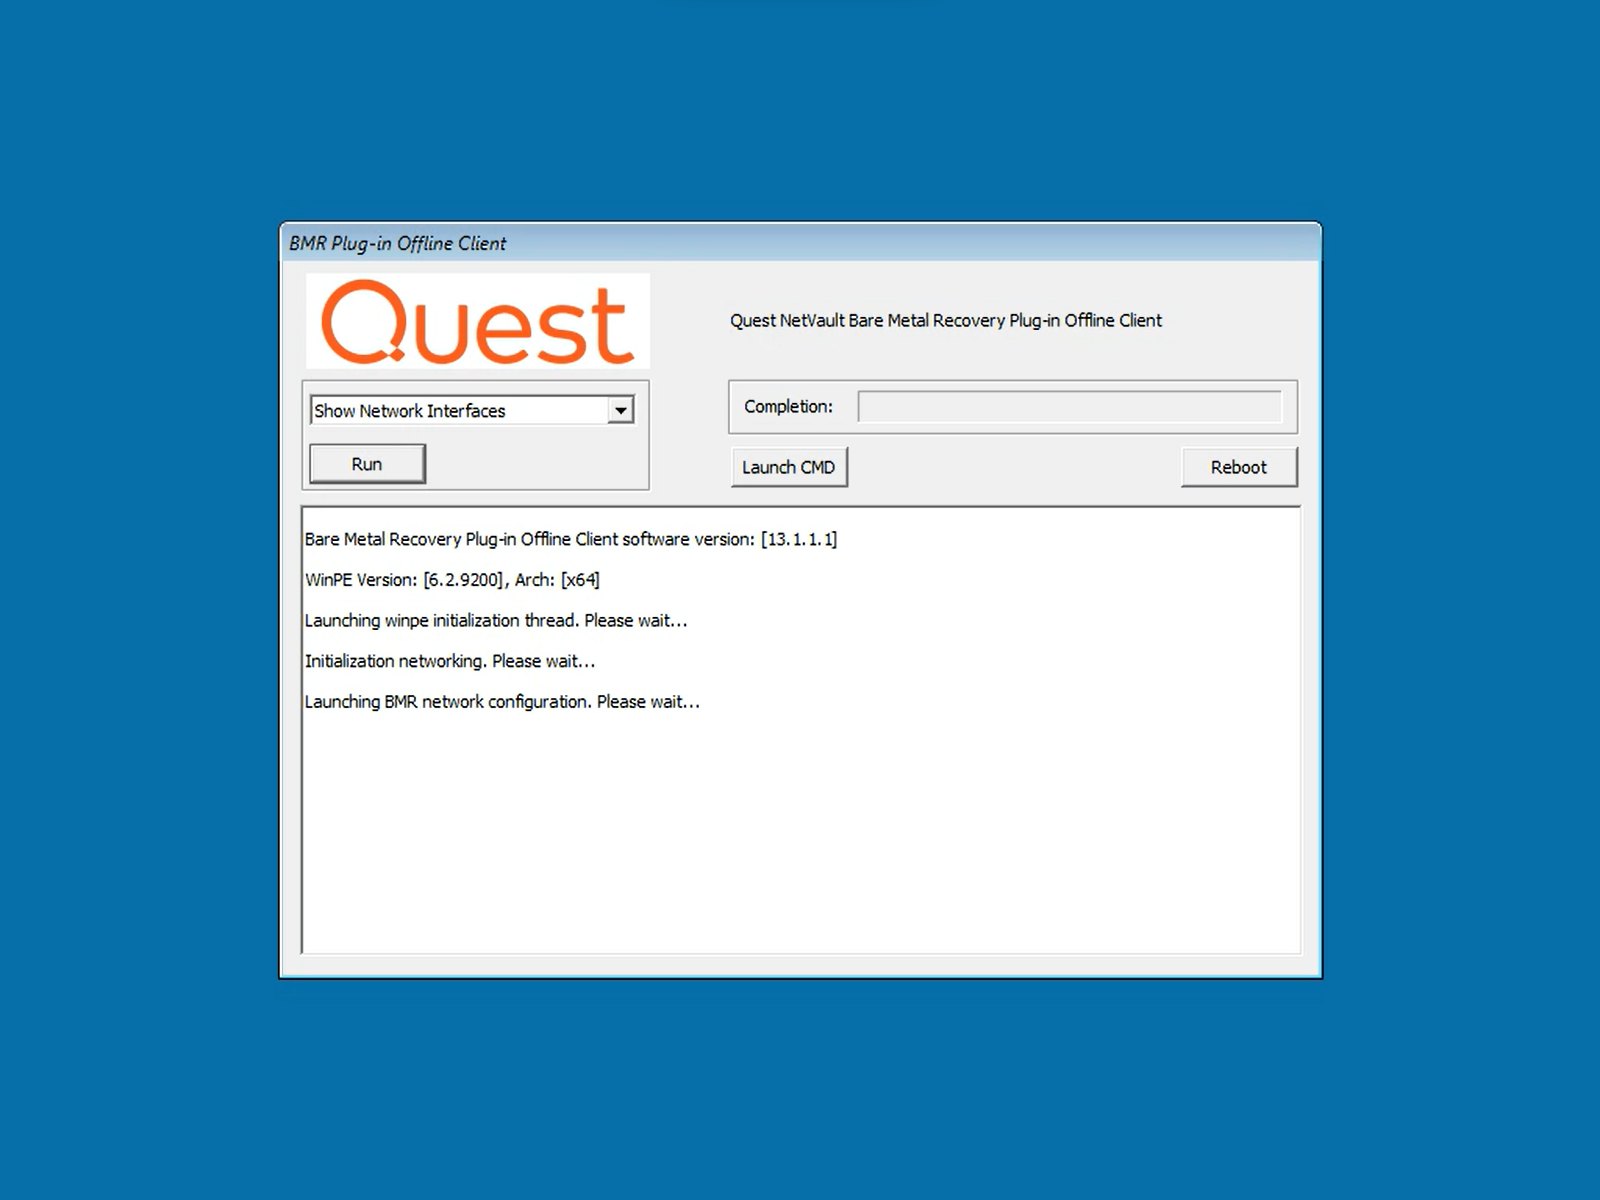
- WinPE will load and launch the BMR Plug-in Offline Client.
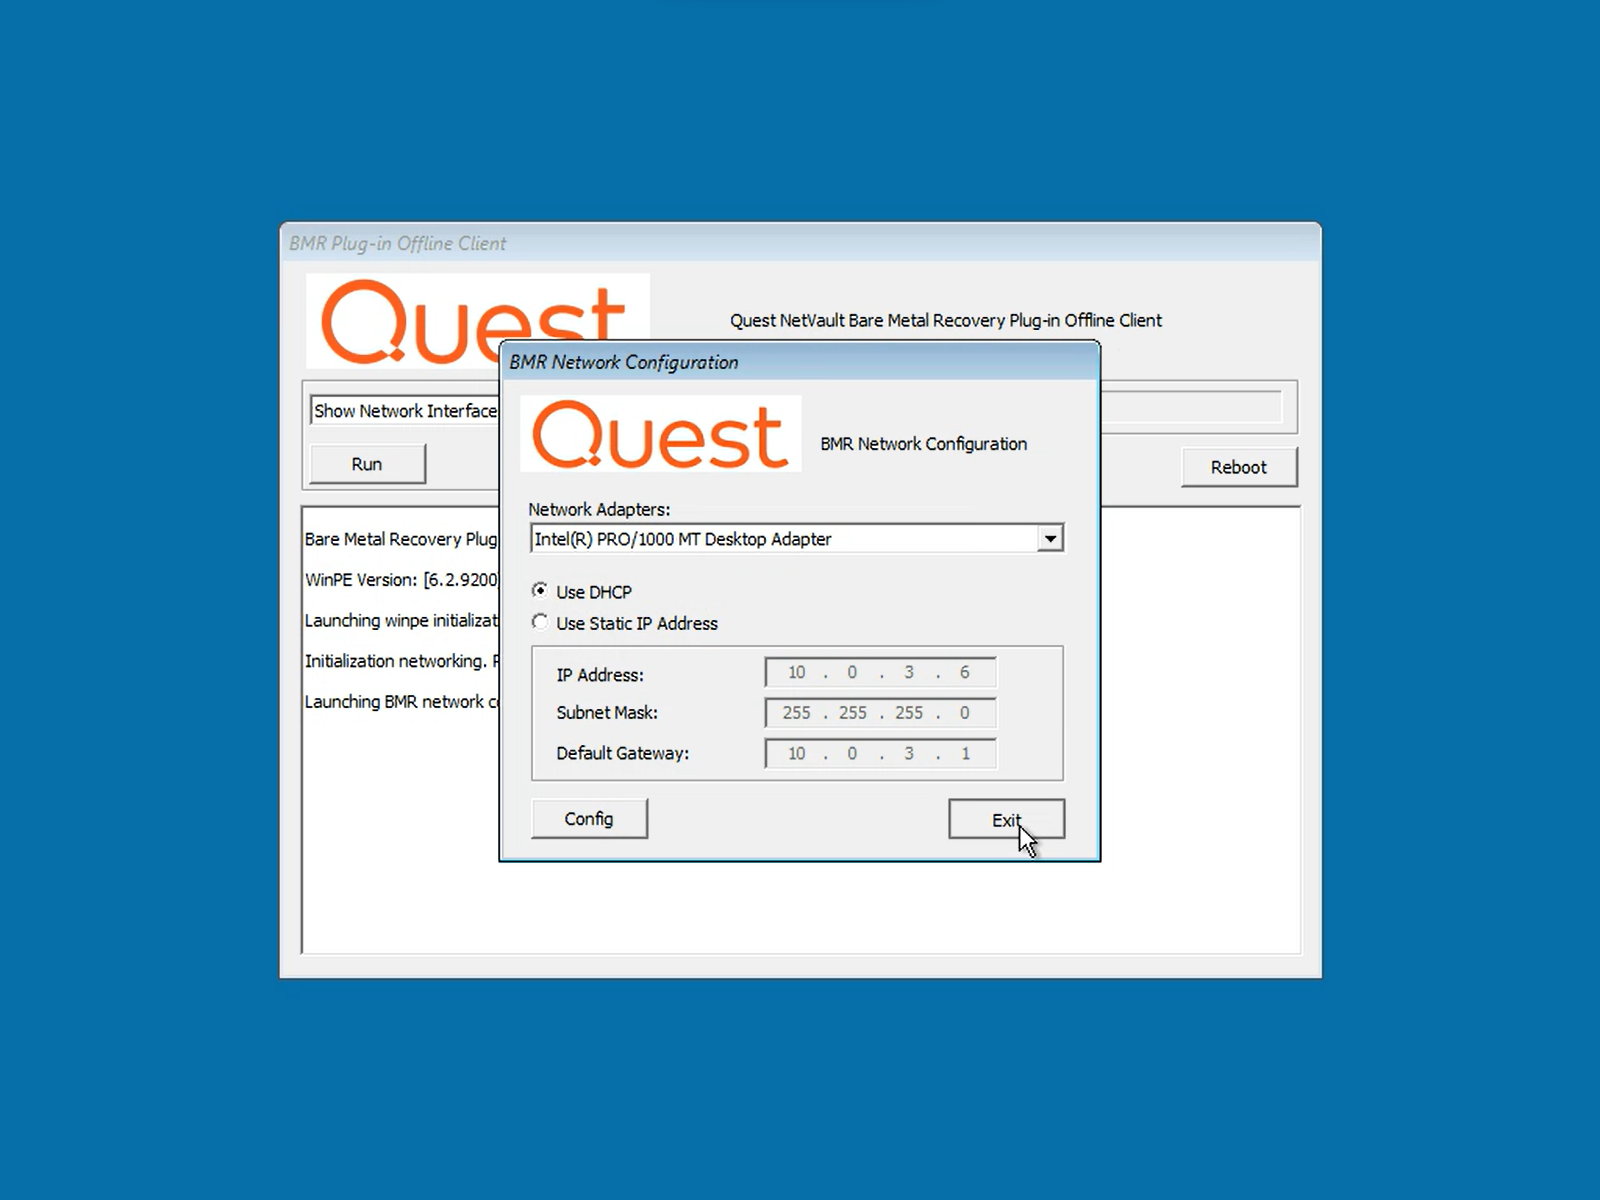
- On the BMR Network Configuration dialogue box, press the [Config] button to obtain an IP address by DHCP or input the IP Address, Subnet Mask, and Default Gateway if configuring a static one. Apply the changes by pressing the [Exit] button.
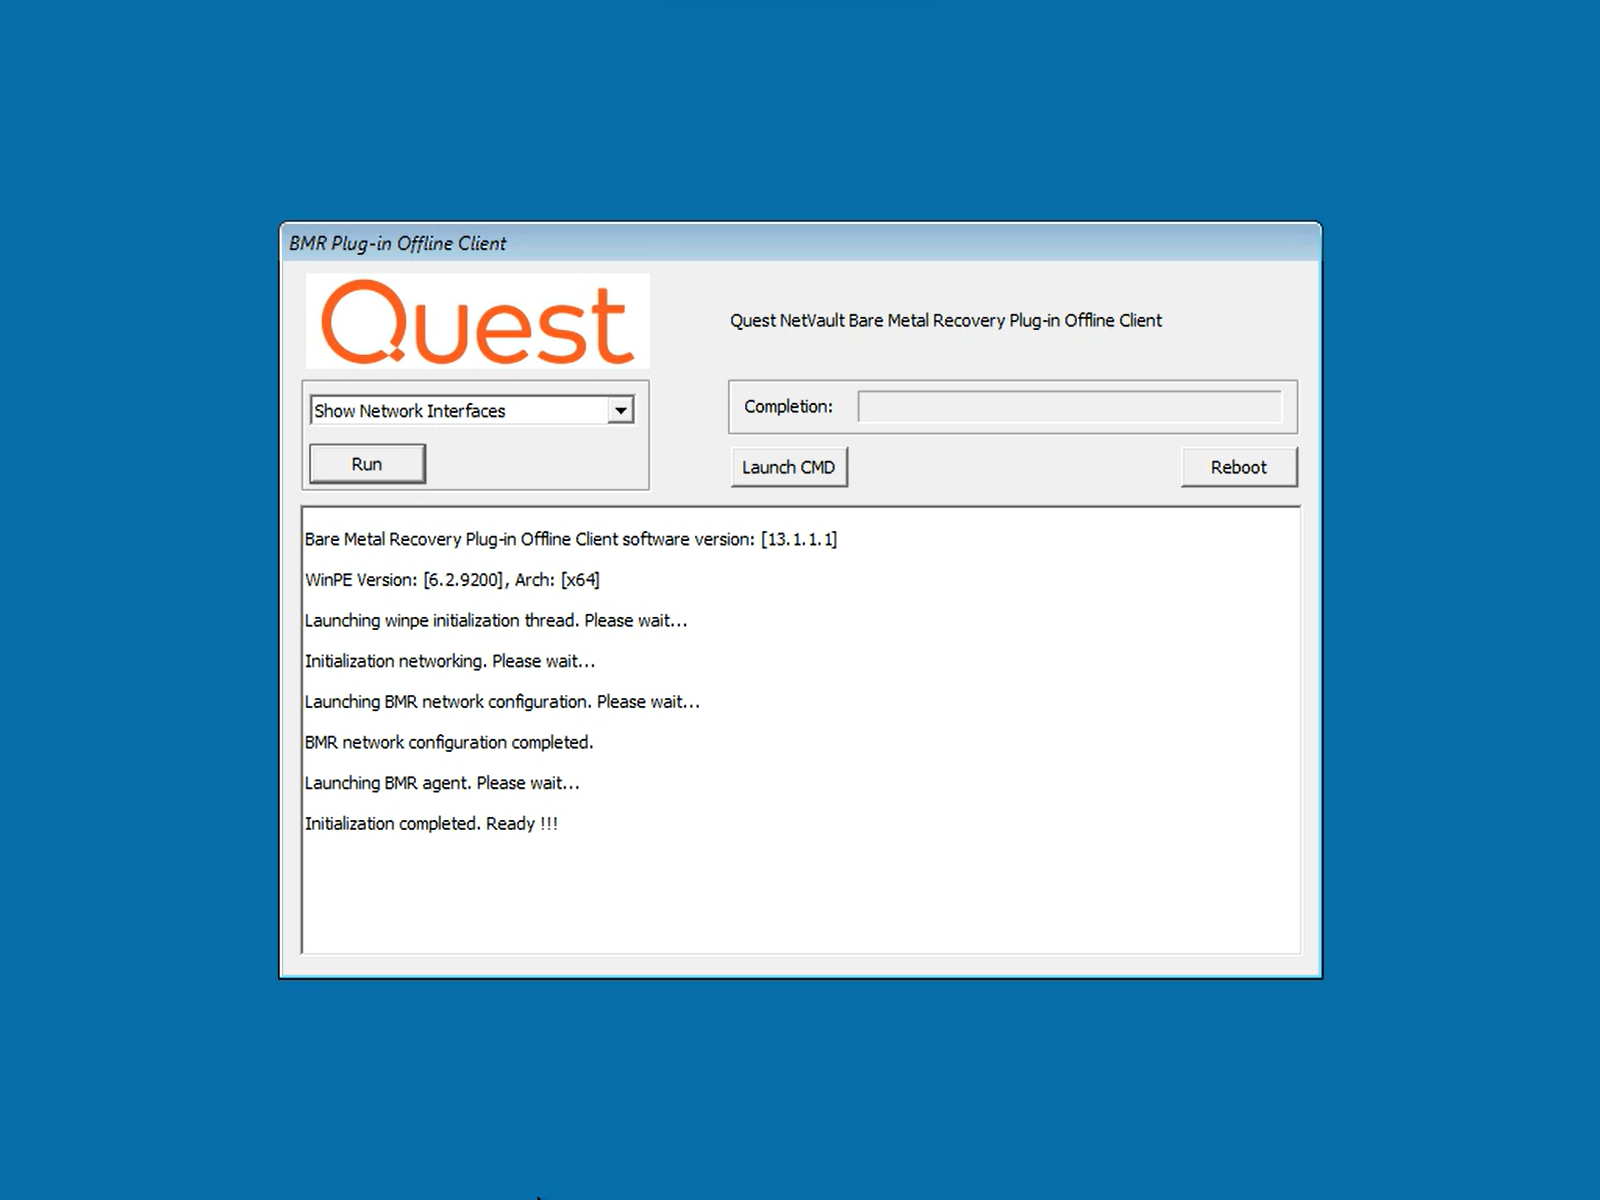
- The BMR Plug-in Offline Client will display the message: Initialization completed. Ready!!!
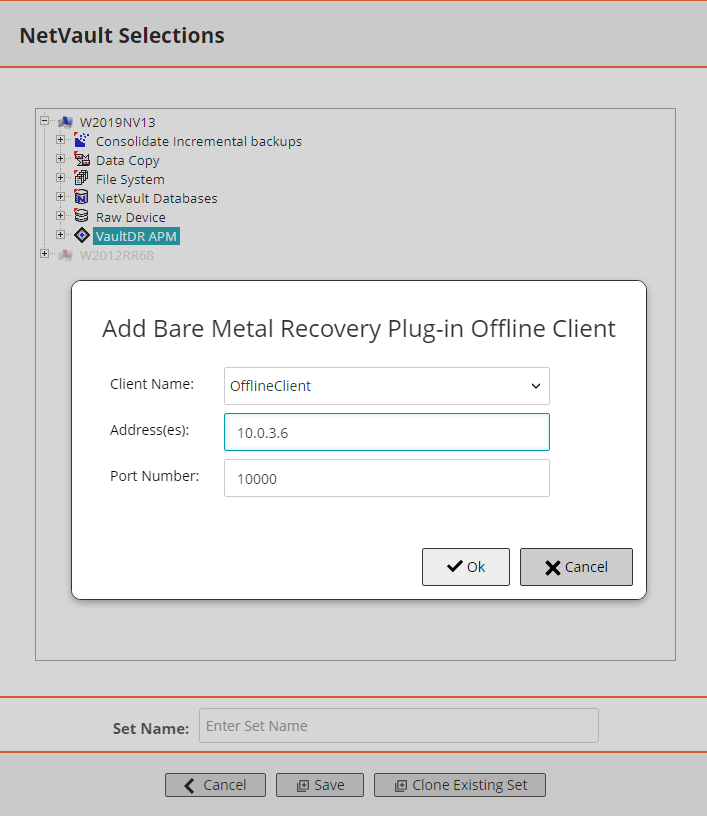
D. Add the BMR Offline Client to the VaultDR APM plug-in.
- From the left navigation pane, select Create Backup Job.
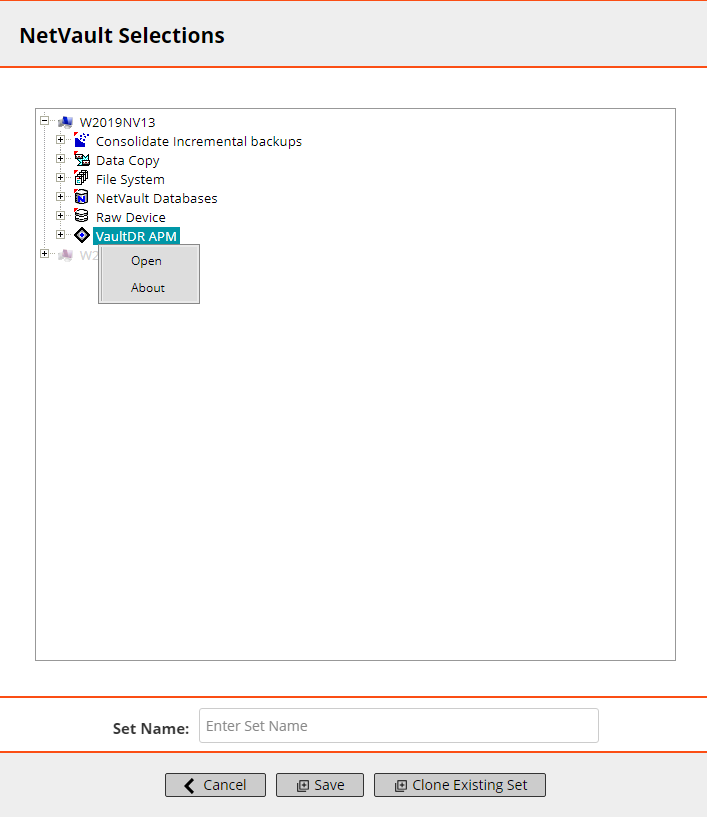
- On the Create Backup Job screen, press ➕ on the Selections row. This will open the NetVault Selection dialogue box. This will be used to configure the plug-in; a selection set will not be created.
- Expand the NetVault Server to show the list of installed plug-ins.
- Click on the VaultDR APM plug-in and select Open from the dialogue box.
- Input an arbitrary Client Name to identify the BMR Offline Client.
- input the IP address of the Offline Client (configured on step 3 from the previous section).
- It is recommended to use default port 10000. If an alternate port is required, make sure that is specified on the BMR Offline Client too.
- Press the [OK] button to add the BMR Offline Client. The message "Request for all disk devices from server: {NV Server IP address}" will be displayed on the BMR Offline client.
- Press the [< Cancel] button.
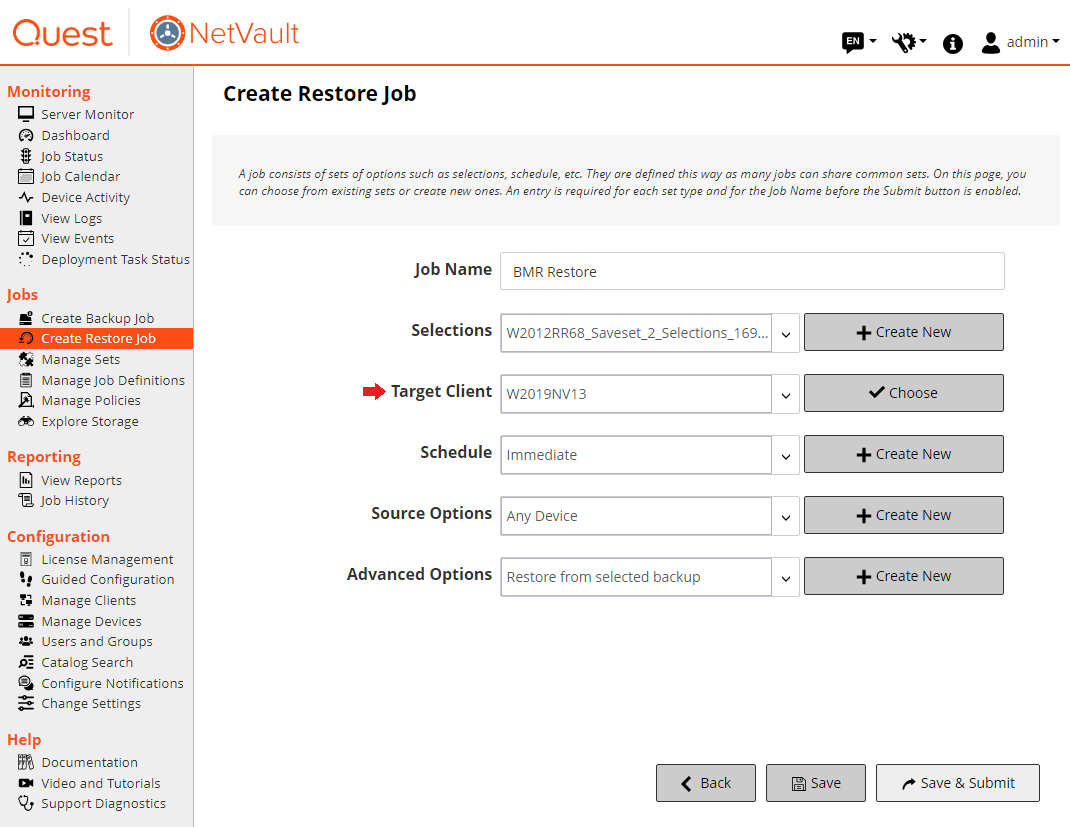
E. Create the restore job:
- From the left navigation pane, select Create Restore Job.
- On the "Create Restore Job - Choose Saveset" screen, select the backup to be restored from the table. Use the search field and/or filters to trim down the list of savesets.
- Press the [Restore] button.
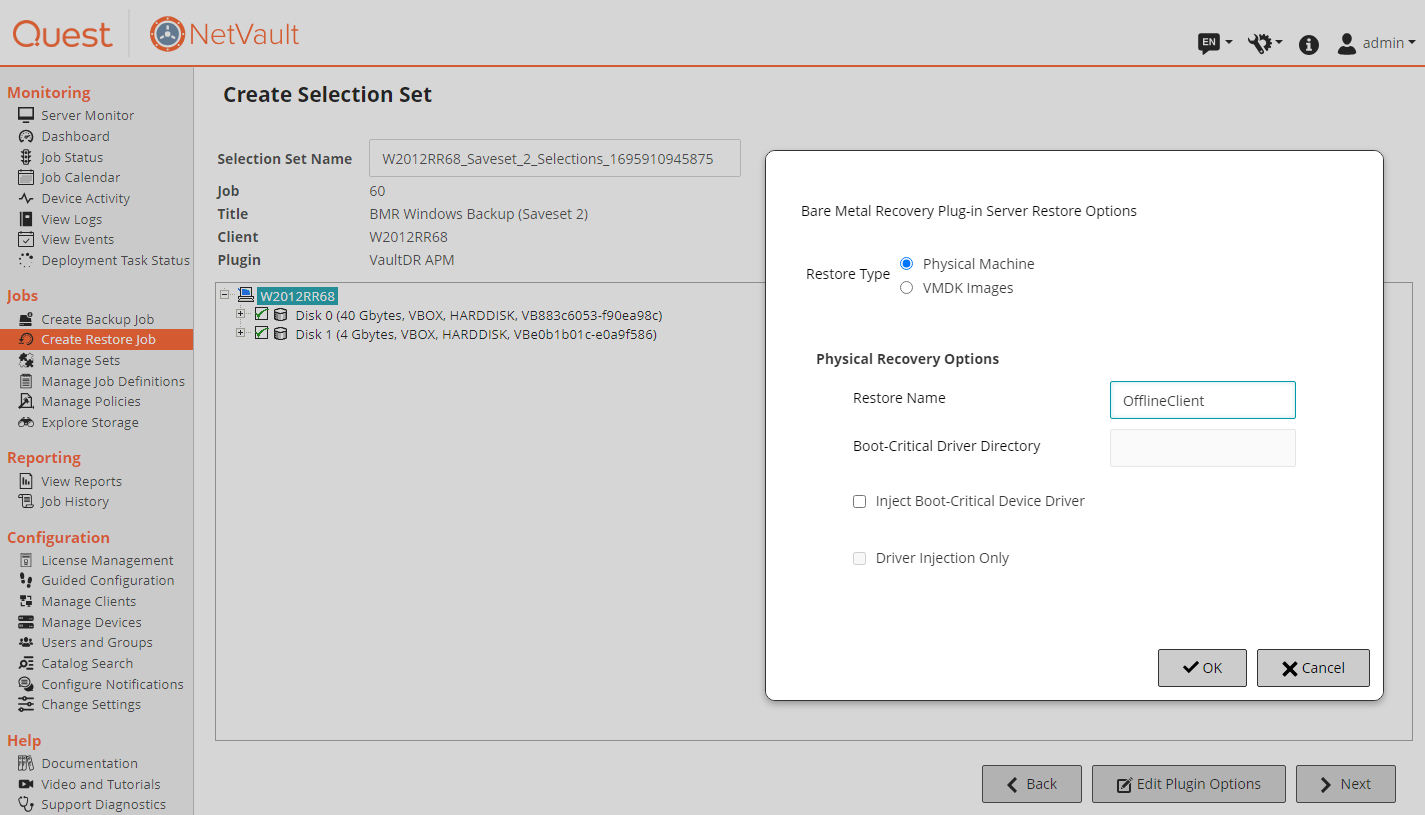
- On the Create Selection Set screen, check the items to be restored.
- Press the [Edit Plugin Options] button.
- On the dialogue box, input the arbitrary name used on step 5 from the previous section on the Restore Name field. Press [OK] to save.
- Press the [> Next] button.
- On the Create Restore Job screen, select the NetVault Server from the Target Client drop-down list.
- Press [Save and Submit] to run the job.
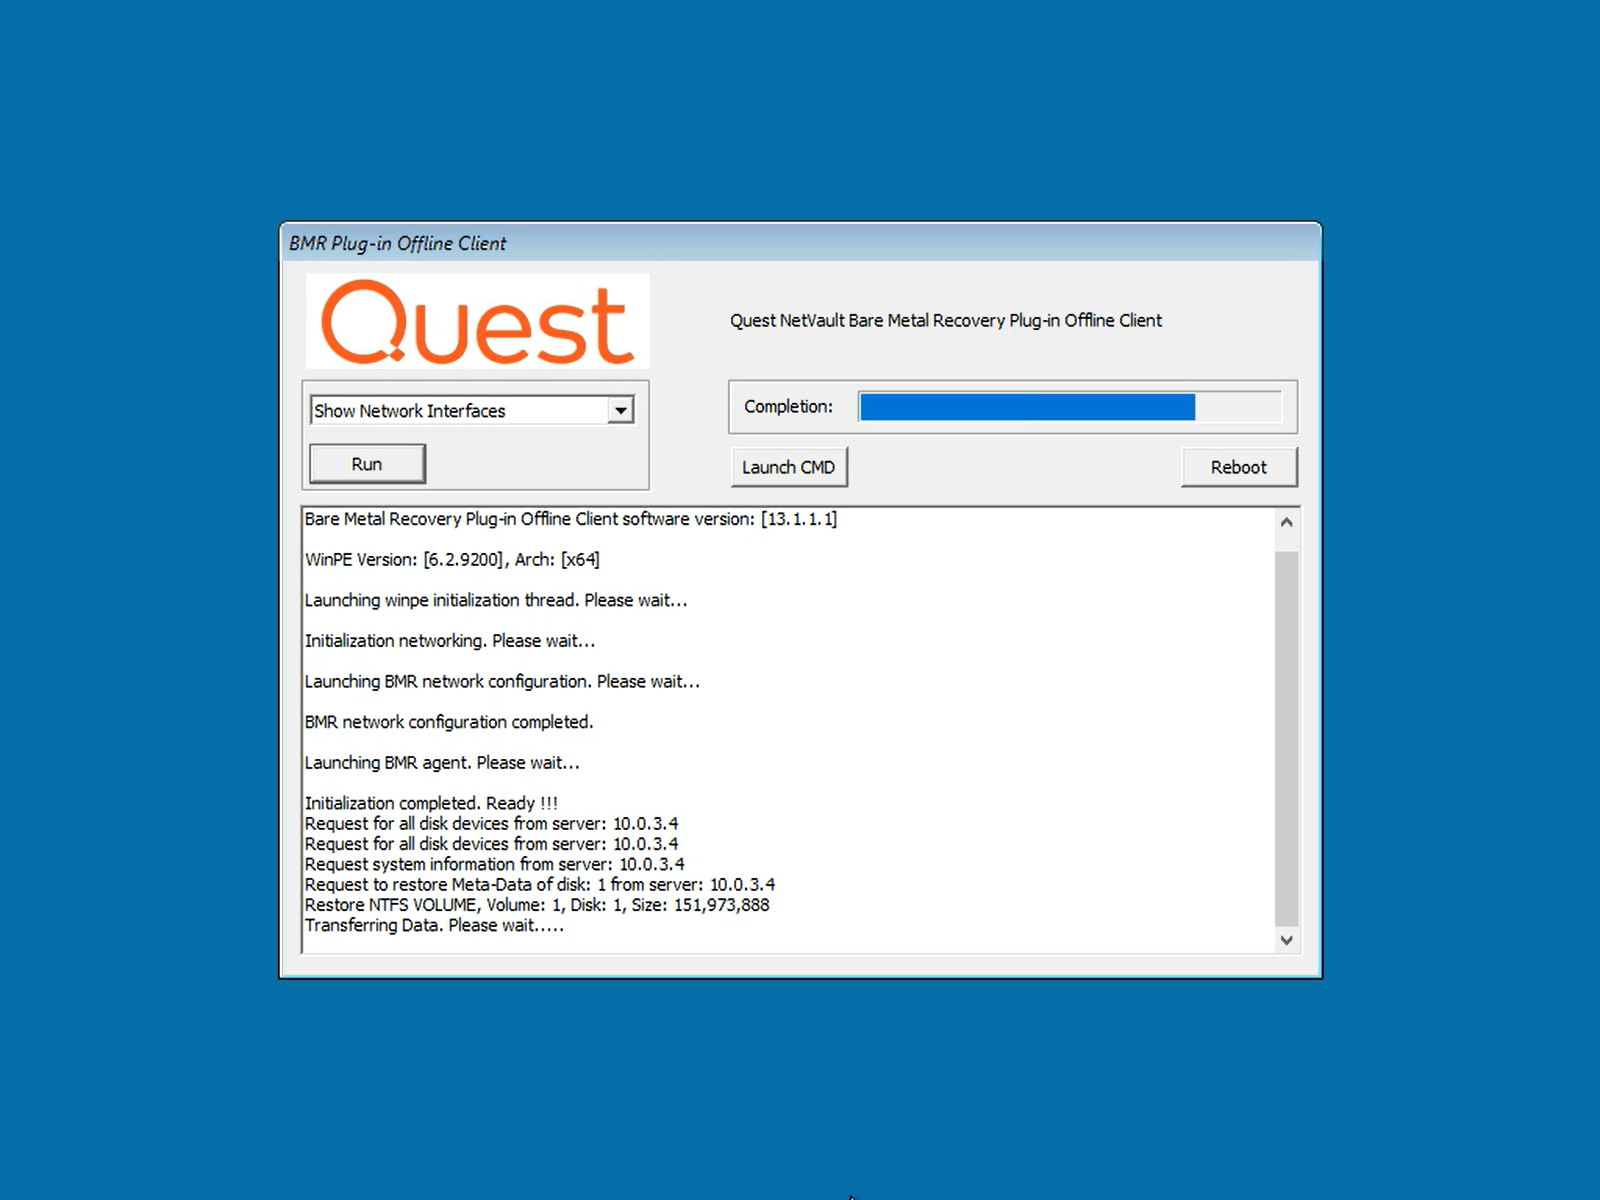 | 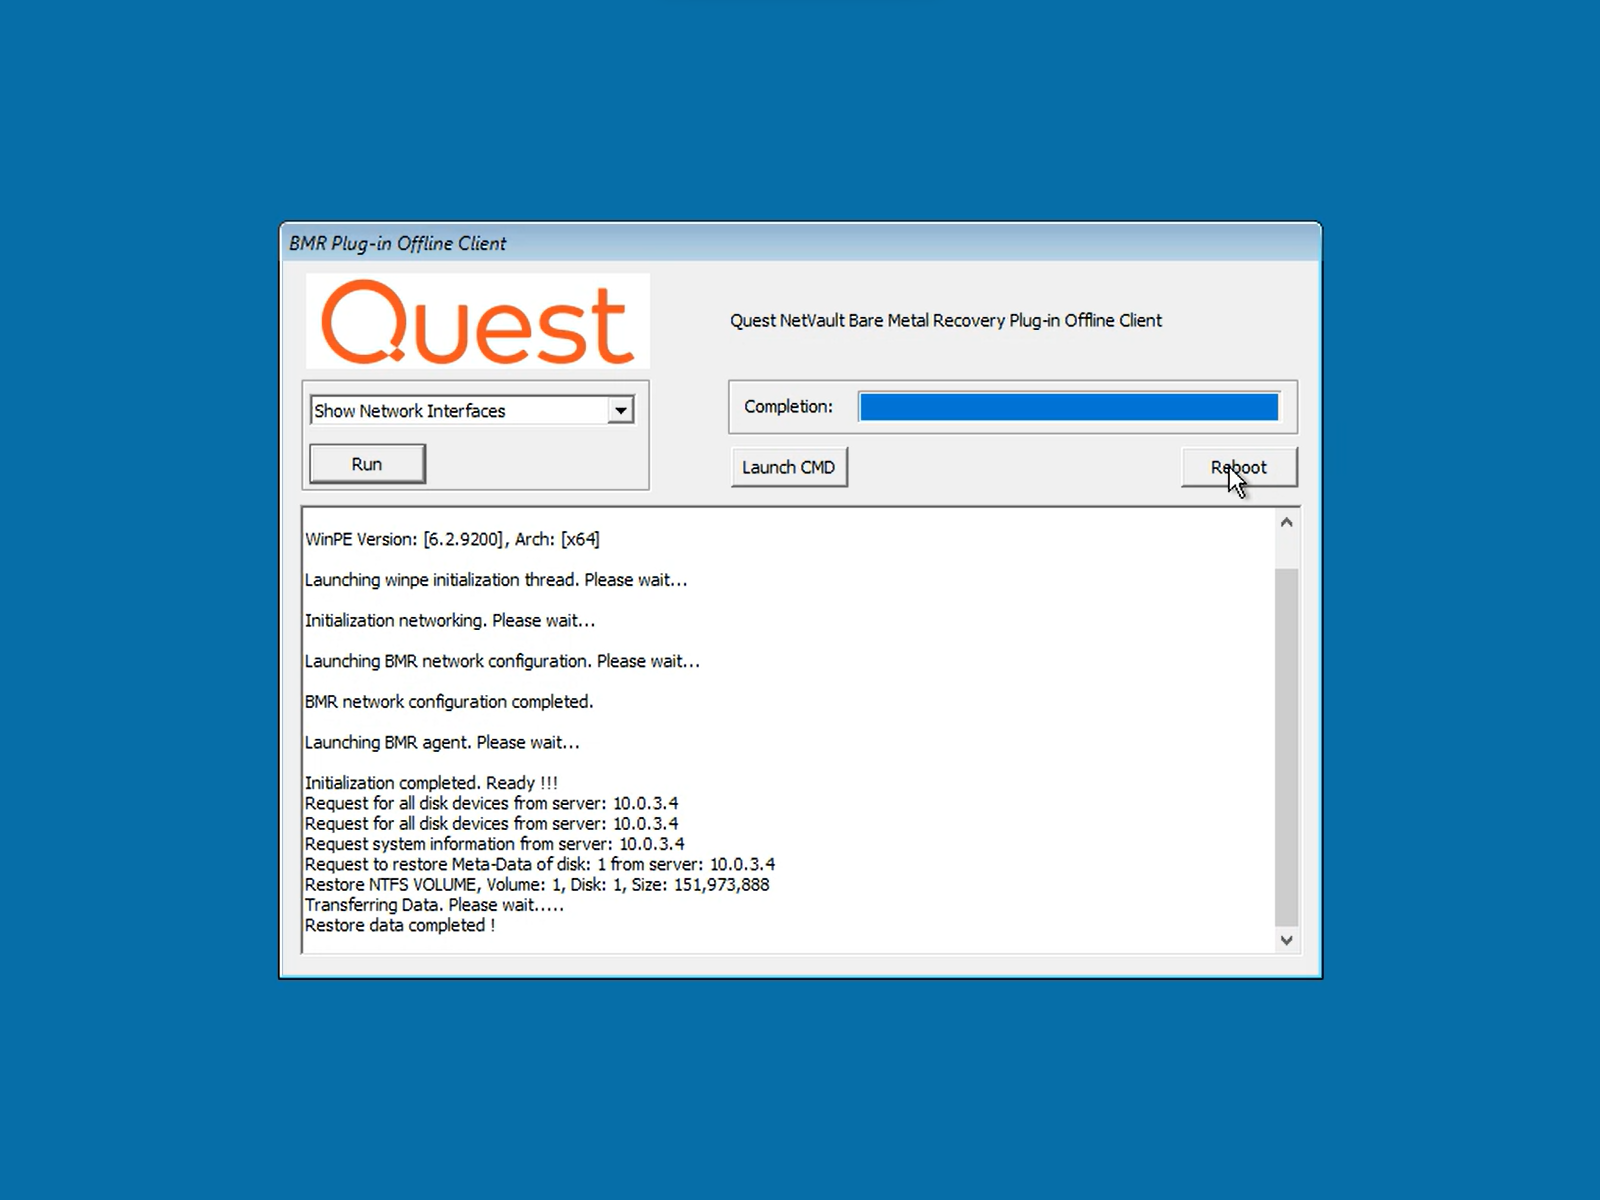 |
On the BMR Offline Client, the transfer of data will initiate. The job can be monitored using the progress bar on the upper right. When the "Restore data completed!" message is displayed, press the [Reboot] button to restart the system. If the system was restored to a different hardware, when the operating system load, it will attempt to identify and load the required drivers; however, there could be devices that will require manual intervention to start working.