Customer needs to configure SSL for Metalogix Archive Manager for Exchange to encrypt traffic between the archive server and user workstations
Customer needs to configure external access to the archive server to allow users to open archived messages outside the private network without using a VPN
Metalogix Archive Manager for Exchange by default uses port 80 http when users open archived messages. This can be changed to use SSL and port 443 if needed, however the following prerequisites must be met BEFORE changing any settings for Archive Manager:
Prerequisites
1. The Archive server must have a certificate provided by a 3rd party Certificate Authority (GoDaddy, Digitcert, etc). A certificate should be obtained with the subject name for whatever external name you plan to use for the archive server (example: archive.contoso.com). Please follow any instructions from your certificate provider to obtain the certificate and install it in IIS on the archive server.
2. An external name for the archive server and correctly configured external DNS (example: archive.contoso.com)
3. Port 443 open in the firewall and directed to the archive server for the IP address associated with the external DNS name.
To change the name that is being used to create shortcuts for archived messages:
1. Start by logging on to the archive server as the SuperUser account. If you are unsure which account to use, check the services on the archive server as most are configured to run as the SuperUser account.
2. Open the Archive Manager console using Run As Administrator. In most cases you do not need to run the console As Administrator, but some of these settings will require changes to the registry which will not work without running the console As Administrator.
3. Select Tools -> Options
4. Select Archiving Settings on the left and click the Links tab at the top
5. Change the name in the field for Alias for attachment link URL to your external server name (example: archive.contoso.com). This will change the name the software uses when creating shortcuts. Select the option for use SSL.
.PNG)
6. Click OK to save and close this window.
7. Select the Locations tab in the console
8. In the left pane find the location that contains the server you are making changes to. Right click the location and select Add server to location...

9. Enter the new external name in the name field (example: archive.contoso.com). Select the option for Use Secure connection (https)
.PNG)
10. Click OK to save and close the window.
Publishing new forms to Exchange with the new server name
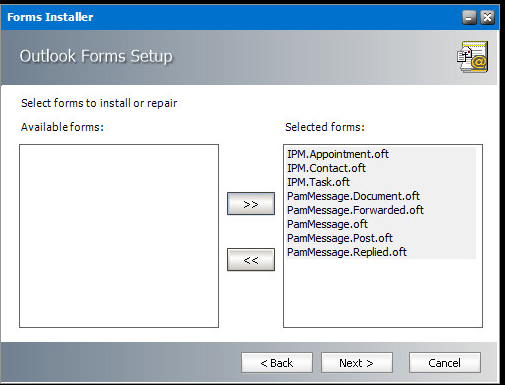
1. Open the Forms Installer As Administrator on the archive server (must be logged on as the SuperUser account) from the Metalogix Programs group on the Start Menu
2. Select Install / repair and click Next

3. Click Next on the form templates location page

4. Ensure all available forms are selected and click the >> to add them to the selected forms pane, then click Next
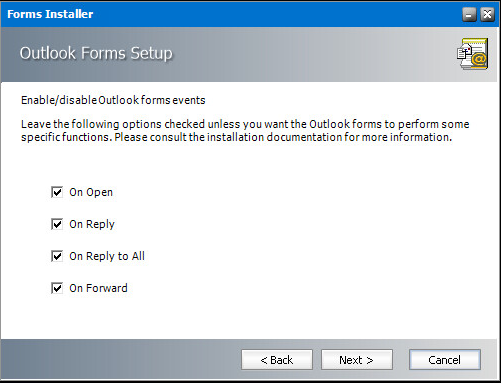
5. Ensure all of the check boxes are selected for the forms events page and click Next
6. On the Retrieve Servers page change the name for the Primary Retrieve Server to your new external DNS name (example: archive.contoso.com). For the secondary Retrieve Server specify the NETBIOS name for the archive server. Click Next.
.PNG)
Note: Specifying a secondary retrieve server is not usually needed but it can be helpful to use the NETBIOS name of the archive server in this field for internal users. IP Addresses should never be used for the server names as this makes changing the IP address of the archive server very difficult if ever needed.
7. On the retrieval settings page only select Use SSL and click Next
.PNG)
8. Click Install on the Summary page
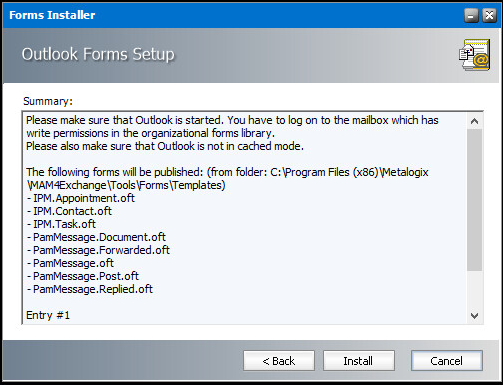
8a. If prompted for an Outlook Profile, select a profile that starts with eprof and contains the name of one of your active Exchange servers. If the forms report errors and fail to publish, close the Forms Installer and create an Outlook profile. Follow the steps for the Forms Installer tool again and select the profile you created when prompted.
After forms are published it will begin updating the forms on all client workstations so they begin to use the new name. This may take up to several hours to update all workstations.
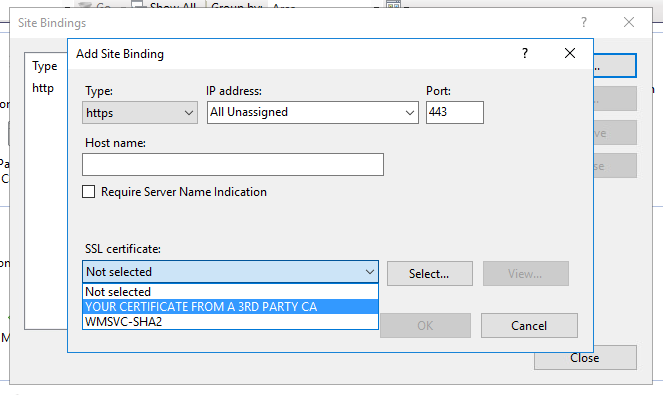
Configuring IIS to use SSL
1. Open the IIS Management Console on the Archive Server
2. Expand the server and sites in the left pane and select Default Web Site. Select Bindings on the Right.
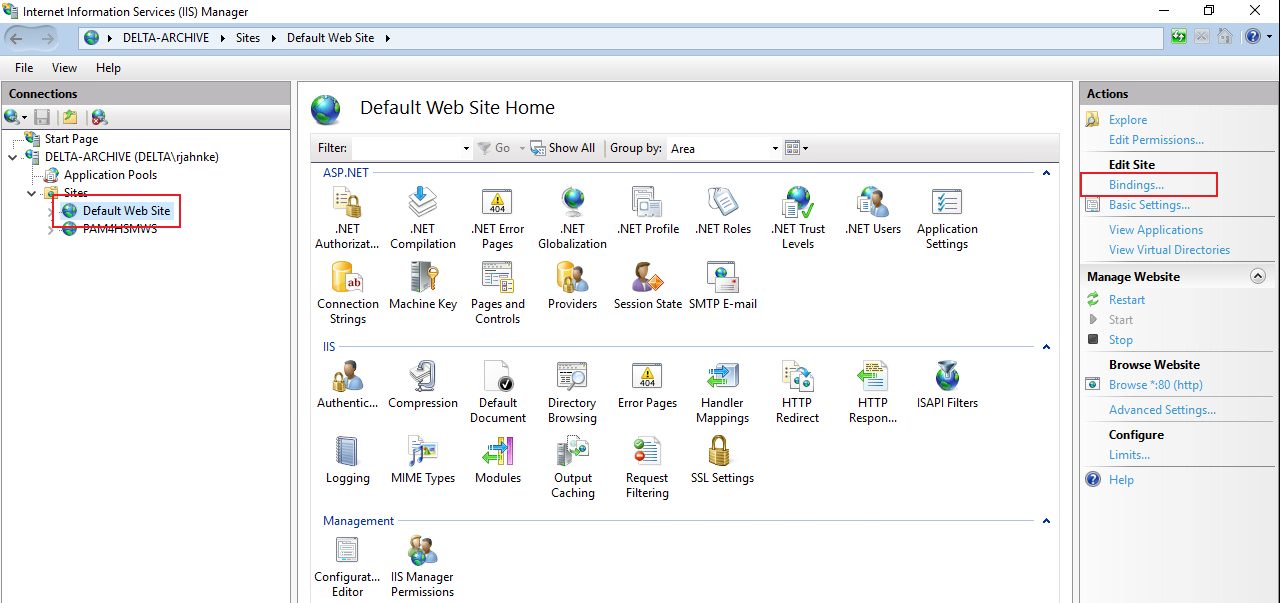
3. Click Add...
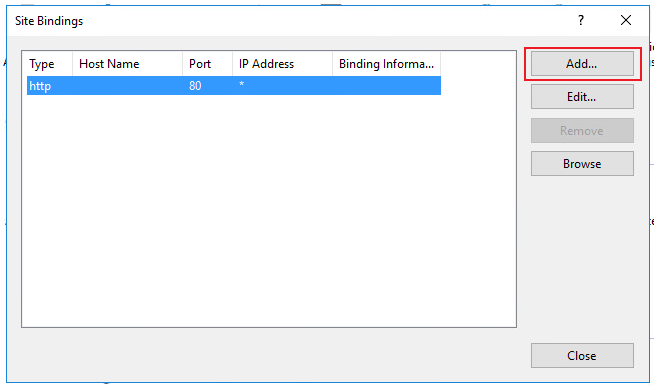
4. Select https for Type and the port should automatically change to 443. Under SSL certificate select the certificate you received and installed from your 3rd Party Certificate Authority. Click OK