Before you can start the migration of mailboxes, the On Demand Migration for Hybrid Exchange service must be able to discover the set of mailboxes you intend to migrate. The discovery process uses a a CSV file which lets you specify the mailboxes that you want to discover and ignore the rest.
Discovery and matching is a two-step process as described below:
Step 1: Preparing the CSV file
- Open Microsoft Excel.
- Enter the following information in adjacent columns for each email that you want to migrate. The column headers are mandatory.
- SourceEmail - email address of the mailbox in the source.
- SourceUPN - User Principal Name of the mailbox account in the source.
- TargetEmail - email address of the mailbox in the target.
- TargetUPN - User Principal Name of the mailbox account in the target.
- Save as a CSV file. You can rename the file if needed.
Step 2: Starting the Mailbox Matching from File Task
- Log in to Quest On Demand and choose an organization if you have multiple organizations.
- From the navigation pane, click Migration to open the My Projects list.
- Create a new project or open an existing project.
- Click the Mailboxes tab. Then click Matching from File from the Actions menu.
- The New Mailbox Matching from File Task wizard opens.
- Step 1: Matching Options
- Click Select CSV File and select the CSV that contains the information about mailboxes you want to discover and match.
- Click Next.
- Step 2: Validation
- Validate source mailbox existence - read only. The task will automatically verify the mailboxes in the source.
- Validate target mailbox existence - select this option to verify the existence of mailboxes in the target. A mismatch will be indicated as an error in the events related to this task. You can clear this check box to skip validation when you want to load the data into ODMHE for a future migration but the target mailboxes are not ready.
- Click Next.
- Step 3: Notification
- Send notification email once the task is completed - select this option to send a notification email when the matching task completes.
- Only in a case of failure - select this option to send the email if the matching task fails to complete successfully.
- Recipients - enter the email address of the recipients of this email. You can specify multiple recipient email addresses separated by semicolon.
- Click Next.
- Step 4: Schedule
- Choose from one of three options to schedule the task. The scheduler will be activated only after you complete the task wizard.
- Run now - task runs immediately.
- Run later - task must be started manually.
- Schedule - task will be started at a future date and time.
- Start - enter the start time for the task.
- Click Next.
- Step 5: Summary
- Verify the task specifications as described below:
- Name - name of the task. You can specify a custom name. The default name is Mailbox Matching from File.
- Click Back to revise or review a previous step or click Finish to complete the task wizard and start the task as scheduled.
Reviewing the Mailbox Matching from File Task
- Select the Tasks tab.
- Select the task that you want to review. The default name is Mailbox Matching from File.
- In the task details pane that opens, the information presented is as described below:
- Type - Type of the task. The type is HE Mailbox Matching from File.
- Created - Date and time when the task was created.
- Modified - Date and time when the task was last updated.
- State - State of the task.
- Last Operation - The action that was most recently performed in this task.
- Schedule - Date and time when the task started. Now indicates that the task started immediately after the task was created.
- Events (number) - Number indicates the count of events that the task encountered. The values indicate the type of the events and the event count for each type.
Reviewing the Mailbox Matching from File Task Events
- Select the Tasks tab.
- Select the task that you want to review.
- In the task details pane that opens, click Events (number). The Events tab opens with a filtered list of events for the selected task.
- Select an event that you want to review. In the event details pane that opens, the information presented is as described below:
- Object - Name of the mailbox.
- Task - Name of the task.
- Time - Date and time when the event occurred.
- Category - Type of task. the value is Hybrid Exchange.
Migrating a large numbers of mailboxes requires careful planing. Organize mailboxes the into collections to make large lists more manageable.
Working with the Collection Dashboard
The Collection Dashboard shows the collection-specific summary, allows you to see the mailboxes added to it, create tasks for them, and monitor the progress of tasks.
- To view the collection dashboard for an existing collection
- From the project dashboard, click Open Project to open the migration workspace.
- From the top-right corner of the workspace, click Select Collection and then select the collection to view. The collection Dashboard is displayed.
- Open the MailboxesI tab. You will see the list of mailboxes that belong to the collection.
- To see the tasks for collection-specific mailboxes, open the Tasks tab.
- To see the events related to the collection, open the Events tab.
- To rename the collection, click Rename Collection in the Actions toolbar of the collections dashboard.
- To delete the collection, click More > Delete Collection in the Actions toolbar of the collections dashboard.
- To return to the BI migration workspace, click the collection dropdown at the top-right corner of the page, and select Show All.
Adding Mailboxes to Collections
You can add mailboxes to collections in several ways:
To add selected mailboxes to a new collection:
- Click the Mailboxes tab and select the mailboxes you want to add to the collection.
- From the actions toolbar, click New Collection. The New Collection dialog opens.
- Enter a collection name in the Collection name field and click Save to add the selected mailboxes to the collection.
To add selected mailboxes to an existing collection:
- Click the Mailboxes tab and select the mailboxes you want to add to an existing collection.
- From the actions toolbar, click More > Add To Collection. The Add to existing collection dialog opens.
- Select a collection from the Collection name dropdown and click Save to add the selected mailboxes to the collection.
Removing Mailboxes from Collections
- From the top-right corner of the migration workspace, click Select Collection. Then select a collection to open the collections dashboard.
- From the mailboxes collection list view, select the mailboxes that you want to remove from the collection.
- From the actions toolbar, click Remove from Collection.
- In the confirmation dialog click Remove to remove the selected mailboxes from the collection.
- To return to the migration workspace, click the collection dropdown at the top-right corner of the page, and select Show All.
Before you proceed, verify that the mail-enabled accounts in the source have been discovered and matched. For more information see Discovering and Matching Mailboxes.
In this topic:
Considerations
- The following types of mailboxes are supported: Regular, Room, Equipment (Resource), Shared.
- Mailboxes must be provisioned in the target.
- During remigration, On Demand Migration for Hybrid Exchange (ODMHE) remigrates mail, calendar, task, and sticky note items that have changed in the source mailbox to the target mailbox. Remigration of other types of items that have been modified or deleted in the source mailbox is not supported.
- During mail migration, users may want to receive emails from both source and target mailboxes, or keep custom forwarding. You can set this up in two ways:
- Select the Manage Mail Forwarding options in the Mail Flow step of the New Mail Migration Task wizard.
- Set up mail forwarding with the New Mailbox Switch Task wizard after you complete the mail migration.
Limitations
On Demand Migration for Hybrid Exchange is designed to provide a robust migration experience for a variety of source and target platforms. However, some limitations exist that are the result of inherent discrepancies between email service platforms and cannot be fixed.
General
- When viewing migrated data in OWA, there may be slight differences in the received time of emails when comparing the source to the time recorded in the target. This affects all Exchange source environments and Exchange 2013/2016/2019 target email services.
- When migrating from an Exchange server, any email addresses associated with existing users will be converted to SMTP addresses based on the source system. This means that X500 addresses will not be migrated for items, and the SMTP address on the migrated items will not be updated to the new SMTP address. In order to get Exchange to update to the new address the primary SMTP address on the source system should be an alias on the target system.
- For Exchange-based targets, Groups are treated as Distribution Lists and cannot contain a contact with no email address. Because of this, any group members that do not have an email address on the source will not be migrated as a member of that group on an Exchange/O365 target. The contact will still migrate, it just cannot be a member of a group without an email address.
- InfoPath items are not migrated from Microsoft 365 and Exchange server.
Rules
- For the source Exchange, ODMHE migrates OWA Inbox rules only to the target, and rules with the action "Delete message" will have the option Stop processing more rules selected on the target after migration.
- Autodiscover must be enabled on your target for successful rules migration.
- During the migration, the name of a group participating in a source rule will be converted to an SMTP email address. The address is retrieved from the mailbox list of the migration plan, and will be used in the corresponding target rule.
- Migration of rules from or to personal archives is not supported.
Delegates
- Migration of customized delegate permissions is currently not supported:
- Custom folder permissions are migrated as None (lack of any permissions) when the target delegate does not exist.
- If the target delegate exists, source and target delegate permissions are merged and the predefined Roles (Editor, Author, Reviewer and None) take precedence over any Custom permission set.
- If the target delegate exists and both source and target permissions are set to Custom, the target permissions will be set to None.
Folder Permissions
- Migration of folder permissions for Recoverable Items is not supported.
- Migration of folder permissions from personal archive and to personal archive is not supported.
- The migration service will attempt to migrate permissions for all folders in the mailbox tree and create folders for each, regardless of the content type selected for migration. If a custom folder is specified, non-mail folder permissions are not migrated to the target tenant.
Migration to a Custom Folder
- Mailbox rules are not migrated.
- Mail folders, their content and permissions are migrated to the custom folder.
- Content and permissions of non-mail folders cannot be migrated either to the custom folder or to their default location because non-mail folders are not migrated to the target tenant when a custom folder is specified.
Migrating Rules
This includes OWA (Outlook Web App) Inbox rules, and the rules created in an Outlook client version 2019, 2016, 2013, 2010, or Outlook for Microsoft 365. Migration of rules created in Outlook for Exchange 2010 is not supported.
For all mailboxes that are migrated to existing target mailboxes, On Demand Migration for Hybrid Exchange removes the existing rules from the target tenant like OWA Inbox rules and the rules created in Outlook from the target tenant including previously-migrated rules. Then all the rules from the source are migrated to the target.
|

|
Caution: If the rules in a user's target Outlook do not match the rules on the server, the following message appears when the user opens the target mailbox in Outlook after migration:
The rules on this computer do not match the rules on Microsoft Exchange. Only one set of rules can be kept. You will usually want to keep the rules on the server. Which rules do you want to keep?
In this case, the user must select "Server" to avoid data loss. |
Rules that contain unsupported conditions or actions will not be migrated, or will not work after migration. So, you must set them up manually on the target.
The following tables list the supported Outlook conditions:
| from people or public group |
Yes |
Yes |
Yes |
Yes |
Yes |
| with specific words in subject |
Yes |
Yes |
Yes |
Yes |
Yes |
| through the specified account |
No |
No |
No |
No |
No |
| sent only to me |
Yes |
Yes |
Yes |
Yes |
Yes |
| where my name is in the To box |
Yes |
Yes |
Yes |
Yes |
Yes |
| marked as importance |
Yes |
Yes |
Yes |
Yes |
Yes |
| marked as sensitivity |
Yes |
Yes |
Yes |
Yes |
Yes |
| flag for action |
Yes |
Yes |
Yes |
Yes |
Yes |
| where my name is in the Cc box |
Yes |
Yes |
Yes |
Yes |
Yes |
| where my name is in the To or Cc box |
Yes |
Yes |
Yes |
Yes |
Yes |
| where my name is not in the To box |
Yes |
Yes |
Yes |
Yes |
Yes |
| sent to people or public group |
Yes |
Yes |
Yes |
Yes |
Yes |
| with specific words in the body |
Yes |
Yes |
Yes |
Yes |
Yes |
| with specific words in the subject or body |
Yes |
Yes |
Yes |
Yes |
Yes |
| with specific words in the message header |
Yes |
Yes |
Yes |
Yes |
Yes |
| with specific words in the recipient's address |
Yes |
Yes |
Yes |
Yes |
Yes |
| with specific words in the sender's address |
Yes |
Yes |
Yes |
Yes |
Yes |
| assigned to specific category |
Yes |
Yes |
Yes |
Yes |
Yes |
| assigned to any category |
Yes |
Yes |
Yes |
Yes |
Yes |
| which is an automatic reply |
Yes |
Yes |
Yes |
Yes |
Yes |
| which has an attachment |
Yes |
Yes |
Yes |
Yes |
Yes |
| with a size in a specific range |
Yes |
Yes |
Yes |
Yes |
Yes |
| received in a specific date span |
Yes |
Yes |
Yes |
Yes |
Yes |
| uses the specific form |
Yes |
Yes |
Yes |
Yes |
Yes |
| sender is in specific Address Book |
No |
No |
No |
No |
No |
| with selected properties of documents or forms |
Yes |
Yes |
Yes |
Yes |
Yes |
| which is a meeting invitation or update |
Yes |
Yes |
Yes |
Yes |
Yes |
| from RSS feeds with specified text in the title |
Yes |
Yes |
Yes |
Yes |
Yes |
| from any RSS feed |
Yes |
Yes |
Yes |
Yes |
Yes |
| of the specific form type |
Yes |
Yes |
Yes |
Yes |
Yes |
| on this computer only |
Yes |
Yes |
Yes |
Yes |
Yes |
The following tables list the supported Outlook actions:
| move it to the specified folder |
Yes |
Yes |
Yes |
Yes |
Yes |
| move a copy to the specified folder |
Yes |
Yes |
Yes |
Yes |
Yes |
| assign it to the specific category |
Yes |
Yes |
Yes |
Yes |
Yes |
| delete it |
Yes |
Yes |
Yes |
Yes |
Yes |
| permanently delete it |
Yes |
Yes |
Yes |
Yes |
Yes |
| forward it to people or public group |
Yes |
Yes |
Yes |
Yes |
Yes |
| forward it to people or distribution list as an attachment |
Yes |
Yes |
Yes |
Yes |
Yes |
| redirect it to people or distribution list |
Yes |
Yes |
Yes |
Yes |
Yes |
| have server reply using a specific message |
No |
No |
No |
No |
No |
| reply using a specific template |
Yes |
Yes |
Yes |
Yes |
Yes |
| flag message for action in a number of days |
Yes |
Yes |
Yes |
Yes |
Yes |
| clear the Message Flag |
Yes |
Yes |
Yes |
Yes |
Yes |
| clear message's categories |
Yes |
Yes |
Yes |
Yes |
Yes |
| mark it as importance |
Yes |
Yes |
Yes |
Yes |
Yes |
| print it |
Yes |
Yes |
Yes |
Yes |
Yes |
| play a sound |
Yes |
Yes |
Yes |
Yes |
Yes |
| start application |
N/A |
No |
No |
No |
N/A |
| mark it as read |
Yes |
Yes |
Yes |
Yes |
Yes |
| run a script |
N/A |
No |
No |
No |
N/A |
| perform a custom action |
N/A |
N/A |
N/A |
No |
N/A |
| display a specific message in the New Item Alert window |
Yes |
Yes |
Yes |
Yes |
Yes |
| display a Desktop Alert |
Yes |
Yes |
Yes |
Yes |
Yes |
| apply retention policy |
No |
No |
No |
No |
No |
| stop processing more rules |
Yes |
Yes |
Yes |
Yes |
Yes |
The following tables list the supported OWA Inbox conditions:
| Message was received from the specified users or groups in GAL |
Yes |
Yes |
Yes |
Yes |
| Message was sent to the specified users or groups in GAL |
Yes |
Yes |
Yes |
Yes |
| Message contains the specified words |
in the subject |
Yes |
Yes |
Yes |
Yes |
| in the subject or body |
Yes |
Yes |
Yes |
Yes |
| in the sender's address |
Yes |
Yes |
Yes |
Yes |
| in the body |
Yes |
Yes |
Yes |
Yes |
| in the recipient's address |
Yes |
Yes |
Yes |
Yes |
| in the message header |
Yes |
Yes |
Yes |
Yes |
| My name is |
in the To or Cc box |
Yes |
Yes |
Yes |
Yes |
| the only recipient listed |
Yes |
Yes |
Yes |
Yes |
| in the To box |
Yes |
Yes |
Yes |
Yes |
| in the Cc box |
Yes |
Yes |
Yes |
Yes |
| not in the To box |
Yes |
Yes |
Yes |
Yes |
| Message is marked with |
Importance |
Yes |
Yes |
Yes |
Yes |
| Sensitivity |
Yes |
Yes |
Yes |
Yes |
| Message is |
accompanied by an attachment |
Yes |
Yes |
Yes |
Yes |
| of the type... |
Yes |
Yes |
Yes |
Yes |
| flagged as... |
Yes |
Yes |
Yes |
Yes |
| classified as... |
No |
No |
No |
No |
| Message size is within a specified range |
Yes |
Yes |
Yes |
Yes |
| Message was received within a specified date span |
Yes |
Yes |
Yes |
Yes |
| Apply to all messages |
Yes |
Yes |
Yes |
Yes |
The following tables list the supported OWA Inbox actions:
| Move message to folder |
Yes |
Yes |
Yes |
Yes |
| Copy message to folder |
Yes |
Yes |
Yes |
Yes |
| Delete message |
Yes |
Yes |
Yes |
Yes |
| Pin message |
Yes |
Yes |
N/A |
N/A |
| Mark message |
as read |
Yes |
Yes |
Yes |
Yes |
| as junk |
Yes |
Yes |
N/A |
N/A |
| with importance |
Yes |
Yes |
Yes |
Yes |
| with a category |
Yes |
Yes |
Yes |
Yes |
| Forward message to... |
Yes |
Yes |
Yes |
Yes |
| Forward message as an attachment to... |
Yes |
Yes |
Yes |
Yes |
| Redirect message to... |
Yes |
Yes |
Yes |
Yes |
| Send a text message to... [*] |
Yes |
Yes |
Yes |
Yes |
| Stop processing more rules |
Yes |
Yes |
Yes |
Yes |
Migrating Delegate Permissions
There are two types of delegate access permissions in Exchange on-premises and Exchange Online, and both of them are supported by ODMHE:
Full Access, Send As, Send on Behalf - These permissions are generally used for mailbox-level access and are configured in the Exchange Admin Center or via PowerShell. For more information, see the Microsoft article: Manage permissions for recipients in Exchange Online.
Reviewer, Author, Editor etc. - These permissions are typically used to control access to folders within a mailbox, such as the Inbox or Calendar, and they are set at the folder level. For more information, see the Microsoft article: About Delegates.
On Demand Migration for Hybrid Exchange migrates delegate permissions in the following ways.
- If a matched delegate exists in the target, mailbox delegation permissions can be transferred.
- If a matched delegate does not exist in the target, mailbox delegation cannot be migrated and an error event will occur.
- If the target mailbox delegation is not set, the mailbox delegation will be transferred as is.
- If the mailbox delegation has been set in the target tenant before the migration starts, rules and exceptions as specified below will be applied.
| None |
N/A |
None |
| Reviewer |
N/A |
Reviewer |
| Author |
N/A |
Author |
| Editor |
N/A |
Editor |
| Customized set (except None, Reviewer, Author, Editor) |
N/A |
None |
| None or customized set (except None, Reviewer, Author, Editor) |
None or customized set (except None, Reviewer, Author, Editor) |
None |
|
Customized set (except None, Reviewer, Author, Editor) |
Reviewer, Author, Editor |
Reviewer, Author, Editor values from target. |
| Reviewer, Author, Editor |
Customized set (except None, Reviewer, Author, Editor) |
Reviewer, Author, Editor values from source. |
| Reviewer, Author, Editor |
Reviewer, Author, Editor |
Most permissive value between the source and target access permissions.
Possible values - Reviewer, Author, Editor |
Migrating Folder Permissions
- If the target folder permission does not exist, permissions are migrated as is.
- If the target folder permission exists before a migration starts, the most permissive value between the source and target access permissions will be set.
Setting Migration Limits
You can set limits for the maximum number of concurrent connections for the specified Exchange on-prem server. This is the maximum number of mailboxes which can be migrated in parallel. Where there are more mailboxes selected for migration then only the maximum limit specified will be migrated at the same time. The rest will wait in a queue until the current migration mailboxes count drops down.
Limit is set per on-prem server. If you have more projects with the same Exchange on-prem server then the limit is shared.
To set the migration limit
- Log in to Quest On Demand and choose an organization if you have set up multiple organizations.
- From the navigation pane, click Migration to open the My Projects list.
- Create a new project or open an existing project.
- Click the Mail tile, or click Open from the Mail tile to open the migration workspace.
- Click the Mailboxes tab. The Mailboxes List opens.
- Click Set Limits from the Actions menu. The Set Migration Limits dialog opens.
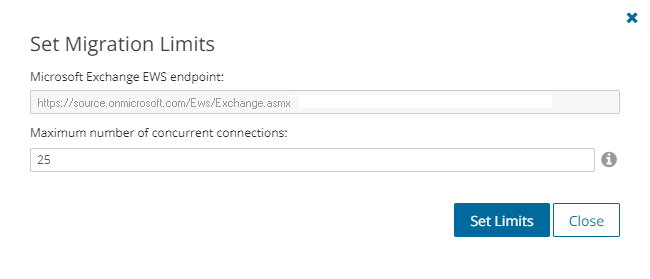
Set the following parameter:
Maximum number of concurrent connections - Specify the limit value. Default value is 25. Allowed value range is between 1 and 500.
- Click Set Limits.
Starting a Mail Migration Task
- Log in to Quest On Demand and choose an organization if you have set up multiple organizations.
- From the navigation pane, click Migration to open the My Projects list.
- Create a new project or open an existing project.
- Click the Mail tile, or click Open from the Mail tile to open the migration workspace.
- Click the Mailboxes tab. The Mailboxes List opens. If you don't see a list of mailbox-enabled accounts, you must run the Mailbox Matching from File task again.
- Select the mailboxes that you want to migrate from the list. You can use search, filtering or collections to quickly navigate through the list of mailboxes. You can also select the check box in the table header to select all the mailboxes.
- Click Migratefrom the Actions menu. The New Mail Migration Task wizard opens.
- Step 1: Migration Options
- Specify a migration flow:
- From Primary Mailbox to Primary mailbox - migrate content of the primary mailbox (default scenario.)
- From Archive mailbox to Archive mailbox - migrate content of the archive mailbox.
- From Archive mailbox to Primary mailbox - restore archived content to primary mailbox.
- From Primary mailbox to Archive mailbox - migrate some of the content of the primary mailbox to archive. Useful with the specific Migration Options selected.
- Specify which mailbox items you want to transfer to the target by selecting the appropriate check box:
- Migrate Mail - select this option to migrate email items.
- Migrate Calendar - select this option to migrate calendar items. The organizer of the calendar item will be mapped to the corresponding target user account. Invitees in calendar items are retained as the source user.
- Migrate Tasks/Notes - select this option to migrate tasks and notes.
- Migrate Contacts - select this item to migrate contacts.
- Migrate Recoverable Items - select this option to migrate recoverable items. If the check box is unchecked these items will not be transferred.
- Step 2: Migration Settings
- Specify which mailbox settings you want to transfer to the target by selecting the appropriate check box:
- Migrate Mailbox Rules - select this option to migrate mailbox rules. See Migrating Rules for more details.
- Migrate Mailbox Delegation - select this option to migrate delegation permissions. See Migrating Delegate Permissions for more details.
- Enable Automapping for shared mailboxes - Auto-mapping is an Exchange & Exchange Online feature. Once enabled, any auto-mapped mailbox will be opened by the delegate's Outlook client in a persistent state with Full Access permissions and cannot be closed by the user. If users want to remove the auto-mapped mailbox from their Outlook client, administrative intervention is required to remove the Full Access permission or clear the auto-mapping flag.
- Migrate Folder Permissions- select this option to migrate folder permissions. See Migrating Folder Permissions for more details.
- Migrate Auto-Reply - select this option to migrate auto-reply messages and settings.
- Click Next.
- Step 3: Mail Flow
|

|
NOTE: You can skip this step and set up mail forwarding with the New Mailbox Switch Task wizard after you complete the mail migration. |
- Manage Mail Forwarding - select this check box to control mail forwarding. This check box is unchecked by default. When this check box is selected, you can choose from the following options:
- Apply Mail Forwarding - enable Mail Forwarding (on by default for the initial New Mail Migration Task) from Target to Source. On Demand Migration assumes that end-users will not be using their new target mailboxes immediately after the first Mail Migration Task is completed, so forwarding is set on the new target mailbox to forward any new mail that is received in the target back to the source. This way any new mail is assured to be delivered to the active end-user mailbox.
- Mail forwarding direction - set the mail forwarding direction by choosing From target to source or From source to target. From the On Demand Migration table of mailboxes, the forwarding email is in the Source Mailbox / Target Mailbox depending on the mail forwarding direction selected. See the Mail Flow column value (To Source or To Target) which can be switched with the switch mailboxes functionality.
- Custom domain for forwarding - specify the custom domain name for forwarding email addresses. If the domain is omitted or does not exist, the primary SMTP address will be used.
- Remove Mail Forwarding - choose this option to clear previously specified mail forwarding address, and remove forwarding addresses in source mailboxes before the migration and target mailboxes after the migration.
- Click Next.
- Step 4: Mail Folders
- Specify which mail folders to migrate and where they should be migrated by selection one of the following options
- Migrate all folders - select this option to migrate all folders from the source to the . Mail will be migrated to a folders with the same name in the target .
- Migrate all folders except - select this option to ignore the selected mailboxes and optionally provide an alternate folder name to migrate all other folder contents. When you select this option the following options are also available:
- Folders to ignore: Choose from Deleted Items, Junk Email, Drafts, Conversation History, Sent Items, and Inbox. You can also specify one or more custom folder names separated by a semicolon.
- Migrate specific folders - select this option to include the selected mailbox folders and optionally provide an alternate folder name to migrate the specified folder contents. When you select this option the following options are also available:
- Folders to include: Choose from Inbox, Sent Items, Drafts, and Deleted Items. You can also specify one or more custom folder names separated by a semicolon.
- Migrate content to a custom folder - select this option to migrate content from source mailbox to a custom folder. Calendar, contacts, and rules are not migrated into this folder. To run incremental migration, a mail migration task should be created with the same folder name. Any change in the folder name will be treated as a migration to a new custom folder.
- Custom folder name - specify the name of the custom folder where content will be migrated.
- Migrate to folder - select this option to specify a custom target folder for well known source folders such as Inbox, Deleted, Archive, and Sent Items. For example, the Inbox folder from the source can be migrated to the Inbox-Migrated custom folder in the target . If you do not provide a target folder name then the mail migration service will migrate the contents of the source folder to a folder with the same name on the target.
- Click Next.
- Step 5: Date Range
Limit the date range for content transfer. You can set any of the following options:
- Migrate mail before to set end date for the date range
- Migrate mail after to set start date for the date range
- Click Next.
- Step 6: Notification
- Select the options as described below:
- Send notification email after the mail migration is completed - select this option to send a notification email when the mailbox migration task completes. The notification is sent whether or not the mailbox migration succeeds unless the Only in a case of failure option is selected.
- Only in a case of failure - select this option to send the notification email only when one or more mailboxes cannot be migrated. When this option is selected, a notification email will not be sent if all the mailboxes are migrated successfully.
- Recipients - enter a semicolon-delimited list of mailboxes where the notification will be sent. The mailbox of the current user will be entered by default and can be changed.
|
|
NOTE: Notifications are sent from no-reply@quest-on-demand.com. Recipients must add this email address to the Safe Senders List.
To add the email address to your Safe Senders list in Microsoft Outlook, do the following:
- On the Home tab, click Junk, and then click Junk E-mail Options.
- On the Safe Senders tab, click Add and add the no-reply@quest-on-demand.com e-mail address.
|
The notification that is sent will contain the following information in the email body:
- Project id - the unique identified of the project.
- Task id - the unique identifier of the task.
- Type - the type of the task: Mail Migration.
- Created - the data and time when the task was created.
- Modified - the most recent date and time when the task was modified.
- Status - the state of the task.
- Last operation - The last recorded event in the task.
- Schedule - indicates when the task was run.
- Mailboxes - The number of mailboxes selected for this migration categorized by migration status (New, Stopped, In Progress, Failed, and Completed) and count.
- Click Next.
- Step 7: Reporting
Select the check box Generate detailed report of migration errors to generate a migration error report when you run the Mail MigrationTask.
You can download the report from the Reports tab in the project workspace by clicking the Download link in the Error Log column. If there are no migration errors, a download link is not available. Error reports are retained for 30 days. After 30 days the download link is replaced with the label Expired and you can no longer download the report. For more information about error reports, see Reports.
- Step 8: Schedule
- Choose from one of three options to schedule the task. The scheduler will be activated after you complete the task wizard.
- Run now - task runs immediately.
- Run later - task must be started manually.
- Schedule - task will be started at a future date and time.
- Start - enter the start time for the task.
- Click Next.
- Step 9: Summary
- Review the task summary. You can specify a custom task name. The default name is Mail Migration Task.
- Mailbox Data - indicates the data types supported for migration like Mail, Calendar, Contacts, and Tasks or Notes.
- Mail Folders - indicates the mail folder selection criteria. if all folders are selected, then the value is All.
- Scheduled start - date and time when the task will start. Now indicates that the task will start immediately.
- Mail Forwarding - direction of the mail flow. Not Set indicates that a mail flow direction is not set
- Click Finish to save or start the task depending on the schedule option selected.
Examples
Example 1
Task options selected:
- Migration Options: Migrate Mail and Migrate Calendar
- Migration Settings: Migrate Folder Permissions
Result:
- A folder for each supported content type is created in the target tenant account mailbox tree, regardless of the content type selected.
- Mail folders, their content and permissions are migrated.
- Permissions of all folders are migrated regardless of the content type selected.
|
Example 2
Task options selected:
- Migration Options: Migrate Mail and Migrate Calendar
- Migration Settings: Migrate Folder Permissions
- Mail Folders: Migrate content to a custom folder> MyFolder
Result:
- A custom folder called MyFolder is created in the target tenant account mailbox.
- A folder for each supported content type is created in MyFolder, regardless of the content type selected.
- Mail folders, their content and permissions are migrated to MyFolder.
- Calendar folders, their content and permissions are not migrated, either to MyFolder or their default locations, because they are non-mail folders.
|
Reviewing the Mail Migration Task
You can track a task's progress from the Tasks tab, view the summary on the Dashboard or monitor alerts and notifications in Events.
You can track the migration of objects from the Mailbox State column in the Mailboxes list view. The column values during and after a task is run are as follows:
| Migrating |
Migration of this object has started. |
| Migrated |
Migration is complete and successful. |
| Migrated with Issues |
Migration is completed with errors. |
| Migration failed |
Migration did not succeed |
| Migration stopped |
Migration canceled by the user |
| Queued |
Migration task is waiting for migration service resources to be available. For more information, see How Queuing Works. |
Meeting Links are migrated to a Microsoft Exchange Online in the target tenant. When a calendar item with a link to a Microsoft Teams meeting is migrated, the link to the original Teams meeting in the source is retained. Use the Meeting Link Migration Task to update Microsoft Teams meeting links in the target.
How it works: The meeting link migration task creates a new Teams meeting with the original meeting details in the target. It sets the target user as the organizer. This new meeting invite must be accepted by all participants. The original meeting migrated to the target is canceled. The cancellation email is automatically sent out to the organizer and attendees.
Considerations
- The attendee list is not updated to match the target domain.
- A cancellation email is sent out to the organizer and attendees. Since the source attendees are not replaced with the corresponding target ones, the cancellation email is sent out to the source.
- A new meeting is created if the migrating user is the organizer of that particular Teams meeting.
- A meeting is not recreated if the source meeting was created in Microsoft Teams through a Teams channel.
- On Demand Migration recreates present and future meetings, both one-time and recurring meetings. Meetings that happened in the past are migrated with Calendar migration.
- Recurring meetings with modified instances are reset to original settings after migration.
- The subsequent runs of the Meeting Link Migration Task will skip the meetings which were previously processed.
- Properties like a flag and categories are not supported with this migration.
|
|
IMPORTANT:
Mailbox migration with the Migrate Calendar option selected in the New Mail Migration Task wizard, must be completed before starting this task. |
To migrate meeting links:
- Log in to Quest On Demand and choose an organization if you have set up multiple organizations.
- From the navigation pane, click Migration to open the My Projects list.
- Create a new project or open an existing project.
- Click the Mail icon, or click Open Project from the project tile to open the project workspace.
- Click the Mailboxes tab. From the Mailboxes List, select the pre-migrated mailboxes in the list for which you want to migrate the meeting links. You can use search, filtering or collections to quickly navigate through the list of mailboxes.
- From the Mailboxes List toolbar, click More > Meeting Link Migration. The New Meeting Link Migration Task wizard opens. This option is not available if the target is a Microsoft Exchange on-premise server.
- Step 1: Custom Email Message
Customize the cancellation message in the text box.
- Step 2: Notification
- Send notification email once the task is completed - select this option to send a notification email when a discovery task completes.
- Only in a case of failure - Select this option to send the email if the discovery task fails to complete successfully.
- Recipients - enter the email address of the recipients of this email. You can specify multiple recipient email addresses separated by semicolon.
- Click Next.
- Step 3: Schedule
- Choose from one of three options to schedule the task. The scheduler will be activated after you complete the task wizard.
- Run now - task runs immediately.
- Run later - task must be started manually.
- Schedule - task will be started at a future date and time entered in the corresponding calendar field.
- Click Next.
- Step 4: Summary
- Review the task summary. You can specify a custom task name. Default name is Meeting Link Migration Task.
- Click Finish to save or start the task depending on the schedule option selected.
How to track the migration
You can track a task's progress from the Tasks tab and filter for tasks where Type = Meeting Link Migration. You can view the summary on the Project Dashboard or monitor alerts and notifications in Events.
