
Provision planned sites
To perform the actual site provisioning of sites and subsites, select the site node that you want to start from and select the Provision Planned Sites action. Upon selecting the action to provision the site, the Subsite Provisioning Task dialog box is displayed.
This dialog box gives you the details of the sites that will be provisioned and the options that you chose for the sites. You have the option to provision the planned child subsites by checking the Provision all Child Subsites check box.
You also have the option to run this action in the background as a task. To do this, select the Run task in background check box. Once the provisioning process begins, status information is displayed in the progress bar. You can also view the detailed status of the provisioning job by viewing the corresponding task record in the Tasks view. Open the task to view the results of the process as well as any errors or warnings. For more information, see Task history.
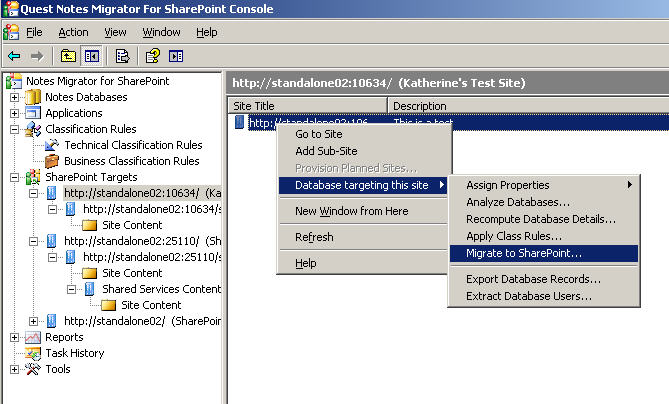
Databases targeting this site
For a site that has one or more databases targeting it, the following database actions are available from the Databases targeting this site menu item:
Scheduled tasks
All scheduled tasks are listed under the Scheduled Tasks node. You can see these information for each one:.
|
The task status can be Ready, Running, Succeeded, Failed, Suspended or Cancelled. | |
|
The task type can be analysis or migration. | |
|
Indicates the number of the databases to be analyzed in the task. | |
|
Indicates the number of the records that has been logged in the last run. | |
You can perform the following procedures for scheduled tasks:
Creating a scheduled task
You can create a scheduled analysis task from the Analyze databases window, or a scheduled migration task from the Migrate to SharePoint window.
|
1 |
In the NMSP console, under the All Databases node, right click on one or multiple databases, and select Analyze Databases.... |
|
2 |
|
3 |
In the New Schedule Analyze Task window, enter a Task Name, and set a Start Time and a Stop Time (optional) for the task. |
|
NOTE: The task will be stopped if it is still running at the stop time you set, and enter the status Stopped. Once stopped the task cannot be resumed again. |
|
4 |
|
5 |
In the NMSP console, click on the Scheduled Tasks node, and notice that the new scheduled task is displayed in the list on the right. |
To create a scheduled migration task
|
1 |
In the NMSP console, right click on a database and select Migrate to SharePoint. |
|
2 |
|
3 |
|
NOTE: The task will be stopped if it is still running at the stop time you set, and enter the status Suspended. To resume the task, right click the task in the Scheduled tasks list, and select Continue. |
|
4 |
In the NMSP console, click on the Scheduled Tasks node, and notice that the new scheduled task is displayed in the list on the right. |