|
• |
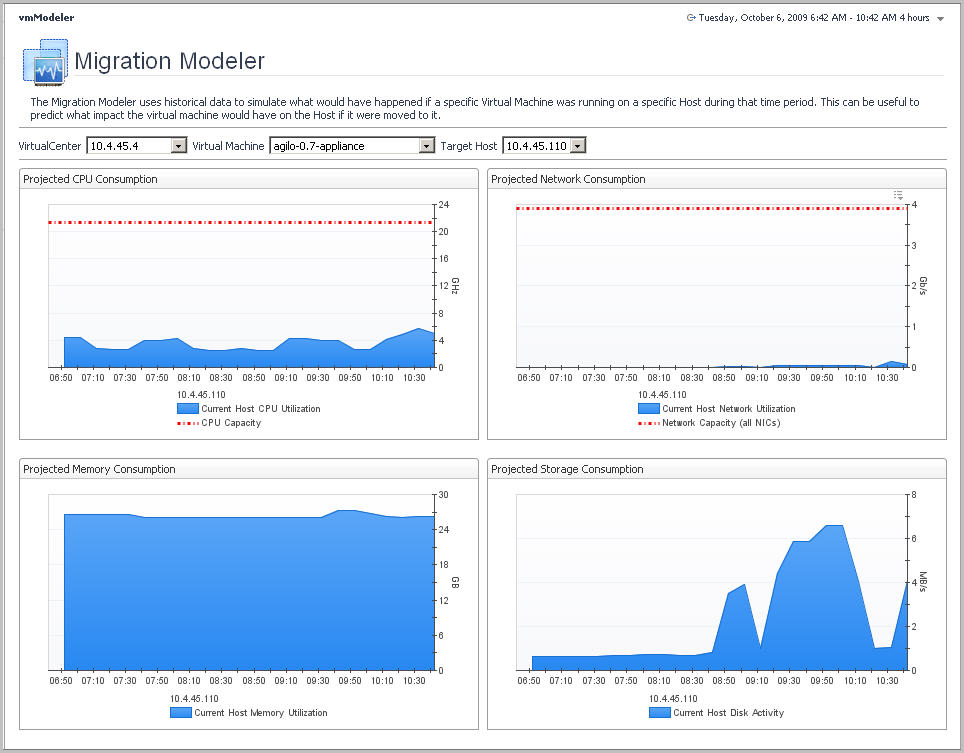
From within any dashboard, you can access the VMware Modeler dashboard by clicking the VMware Modeler link under Dashboards > Virtual > VMware in the navigation panel. |
|
• |
|
1 |

|
2 |
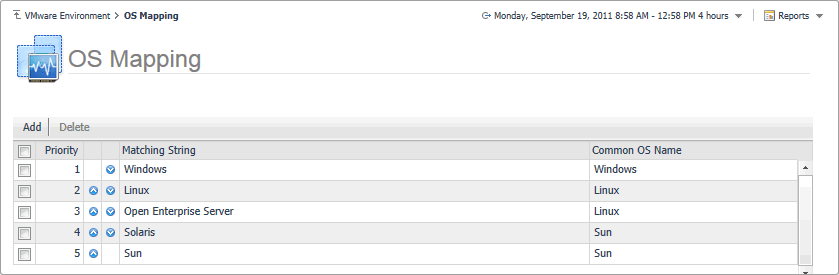
In the Add OS Mapping Rule dialog box, in the Matching Text box, type the OS name with its edition and/or version number to help Foglight for VMware identify the operating system. |
|
3 |
In the Common OS Name list, select the shorter common OS name. |
|
4 |
Click Save. |
|
1 |
In the OS Mapping view, select an OS mapping rule by clicking the associated check box in the left column. |
|
2 |
Click Delete. |
|
3 |
Click Save. |
|
• |
In the OS Mapping view, move a rule one level up by clicking the up arrow in the rule’s row. |

|
1 |

|
3 |
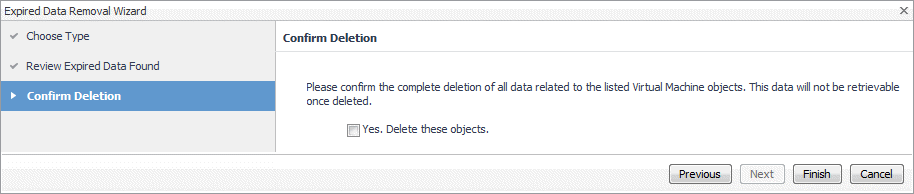
Click Next. |
|
• |
If you want to modify your search, click Previous, make your changes, and observe your results again. For example, to show fewer instances, click Previous, and increase the time period. When satisfied, click Next. |