Configure the virtual appliance
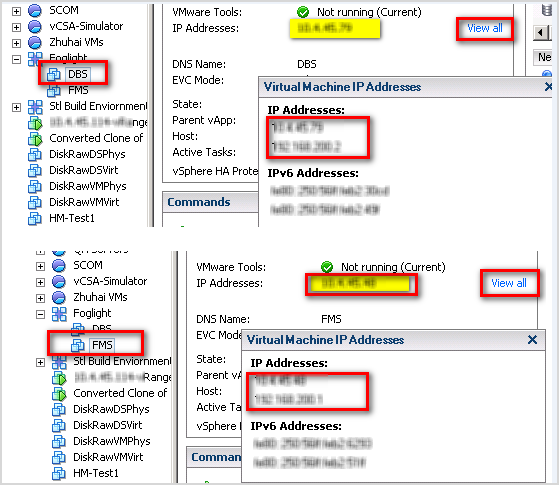
To begin using Foglight Evolve, open a standard web browser and type the IP address of the Foglight Evolve virtual machine. For a list of validated web browsers, see the System Requirements and Platform Support Guide.
The page loads and requests a user name and password. The default user name is foglight and the default password is foglight_admin_password_placeholder.
Start monitoring your environment:
Next step: If you need to change the static IP address of the FMS VM, see Change the network settings.
Change the network settings
|
NOTE: The following procedure should be implemented only after the vApp has completed its initialization, after being deployed and started for the first time. Assigning a static IP address requires a restart of the network services on the virtual machine. Restarting the network before the vApp is initialized interrupts the connection between the FMS and DBS VMs, and could result in some cartridges not being enabled. The vApp initialization process normally takes about 10 minutes after the vApp is started for the first time. The easiest way to determine that the vApp has completed its initialization is to look at the CPU utilization for the FMS. The CPU shows some activity during the initialization, but goes down to just a few percent when the initialization is complete. |
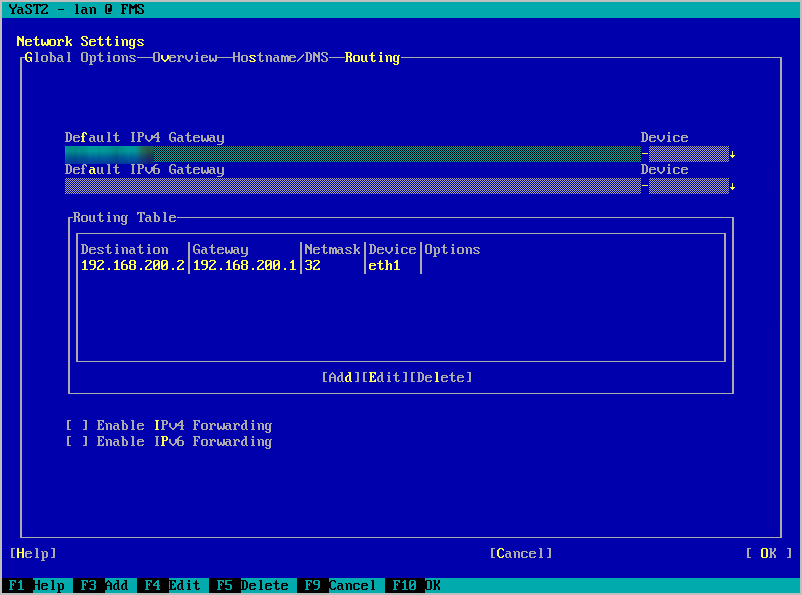
Both FMS and DBS VMs have two NICs — one for communication to the outside and one just for communication to each other. The two NICs that communicate between the VMs have static IPs that should not be changed (192.168.200.1 and 192.168.200.2, respectively).
Change the NICs that are used to communicate to the outside world (that is, eth0) on both FMS and DBS VMs.
If DHCP is enabled, you should see IPs in your range assigned to the FMS and DBS VMs. If you have these IPs, open a web browser to http://<FMS IPaddress> and log in using the user name foglight and password foglight_admin_password_placeholder.
If DHCP does not provide IPs for the FMS and DBS VMs, edit the network settings in the OS.
To configure networking for a static IP, the following information is needed:
|
1 |
|
2 |
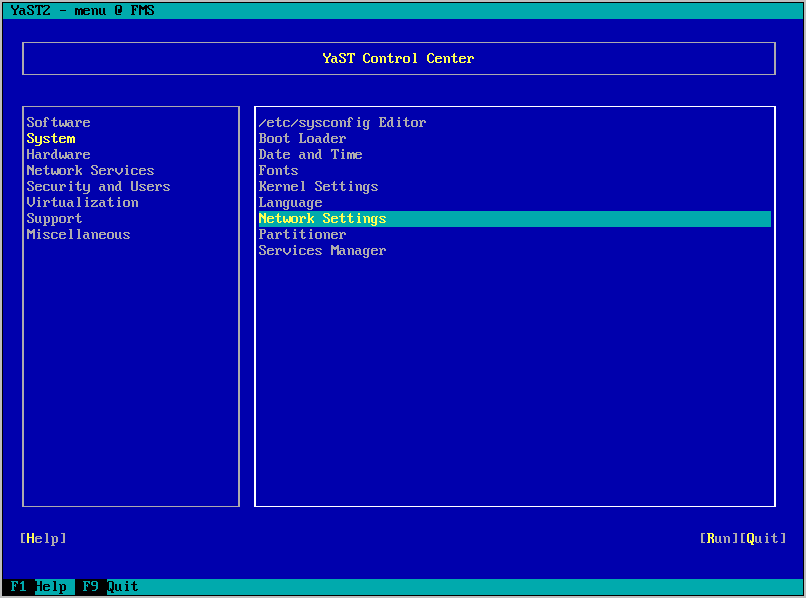
Run yast. |
|
3 |
|
4 |
|
5 |
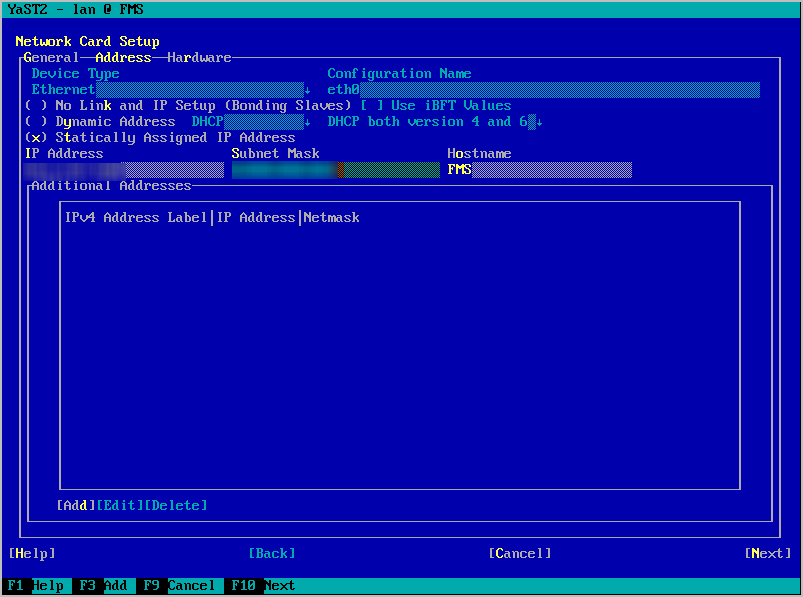
Tab to Statically assigned IP Address and press the spacebar to select it. |
|
6 |
|
7 |
Press F10 to continue. |
|
8 |
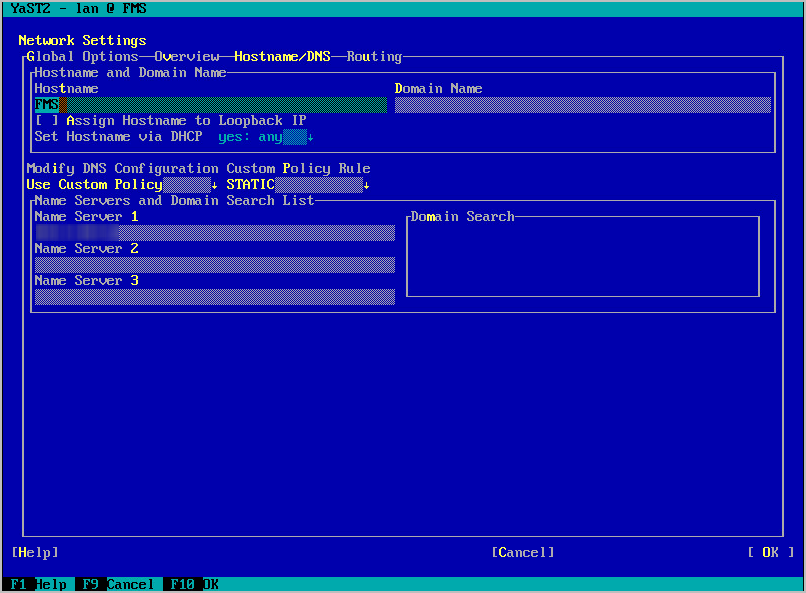
Use the arrow keys to select Hostname/DNS. |
|
9 |
Tab to Domain Name and enter your domain. |
|
10 |
|
12 |
|
13 |
Press F9 to quit and return to the console. |
Next step: If you need to change the timezone for your virtual appliance, see Change the timezone.
Change the timezone
|
1 |
Use the date command for both viewing and changing the date and time. |
|
2 |
Change the time by using the date command followed by the month, day, hour, minute, and year, all numeric and no spaces. For example, to set the date and time to “November 2nd, 2003 12:57”, use the command |
|
2 |
The /etc/ localtime file is a link to or a copy of a file containing information about time zone. Zone information files are usually in /usr/share/zoneinfo, but this depends on your distribution. If the localtime file points to a zone info file that is not the time zone, this can be changed by browsing the directories in /usr/share/zoneinfo to find the local zone or country, then find the city or a city in the same time zone, and link localtime to it.
Some applications may use the configuration file /etc/sysconfig/clock to determine the current time zone, so it is recommended to set the ZONE entry (for example, “America/Los_Angeles”).
|
• |
Navigate to /etc/timezone and enter the required timezone. For example, if only “Asia/Vladivostok” is contained in this file, remove this entry using a text editor of your choice (for example vi) and replace it with the required entry (for example, “Australia/Melbourne”). A restart of the appliance/VM is not required after making this change. |

